
Open-Source Internship opportunity by OpenGenus for programmers. Apply now.
Reading time: 20 minutes
We have taken a look into the drap and drop feature in HTML and implemented a demo to illustrate how to implement and use it.
In this article, we will learn:
- How to create a draggable element and actions that can be taken?
- How to drop a containers and actions on dropping?
Drag and Drop
Drag and drop is a feature that is used to move objects from one place to another.
To move an object in HTML, drag it by holding on the object using left mouse click and move the mouse to the destination where it is to be dropped.
Followings rules are in standard:
- In HTML5, every object is draggable.
- By default, no object is draggable. Thus, we have to make an object draggable by using some JavaScript code.
- For draggable objects, they can only be dropped in allowed positions. Thus, we have to create containers/locations where dropping an object is allowed.
Example:
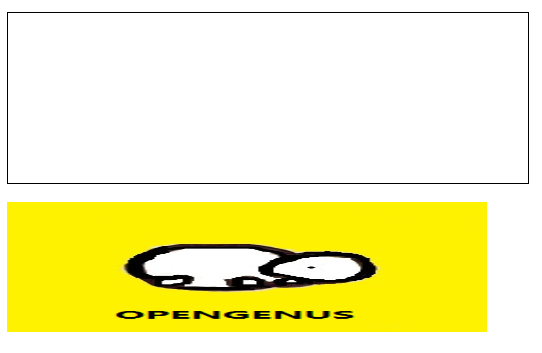
Here, one HTML element is an empty container and another HTML element is an image.
We have to drag the image and drop it in the empty container.
Thus, by basic mouse movement, we can re-allocate the position of HTML elements.
This is the power of drag and drop technique.
Note: Dragging an element in a location other than the container allowed for dropping elements is not allowed
Source code for drag and drop example shown above:
<!DOCTYPE HTML>
<html>
<head>
<style>
#div1 {
  width: 500px;
  height: 150px;
  padding: 10px;
  border: 1px solid black;
}
</style>
<script>
function allowDrop(ev) {
  ev.preventDefault();
}

function drag(ev) {
  ev.dataTransfer.setData("text", ev.target.id);
}

function drop(ev) {
  ev.preventDefault();
  var data = ev.dataTransfer.getData("text");
  ev.target.appendChild(document.getElementById(data));
}
</script>
</head>
<body>
<h4 style="text-align:center;">Drag Image in the container</h4>
<div id="div1" ondrop="drop(event)" ondragover="allowDrop(event)"></div>
<br>
<img id="drag1" src="/content/images/2019/07/OpenGenus.png" draggable="true" ondragstart="drag(event)" width="480" height="130">
</body>
</html>
The code is complex, so it is covered in isolated topics later.
-
Here,
<img>and<div>elements are to be dragged and to be dropped on elements respectively.*
Following points can be observed from the code: -
<img>tag has two attributes for events:- draggable: it allows the object to be moved by grabbing it using left mouse click.
- ondragstart: this event occurs when the object is dragged using the mouse.
-
<div>has two attributes for events:- ondragover: This event occurs when the dragged object is hovered over the element.
- ondrop: This event occurs when dragged object is released on the element.
1. Creating a draggable element
By default, all elements are draggable.
To make an element draggable, we have to define their draggable attribute as true.
Syntax:
<element draggable="true">
Example:
<img src="<source>" draggable="true">

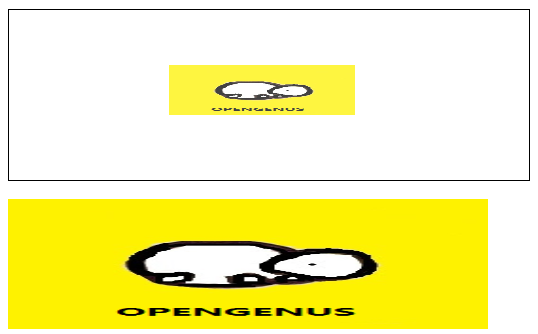
- On the left, the original image.
- On the right, the dragged image which is lighter and miniaturized version of the original image.
Thus, the draggable attribute allows us to drag images.
2. Actions on drag
When the mouse grabs the object and starts dragging it, the attribute ondragstart starts working.
<img id="drag1" ondragstart="drag(event)">
Here, ondragstart calls the function drag with a parameter event
Note: Function call is handled by the <script> element of HTML which is used to define JavaScript code.
The drag function has following definition:
function drag(ev)
{
  ev.dataTransfer.setData("text", ev.target.id);
}
- "ev" is the formal parameter whereas "event" was the actual parameter used during function call.
- text is the data type of the dragged data.
- target.id fetches the id of the object, (here, "drag1").
3. Creating a container to allow drops
By default, objects cannot be drag and dropped in any other element.
For making element as a container where objects can be dropped we have to override the default definition of it.
The ondragover event is called when a dragged object is hovered over the element.
<div id="div1" ondrop="drop(event)" ondragover="allowDrop(event)">
If the element's defaults are overridden, the object can be dropped there.
To override the element's default, use the preventDefault() method of JavaScript.
function allowDrop(ev)
{
    ev.preventDefault();
}
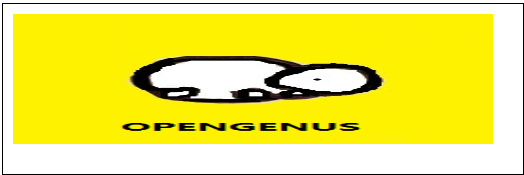
Here, the dragged image is hovered over(not dropped on) the container that allows the element to be dropped upon it.
4. Actions on drop
When the dragged object is hovered above the container which allows the objects to be dropped, the ondrop event is called.
This event calls the drop(event) method of JavaScript code.
<div id="div1" ondrop="drop(event)" ondragover="allowDrop(event)">
The drop event has the following definition:
function drop(ev) {
  ev.preventDefault();
  var data = ev.dataTransfer.getData("text");
  ev.target.appendChild(document.getElementById(data));
}
- Variable "data" is defined to get the details of the dragged object.
- target is used to set the drop link between container and to-be-dropped object.
- appendChild() method is used for dropping the object.
- document.getElementById() fetches the variable data for details of the object.
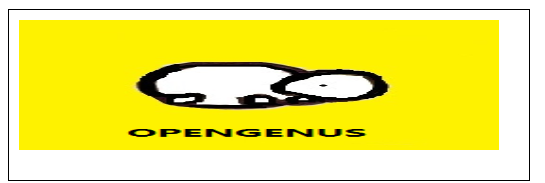
Here, the image element is dropped on the div container element.
Now, you can create any HTML page where some elements are draggable and others are containers.