Open-Source Internship opportunity by OpenGenus for programmers. Apply now.
Introduction
Image recognition, also known as computer vision (CV), is the process of using algorithms and artificial intelligence to analyze digital images and recognize patterns or objects within them. This technology has a wide range of applications, from facial recognition to self-driving cars. In this article at OpenGenus, we will explore how to make image recognition with ExpressJS, a popular Node.js web framework.
As the world becomes increasingly digitized, image recognition technology has become more prevalent in our everyday lives. From social media platforms automatically tagging people in photos to security systems using facial recognition to grant access, image recognition has become an integral part of many industries. The ability to accurately identify and analyze images in real-time has opened up a world of possibilities for businesses and individuals alike.
Applications of Image Recognition
One of the most common applications is in the field of surveillance and security. Image recognition technology is used to analyze CCTV footage and identify individuals, objects, and activities in real-time. This helps to prevent crimes, monitor public spaces, and improve safety.
Another application of image recognition is in the automotive industry, particularly in the development of self-driving cars. Image recognition algorithms are used to analyze the environment around the vehicle, identify objects such as traffic signs, pedestrians, and other vehicles, and make decisions based on that information. This technology is critical for the safe operation of autonomous vehicles and has the potential to revolutionize transportation. Other applications of image recognition include medical diagnosis, retail and advertising, agriculture, and robotics.
Steps to create image recognition in express
- Setting up a new ExpressJS project
- Installing and configuring dependencies
- Creating an image upload route with Multer
- Preprocessing the uploaded image using TensorFlow.js
- Making predictions on the preprocessed image using a pre-trained model
- Returning the prediction result to the client
Setting Up the Environment
To get started with image recognition in ExpressJS, we'll need to set up our development environment. We'll be using TensorFlow.js, a JavaScript library for machine learning, as well as ExpressJS and Multer, a middleware for handling file uploads.
First, let's create a new directory for our project and initialize a new Node.js project using the npm init command. We'll also install the necessary dependencies:
npm install express multer @tensorflow/tfjs-node nodemon
The above command installs ExpressJS, Multer, and TensorFlow.js Node.js bindings.
After installation of these packages/modules the package.json should look like this:
{
  "name": "express-image-recognition",
  "version": "1.0.0",
  "description": "",
  "main": "index.js",
  "scripts": {
    "dev": "nodemon server.js",
    "test": "echo \"Error: no test specified\" && exit 1"
  },
  "keywords": [],
  "author": "",
  "license": "ISC",
  "dependencies": {
    "@tensorflow/tfjs": "^4.2.0",
    "express": "^4.18.2",
    "multer": "^1.4.5-lts.1",
    "nodemon": "^2.0.22"
  }
}
Creating an Image Recognition Route
Next, let's create a new ExpressJS app and define a route for handling image recognition requests. We'll use Multer to handle file uploads and TensorFlow.js to process the uploaded image and generate a result.
// Importing necessary packages
const express = require('express');
const multer = require('multer');
const tf = require('@tensorflow/tfjs-node');
const sharp = require('sharp');
const predictImageContents = require('./TensorFlow')

// Creating an Express application
const app = express();

// Creating a multer instance with memory storage
const storage = multer.memoryStorage()
const upload = multer({ storage: storage })

// POST route for uploading an image and predicting its contents
app.post('/image', upload.single('image'), async (req, res) => {
    const buffer = req.file.buffer;
    const decodedImage = tf.node.decodeImage(buffer);
    // Checking if the image type is supported
    if (!/^image\/(jpe?g|png|gif)$/i.test(req.file.mimetype)) {
        console.log('Unsupported image type');
        res.json({ error: "Unsupported image type" })
        return;
    }
    // Resizing the image to 224x224 and converting it to a buffer
    const resizedImage = await sharp(req.file.buffer)
        .resize(224, 224)
        .toBuffer();

    // Predicting the image contents using the TensorFlow model
    const result = await predictImageContents(resizedImage);

    // Sending the predicted result back as a response
    res.send(result);
});

// Setting the view engine to ejs
app.set('view engine', 'ejs');

// GET route for rendering the index page
app.get('/', (req, res) => {
    res.render('index');
})

// Starting the Express server on port 3000
app.listen(3000, () => {
    console.log('Server listening on port 3000!');
});
In the above code, the web application allows users to upload an image and get a prediction of what is contained within the image. The app utilizes TensorFlow.js, an open-source library that provides tools for training and deploying machine learning models in JavaScript. In order to handle the file upload, the app uses Multer, a middleware for handling multipart/form-data, which is commonly used for uploading files. The uploaded image is then decoded into a TensorFlow.js Tensor object using the decodeImage function.
After the image is decoded, the app checks if the image is of a supported type (JPEG, PNG, or GIF) and resizes it to a uniform size of 224x224 pixels using Sharp, an image processing library. The resized image is then passed to a function called predictImageContents which is responsible for using a pre-trained MobileNet model to make a prediction on what is contained within the image. The prediction is returned as a JSON object and sent as a response to the client.
Overall, this code provides a simple yet powerful web application that demonstrates the potential of machine learning in the browser. It is a great starting point for developers who want to experiment with machine learning in JavaScript, as it provides a straightforward implementation of image classification using pre-trained models.
Processing the Image Data
Now that we have a route set up for handling image recognition requests, let's implement the someTensorFlowFunction function to process the image data and generate a result. This function will use the TensorFlow.js API to load a pre-trained model and make predictions based on the input image.
const tf = require('@tensorflow/tfjs-node');
const classes = require('./class_name');

const TOP_K = 1; // Number of top predictions to return
async function predictImageContents(imageData) {
    const model = await tf.loadLayersModel(
        "https://storage.googleapis.com/tfjs-models/tfjs/mobilenet_v1_0.25_224/model.json"
    );
    const uint8Array = new Uint8Array(imageData.buffer);
    const decodedImage = tf.node.decodeImage(uint8Array);
    const resizedImage = tf.image.resizeBilinear(decodedImage, [224, 224]);
    const normalizedImage = resizedImage.div(255.0).expandDims();

    // Make the prediction
    const prediction = model.predict(normalizedImage);

    // Get the top k predictions
    const topK = await prediction.topk(TOP_K);

    // Get the predicted class and label
    const classIndex = topK.indices.dataSync()[0];
    const label = classes[classIndex];

    // Return the result
    return { classIndex, label };
}

module.exports = predictImageContents;
The code above exports a function named predictImageContents that takes an image data as input, and returns a promise that resolves to an object containing the predicted class index and label of the image. This function is using TensorFlow.js and its Node.js extension, @tensorflow/tfjs-node, to load a pre-trained model from Google's TensorFlow Hub which you can get from mobilenet, the MobileNet v1 model with a scaling factor of 0.25, which is a lightweight version of the model that is suitable for running on devices with limited resources. The input image is then preprocessed by decoding and resizing it to 224x224 pixels, and normalizing the pixel values to a range of 0-1. The model then makes a prediction by applying the input image to the pre-trained model, and returns the top k predictions, where k is set to 1 in this case. Finally, the predicted class index and label are extracted from the top k predictions, and returned as an object. For determining what the class index number are I have used the class name file from mobilenet from this repository I find the TypeScript function for looking in to the class index match and just for usage I turned that In to json file for easy refernce.
Creating user Interface
We can build an interface for our web app by using the EJS engin. EJS is a simple templating language that lets you generate HTML markup with plain JavaScript. No religiousness about how to organize things. No reinvention of iteration and control-flow. It's just plain JavaScript. I used EJS to send the image with a HTML interface and show the predicted image.
<!DOCTYPE html>
<html lang="en">
<head>
<meta charset="UTF-8">
<meta http-equiv="X-UA-Compatible" content="IE=edge">
<meta name="viewport" content="width=device-width, initial-scale=1.0">
<title>Sentayhu's Image Recognition</title>
<link rel="stylesheet" href="style.css">
</head>
<body>
<h1>Image recogntion System</h1>
<p>Welcome to image recognition system </p>
<form>
<input type="file" id="image">
<button type="submit" id="submit">Submit</button>
</form>
<h2 id="info"></h2>
</body>
</html>
<script>
// Get the HTML elements
const form = document.querySelector('form');
const imageInput = document.querySelector('#image');
const submitButton = document.querySelector('#submit');
const info = document.querySelector('#info');
const url = "http://localhost:3000/image";
// Add event listener to submit button
submitButton.addEventListener('click', async (event) => {
// Show loading message
info.textContent = "Loading...";
event.preventDefault();
const formData = new FormData();
formData.append('image', imageInput.files[0]);
// Send POST request to the server
const response = await fetch(url, {
method: 'POST',
body: formData
});
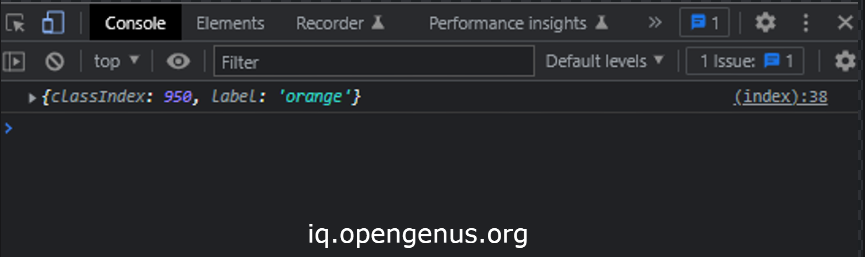
// Get the prediction result
const result = await response.json();
console.log(result);
// Update the UI with the predicted label
info.textContent = result.label;
});
</script>
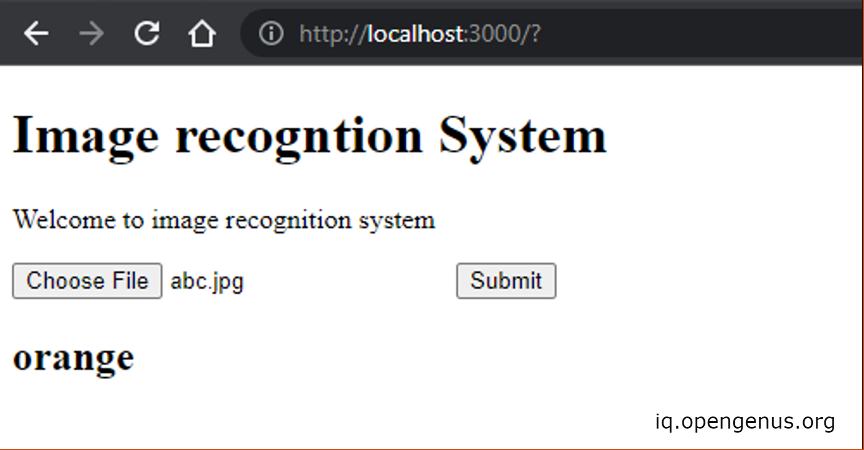
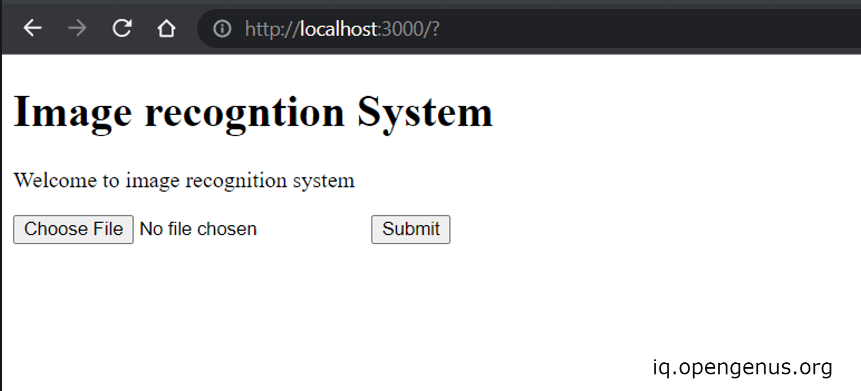
The web app interface looks like the following.
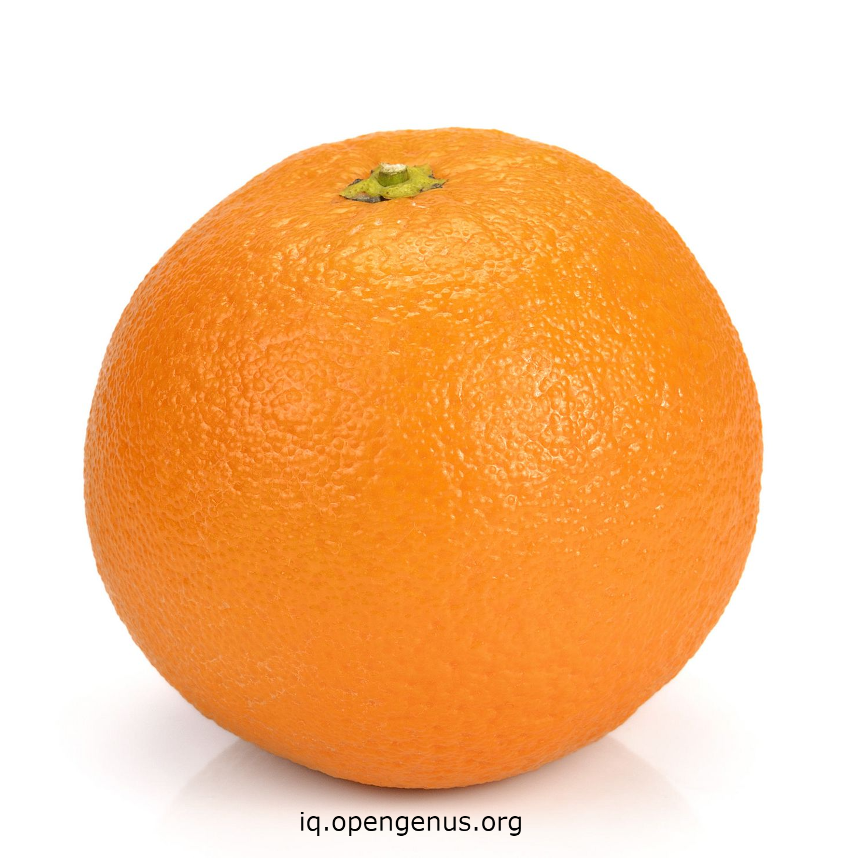
Lets use the image orage for testing.
After submiting the image we get Loading.. the the API will reponse with labels categorizing the object in the image.