
Hello everyone in this article at OPENGENUS, we are going to see an introduction to CocoaPod and how to use it with an example app.
What is CocoaPod
CocoaPods are application level dependency manager for Objective-C, Swift and any other languages that run on the Objective-C runtime,In simple terms it means a piece of code which is written by others and it can be added in your app.It saves development time by allowing the developers to perform reusability of the code.You can even publish your own CocoaPod as an open-source contribution.
Cocoa Pod installation
1. Install HomeBrew
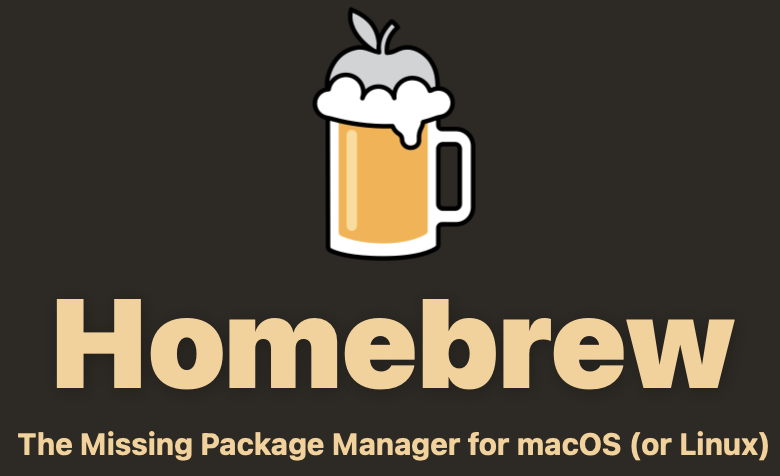
HomeBrew is a package manager for Mac and Linux.CocoaPods are available as a package in HomeBrew. The advantage of using HomeBrew is it is simple and also provide details whether a package will work on both M1 and Intel powered Macs.
Open up the Mac Terminal and install homebrew by using below command.
/bin/bash -c "$(curl -fsSL https://raw.githubusercontent.com/Homebrew/install/HEAD/install.sh)"
After installation of HomeBrew we can install CocoaPod by using below command
brew install cocoapods
Note for M1 Mac Users
If you are using M1 Mac then some packages of HomeBrew and CocoaPods are not compatible with M1 Macs so before installing HomeBrew and Cocoa Pod make sure you create a copy of the terminal app and run it using Rosetta2 emulation.
How to find a Cocoa Pod for any project
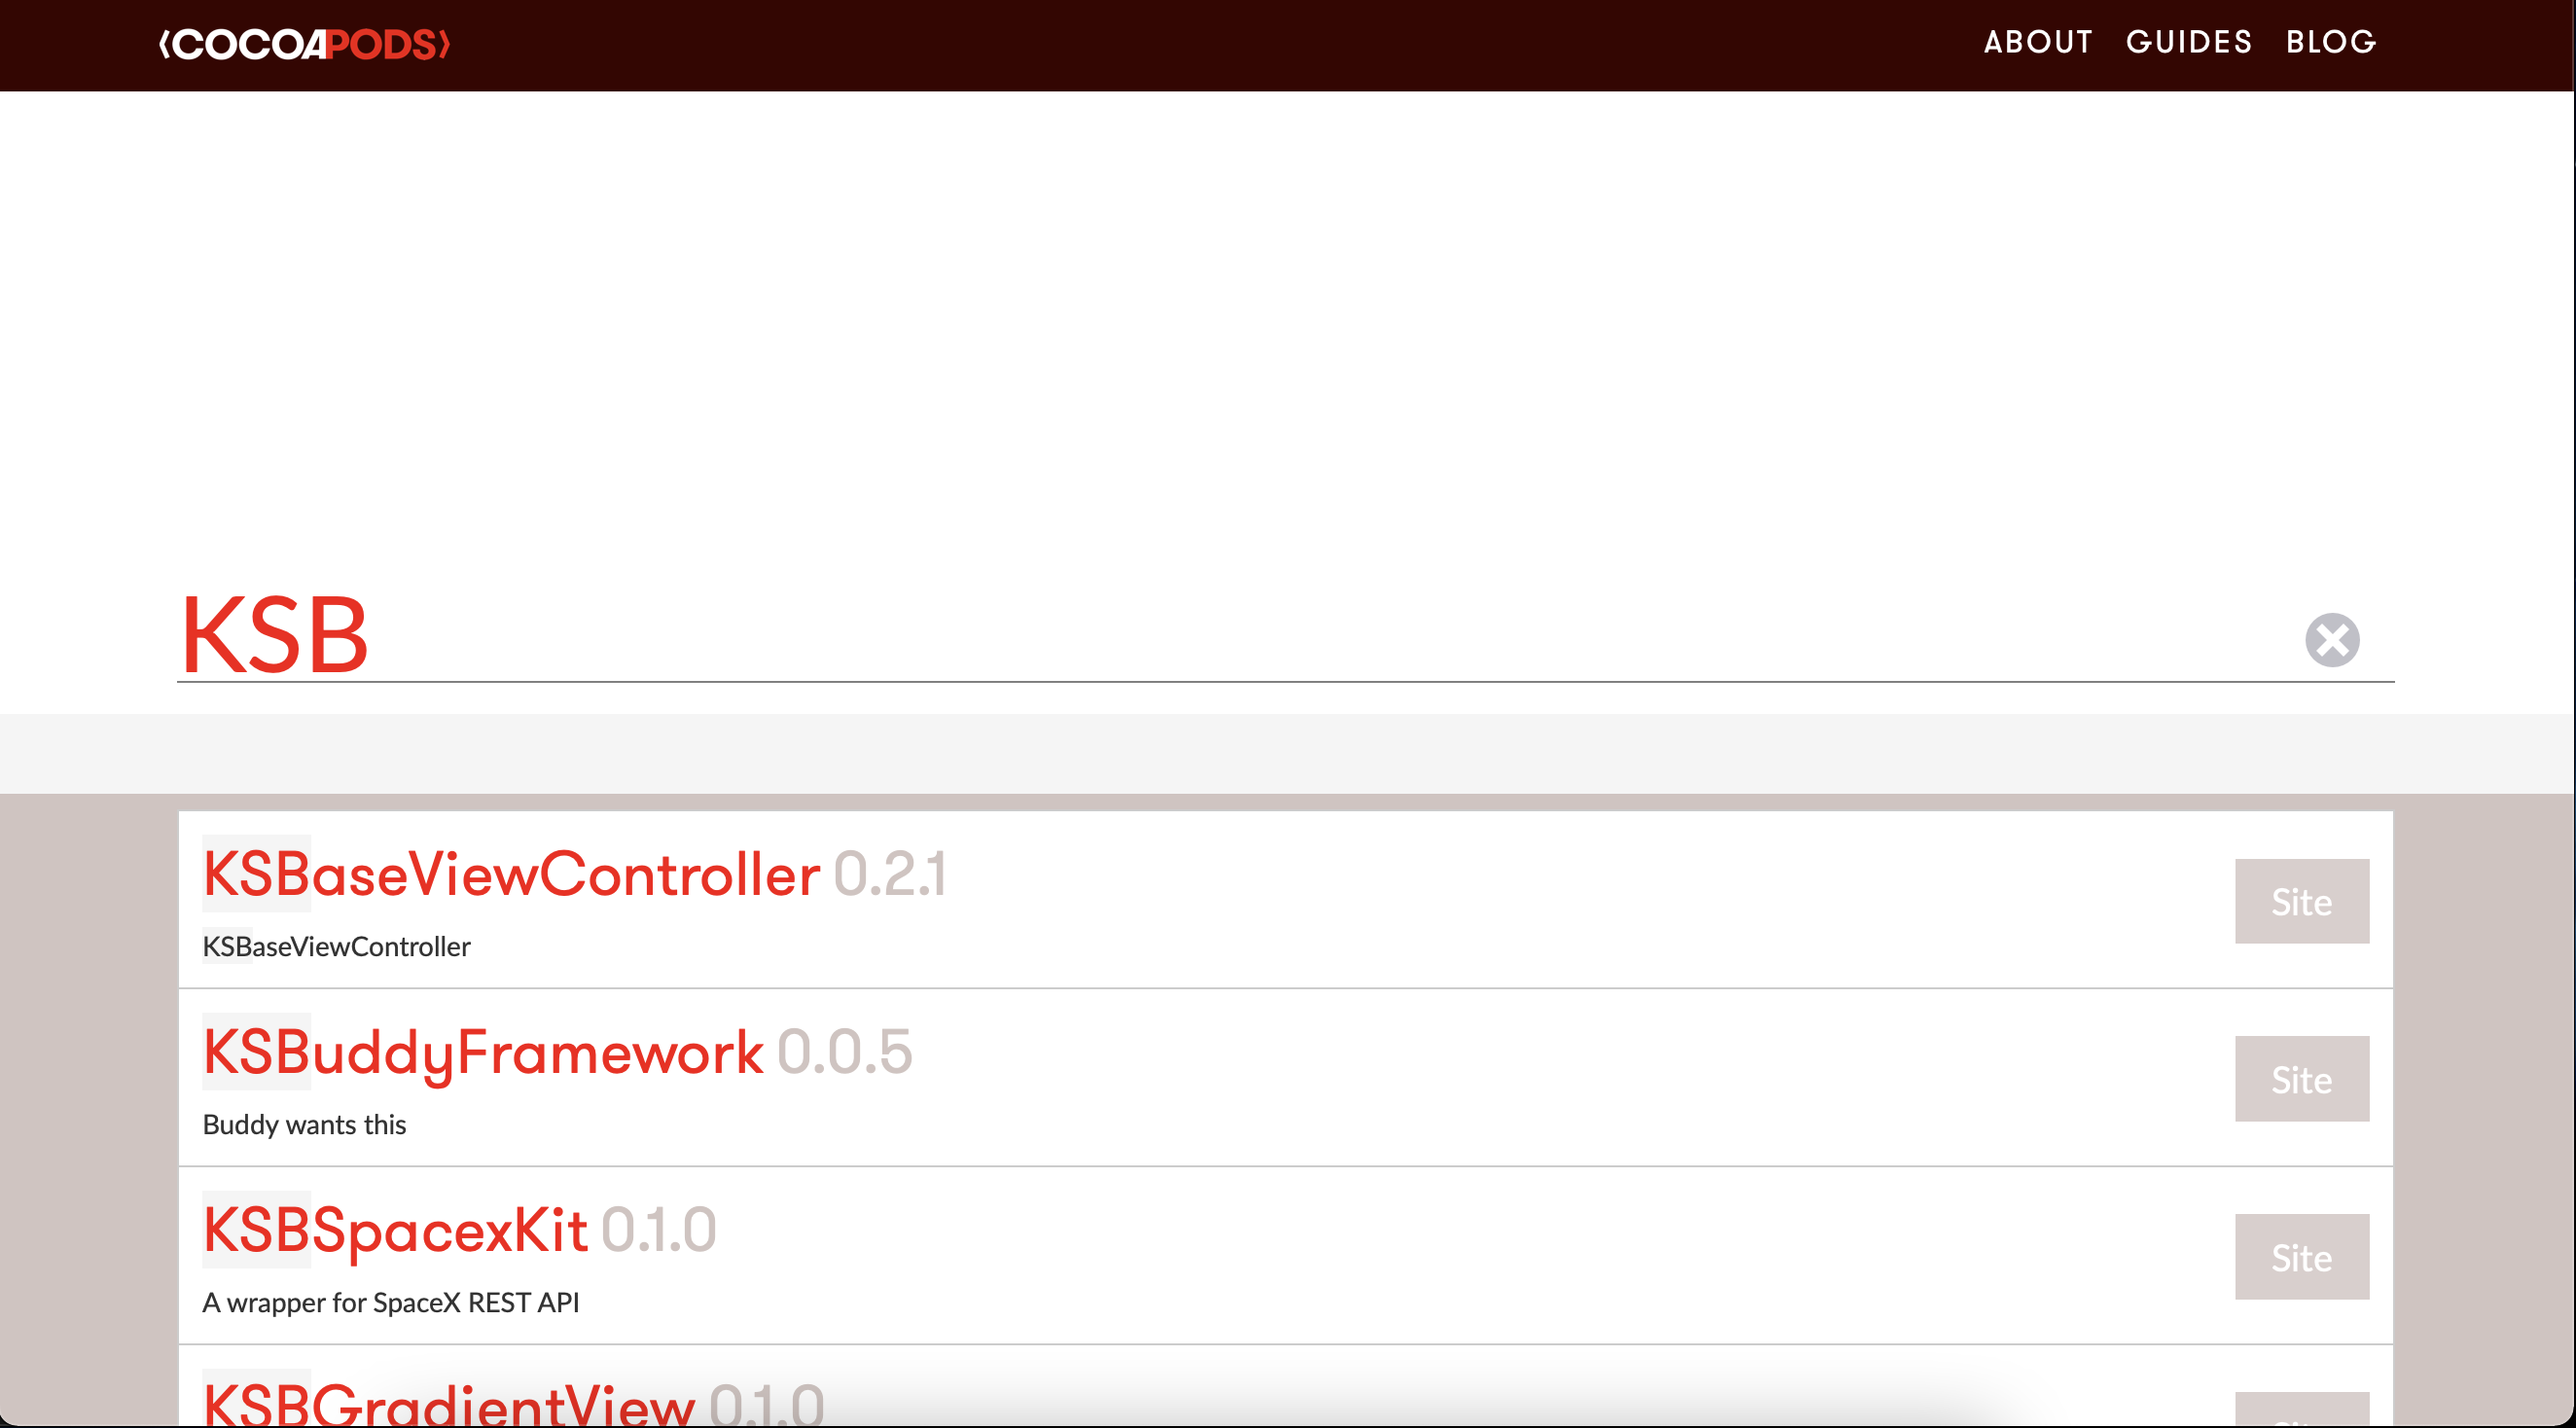
CocoaPod has its own website where you can find several open-source pods(or CocoaPods).
It can be found here
In that website you can search for any Pod simply by typing the name of the pod.And If you are searching for a Pod by particular author then the most common practice is to name the cocoa pod based on short form name of the author so you can easily find it.
Here I search for CocoaPods created by me which I named with short form of my name KSB.
Adding CocoaPod to your project
We are going to build an iOS app which allow us to add gradient background to the apps by using KSBGradientView CocoaPod.
-
Open up Xcode and create new Blank iOS app project make sure you choose Swift as language.
-
Now close the Xcode project and open up terminal
-
Navigate to project directory in terminal
-
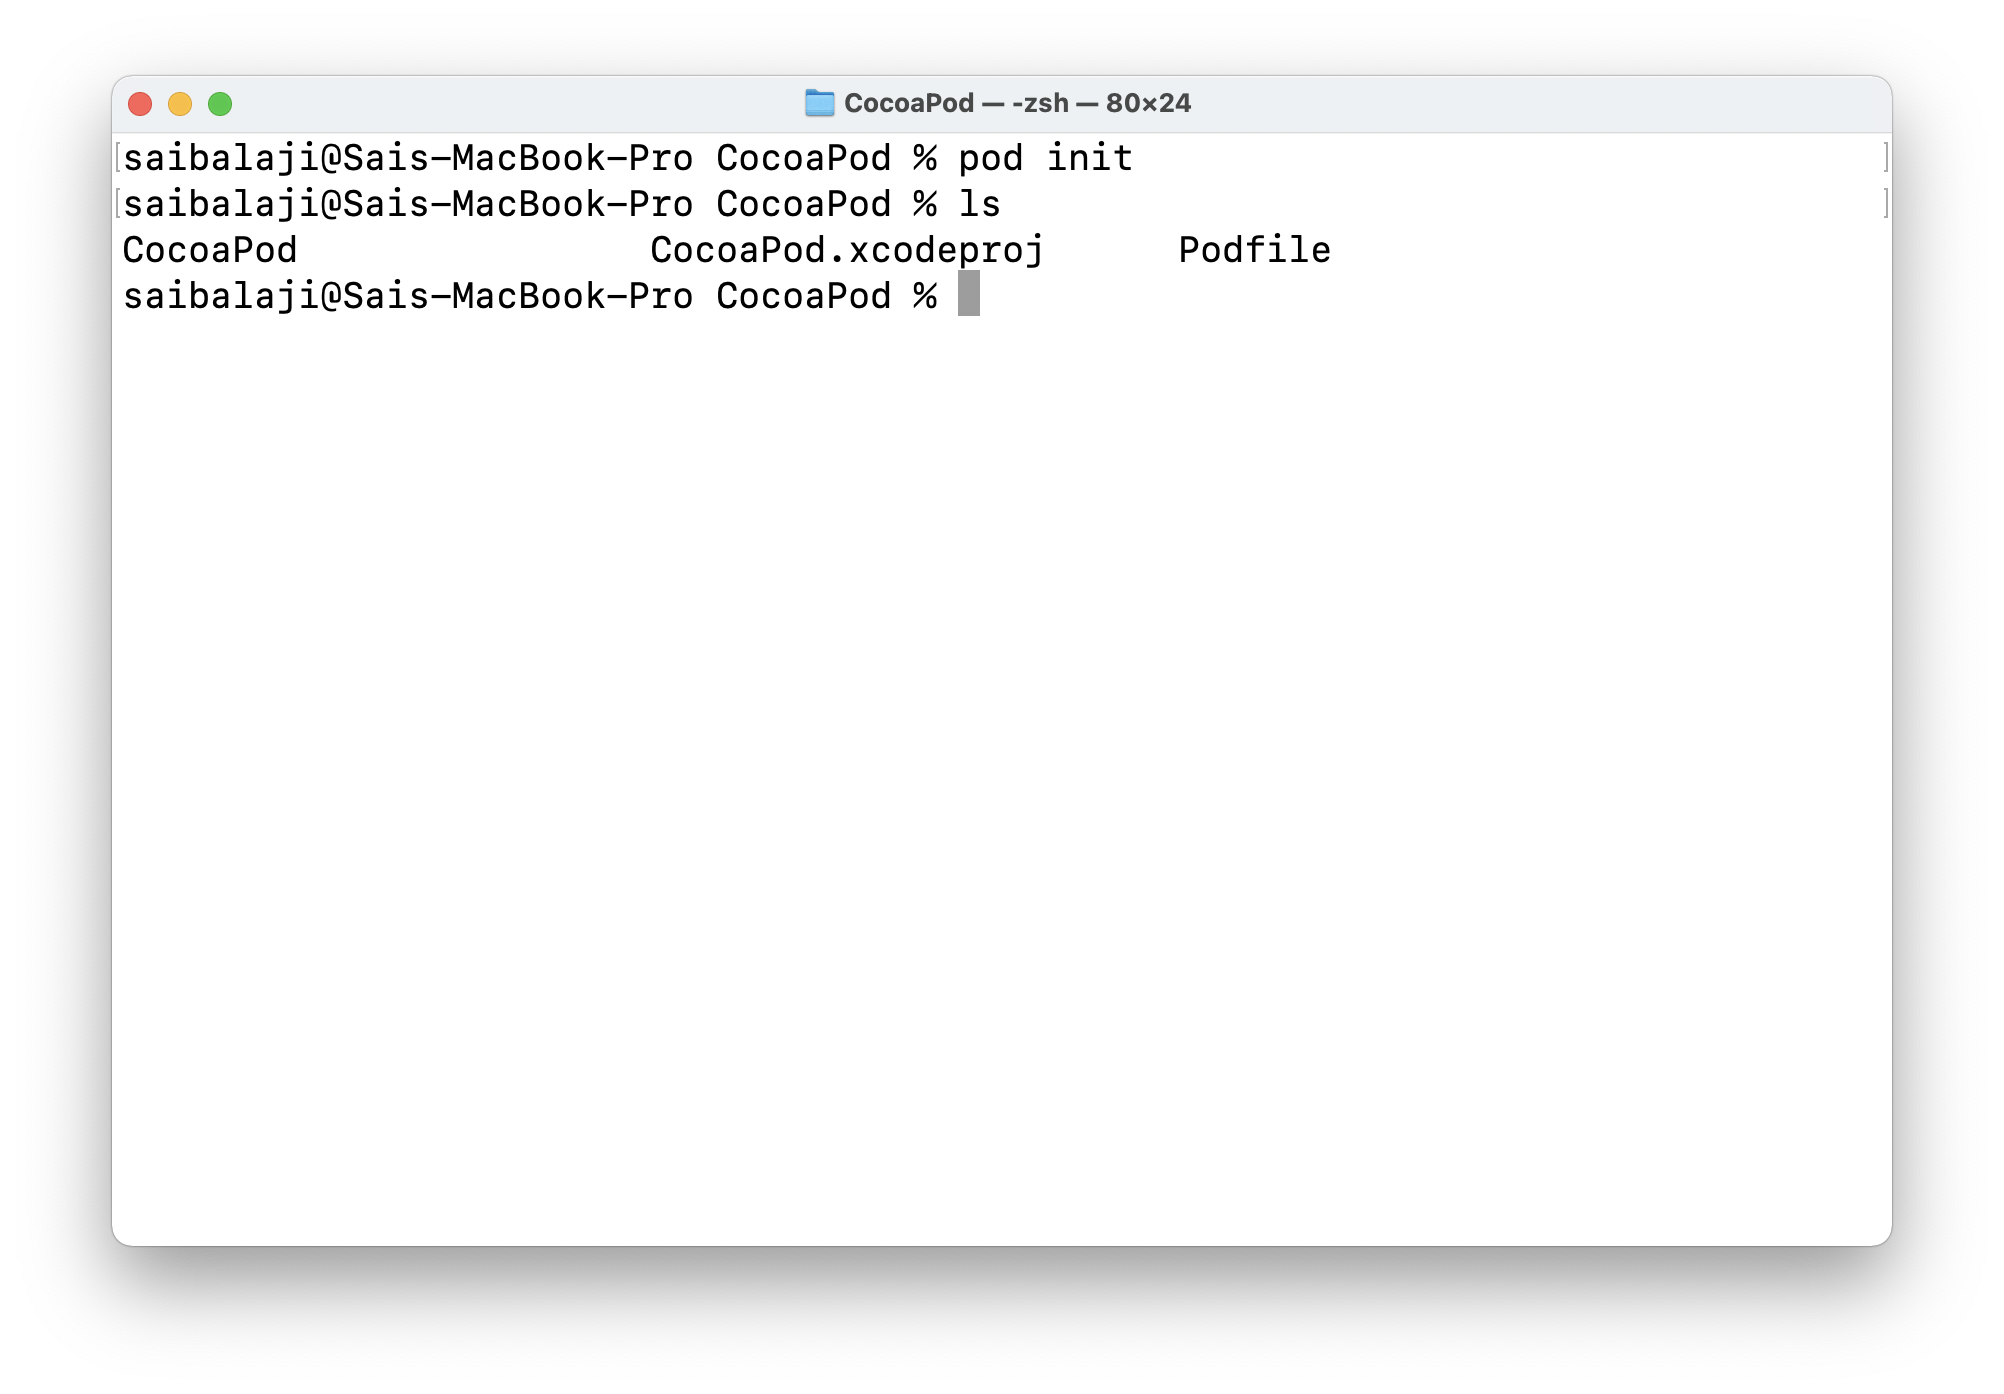
Now run this below command
pod init
Now list the contents of your project directory you can see that there is a new file called Podfile this is the file where we will add our Cocoa Pods.
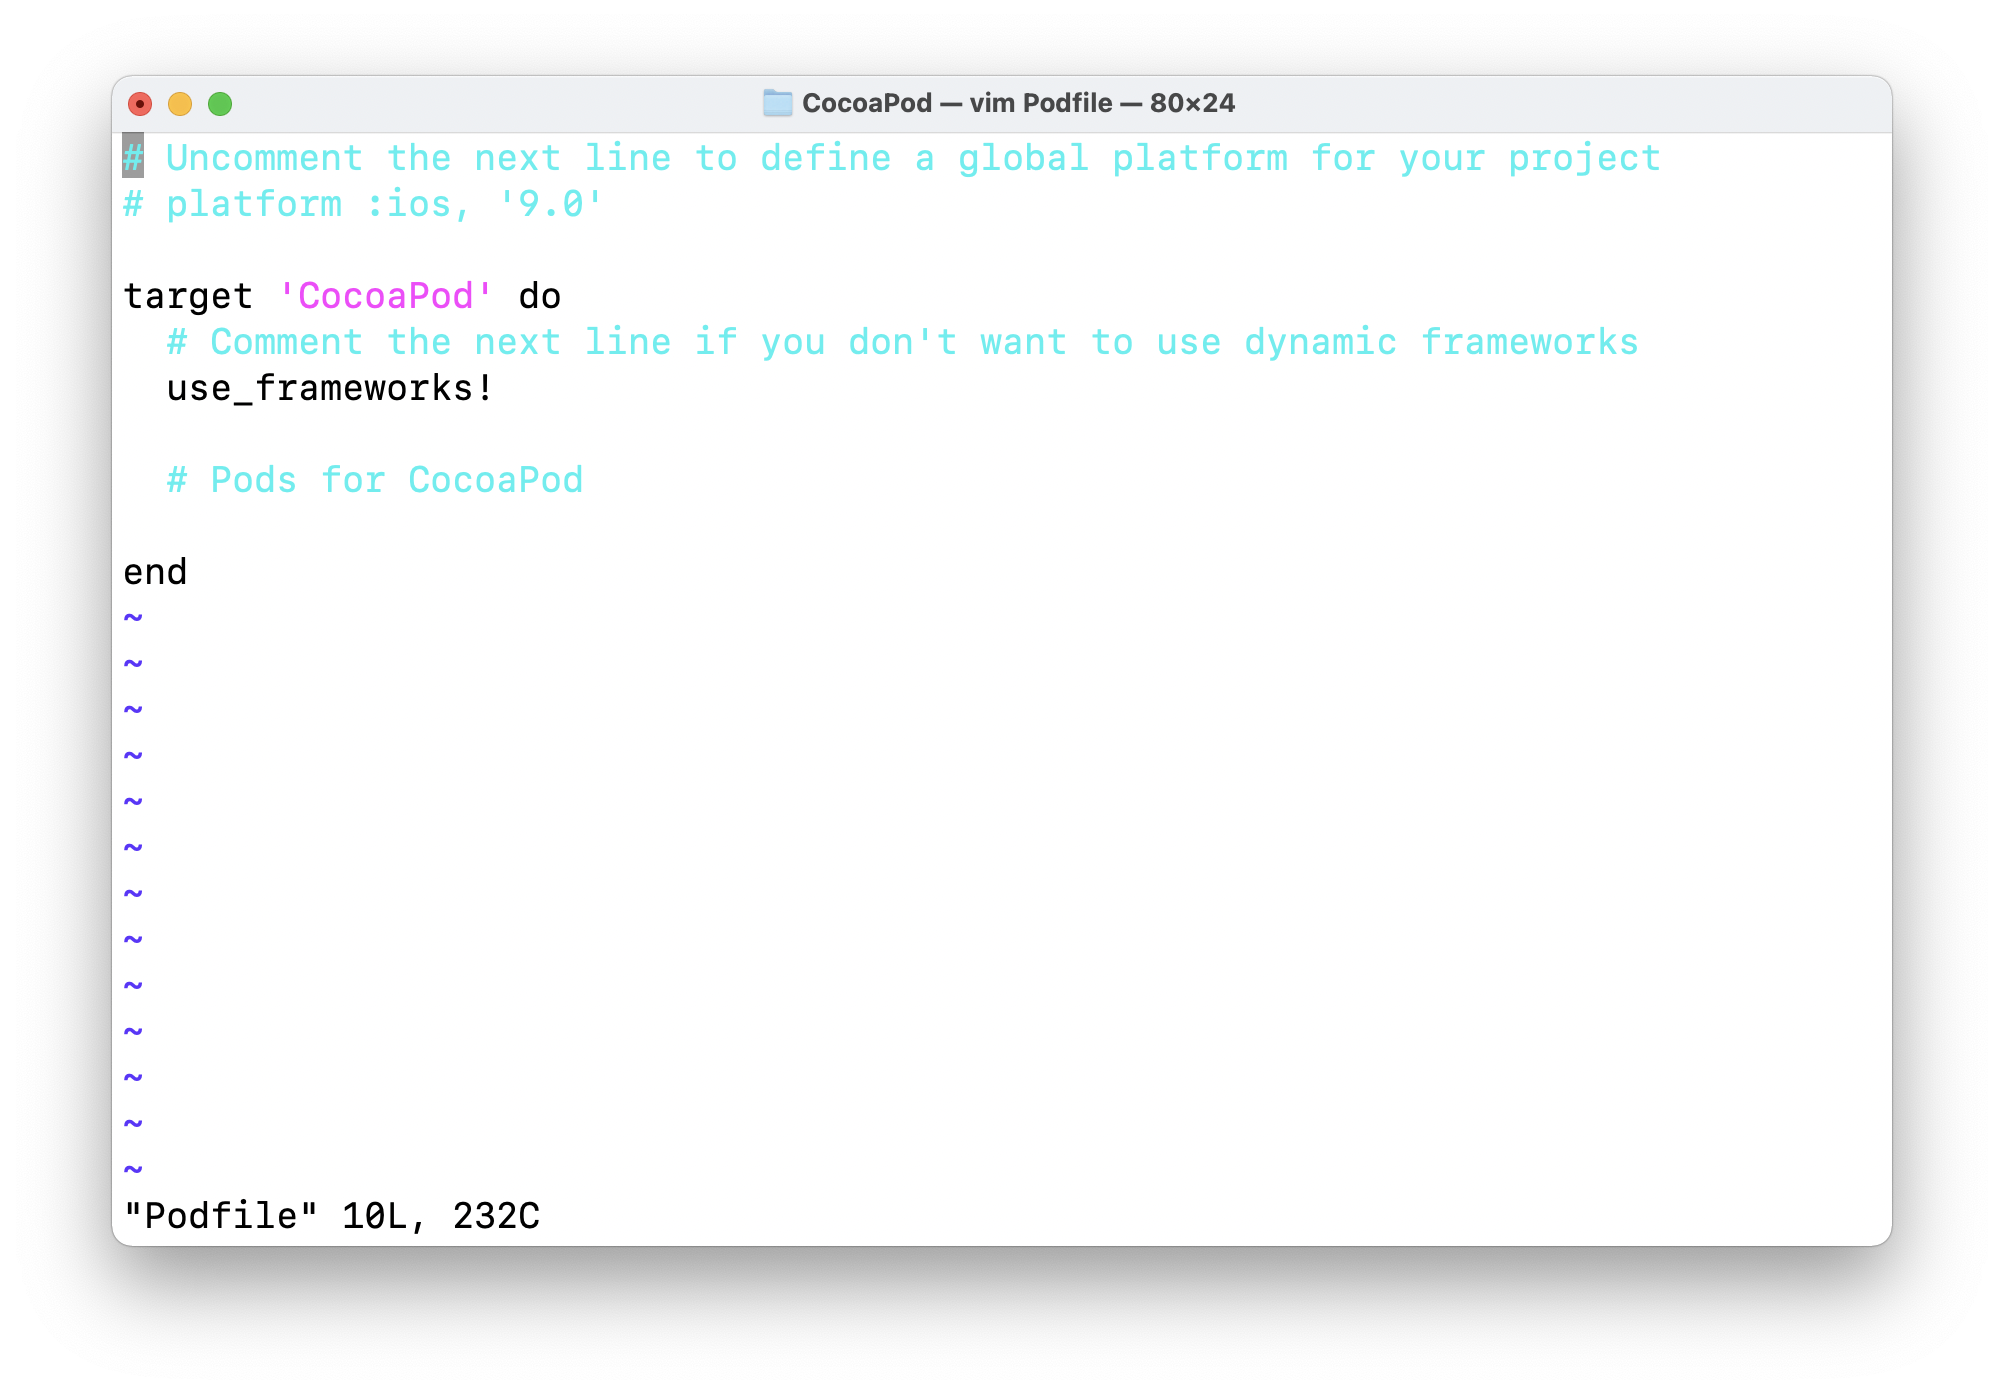
Now open up the pod file in any text editor here i used Vim.When you open the Podfile it should look similar to this.
- Next step is to add the KSBGradientView pod to our project.
Every CocoaPod has a GitHub page where the author will specify how to add the pod to your project pod file.
- Now to add the pod we should modify the pod file such that it looks like this
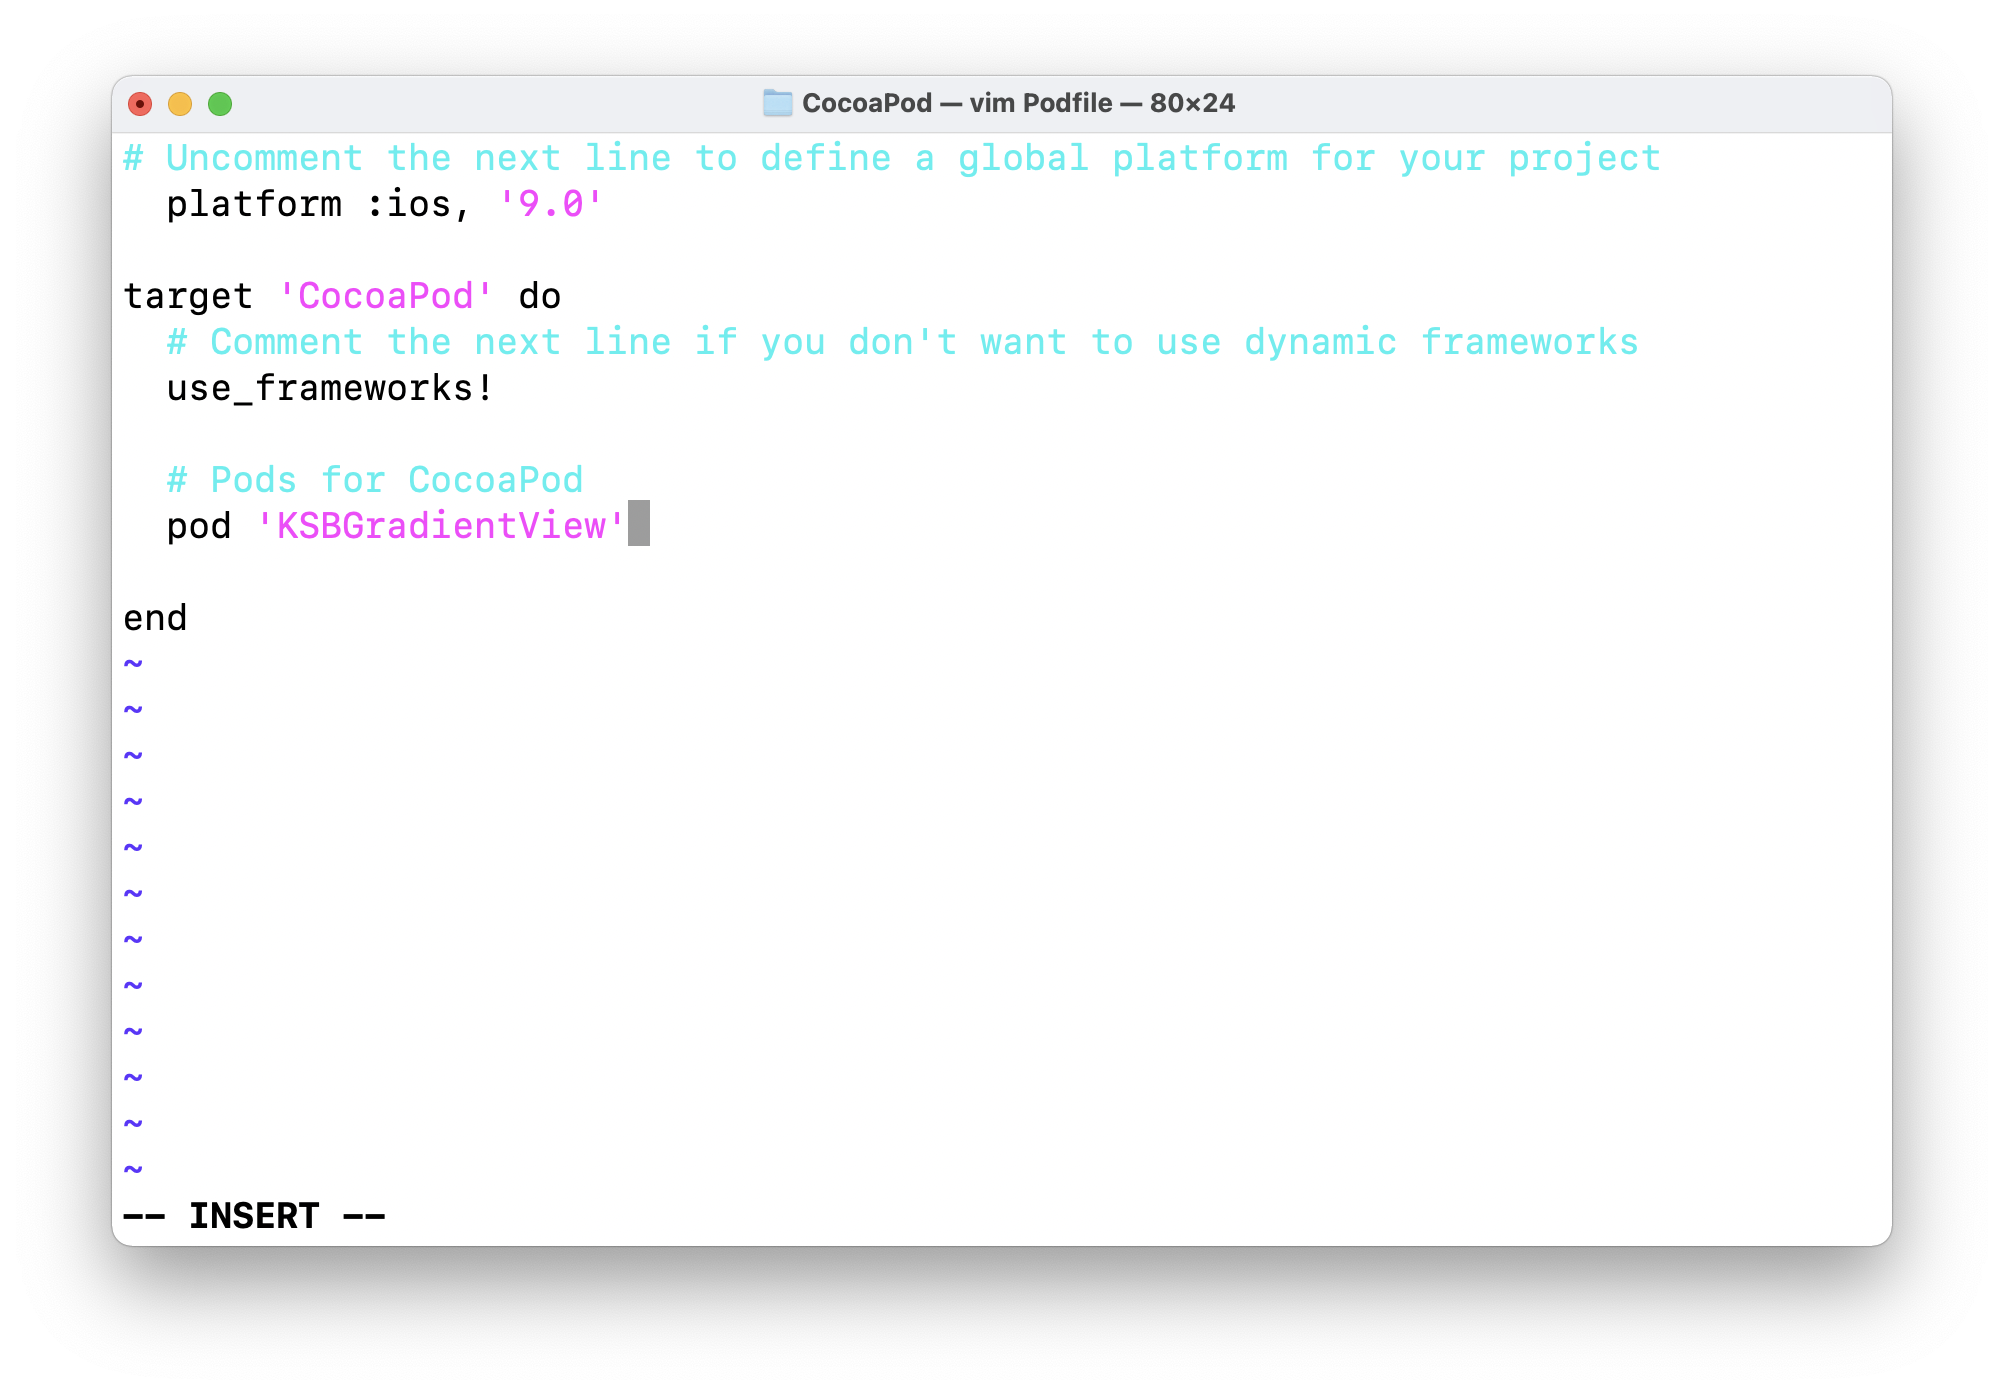
Here we uncommented the platform:iOS line which is used to denote the minimum version of iOS to support the pod.It depends upon Cocoa Pod which can be found in the readme page of the pod github repo.
pod 'KSBGradientView'
And then we add the pod below the comment #Pods for CocoaPod here CocoaPod is my project name it varies depending upon your project.
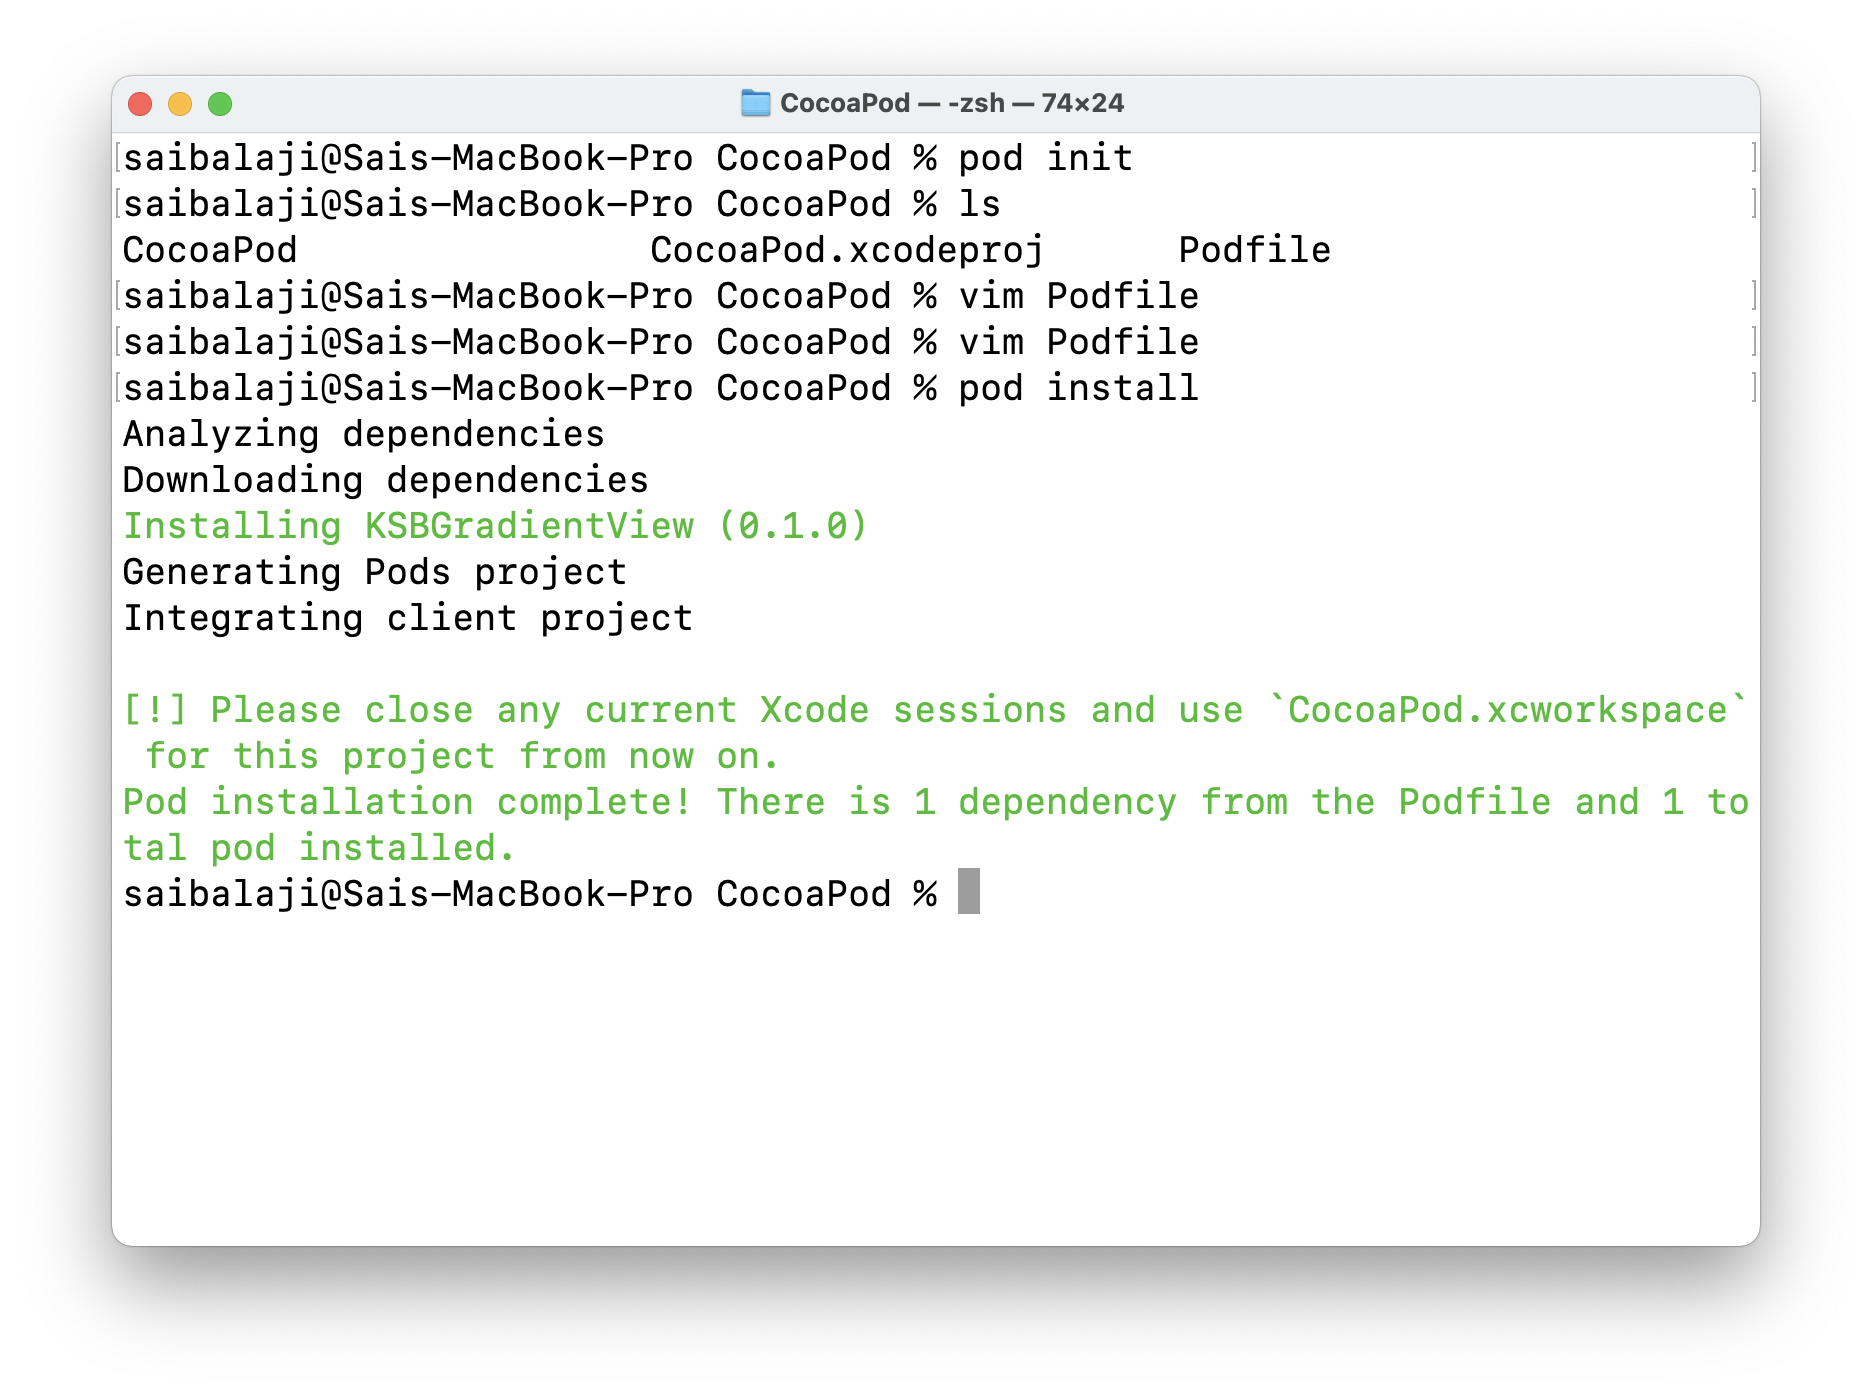
- Now close your editor and make sure you closed your Xcode project and run the below command in the terminal inside your Xcode project directory
pod install
It should fetch and install the KSBGradientView cocoa pod in our Xcode project.When it is successfully installed it should give this below output
- Now when you list the directory content

you can see that we have some new files created.The one which we will use is xcworkspace which is the fusion of our Xcode project and CocoaPod Xcode project created by the author of that pod.
- Now open up the xcworkspace in Xcode by double clicking it in finder and build the project.When your build is completed without any errors then It shows that we have successfully added the cocoa pod to our project.
Using KSBGradientView in our app.
- To use the pod which have installed in our app open ViewController.swift and import the pod.
import KSBGradientView
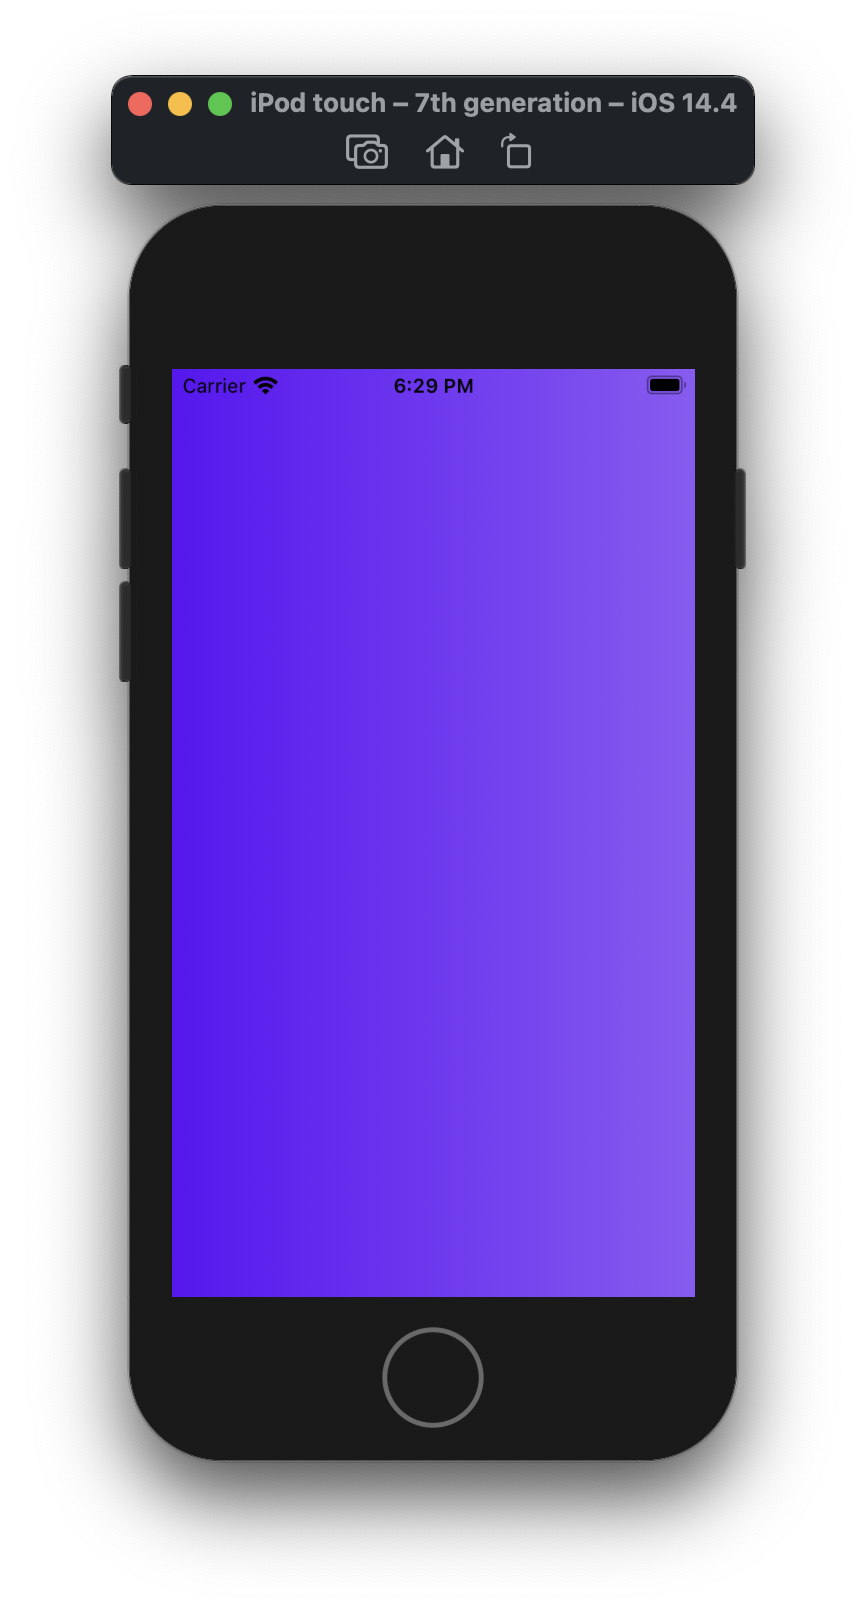
- Now inside viewdidLoad() add this code which adds a horizontal gradient with start color dark purple and end color light violet. applyHorizontalGradient() is a method present in the KSBGradientView pod other methods can be found in the pod's documentation
override func viewDidLoad() {
        super.viewDidLoad()

        view.applyHorizontalGradient(startcolor: #colorLiteral(red: 0.3647058904, green: 0.06666667014, blue: 0.9686274529, alpha: 1), endcolor: #colorLiteral(red: 0.5568627715, green: 0.3529411852, blue: 0.9686274529, alpha: 1))

    }
- Now run your app
Congratulations you have learned about Cocoa Pod and how to use them in your projects. Here are some list of useful Cocoa pods which most of the iOS devs use
- Alamofire - Alamofire is an HTTP networking library written in Swift.
- SDWebImage - This library provides an async image downloader with cache support.
- SVProgressHUD - SVProgressHUD is a clean and easy-to-use HUD meant to display the progress of an ongoing task on iOS and tvOS.
- SwiftyJSON - SwiftyJSON makes it easy to deal with JSON data in Swift.
Let's end this article with a Quiz