
Get this book -> Problems on Array: For Interviews and Competitive Programming
Hello everyone in this article we are going to create a simple login page UI in iOS application using swift codein UIKit without using storyboard(visual designer).
What is StoryBoard in iOS development
Storyboard is a visual designer which is used to design User Interface for apple devices.It has a drag and drop feature to design the User Interface.It comes along with Xcode.Before iOS 7 version Xcode the story board was a seperate software but now it is bundled with Xcode.
Advantages of using Storyboard
- Easy to design simple UI
- Beginner friendly
- Designer friendly
- Faster prototyping
- Autolayout with storyboard adds pixel perfect UI desing
Disadvantages of using Storyboard
- It becomes slow as the project size increases
- It is difficult to make changes when using a version control system
- Does not provide much options to create custom views
- Not suitable for complex User Interface design
What we are going to build
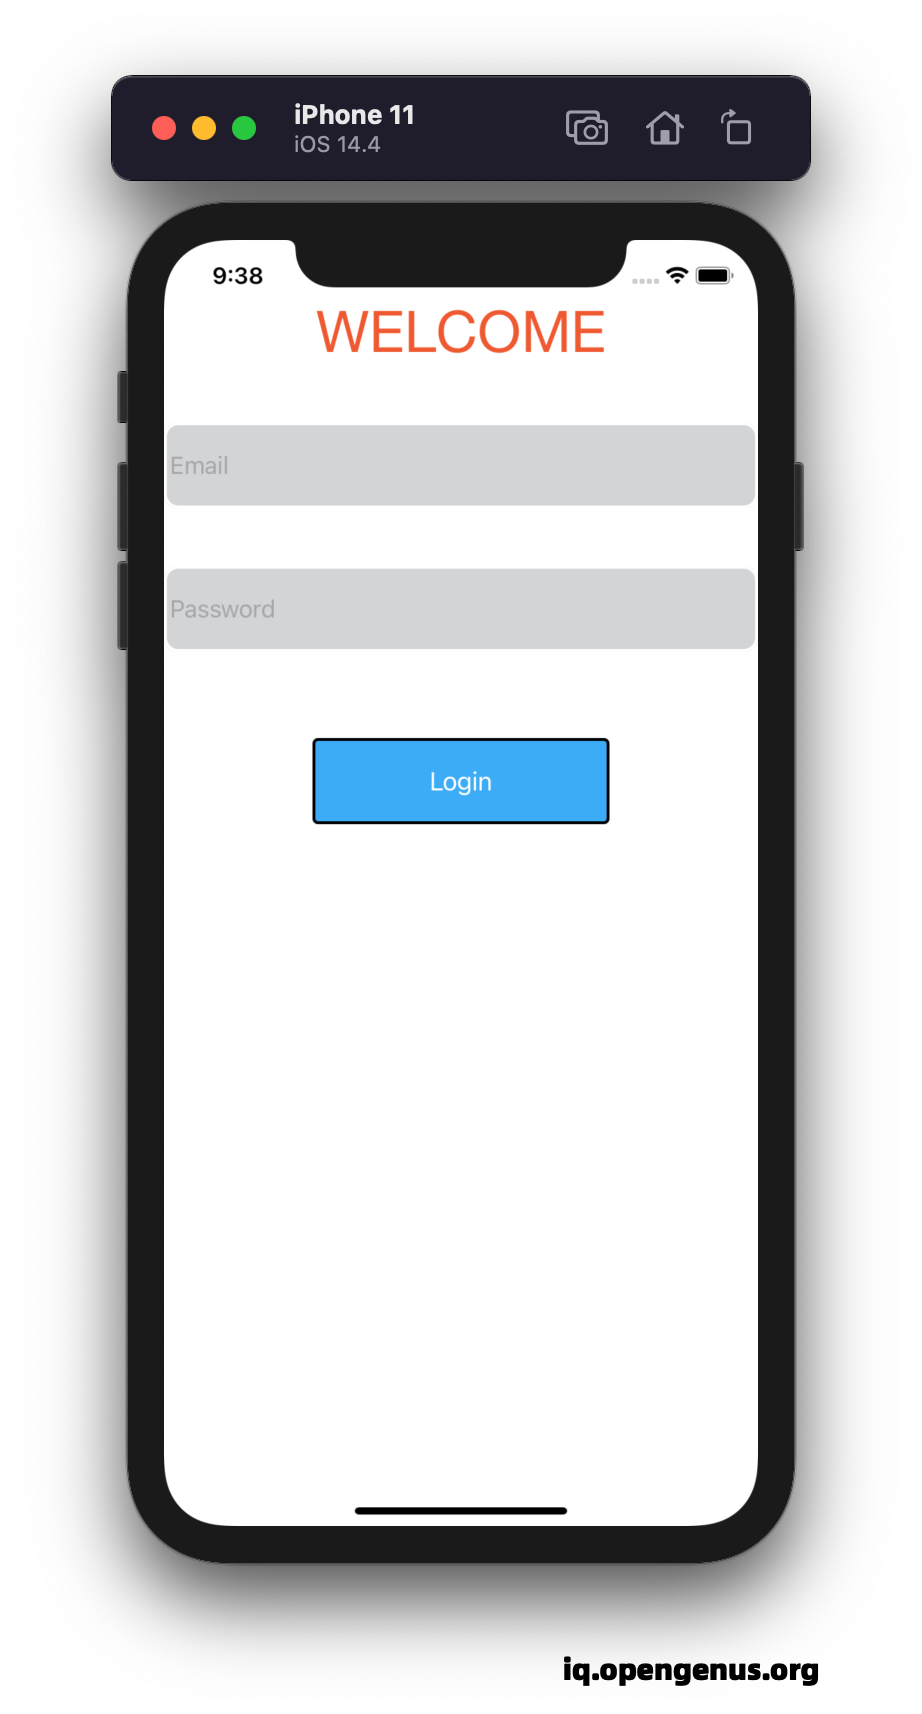
We are going to build a simple login page in swift code without using storyboard. Here is how our final app looks like.
Steps
- Open up Xcode and create a new project make sure you select UIKit and not SwiftUI.
- Open up the ViewController.swift file Here is where we are going to design our UI by code.
- Declare a closure which returns UILabel
let Label: UILabel = {
       let lbl = UILabel()
        lbl.text = "WELCOME"
        lbl.font = UIFont(name: "Helvetica Neue", size: 40.0)
        lbl.textAlignment = .center
        lbl.textColor = #colorLiteral(red: 0.9372549057, green: 0.3490196168, blue: 0.1921568662, alpha: 1)

        return lbl
    }()
Here as you can see we are creating a variable named Label which is actually a closure when get called it returns a UILabel with text "WELCOME" and other properties like text alignment,font and text color.
- Now create another two variables which returns UITextField one for username and another one for password.
let UserNameTextField: UITextField = {
        let textfield = UITextField()
        textfield.placeholder = " Email"
        textfield.layer.borderWidth = 2
        textfield.layer.cornerRadius = 10
        textfield.layer.borderColor = #colorLiteral(red: 1, green: 1, blue: 1, alpha: 1)
        textfield.layer.backgroundColor = #colorLiteral(red: 0.2549019754, green: 0.2745098174, blue: 0.3019607961, alpha: 0.2339869619)
        return textfield
    }()

    let PasswordTextField: UITextField = {
       let textfield = UITextField()
        textfield.placeholder = " Password"
        textfield.layer.borderWidth = 2
        textfield.layer.cornerRadius = 10
        textfield.layer.borderColor = #colorLiteral(red: 1, green: 1, blue: 1, alpha: 1)

        textfield.layer.backgroundColor = #colorLiteral(red: 0.2549019754, green: 0.2745098174, blue: 0.3019607961, alpha: 0.2339869619)
        return textfield
    }()
Here we have created two closures both of them returns a UITextField.
- Create another variable which returns a UIButton which will be our login button.
let LoginButton: UIButton = {

        let button = UIButton()
        button.setTitle("Login", for: .normal)
        button.layer.backgroundColor = #colorLiteral(red: 0.2392156869, green: 0.6745098233, blue: 0.9686274529, alpha: 1)
        button.layer.cornerRadius = 4
        button.layer.borderWidth = 2
        button.layer.borderColor = #colorLiteral(red: 0, green: 0, blue: 0, alpha: 1)

        return button

    }()
- We have created our views for the login page next step is to add it to our view controller.It can be done easily by calling the addSubView() method of View class and passing the view which are to be added.In our case it is two UITextField,UILabel and a UIButton.Inside viewDidLoad() add the following code
view.addSubview(Label)
        view.addSubview(UserNameTextField)
        view.addSubview(PasswordTextField)
        view.addSubview(LoginButton)
- Next step is to add constraints to our views to place them in appropriate positions in the ViewController file.Create a function called SetUpAutoLayout() and add the following lines of code to setup constraint for welcome label
Label.translatesAutoresizingMaskIntoConstraints = false
        Label.topAnchor.constraint(equalTo: view.topAnchor,constant: 40.0).isActive = true
        Label.centerXAnchor.constraint(equalTo: view.centerXAnchor).isActive = true
Here translatesAutoresizingMaskIntoConstraint dictates the iOS to prevent auto resizing mask to conflict with our constraints.By default iOS adds resizing mask to all the views inside view controller which inturn act as constraints.But in our case we want to explicitly specify the constraints so we tell iOS to prevent translating default resize mask to constraint so that it will not conflict with our coded constraints.
- Similarly add the below constraints for UITextFields and UIButton
   UserNameTextField.translatesAutoresizingMaskIntoConstraints = false
        UserNameTextField.heightAnchor.constraint(equalToConstant: 60.0).isActive = true
        UserNameTextField.widthAnchor.constraint(equalToConstant: view.frame.size.width).isActive = true
        UserNameTextField.topAnchor.constraint(equalTo: Label.bottomAnchor,constant: 40.0).isActive = true
        UserNameTextField.centerXAnchor.constraint(equalTo: view.centerXAnchor).isActive = true

        PasswordTextField.translatesAutoresizingMaskIntoConstraints = false
        PasswordTextField.heightAnchor.constraint(equalToConstant: 60.0).isActive = true
        PasswordTextField.topAnchor.constraint(equalTo:UserNameTextField.bottomAnchor,constant: 40).isActive = true
        PasswordTextField.widthAnchor.constraint(equalToConstant: view.frame.size.width).isActive = true
        PasswordTextField.centerXAnchor.constraint(equalTo: view.centerXAnchor).isActive = true

        LoginButton.translatesAutoresizingMaskIntoConstraints = false
        LoginButton.topAnchor.constraint(equalTo: PasswordTextField.bottomAnchor, constant: 60).isActive = true
        LoginButton.widthAnchor.constraint(equalToConstant: view.frame.size.width/2).isActive = true
        LoginButton.heightAnchor.constraint(equalToConstant: 60).isActive = true
        LoginButton.centerXAnchor.constraint(equalTo: view.centerXAnchor).isActive = true
As you can see we setup height,width for each view and position them relative to other views and also with parent view.
All set now run your app in the simulator to see the output.
**And here is a challenge for you **
Modify this application such that when user taps on the button it should display an alert
Before we end this article here is the quiz for you