
In this article, we learn how to install AngularJs Javascript Framework in Linux Ubuntu.
Table of contents.
- Introduction.
- Installing nvm, node.js and npm.
- Installing AngularCLI.
- Creating a new AngularJs application.
- Summary.
Introduction.
AngularJs is a Javascript framework. With it, we can build scalable single-page applications(SPAs) using HTML and Typescript. It was developed and is currently being maintained by Google.
Some of its features include routing, client-server communication, MVC framework, two-way data binding, dependency injection, testing, custom components.
We learn how to create AngularJs applications in the Ubuntu operating system.
Installing nvm, node.js and npm.
Node.js is a cross-platform run-time environment used to run javascript outside the browser, npm, is its package manager and nvm its version manager.
So how do AngularJs, Node.js, and NPM relate to each other? It is not mandatory to use Node.js. However, we need it for all build and development tools. Furthermore, using Node.js, we can create a lightweight web server to host our application locally. NPM is a Node.js package manager. We use it to install packages and project dependencies, in this article, we use it to install Angular CLI, which we will look at shortly.
There exist different versions of Node.js. To manage them, we use the NVM(Node Version Manager). With NVM, it is much easier to install, switch between and remove Node.js versions. For example, to install node.js version 6, we write:
$ nvm install 6
We can also have other versions of Node.js installed and occasionally switch between them. For example, if we are currently using Node.js version 6 and wish to switch to version 16, we write:
$ nvm use 16
Additionally, while installing Node.js using the Node Version Manager, its package manager NPM is also installed automatically.
To check if NVM is available in our system, we can check its version:
$ nvm --version
This way, we know if it is available. If not, we install it by executing the following curl command that fetches the installation script - install.sh and runs it locally:
$ curl -o- https://raw.githubusercontent.com/nvm-sh/nvm/v0.37.2/install.sh | bash
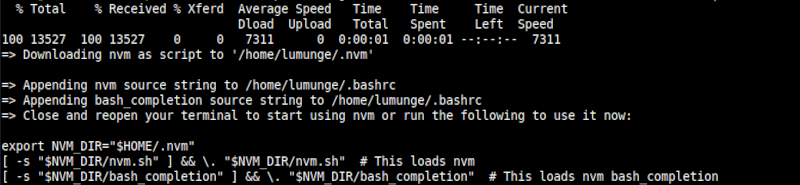
From the command output, we see curl working. After it has downloaded the script, we execute it. We see this from the command where we have piped the downloaded script to the bash command for execution.
We can also use the wget command to download the script.
The script attempts to add the following lines to the correct profile i.e, ~/.bash_profile, ~/.zshrc, ~/.profile, or ~/.bashrc.

To make sure this action is successful, we can perform this operation by ourselves by executing the following command:
$ source ~/.bashrc
Alternatively, we can also execute the new instructions individually in the terminal as shown:

After this, we will have installed the latest version of nvm. We can confirm this by checking its version as we did previously.
In this article, we install Angular CLI version 13. It is compatible with Node.js version 12, 14, or 16(lts). Currently, the LTS(long term support) version of Node.js is v16. By using NVM to install Node.js, the latest version of NPM is also installed automatically. To install the lts version of Node.js, we write:
$ nvm install --lts

After the installation is complete, we can check the versions of both Node.js and NPM by using the --version option:
$ node --version
We can also check the current version of Node.js using nvm:
$ nvm current
And to check the npm version, we write:
$ npm --version
Installing AngularCLI.
We use the AngularCLI command-line interface utility to create, develop, scaffold, and maintain Angular applications. We do this by executing AngularCLI commands in the terminal.
AngularCLI also assists developers in generating code that follows best practices as specified by Angular’s home page.
To install the latest AngularCLI package using NPM, we execute the command below:
$ npm install -g @angular/cli

We use the -g option within the command to install AngularJs globally in the system. Now it will be available to all system users and applications.
We can also choose to install a specific version of AngularJs. For example, to install version 11, we write: $ npm install -g @angular/cli@11
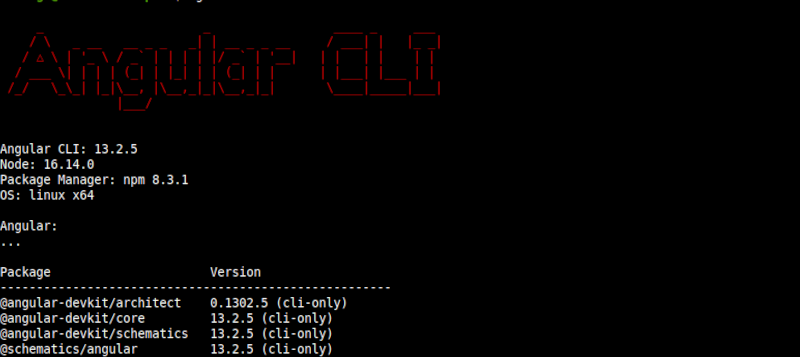
To verify a successful installation of AngularCLI, we check its version by writing:
$ ng --version
Creating a new AngularJs application.
AngularCLI makes it easier to bootstrap and develop AngularJS applications. For example, we only need to execute not more than four commands to have a newly executable AngularJS project setup with all third-party libraries included.
We first navigate to a project directory such as home or documents, whatever is preferred and using the ng CLI, we create a new AngularJS project by writing:
$ ng new test-angular
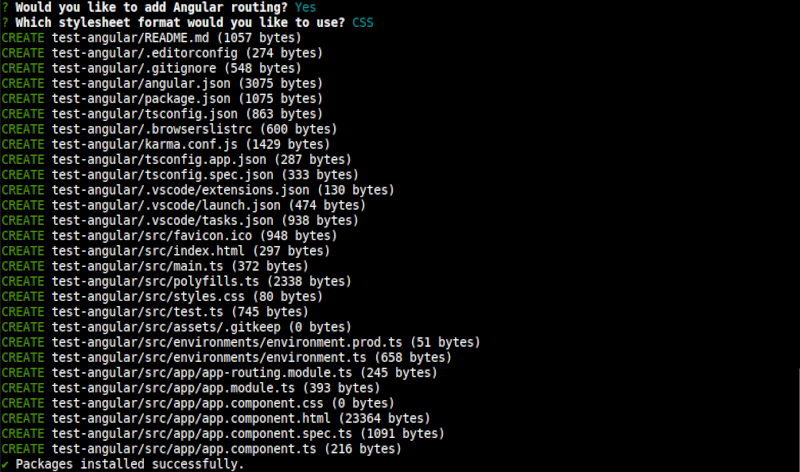
In this case, the AngularJS application we are creating is called test-angular.
Before installation of packages and dependencies begins, we can choose which to include and which to exclude in the initial project setup as shown above. We can also accept the defaults by pressing the enter key. After this, AngularCLI proceeds to install all the required Angular NPM packages and dependencies for the new project.
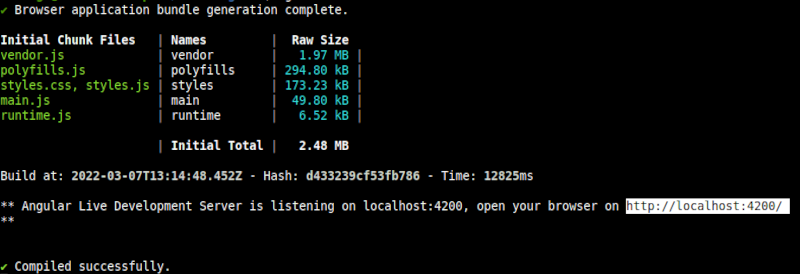
After creating the new app, we navigate to its directory. In this case, it is test-angular. We execute the following command to serve it on a web browser:
$ ng serve
Alternatively, we can also execute the $ ng serve --open command to serve it as a web page.
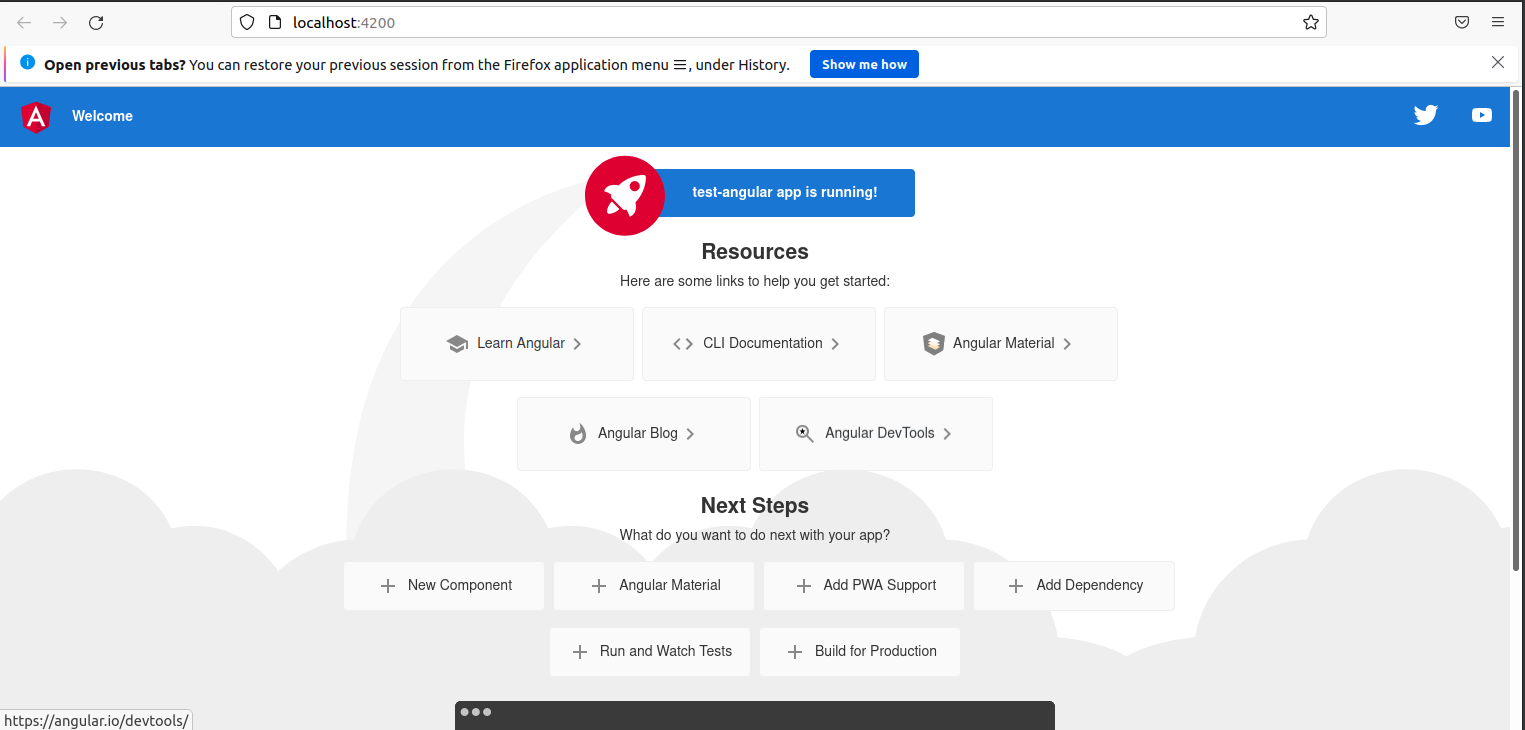
After this, we will have a URL to a localhost web page. When we open it in the browser, we will see the following web page;
We can also specify the host and port by passing these parameters as command arguments. For example, to host the app on the IP address 0.0.0.0 on port 8080, we write:
$ ng serve --host 0.0.0.0 --port 8080
Uninstalling AngularJs CLI.
Package managers automate installing, upgrading, configuring, and even uninstalling packages. To uninstall the AngularJs CLI tool using NPM, we can execute the following command that removes it globally:
$ npm uninstall -g @angular/cli
Summary.
AngularJS is a javascript framework for building SPAs using HTML and typescript.
We learned the relationship between node.js and npm. The former is a run-time environment that allows javascript code to run outside the browser, while the latter is a package manager for node.js. We also learned the purpose of NVM and why we use it.
Finally, we used NPM to install AngularCLI and ng commands to create a new AngularJS application which we launched in a browser.