
In this article, we learn how to install and configure PHP composer on Rocky Linux 8 for PHP development.
Table of contents.
- Introduction.
- Installing PHP.
- Installing PHP Composer.
- Global installation.
- Uninstallation.
- Summary.
Introduction.
PHP composer is an open-source application-level package manager for managing application dependencies and libraries used during PHP development.
When using PHP composer, all we do is declare the libraries a project needs, and it installs and keeps updated.
Just like we use NPM(Node Package Manager) to manage Node.js packages during Javascript development, we use PHP Composer to manage PHP packages during PHP development.
For example, to update packages in a Node.js project, we write $ npm update. On the other hand, to update PHP packages using the PHP composer we write, $ composer update.
System Requirements.
Before we start, we need to have PHP version 7 and above installed and root privileges on the Rocky Linux system.
To check the current PHP version, we execute the following command:
$ php -v

System update.
Usually, before any installations, we always make sure that the installed packages are up to date. It helps us avoid issues during the installation of PHP composer. In rocky Linux 8, we execute the following commands to update the system.
First, we check for updates in the repositories:
$ sudo dnf check-update [ check for updates ]
$ sudo dnf update -y       [ update packages ]
Installing PHP.
PHP composer manages PHP packages for PHP projects.
Therefore we need to have the latest version of the PHP available.
If the PHP version command in step one fails to produce a PHP version number, then PHP is not available in the system so we install it as follows:
$ sudo dnf module list php [ get module list ]

$ sudo dnf module enable php:7.4 [ enable php7.4 module ]
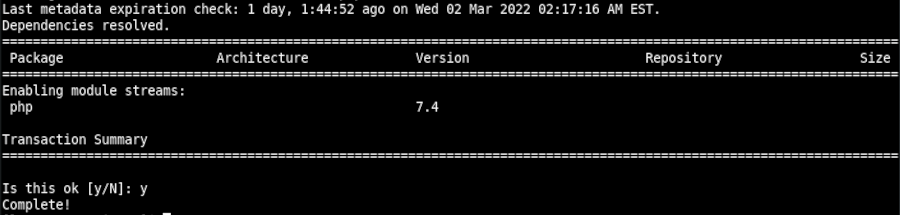
$ sudo dnf install php [ install PHP7.4 ]

We verify a successful installation by checking the installed version.
Installing PHP composer.
We can install PHP composer in Rocky Linux 8 in two ways. The first is installing it locally as part of a single project or installing it globally as a system-wide executable.
We begin with a local installation then demonstrate how to install composer globally.
Local Installation:
A local installation of PHP composer involves downloading the installer to the project directory.
For this we first navigate to the project directory and execute the following commands:
$ php -r "copy('https://getcomposer.org/installer', 'composer-setup.php');" [ download installer script ]
$ php -r "if (hash_file('sha384', 'composer-setup.php') === '$(wget -qO - https://composer.github.io/installer.sig)') { echo 'Installer verified'; } else { echo 'Installer corrupt'; unlink('composer-setup.php'); } echo PHP_EOL;" [ verify installer script ]
The text, 'Installer verified', is displayed as output, meaning the script is not corrupt. Therefore, we can proceed.
We use the PHP interpreter to execute the downloaded installer script that will install composer to the current directory:
$ php composer-setup.php

After installation, the PHP composer should be available. To verify we write:
$ php composer.phar

Once we install the PHP composer successfully, its installer script is useless. Therefore, we can remove it:
$ php -r "unlink('composer-setup.php');"
With that, we have the PHP composer installed on our project locally.
Global installation.
The steps of downloading and verifying the PHP composer installation script are similar to what we did in the previous section involving local installation with a slight difference. In this case, we install the PHP composer in the /usr/local/bin directory that makes the composer accessible from any directory in the terminal.
$ sudo php composer-setup.php --install-dir=/usr/local/bin --filename=composer

Above we set the value of --install-dir to /usr/local/bin and give it a file name composer.
After installation, we can verify it was successful by writing:
$ composer
The output of the composer command should be similar to the one below:
If this does not work, we can open a new terminal session and execute the command.
To check the current version of PHP composer, we write:
$ composer -V
And that's it. We can easily manage packages and libraries for PHP development using PHP composer in Rocky Linux 8. As mentioned earlier, we can navigate to any directory in the terminal, and composer will still be accessible since we placed it in the /usr/local/bin directory, which is part of our $PATH variable:
Uninstallation.
To do away with a local installation of PHP composer, we delete the composer.phar file we downloaded earlier:
$ rm composer.phar
On the other hand, to uninstall it globally, we delete its binary from the /usr/local/bin/ directory where we previously installed it:
$ sudo rm -rf /usr/local/bin/composer
Summary.
We use PHP composer for installing and managing our PHP packages using simple commands during PHP development.
We learned how to install PHP composer locally per-project basis, and globally within the system in Rocky Linux 8.