
Let us delve deeper into Rust, and start exploring some more complicated topics. Today's topic is... Daemons!
Table of contents
- What is a Daemon?
- Don't reinvent the wheel
- Small intro to Cargo
- Importing the crate
- Small Code Example
So.. Demons? What is a Daemon?
Not quite. Common misconception. We're talking about Daemons. In computing, a daemon is a essentially a background process. If you're on windows, all your services are most likely daemons.
Okay okay.. But why Daemons? The term originated as a joke, back in 1963. It was first used by Fernando J Corbato's team at MIT. They were working on Project MAC (the Project on Mathematics and Computation, later backronymed to Multiple Access Computer, Machine Aided Cognitions, or Man and Computer).
He said..
"We fancifully began to use the word daemon to describe background processes that worked tirelessly to perform system chores"
They were referring to a thought experiment, proposed by the physicst James Clerk Maxwell in 1867. I'll leave a link in the references to Maxwell's Demon Wiki article in case you're interested.
Don't reinvent the wheel
Depending on the OS, the daemons' spawning process is different, since they all handle processes differently. Are we going to write the entire daemon ourselves?
Short answer: No.
Long Answer: You should not reinvent the wheel. What do I mean by this? If someone out there has already written the code, the library, the functionality that you need (And made it available in any of the appropiate places, like github or crates.io -more on this later-), it is probably more efficient, better tested and simpler to use than anything you can cook up. Of course overtime you might find some better solution to a particular problem, and write your own library to help yourself write better code faster, and maybe you will make it available aswell, thus continuing this cycle. But to start off, you should certainly let external libraries handle the more complex areas of your code.
Remember our last article, when we "used" use std::collections::BTreeMap ?. That was us using someone else's library, in this case Rust's std library (Which was written by someone of course). We let them handle the whole BTreeMap implementation. We could've done it ourselves, sure but.. don't forget. Don't reinvent the wheel.
That's good and all but we've only used the std library, which is included in every Rust installation but.. how do we get other libraries? We use Rust's package manager, Cargo!
Small intro to Cargo
For a deeper dive into Cargo, make sure to check The Cargo Book, I'll leave a link below, as always!
Anyway. Let's say you want some particular functionality in your program, something that is not precisely simple to do, or you just don't want to deal with potential problems. For example, making a Daemon. Where do you go looking for this? You could google "Daemons in Rust", and try to find someone recommending a package there, perfectly valid solution. But you could also go straight to the Crates Registry. Crates can be binaries or libraries.
Typically when you start a new Rust project, you use cargo to initialize it. In your command line, you first travel to the desired location for your project, then use...
cargo new project_name
This creates 3 things. A src folder ith a main.rs file in it, and a cargo.toml file. We'll focus on this last one. I have a little project I'm using for OpenGenus examples. Here's the cargo.toml file I have there..
[package]
name = "opengenus_examples"
version = "0.1.0"
edition = "2018"

# See more keys and their definitions at https://doc.rust-lang.org/cargo/reference/manifest.html

[dependencies]
As you can see, there's the name of my package, the version it's currently at and what rust edition it's using. Then below the next comment, there's a "[dependencies]" tag. This is where we'll be putting our external crates.
Importing the crate
So. We want to find a crate that would take care of "daemonizing" our code. Let's look for a crate to do that. Let's search... daemonize.
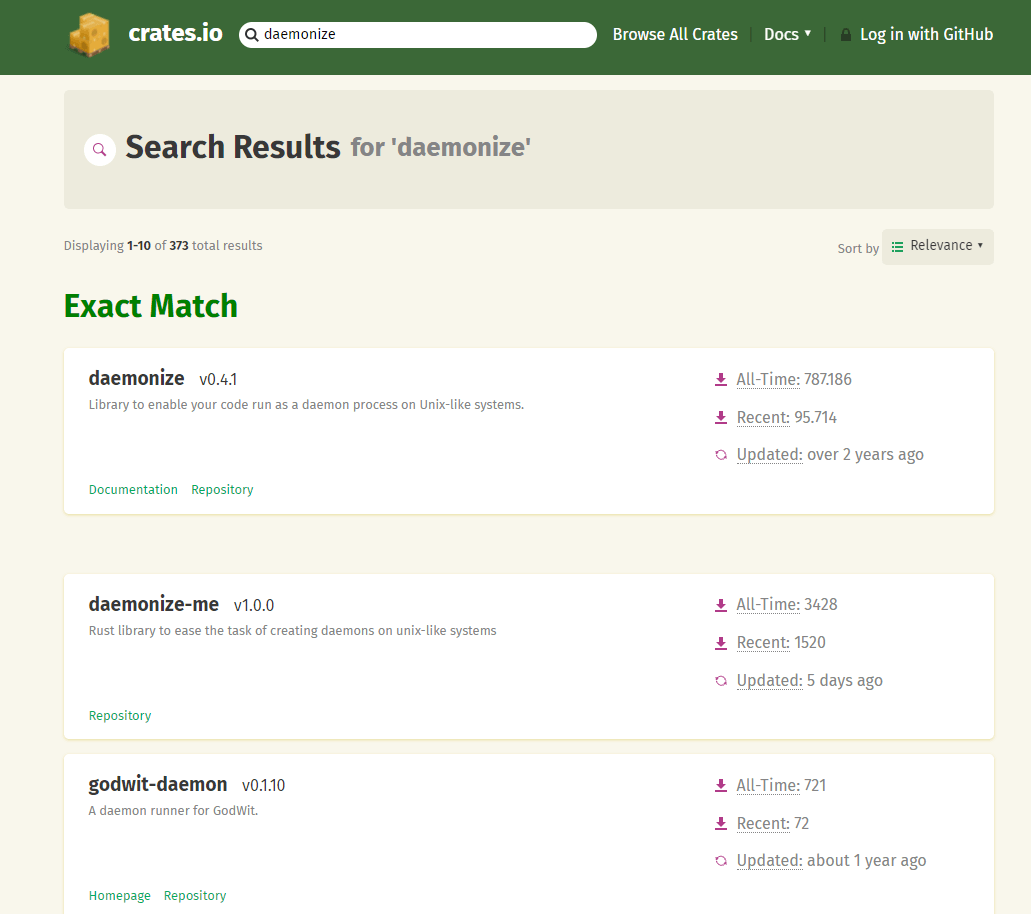
At the time of taking the picture, those were the results. I encourage you to go to crates.io right now and look for daemonize, and have a look at the first page of results. As you can see there's several libraries that help in daemonizing, or have something to do with daemons. I typically go for whichever has the most downloads, since that's what I would guess is most used, but it's worth taking a peek at the smaller ones. Maybe one of those solves your particular problem, that the big ones out there do not. But first try to go for the bigger ones. More people using them means more bugs are found and fixed, which helps keep a library updated and 'secure'. I would avoid dead libraries (Last update over a certain amount of time. For me it is around 6 months, but that timeframe is up to you).
So with those points in mind, let's use daemonize v0.4.1.
[dependencies]
daemonize = "0.4.1"
Done! Simple as that! Now we run a quick cargo check to update the dependencies...

Oh no.. A lot of errors (17 to be exact)! What's going on? You told me this was easy.
Indeed! It is easy, but we've made a mistake.
If you're on windows, all your services are most likely daemons.
Maybe we should look for Services instead.. And guess what..
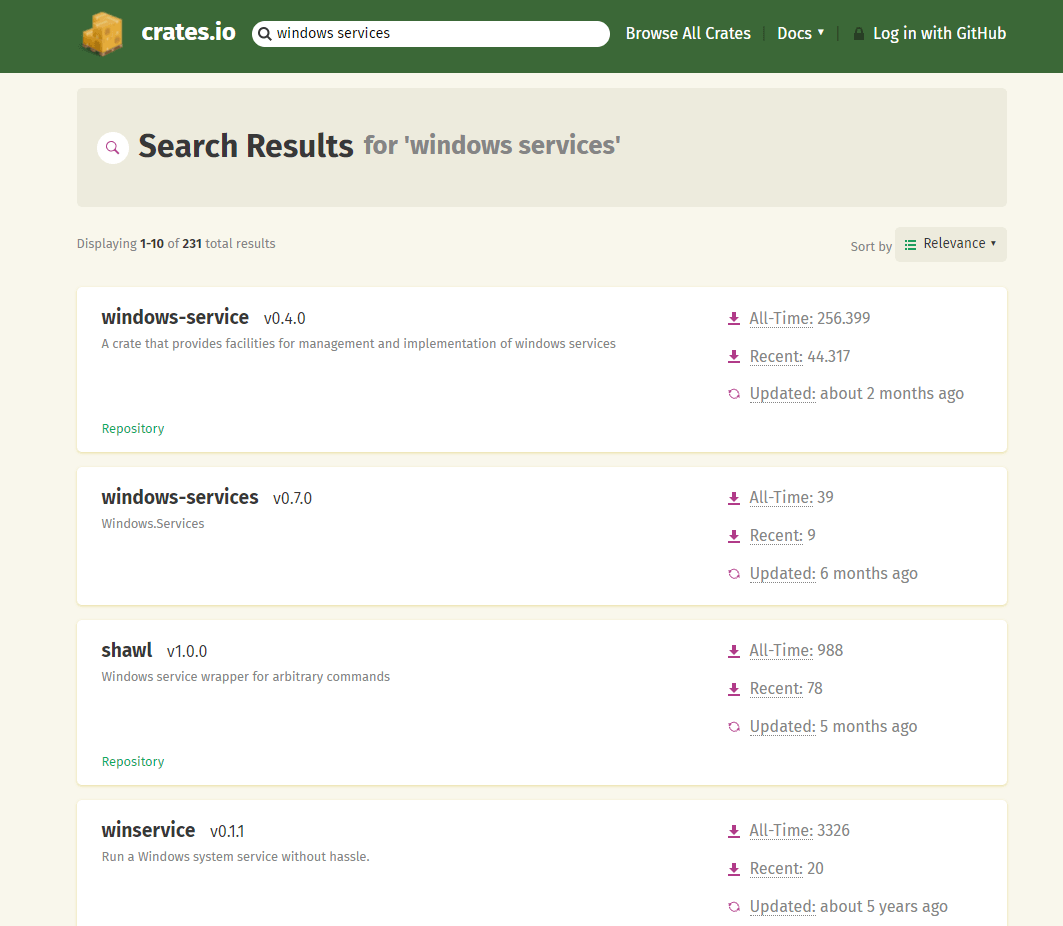
There is a crate for windows services! Let's replace our dependency..
[dependencies]
windows-service = "0.4.0"
And now run cargo check...

All good! So now we can use this crate in our project. So let's write a very simple daemon to demonstrate how to do this.
So. For a basic barebones Daemon, I'm going to be following the example provided by the windows-service package itself. All it's going to do is send a UDP packet every second. We need at least, 3 files. 1 to install our new service, 1 to uninstall it when we want to get rid of it, and finally our service itself.
We'll name them in their most straightforward way, just as the example. install_service, uninstall_service and ping_service. I'll link in the references the direct link to the github page of this package, so you can read more about it and explore the example more in depth.
So. Let's start with.. The installation and uninstallation.
#[cfg(not(windows))]
fn main() {
    panic!("This program is only intended to run on Windows.");
}

#[cfg(windows)]
fn main() -> windows_service::Result<()> {
    use std::ffi::OsString;
    use windows_service::{
        service::{ServiceAccess, ServiceErrorControl, ServiceInfo, ServiceStartType, ServiceType},
        service_manager::{ServiceManager, ServiceManagerAccess},
    };

    let manager_access = ServiceManagerAccess::CONNECT | ServiceManagerAccess::CREATE_SERVICE;
    let service_manager = ServiceManager::local_computer(None::<&str>, manager_access)?;

    let service_binary_path = ::std::env::current_exe()
        .unwrap()
        .with_file_name("ping_service.exe");

    let service_info = ServiceInfo {
        name: OsString::from("ping_service"),
        display_name: OsString::from("Ping service"),
        service_type: ServiceType::OWN_PROCESS,
        start_type: ServiceStartType::OnDemand,
        error_control: ServiceErrorControl::Normal,
        executable_path: service_binary_path,
        launch_arguments: vec![],
        dependencies: vec![],
        account_name: None, // run as System
        account_password: None,
    };

    let service = service_manager.create_service(&service_info, ServiceAccess::CHANGE_CONFIG)?;
    service.set_description("Windows service example from windows-service-rs")?;

    Ok(())
}
Then Uninstall.. which is quite similar..
#[cfg(not(windows))]
fn main() {
    panic!("This program is only intended to run on Windows.");
}

#[cfg(windows)]
fn main() -> windows_service::Result<()> {
    use std::{thread, time::Duration};
    use windows_service::{
        service::{ServiceAccess, ServiceState},
        service_manager::{ServiceManager, ServiceManagerAccess},
    };

    let manager_access = ServiceManagerAccess::CONNECT;
    let service_manager = ServiceManager::local_computer(None::<&str>, manager_access)?;

    let service_access = ServiceAccess::QUERY_STATUS | ServiceAccess::STOP | ServiceAccess::DELETE;
    let service = service_manager.open_service("ping_service", service_access)?;

    let service_status = service.query_status()?;
    if service_status.current_state != ServiceState::Stopped {
        service.stop()?;
        // Wait for service to stop
        thread::sleep(Duration::from_secs(1));
    }

    service.delete()?;
    Ok(())
}
And finally, ping_service itself..
#[cfg(not(windows))]
fn main() {
    panic!("This program is only supposed to be run on a windows machine");
}

#[cfg(windows)]

fn main() -> windows_service::Result<()> {
    ping_service::run()
}

mod ping_service {
    use std::{
        ffi::OsString,
        net::{IpAddr, SocketAddr, UdpSocket},
        sync::mpsc,
        time::Duration,
    };
    use windows_service::{
        define_windows_service,
        service::{
            ServiceControl, ServiceControlAccept, ServiceExitCode, ServiceState, ServiceStatus,
            ServiceType,
        },
        service_control_handler::{self, ServiceControlHandlerResult},
        service_dispatcher, Result,
    };

    const SERVICE_NAME: &str = "ping_service";
    const SERVICE_TYPE: ServiceType = ServiceType::OWN_PROCESS;
    const LOOPBACK_ADDR: [u8; 4] = [127, 0, 0, 1];
    const RECEIVER_PORT: u16 = 1234;
    const PING_MESSAGE: &str = "ping\n";

    pub fn run() -> Result<()> {
        service_dispatcher::start(SERVICE_NAME, ffi_service_main)
    }
    define_windows_service!(ffi_service_main, my_service_main);
    pub fn my_service_main(_arguments: Vec<OsString>) {
        if let Err(_e) = run_service() {
            // We should be handling the error here. Logging it to a file or something like that
        }
    }

    pub fn run_service() -> Result<()> {
        // Create a channel to be able to poll a stop event from the service worker loop
        let (shutdown_tx, shutdown_rx) = mpsc::channel();

        // Define system service event handler that will be receiving service events.
        let event_handler = move |control_event| -> ServiceControlHandlerResult {
            match control_event {
                ServiceControl::Interrogate => ServiceControlHandlerResult::NoError,

                ServiceControl::Stop => {
                    shutdown_tx.send(()).unwrap();
                    ServiceControlHandlerResult::NoError
                }

                _ => ServiceControlHandlerResult::NotImplemented,
            }
        };

        println!("Starting service...");

        let status_handle = service_control_handler::register(SERVICE_NAME, event_handler)?;

        status_handle.set_service_status(ServiceStatus {
            service_type: SERVICE_TYPE,
            current_state: ServiceState::Running,
            controls_accepted: ServiceControlAccept::STOP,
            exit_code: ServiceExitCode::Win32(0),
            checkpoint: 0,
            wait_hint: Duration::default(),
            process_id: None,
        })?;

        // For Demo purposes, we're just sending a message using UDP once a second
        let loopback_ip = IpAddr::from(LOOPBACK_ADDR);
        let sender_addr = SocketAddr::new(loopback_ip, 0);
        let receiver_addr = SocketAddr::new(loopback_ip, RECEIVER_PORT);
        let msg = PING_MESSAGE.as_bytes();
        let socket = UdpSocket::bind(sender_addr).unwrap();

        loop {
            let _ = socket.send_to(msg, receiver_addr);

            match shutdown_rx.recv_timeout(Duration::from_secs(1)) {
                Ok(_) | Err(mpsc::RecvTimeoutError::Disconnected) => break,
                Err(mpsc::RecvTimeoutError::Timeout) => (),
            };
        }

        status_handle.set_service_status(ServiceStatus {
            service_type: SERVICE_TYPE,
            current_state: ServiceState::Stopped,
            controls_accepted: ServiceControlAccept::empty(),
            exit_code: ServiceExitCode::Win32(0),
            checkpoint: 0,
            wait_hint: Duration::default(),
            process_id: None,
        })?;

        Ok(())
    }
}
To run these, We have to use a commandline terminal with administrator access.
After compiling them into their .exe versions using cargo build --bin "file_name", we're going to first run install service.

As you can see there's no feedback. We didn't code any in! But.. If I check my installed services...

There it is. So.. to start a service, you either use the command line, or the Services menu itself.
I encourage you to try this yourself, start the ping_service and check the services details. It's there, running. We can't see any visible result, but the OS tells us and shows us it's running.
Stopping and Uninstalling are essentially the Running and installing the service. Same actions, just in reverse.
This should cover very briefly and in a very "only scratching the surface" way, how to make a daemon in windows. I sadly do not have access to a linux machine or a mac machine, to show you the other ways. But I have given you the tools here to look for the packages and example that could help you achieve this.
Thank you for joining me in this little journey in this article at OpenGenus. I hope to see you at the next stop!