Reading time: 30 minutes | Coding time: 15 minutes

Apache Maven is a Configuration-oriented build tool used to build projects whose source code in written in Java. It can also be modified to work with C++ and Ruby language.
Apache Maven automatically creates a hierarchy for source code, its unit test cases and after the build, it creates a target/ folder containing the .jar or .war file which is a platform independent binary file.
Our aim is to create a basic Java Project from scratch. All the required source code files will be automatically handled by Maven and stored in src/main/ folder and built by using pre-defined Maven functions.
Here, We create a simple Java Project with one source file App.java which will give the following output:
Hello World
Pre-requisite: Download Maven and set its environment
Apache Maven is a free build tool. Its binary file can be downloaded from the Apache Maven Central Repository
Since download file is a binary file and not an executable file, Apache Maven needs no installation. Its file must be in local machine and can be then used for building projects.
Setting up Apache Maven environment in our local machine:
- Save Apache Maven binary on any path you want on your local machine.
It is a good practise to store the binary on C:/ directory root.
Example:
C://apache-maven-{version}
- Open Command Prompt in Windows and type following command
mvn -version
Error message is displayed because Maven is not configured in our local machine.
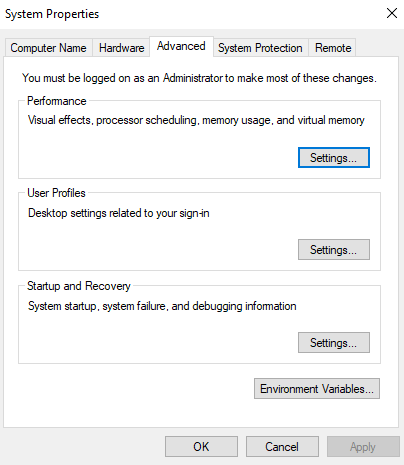
- Open Control Panel -> System and Security -> System
Click on Advanced System Settings on the left side panel. System Properties Dialog Box opens.
-
Click on Environment Variables button.
-
In System Variables -> Click on New button.
Specify following details
Variable Name: M2_HOME
Variable Value: {path of Maven Binary}
In our case, Variable Value: C:\apache-maven-{version}
- In System Variables -> Select path variable and click on Edit.
Click on New button.
Add the path specified in step 6 followed by bin/.
Path: {Path of Maven binary}\bin
Example: C:\apache-maven-{version}\bin
- Open Command Prompt and type following command:
mvn -version
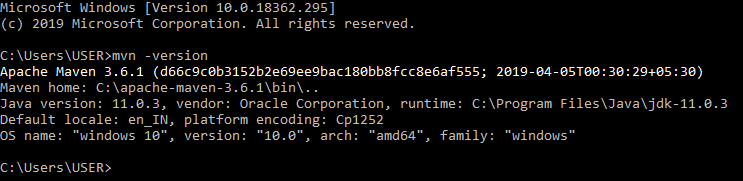
If we get the correct version message, then Maven is successfully configured on our local machine. Let us get started with our basic Java project using Maven.
Java Project using Maven
Step 1: Create a Maven Project
Open the command line on your machine and type the following command:
mvn archetype:generate -DgroupId={group name} -DartifactId={project name} -DarchetypeArtifactId=maven-archetype-quickstart -DarchetypeVersion=1.4 -DinteractiveMode=false
Here,
- Group ID is the name of the group you want for your project. A group is basically a collection of projects.
Provide any group name you want.
Here, we use "Maven_Basics" as group name. - Artifact ID is the name of the current project you want to give.
Here, we use "project1" as the project name.
Note: By convention, you must always start project name with lowercase alphabet although you can use a captial letter or underscore as well. - All rest parameters in the command are used to set up hierarchies in the Maven project and automatically configure basic dependencies to used in the project.
On first usage of the command, the Maven tool downloads all the configuration files from Central Maven Repository
Implementation:
mvn archetype:generate -DgroupId=Maven_Basics -DartifactId=project1 -DarchetypeArtifactId=maven-archetype-quickstart -DarchetypeVersion=1.4 -DinteractiveMode=false
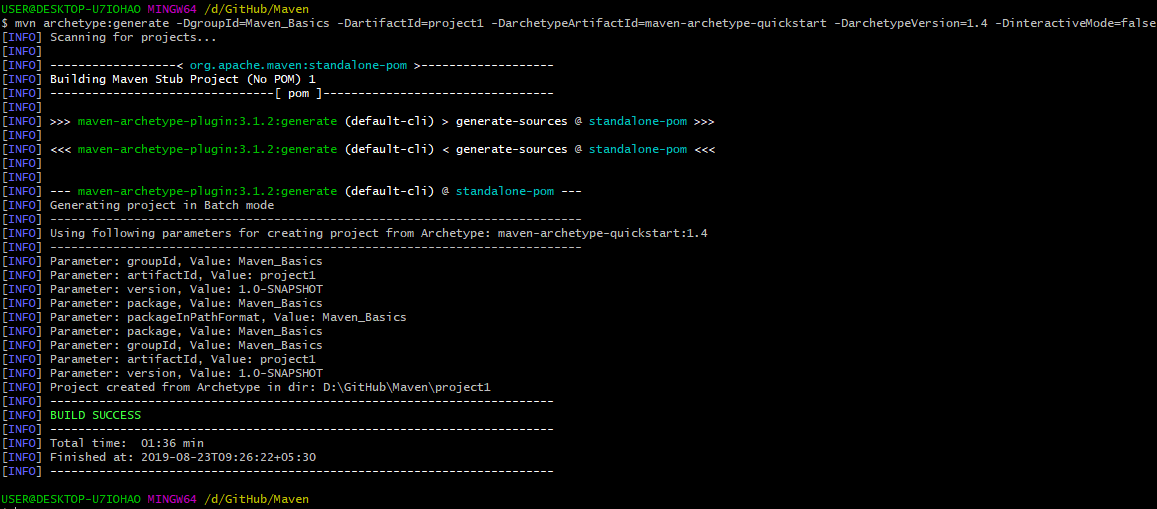
If we get a Build Success message, Maven has successfully created a hierarchy for out project.
The following hierarchy is set:
- Maven creates a folder named project1 which is the name of the project we gave in the first command.
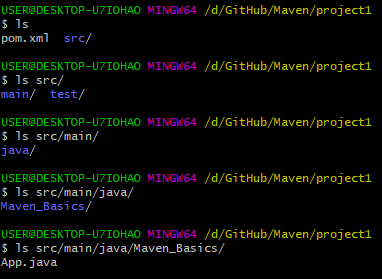
- In the project1/ folder, there is src/ folder and pom.xml file.
- pom.xml is the main configuration file of Maven and it includes all the dependencies and metadata (data about data) for the the Maven project.
- src/ folder consists of two subfolders: main/ and test/
- test/ folder is used to store unit test cases using JUnit tool etc.
- main/ folder contains source code of java in the following path:
{projectname}/src/main/java/{groupname} where groupname and projectname are specified in the first command for Maven. - The above path contains a sample Java program App.java
Step 2: Write project source code in Java
-
Delete the sample App.java file.
-
Write your source code and paste it in the following path {projectname}/src/main/java/{groupname}
Implementation:
Here, we use the default sample file App.java which prints the "Hello World" string as output.
package Maven_Basics;
/**
 * Hello world!
 *
 */
public class App
{
    public static void main( String[] args )
    {
        System.out.println( "Hello World!" );
    }
}
Here,
- Package is the group name specified in step 1.
- Class must be public because this source code executable is meant to be portable and platform independent.
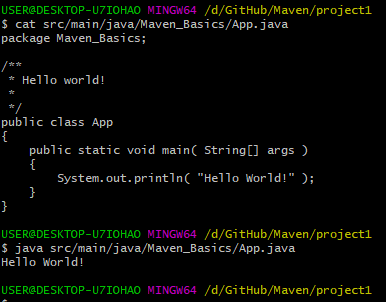
Note: cat command is used to see content of the file.
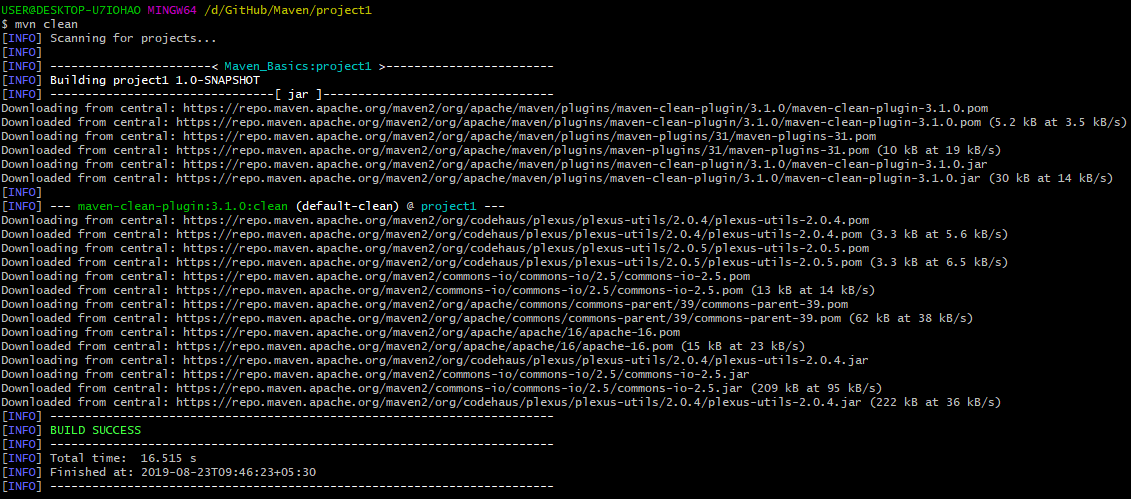
Step 3: Clean the project environment
- Maven creates output binary files and documentation reports in target/ folder.
- target/ folder is created in the {projectname/} folder which consists of src/ and pom.xml file.
- Before building a project, it is a good practise to clean the environment, i.e., to delete previous builds in target/ folder and remove its configuration file.
- Using Maven, we can do this tedious task of finding and removing configurations with one simple command.
Command:
mvn clean
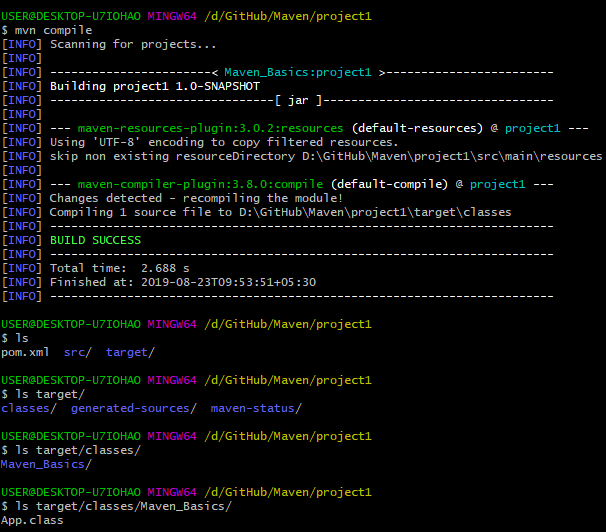
Step 4: Compile the Java code
- Maven uses following command to compile the Java code:
mvn compile
It compiles the Java code and gives one of the following outputs:
-
Build Failure: if the Java code fails to compile successfully.
-
Build Success: if Java code compiles successfully.
If the build is successful, Maven creates the target/ folder and creates executable .class files for Java source code in target/classes/{groupname} folder.
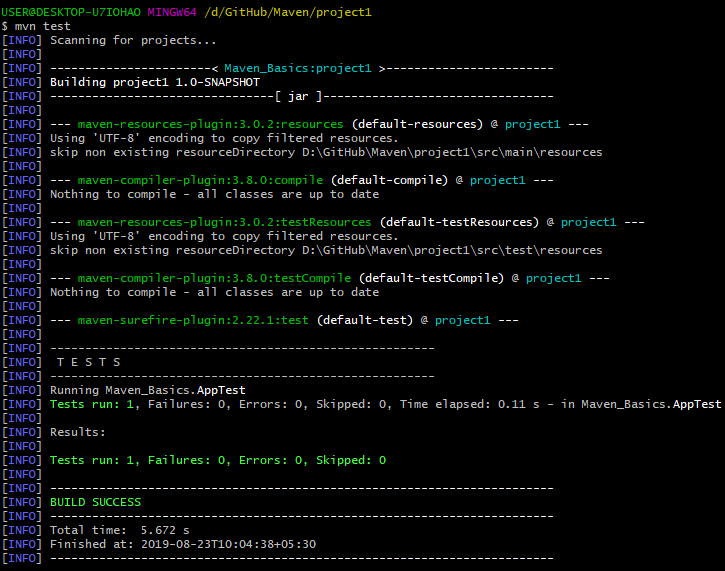
Step 5: Unit Testing for the source code
For this step, you must know Unit Testing framework tool: Junit. Since, we are creating a simple project, we can ignore using test cases for our build.
Since testing is important for build in Maven, we can use the sample AppTest.java file present in {projectname}/src/test/java/{groupname} which sets all test cases to true value which means successful test case.
AppTest.java file
package Maven_Basics;
import static org.junit.Assert.assertTrue;
import org.junit.Test;
/**
 * Unit test for simple App.
 */
public class AppTest
{
    /**
     * Rigorous Test :-)
     */
    @Test
    public void shouldAnswerWithTrue()
    {
        assertTrue( true );
    }
}
Here,
- Package is the group name of the project
- Two libraries for JUnit tool are imported.
- @Test is an optional annotation which will be ignored by the compiler. It tells the programmers that the following code includes test cases.
Command:
mvn test
Step 6: Build the project source code file and create executable binary
Command
mvn install
- Checks the configuration and dependecies from pom.xml file
- Creates platform independent binary executable .jar or .war file in the target/ folder
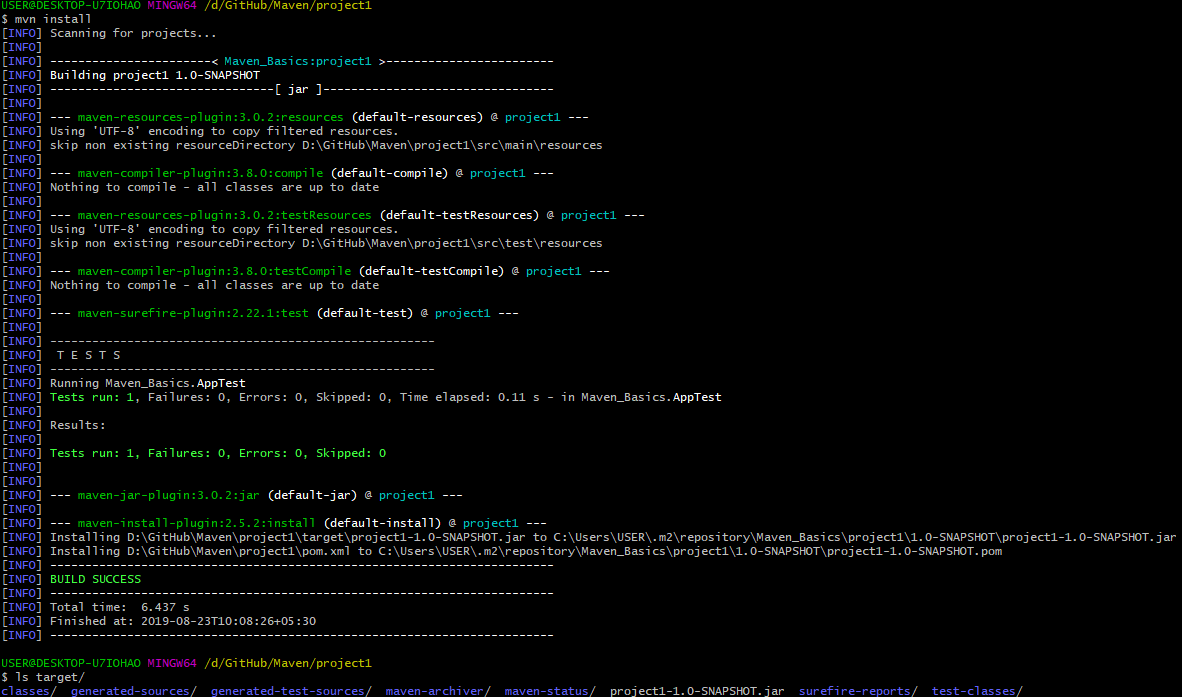
Here, the footer of the image shows the contents of target/ folder.
The project1-1.0-SNAPSHOT.jar file is the platform-independent executable file which can be executed on any platform or OS like Windows/ Linux/ MacOs etc.
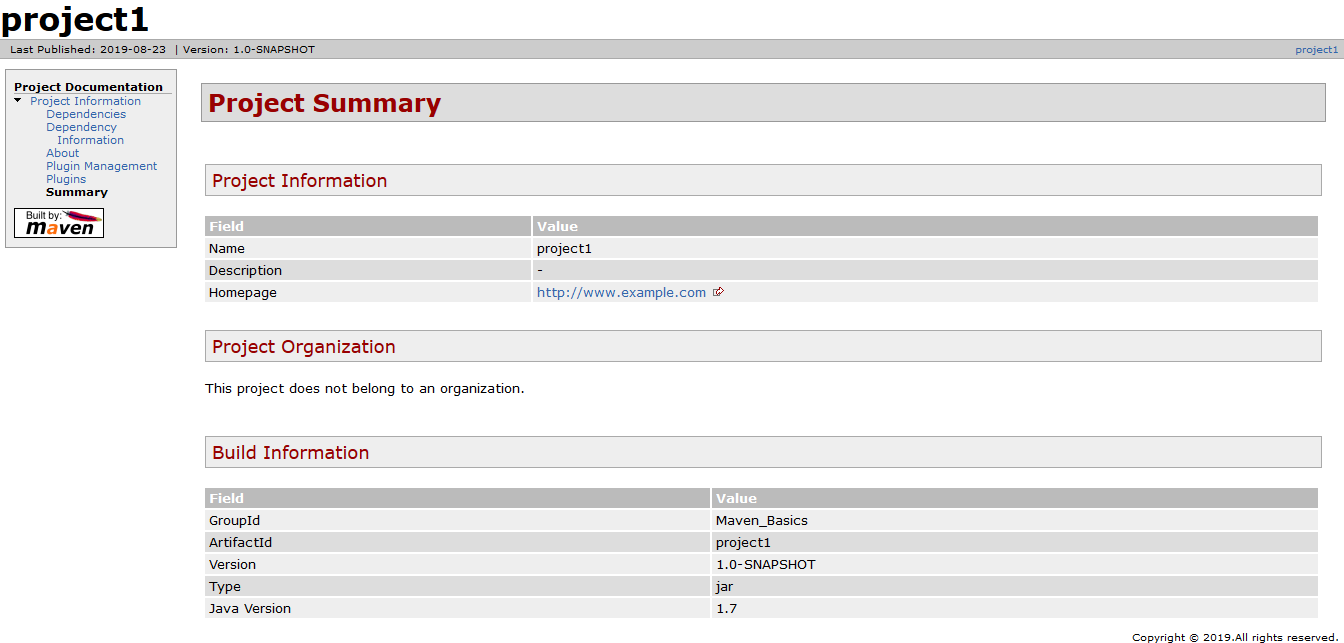
Step 7: Creating Documentation and Report for Maven Build
Command:
mvn site
- It uses plugins like Maven-Surefire etc. to create build reports using HTML and CSS
- All the documentation and reports are stored in target/site/ folder.

The summary of the site report is shown below: