
UFW (Uncomplicated Firewall) is a Linux utility that runs on top of iptables used to manage Netfilter and managing the firewall. We look at ufw in Ubuntu and how to manage the firewall.
Table of contents.
- Introduction.
- Installation.
- Enabling and disabling ufw.
- Allowing and denying connections.
- Port management.
- Deleting ufw rules.
- Applications.
- IP masquerading.
- Firewall logs.
- Summary.
- References.
Prerequisites.
Introduction.
A firewall is what is stands between the computer system and the outside world. Traffic in and out passes through the firewall and is either allowed in or rejected based on the rules we have specified in the iptables.
We have discussed iptables in a previous article. Unlike managing the firewall with iptables ufw has a user-friendly front-end as well as a command-line interface and a framework for managing Netfilter. It makes managing the firewall easier.
Installation.
Before any installation we make sure that our repositories and system is up to date after which we install the ufw package:
$ sudo apt update && sudo apt upgrade
To install ufw:
$ sudo apt install ufw

Enabling and disabling ufw.
By default, the package will be disabled therefore to enable it we write:
$ sudo ufw enable
We can check its status as follows:
$ sudo ufw status verbose
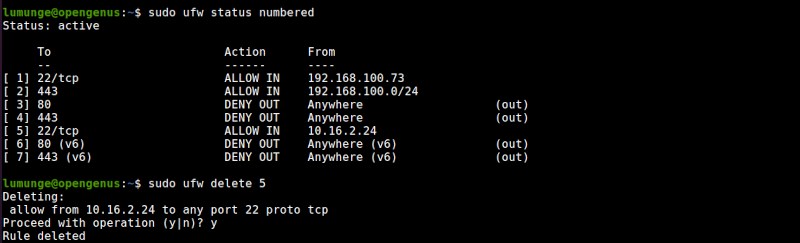
To view its status in numbered form, we write:
$ sudo ufw status numbered
And to disable it we write:
$ sudo ufw disable

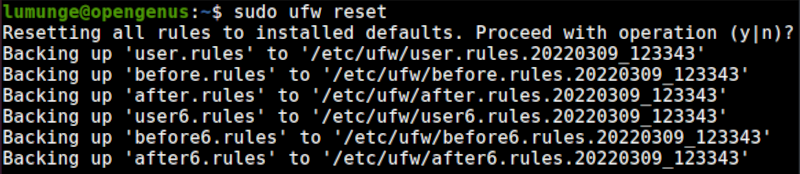
We may want to reset everything and start creating rules a fresh, for this we write:
$ sudo ufw reset
Allowing and denying connections.
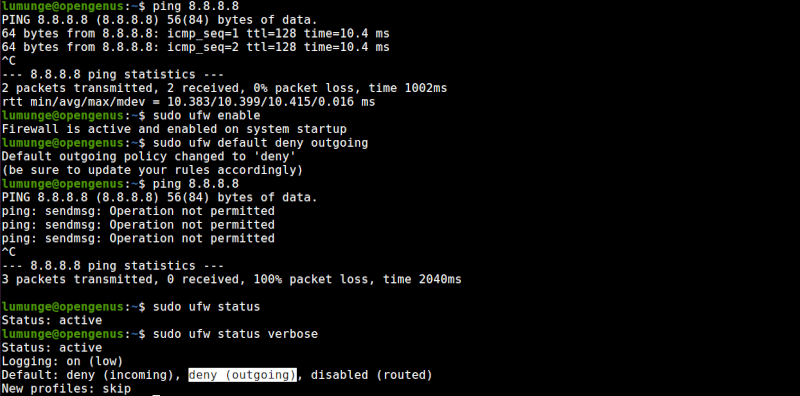
We can allow or deny connection using ufw as follows, to deny all outgoing connections, we write:
$ sudo ufw default deny outgoing
To allow them we write:
$ sudo ufw default allow outgoing
We can also choose to block incoming or outgoing connections to a specific host: For example, to allow all connections to an IP address 10.16.3.24 we write:
$ sudo ufw allow from 10.16.3.24
We can also specify rules for an entire subnet:
$ sudo ufw allow from 192.168.100.0/24 to any port 443
Here we allow all HTTPS traffic for the subnet 192.168.100.0/24
We are also able to choose an interface where we want our rules to apply. For example, to deny all ssh traffic on an interface eth4 we write:
$ sudo ufw allow in on eth4 to any port 22
Port management.
Ports are communication end-points that two computers use to exchange data.
We can allow or deny specific ports ufw, For example, we can deny all connections that go through ports 80 and 443 for HTTP and HTTPS:

$ sudo ufw deny out 80
$ sudo ufw deny out 443

We can confirm this by trying to reach the internet:
$ curl -v google.com
From the output, we see that the google.com is unreachable. We can undo this by deleting the rules.
$ sudo ufw delete deny out 80
$ sudo ufw delete deny out 443
We similarly test this as before.
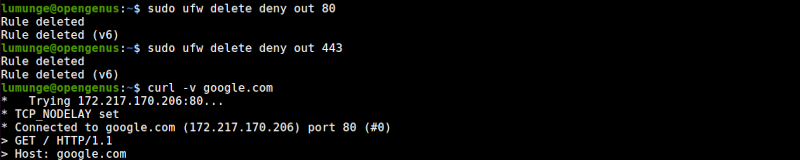
We can create a rule to allow the traffic through by writing:
$ sudo ufw allow 80
$ sudo ufw allow 443
We can also be specific about a host IP address and the exact port(s) we allow or deny. For example, to allow ssh only to be used by an IP address 10.16.2.24 we write:
$ sudo ufw allow proto tcp from 10.16.2.24 to any port 22
To apply firewall rule to a range of ports, we separate the ports using a semi-colon. For example, to deny UDP traffic for ports from 7100 to 7200, we write:
$ sudo ufw allow 7100:7200/UDP
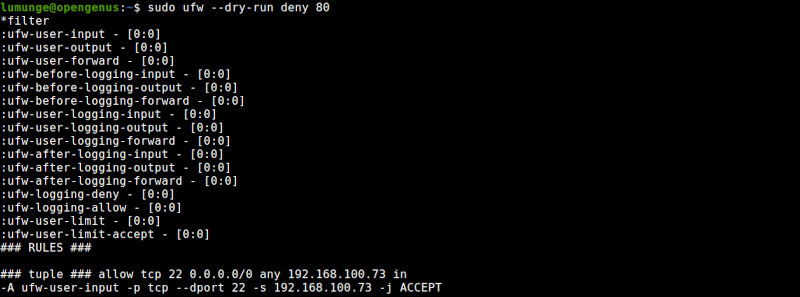
The --dry-run option outputs the rules without applying them. For example, to close a port and not have the rules apply, using --dry-run we would write:
$ sudo ufw --dry-run deny 80
Deleting UFW rules.
To delete rules we use the delete option. To delete a rule we first have to list it in a numbered form then use that number to delete it.
We have seen how to list ufw rules in the previous section. To delete, for example, rule number 5 we write:
$ sudo ufw delete 5
We can also remove a rule by specifying it as follows:
To delete a rule 'allow 443' we write:
$ sudo ufw delete allow 443
Applications.
Applications that open ports in Linux have a ufw profile that has information about ports needed for the application to work well. These profiles are stored in the /etc/ufw/applications.d directory:
$ ls /etc/ufw/applications.d
we can list profiles by writing:
$ sudo ufw app list

To view this information about what ports or protocols an application uses we write:
$ sudo ufw app info [protocol/port]
We can allow or deny applications using ufw: For example to deny an application Telnet we write:
$ sudo ufw deny Telnet
IP Masquerading.
This is allowing hosts within a private network to access the internet using a Linux machine as a gateway.
It involves translating network traffic by re-writing source and destination IPs and ports.
In this section, we configure IP masquerading in three steps.
First, we enable ip forwarding - whereby a system accepts incoming traffic on an interface, recognizing it is meant for another system it forwards it accordingly.
To anable forwarding we edit the /etc/ufw/sysctl.conf file:
$ sudo vim /etc/ufw/sysctl.conf
After it is open we uncomment the line as shown below;
net/ipv4/ip_forward=1

The next step involves configuring ufw to allow forwarded packets. For this, we also edit the ufw configuration file in the/etc/default directory.
$ sudo vim /etc/default/ufw

We change the value of DEFAULT_FORWARD_POLICY from DROP to ACCEPT.
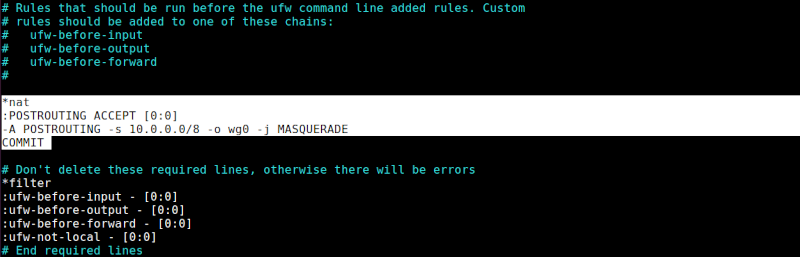
The final step is to set the default policy for POSTROUTING chain in the NAT table and the masquerade rule. For this, we edit the before.rules file in the /etc/ufw directory:
$ sudo vim /etc/ufw/before.rules
and add the following line on top of the filter section:
*nat
:POSTROUTING ACCEPT [0:0]
-A POSTROUTING -s 10.0.0.0/8 -o wg0 -j MASQUERADE
COMMIT
This allows IP addresses in subnet 10.0.0.0/8 to access the internet using a Linux system as the gateway.
When done we reload the service by writing:
$ sudo ufw disable
$ sudo ufw enable
or
$ sudo ufw reload
We can also accomplish all this with a single iptables rule:
$ sudo iptables -t nat -A POSTROUTING -s 192.168.100.0/24 -o ppp0 -j MASQUERADE
Here we have an allowed ip masquerading for all hosts on subnet 192.168.100.0/24.
The -t nat option states that the rule goes to the NAT table.
-A POSTROUTING states that the rule is to be added to the POSTROUTING chain.
-o ppp0 states that the rule applies to traffic routed through the specified network device.
-j MASQUERADE states that traffic matching this rule will jump to MASQUERADE target.
Firewall logs.
Logs are important as they give us information about how a service is operating. We use ufw logs to identify attacks or unusual activity and troubleshoot issues.
We turn on logging y writing:
$ sudo ufw logging on
To turn it off we write:
$ sudo ufw logging off

Logs are stored in the /var/log/messages, /var/log/syslog and /var/log/kern.log directories.
$ sudo more /var/log/ufw.log

Summary.
As mentioned earlier, ufw also has a friendly user interface. To install it we write: $ sudo apt-get install gufw.
References.
For the command manual for ufw we write $ man ufw.