
Reading time: 50 minutes | Coding time: 20 minutes
In this article, we will develop a basic calculator in Java using DevOps tools like Apache Maven as a build tool, GitHub for source code management, Jenkins for Continuous integration and deployment and Sonatype Nexus for Artifact repository management.
In this article, we will cover the following:
- Write Source Code in Java
- Configure the project in Apache Maven
- Host the project on GitHub
- Create an automated pipeline using Jenkins
- Deploy the build artifacts to Nexus repository via Jenkins
Here, we create a simple four function calculator using following tools and technologies:
1. Programming Language: Java
2. Build tool: Apache Maven
3. Source Code Management: GitHub for Git
4. Continuous Integration and Continuous Deployment: Jenkins
5. Artifact Repository Management: Sonatype Nexus
Build Tool: Build tools are used to collect all the source code files assigned into a single executable binary file, configure their dependencies and package the executable files.
For example: Make is a build tool for C language.
Here, Apache Maven is used for Java source code files. Maven allots a src/main/ path to write all source code files at one place and then builds them into a single executable .jar file in the target/ folder.
Source Code Management: Source Code Management is another term for Version Control System. VCS are important when a project is made in collaboration by a team, especially in distributed development.
Each member of the team has their own copy of the central repository on which they can work in isolation and the central repository includes only the successful increments of source code.
Continuous Integration and Continuous Deployment: Continuous here means that the entire software development pipeline is automated. Automation aims to decrease the cycle time of the product and increase efficiency by reducing human intervention in the project.
Continuous Integration encourages the product development team members to commit at least once on day and integrate it with the central repository so that the project has multiple increments every day.
Continuous Deployment encourages each CI leads to automated testing and reviews so that the product is deployed as fast as possible. The main aim of CD is that the version of software at the Developer end and the version of the software at the user end is negligible.
Artifact Repository: Artifacts are the executable binaries like .jar or .war file. Artifact repositories are used to store the executable of the builds after they are successfully deployed.
1. Write Source Code in Java
Here, we create a basic four function calculator performing:
- Addition
- Subtraction
- Multiplication
- Division
Code:
import java.util.*;
public class Main
{
    public static void main(String args[])
    {
        int flag=0,ch;
        double num1,num2;
        Scanner reader = new Scanner(System.in);
        System.out.println("Calculator System");
        do
        {
            System.out.println("Option Menu");
            System.out.println("");
            System.out.println("1) Addition");
            System.out.println("2) Subtraction");
            System.out.println("3) Multiplication");
            System.out.println("4) Division");
            System.out.println("5) Exit");
            System.out.print("Enter your choice: ");
            ch = reader.nextInt();
            if(ch==5)
            {
                flag = 1;
            }
            else
            {
                switch(ch)
                {
                case 1:
                System.out.println("Addition");
                System.out.println("Enter two numbers");
                System.out.print("Enter number 1: ");
                num1 = reader.nextDouble();
                System.out.print("Enter number 2: ");
                num2 = reader.nextDouble();
                System.out.println(num1+num2);
                break;
                case 2:
                System.out.println("Subtraction");
                System.out.println("Enter two numbers");
                System.out.print("Enter number 1: ");
                num1 = reader.nextDouble();
                System.out.print("Enter number 2: ");
                num2 = reader.nextDouble();
                System.out.println(num1-num2);
                break;
                case 3:
                System.out.println("Multiplication");
                System.out.println("Enter two numbers");
                System.out.print("Enter number 1: ");
                num1 = reader.nextDouble();
                System.out.print("Enter number 2: ");
                num2 = reader.nextDouble();
                System.out.println(num1*num2);
                break;
                case 4:
                System.out.println("Division");
                System.out.println("Enter two numbers");
                System.out.print("Enter number 1: ");
                num1 = reader.nextDouble();
                System.out.print("Enter number 2: ");
                num2 = reader.nextDouble();
                System.out.println(num1/num2);
                break;
                default: System.out.println("Exiting program due to invalid input");
                flag=1;
                }
            }
            System.out.println("\n");
            }while(flag==0);
    }
}
Here,
- The interface is created as a menu-driven code, in an infinite do while loop, taking user input to perform any one of the four function calculator task or exit the code.
- Switch case is used to perform the tasks on basis of user input.
Output:
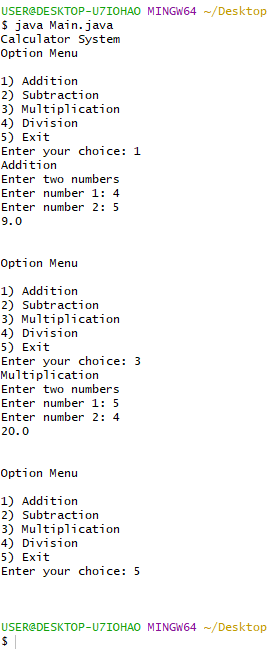
Here,
- We first give 1 as an input for addition, and give 5 and 4 as an input to get 9 as an output.
- We then give 2 as an input for multiplication, and give 4 and 5 as input to get 20 as an output.
- We give 5 as an input to exit the program.
2. Configure the project in Apache Maven
For configuring a java project in Apache Maven, see this article.
In this project, Maven is used to build the java source code by configuring all the dependencies and create a .jar executable binary of it the target/ folder.
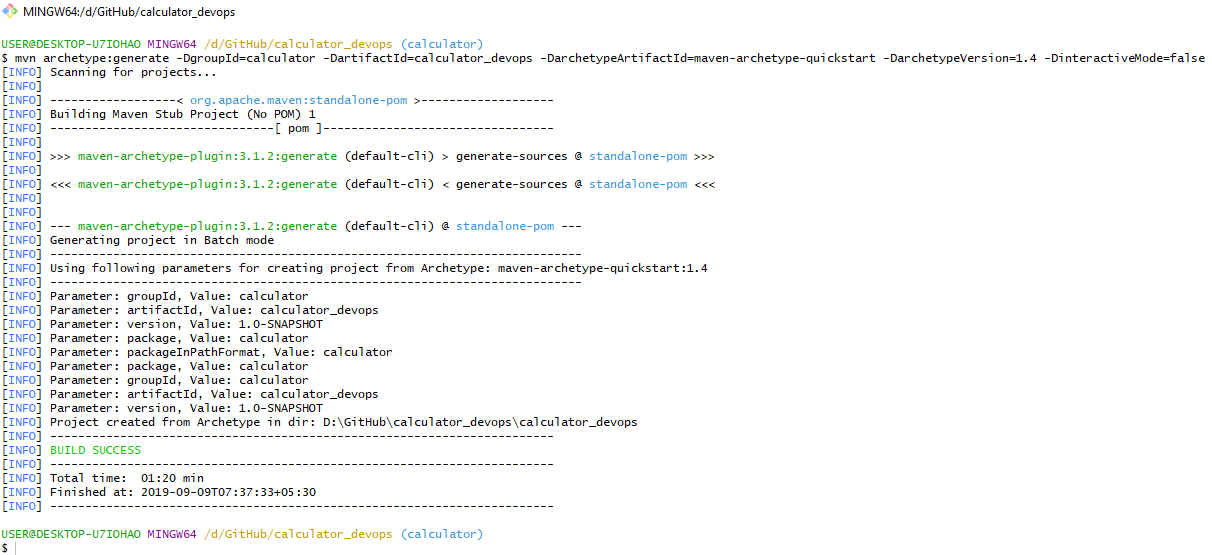
1. Create an Apache Maven project hierarchy using following command on the command line
mvn archetype:generate -DgroupId=calculator -DartifactId=devops_calculator -DarchetypeArtifactId=maven-archetype-quickstart -DarchetypeVersion=1.4 -DinteractiveMode=false
- Group ID: It is the package name of our project. It is kept as calculator here.
- Artifact ID: Is is the name for our Maven project. It is kept as devops_calculator here.
- All other tags set up the maven hierarchy automatically.
2. Copy our java code in the Maven hierarchy
- Go to src/main/java/{package name}/ and delete the template App.java file. Here, package name is calculator.
cd /src/main/java/calculator
- Copy our Main.java code in the current directory.
- Modify the Main.java code by placing the following line on the top of the code.
import calculator;
It is used to create a package with name of the group Id of the project.
3. Clean the project hierarchy using Maven on command line
$ mvn clean
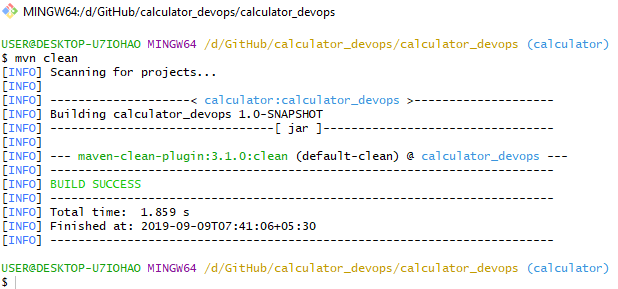
Clean goal of Maven is used to clear the cache in the Maven hierarchy.
If previous builds are present in the target/ folder, the target/ folder is also deleted for a fresh start.
4. Compile the java source code
$ mvn compile
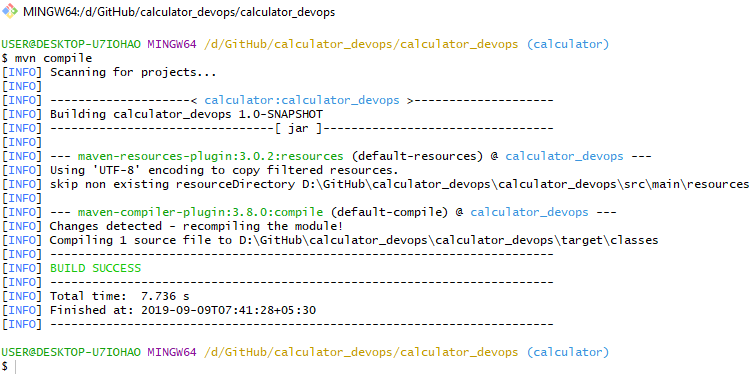
Maven compile goal is used to compile all the source code files in the src/main/java/{packagename} folder
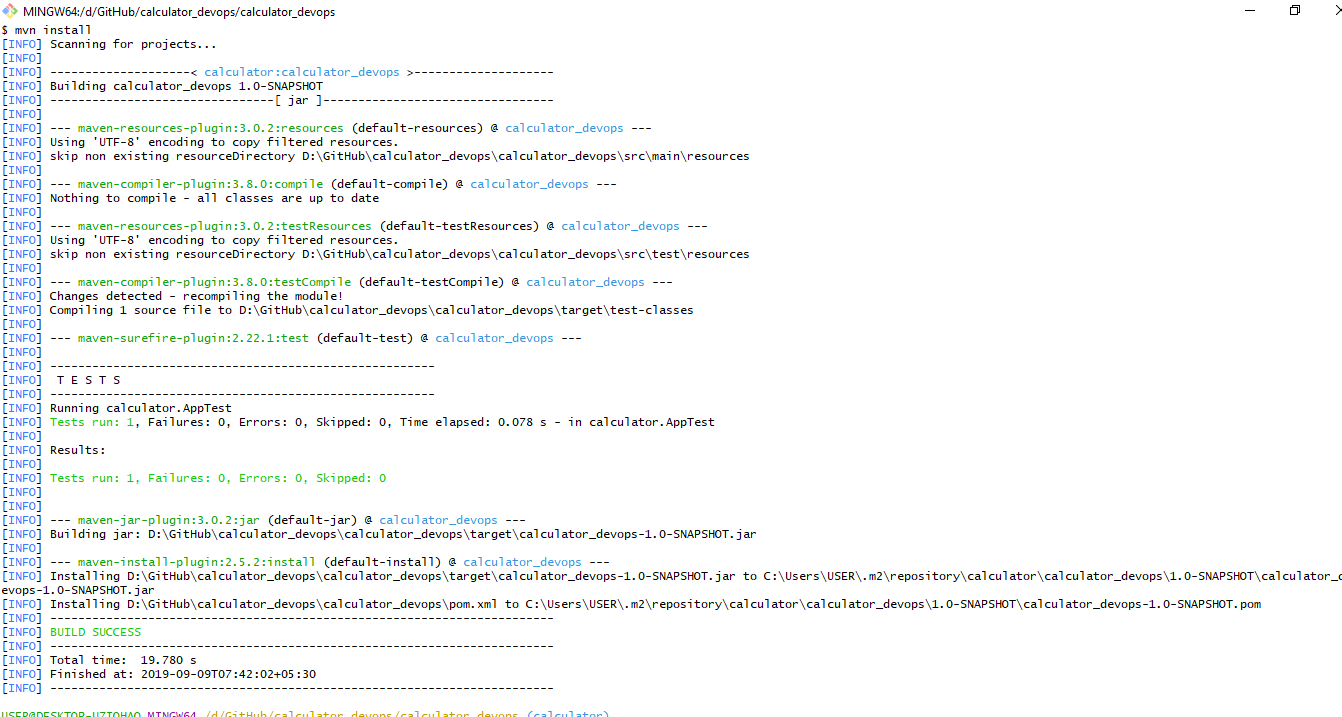
5. Create a build of the project using Install goal
$ mvn install
Install goal of Maven creates a binary executable .jar file of the project which is stored in the target/ folder.
6. Maven Site goal
Maven site goal is used to automatically create a documentation report of the project using HTML and CSS in the target/site folder.
$ mvn site
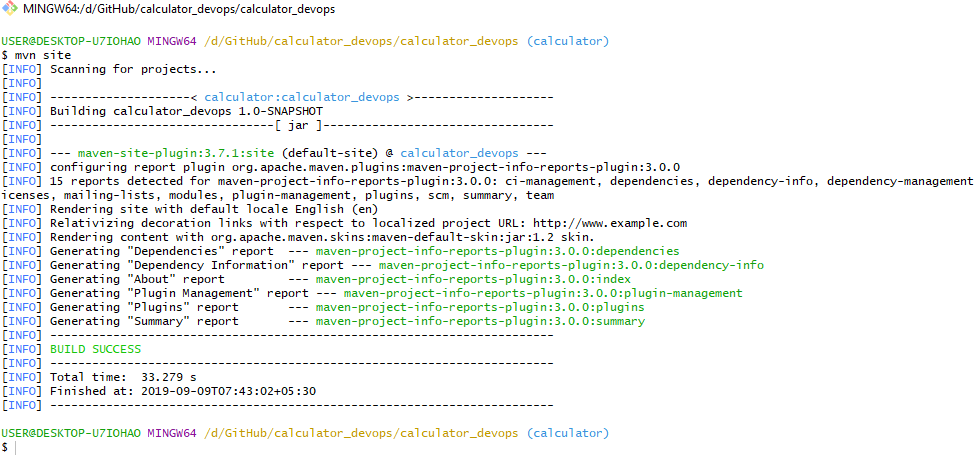
Following is the summary of our current Maven project made by the mvn site goal.

3. Host the project on GitHub
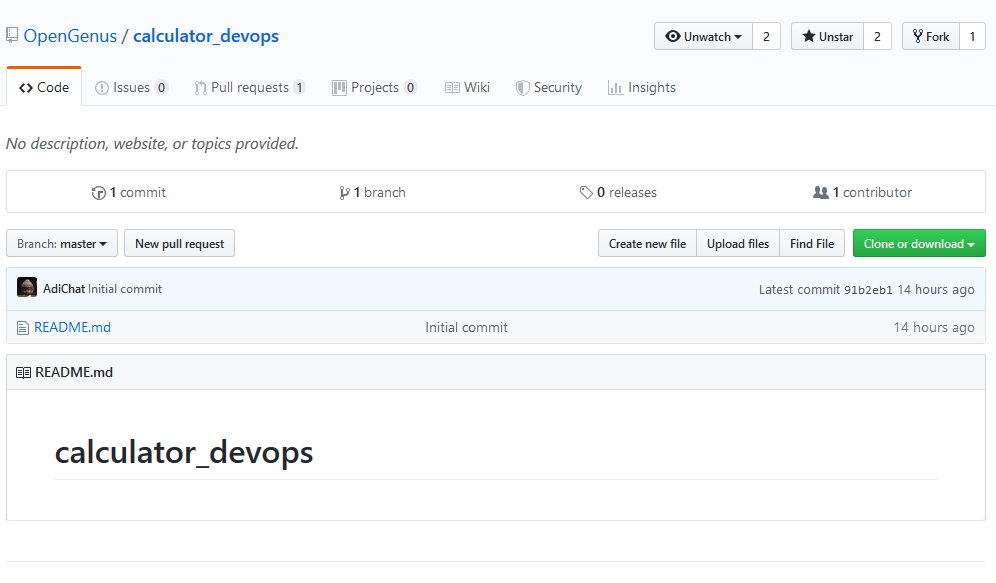
1. Create a new repository on GitHub
Here, we create a repository with the same name as that of the Maven project artifact ID.
Go to your GitHub account -> Your Repositories -> New repository.
2. Configure the Maven project on local machine and link it to the Git repository
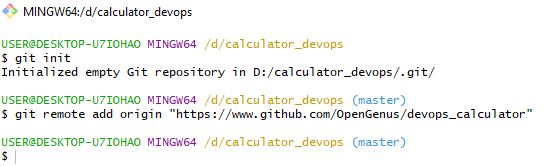
Step 1. Initialize the Maven project as a Git repository
Open the command line on the root of the Apache Maven project and type the following command:
$ git init
Step 2. Link the Git repository with local repository
In this step, we establish a link between the project stored on our local machine and the repository we created on the GitHub account.
Copy the URL of the repository hosted on Git and type the following command on the command line:
$ git remote add origin "URL of the GitHub repository"
- origin: It is the name of the link between remote repository and local repository. It is a convention to use origin as the link name but we can use any other name as well.
$ git remote add origin "https://www.github.com/OpenGenus/devops_calculator"
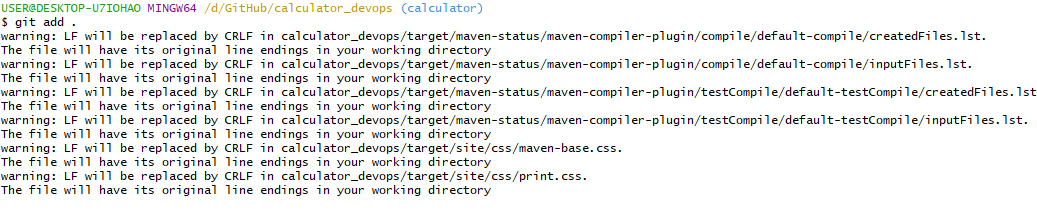
3. Stage the Maven project in Git environment
The files which are to be version controlled by Git have to be staged.
After a file is once staged, git always checks whether it is modified, deleted, renamed etc.
A file must be staged before it can be pushed to the remote Git repository.
Syntax:
$ git add <filenames>
Here, following command is used.
$ git add .
- . command specifies stage all the files in the current folder that are modified or created.
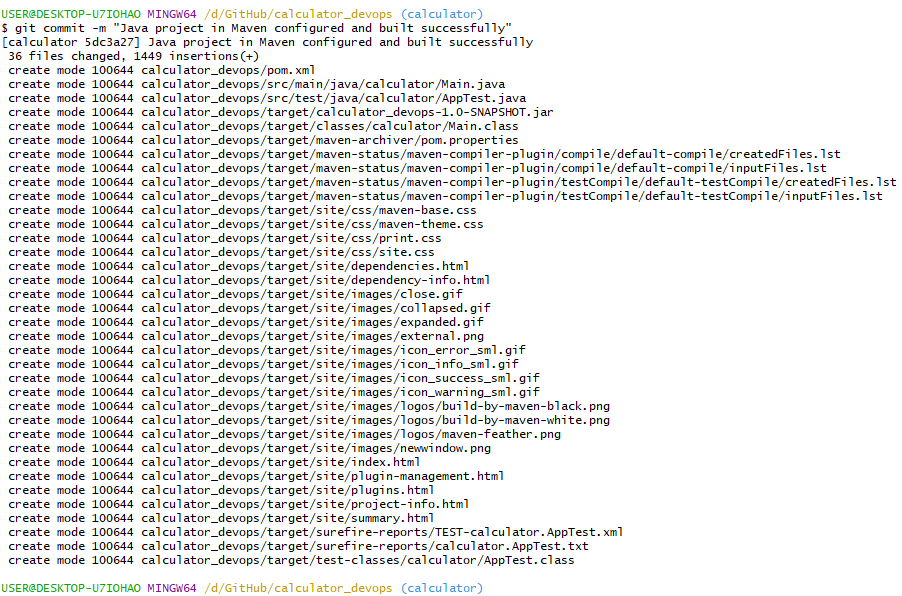
4. Commit the staged files to GitHub
Staged files can be committed to the remote Git repository using the following command.
Committing a file means that the file is mirrored in the Git repository.
$ git commit -m "Commit Message"
5. Push the changes to the GitHub repository
Git commit sends the file from local repository to the remote repository but they will not be shown on the remote repository unless they are pushed.
Push synchronizes the remote Git repository with the latest committed changes from local repository.
$ git push -u origin master
Here,
- origin is the link name defined in the step 2.
- master is the default branch
4. Create an automated pipeline using Jenkins
Automation is the key principle of DevOps.
Automation aims to remove human intervention and execute the entire development cycle from version control to deployment automatically using triggers, scripts etc.
Here, we use the Jenkins tool to automate our work flow pipeline.
Downloading and configuring Jenkins
- Download Generic java package jenkins.war
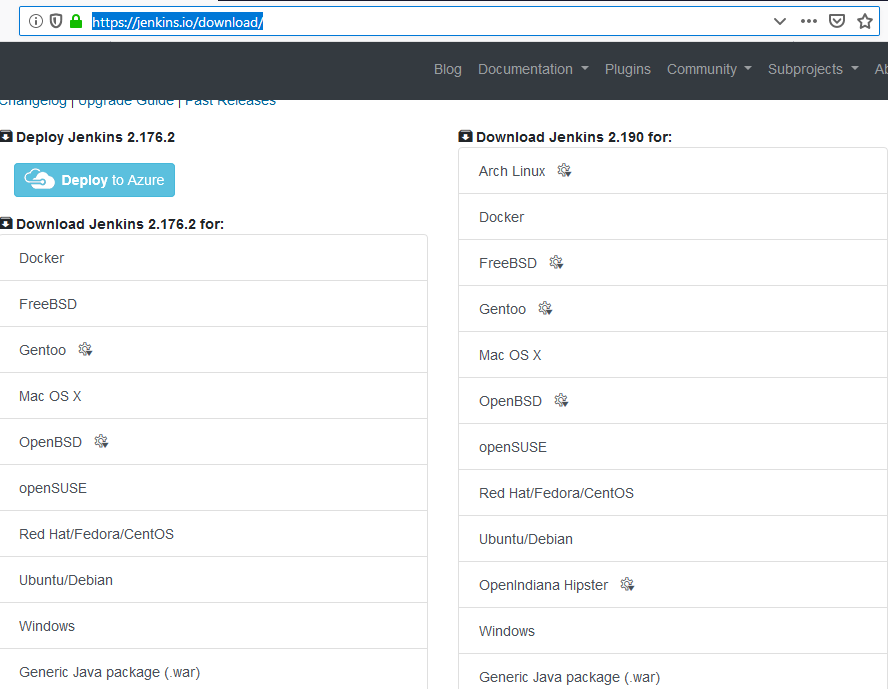
- Open Command line with path of the .war file and execute the it using following command:
$ java -jar jenkins.war
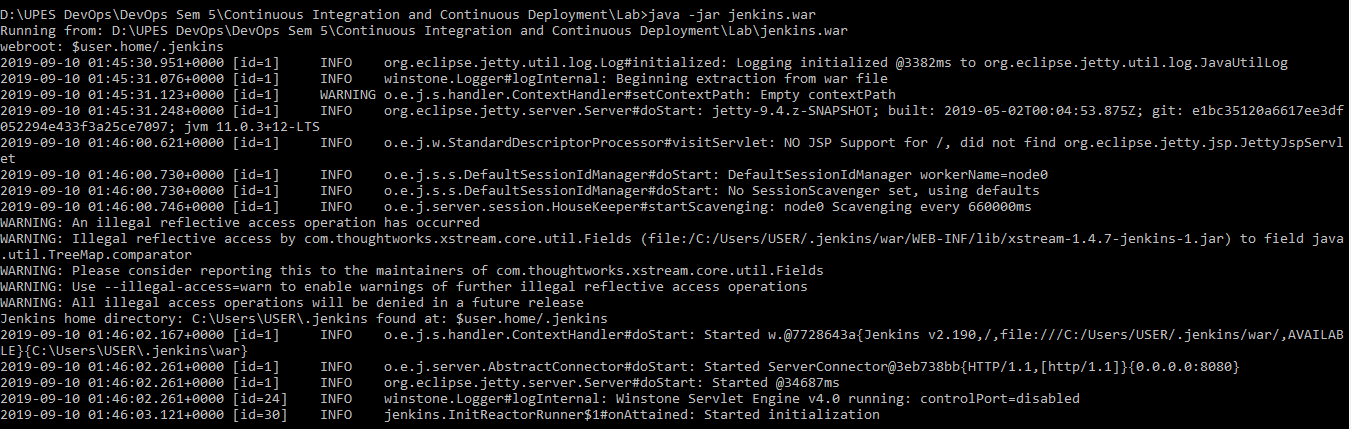
- For the interface of Jenkins, open the web browser and go to localhost:8080
When Jenkins is launched for the first time, it asks for a 32 bit encryption key for authentication which can be found at following path (For Windows OS):
C://Users/{Username}/.jenkins/secrets/master.key
- Jenkins will then open a configuration page with following options:
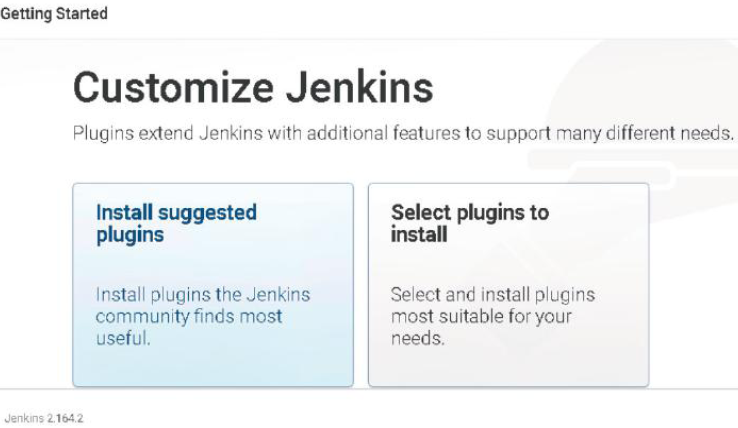
a) Install suggested plugins: Jenkins automatically installs the bare minimum plugins.
b) Select plugins to install: Select the plugins you want to install.
After the installation is complete, select Start Using Jenkins option.
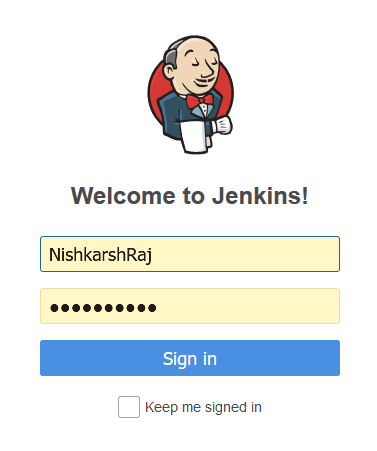
- A signup page loads, create a new user and sign in.
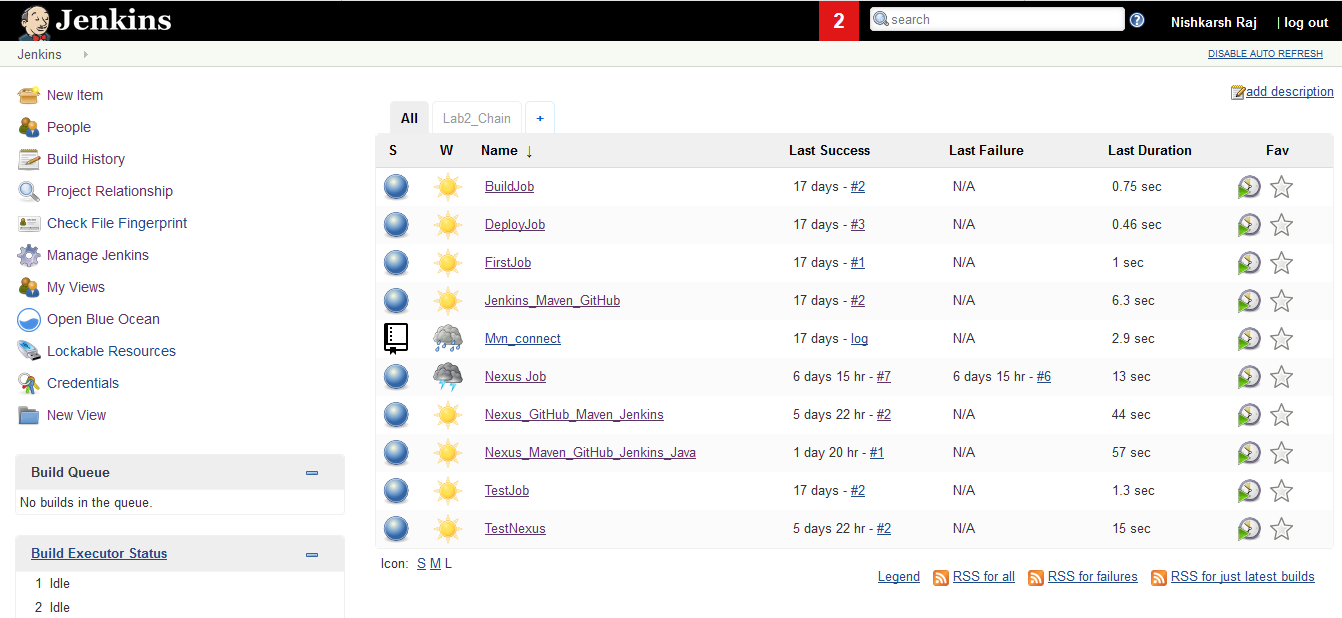
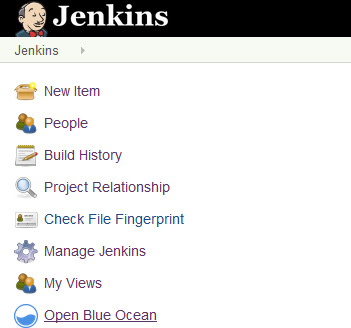
- Jenkins dashboard opens up
Using Jenkins to automate our Maven Project hosted on GitHub
Till now, our Java project has been configured using the build tool Maven and the entire project is hosted on GitHub.
Now, we will use Jenkins to automate the entire project.
Here, we create a Jenkins job to execute Maven tasks like clean, compile and install on the project hosted on Git.
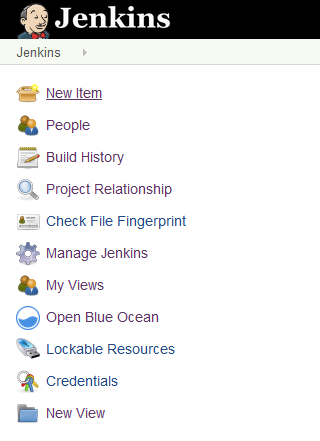
- Click on New Item on left sidebar on the Jenkins Dashboard.

- Enter the project name and select Freestyle Project. Click on OK.
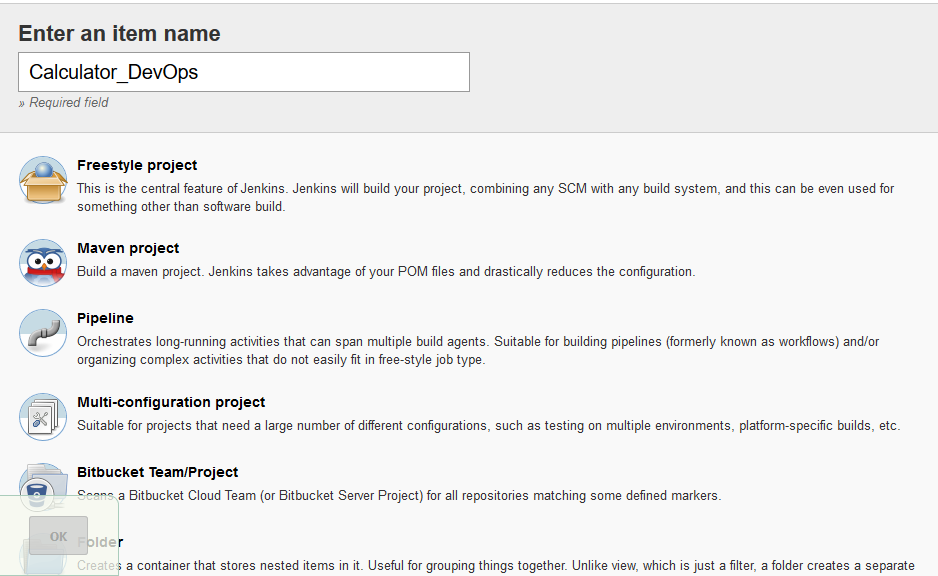
- Project configuration Windows opens.
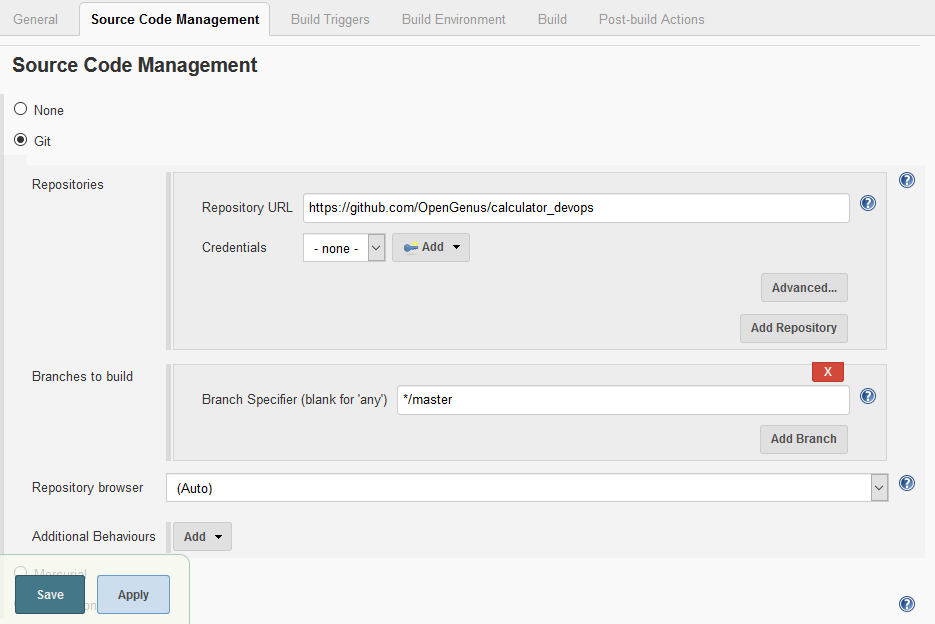
In the Source Code Management tab, select the Git option and specify the URL of the GitHub project.
Note: The pom.xml file of our Maven project must be on the root of the GitHub repository.
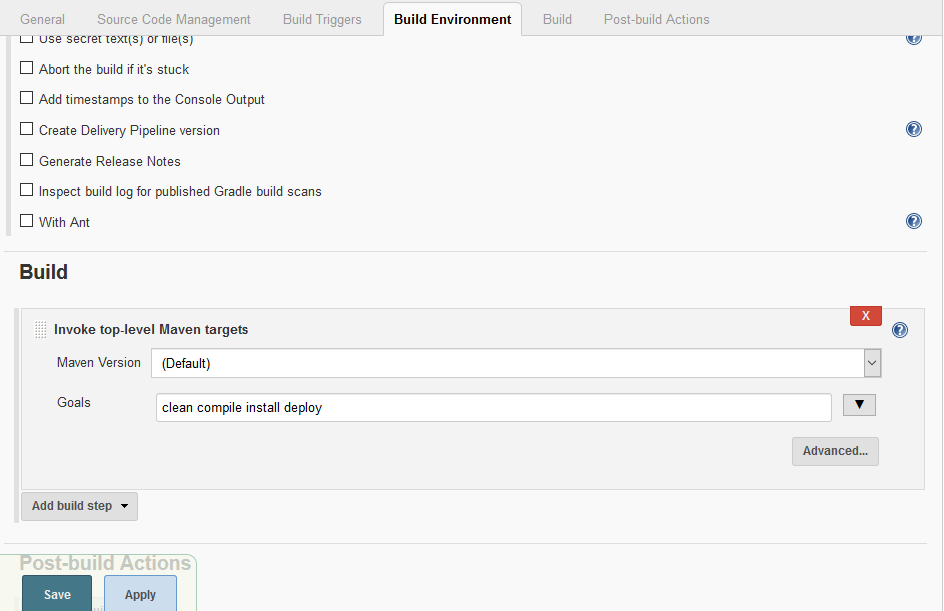
In the Build Environment tab, select Invoke top level Maven Targets from Build dropdown menu and specify the following goals in order:
clean compile install
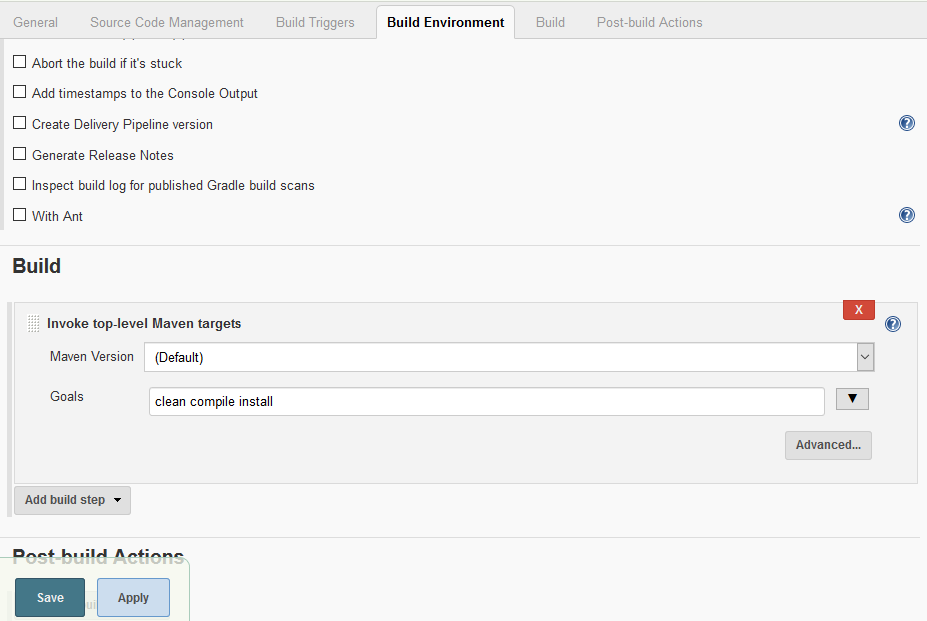
Click on Save.
- The project is created and its dashboard is displayed.
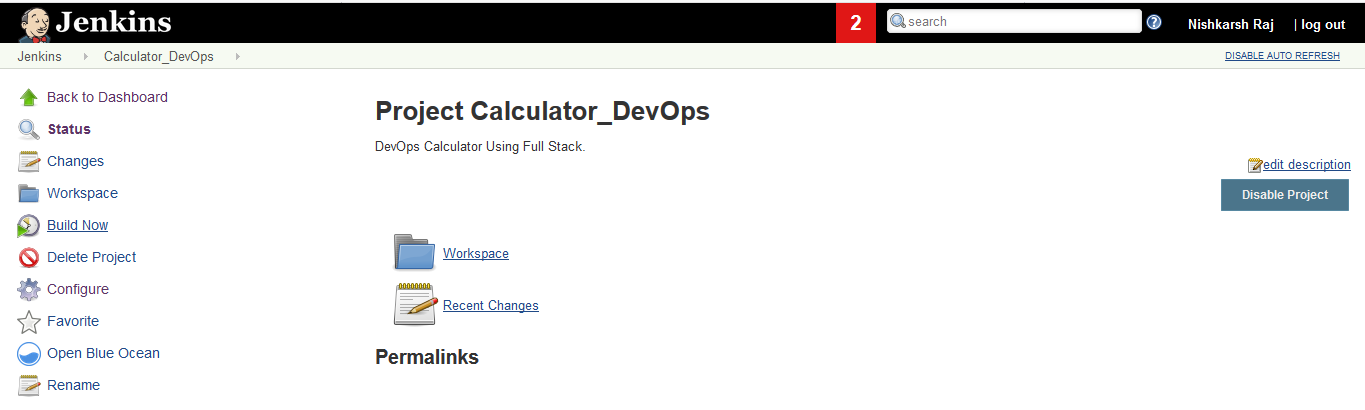
Click on Build Now option on the sidebar.
- After the project is built, the build history shows the Build with its build number on the bottom of the left sidebar.
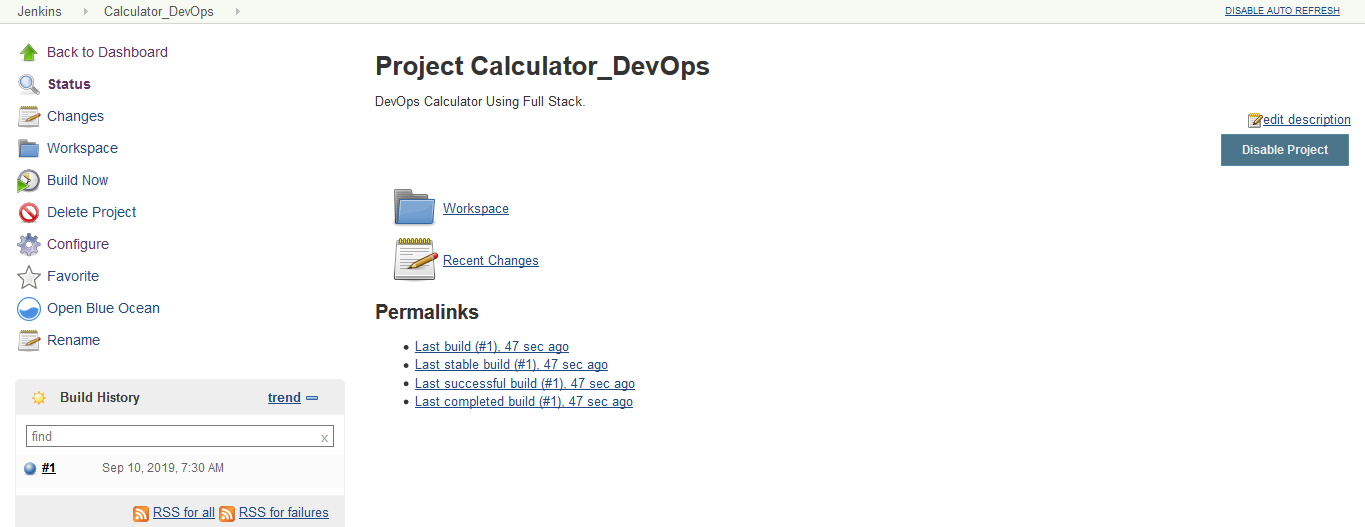
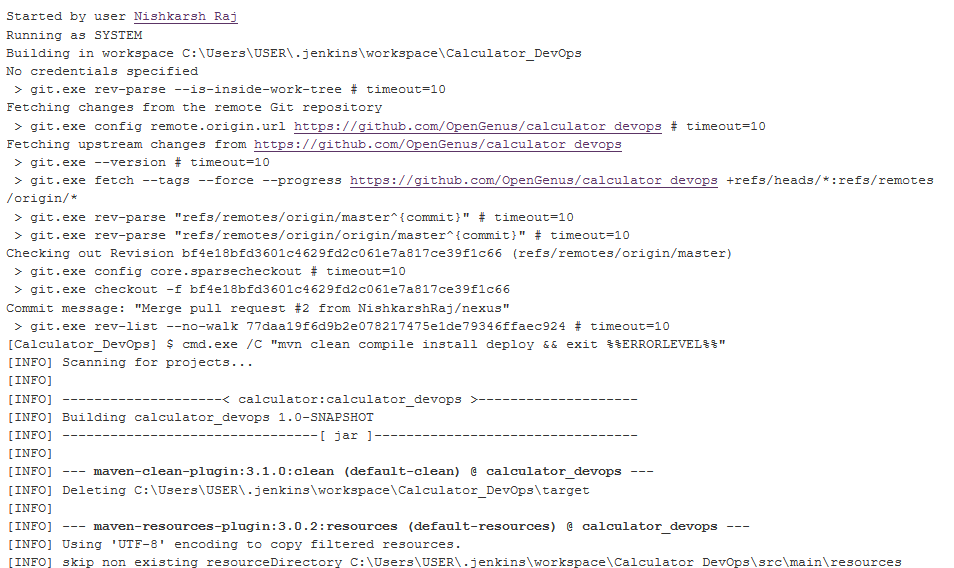
- Click on the build number (Here,
#1) and click on Console Output to see the Build history.
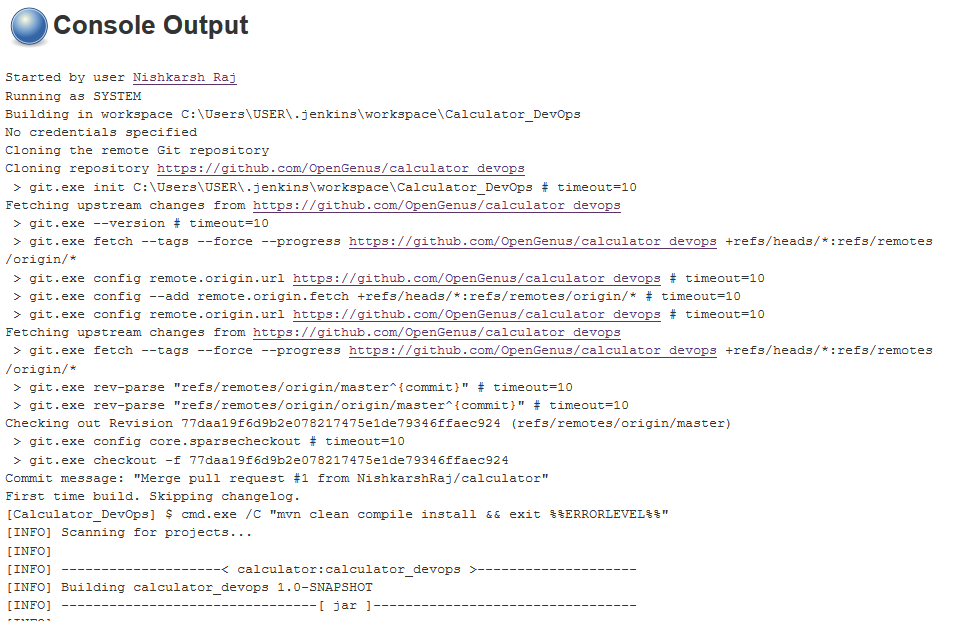
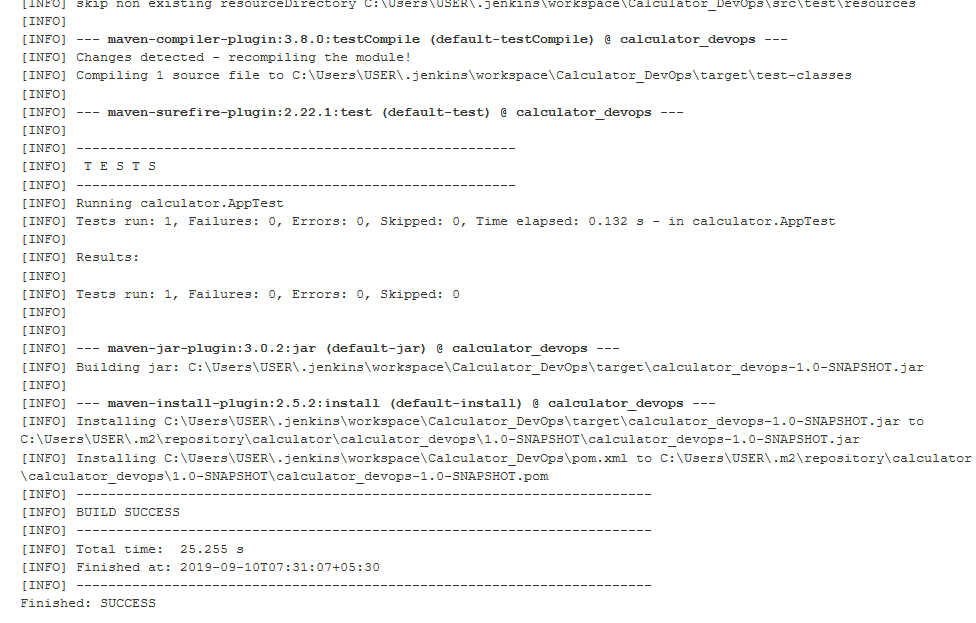
Console output ends with the message Build Successful which means our project is successfully built using Jenkins.
Creating an automated Pipeline for our project using Jenkins
We have created a Jenkins job to execute Maven goals like clean, compile and install on the project hosted on GitHub. Here, we create a pipeline that shows the progress of each task. For this, we use the BlueOcean pipeline plugin of Jenkins.
- Create a Jenkinsfile (same file name and no extension) and save this file on the root of our GitHub repository.
pipeline {
  agent any
  stages
    {
    stage('Clean') {
      steps {
        bat 'mvn clean'
      }
    }
    stage('Compile') {
      steps {
        bat 'mvn compile'
      }
    }
    stage('Test') {
      steps {
        bat 'mvn test'
      }
    }
  }
}
- Stages define the stages that will be seen on the pipeline.
Here, The pipeline will contain three stages: clean, compile and test. - Steps define the commands that each stage will execute.
- bat is used here because the Windows Powershell will be used to execute Batch commands.
If Linux is used, use sh instead of bat
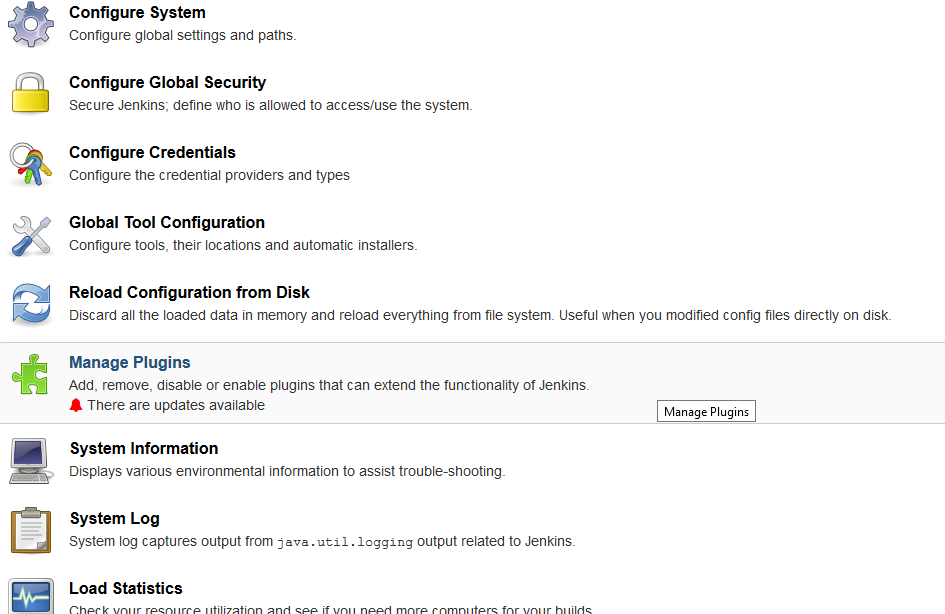
- Install BlueOcean Pipeline plugin on Jenkins
Click on Manage Jenkins -> Manage Plugins -> BlueOcean Plugin
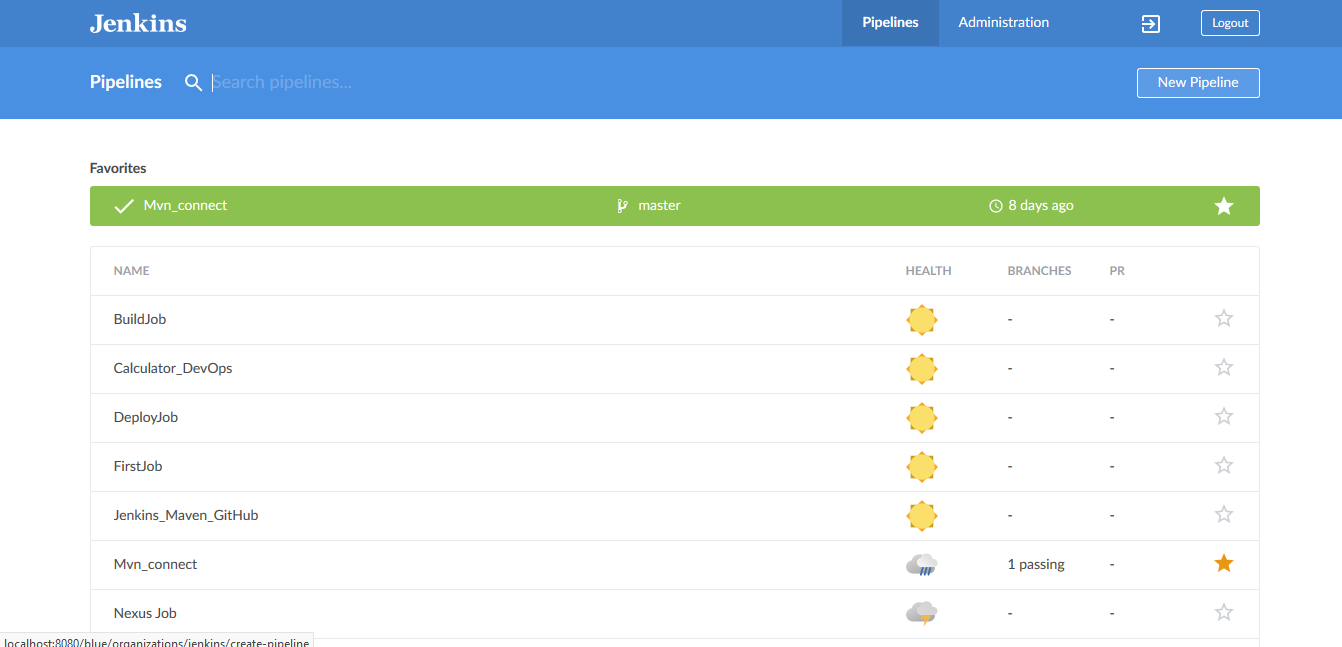
- Click on Open Blue Ocean on the left sidebar of the Jenkins dashboard.
The BlueOcean dashboard opens up.
- Click on New Pipeline on the top right.
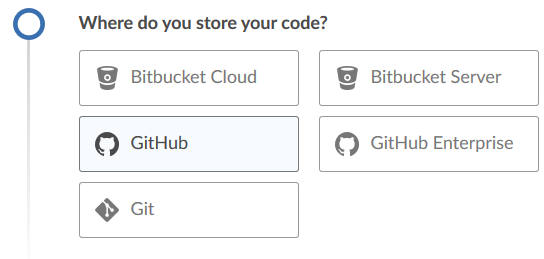
- Specify the Source Code Management tool where the project is hosted. In this project, we use GitHub
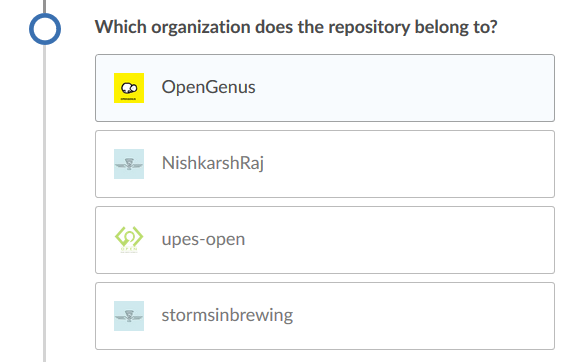
- If your connected GitHub account is linked with multiple organizations, select the organization where your project is hosted. Here, the project belongs to OpenGenus
- Select the repository where your project is hosted.
Here, the repository name is calculator_devops
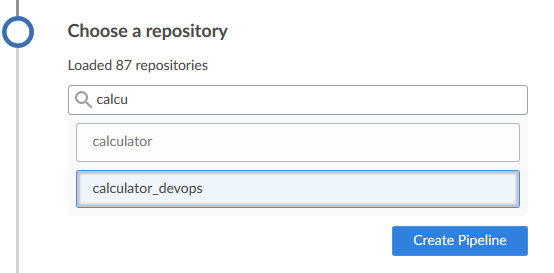
- Resolve naming conflicts, if any.
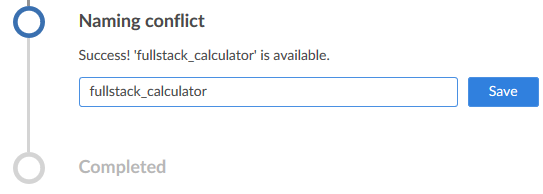
The pipeline is thus created and Jenkins automatically executes the pipeline whenever a change triggers it.
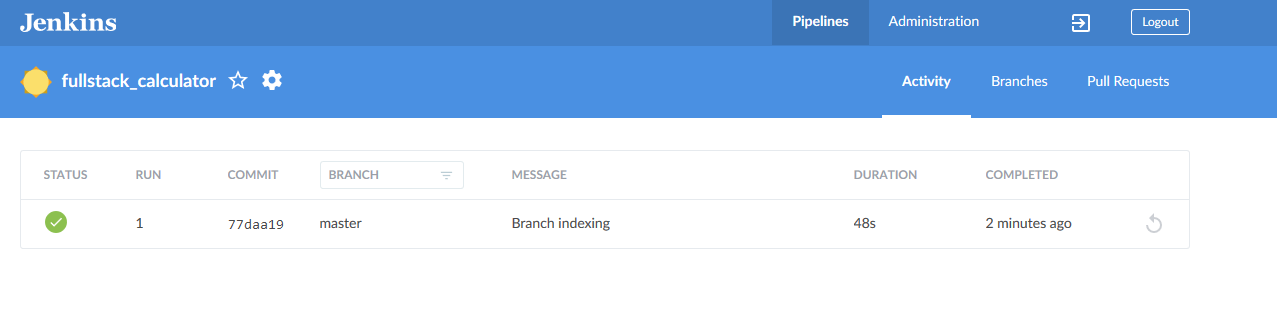
- Click on the pipeline name to check its status.
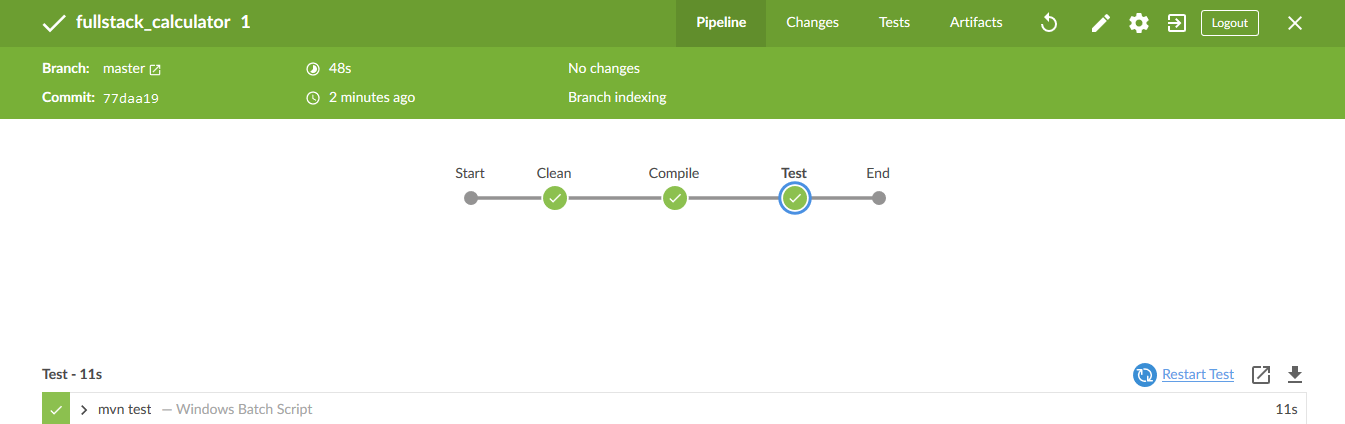
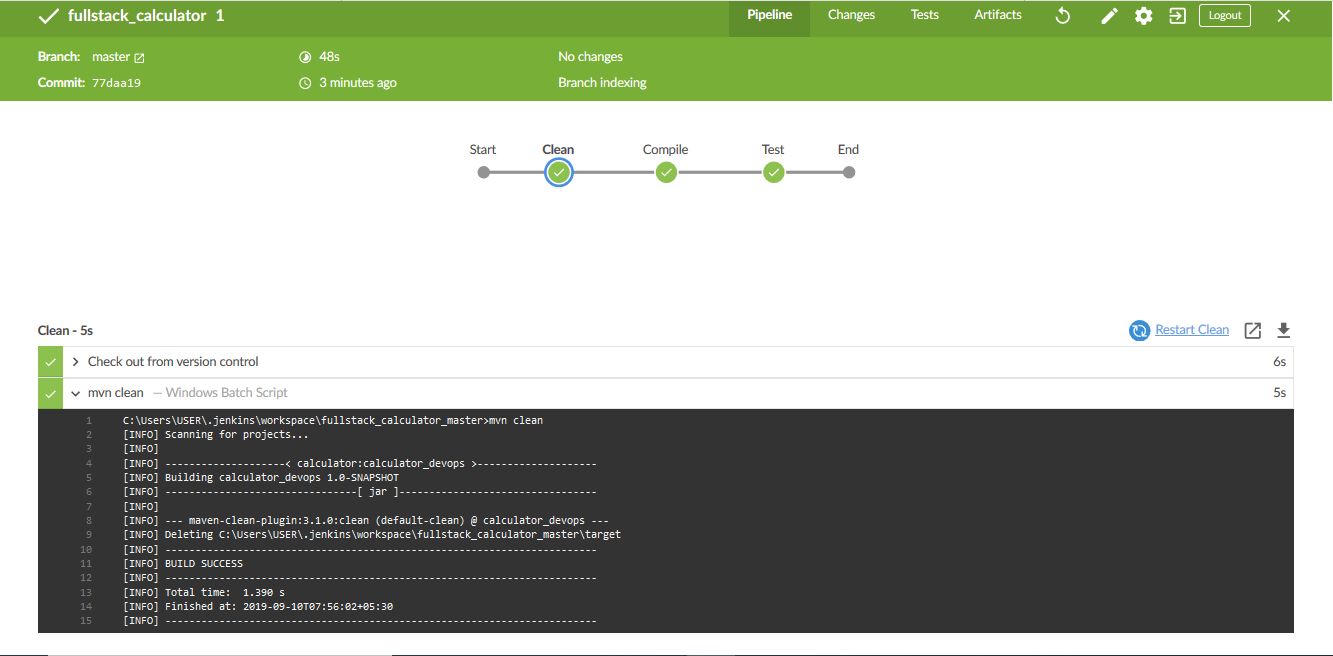
Here, the pipeline shows green color for all the stages which states that all the stages in the pipeline are up and running.
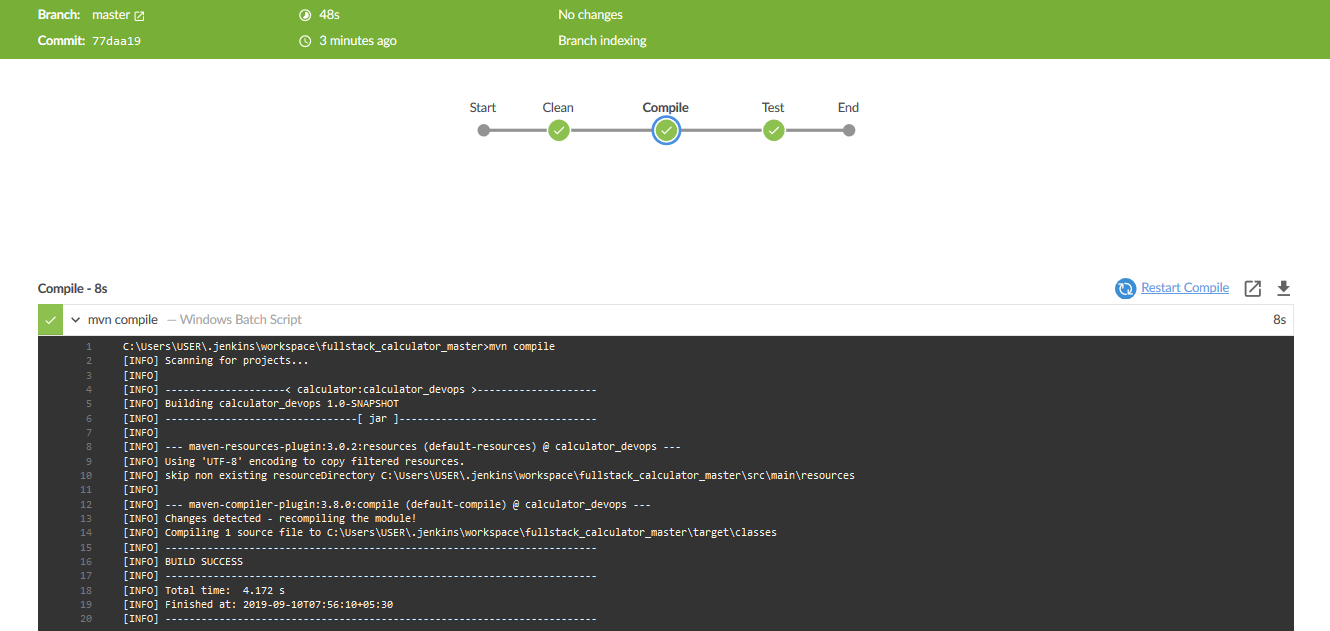
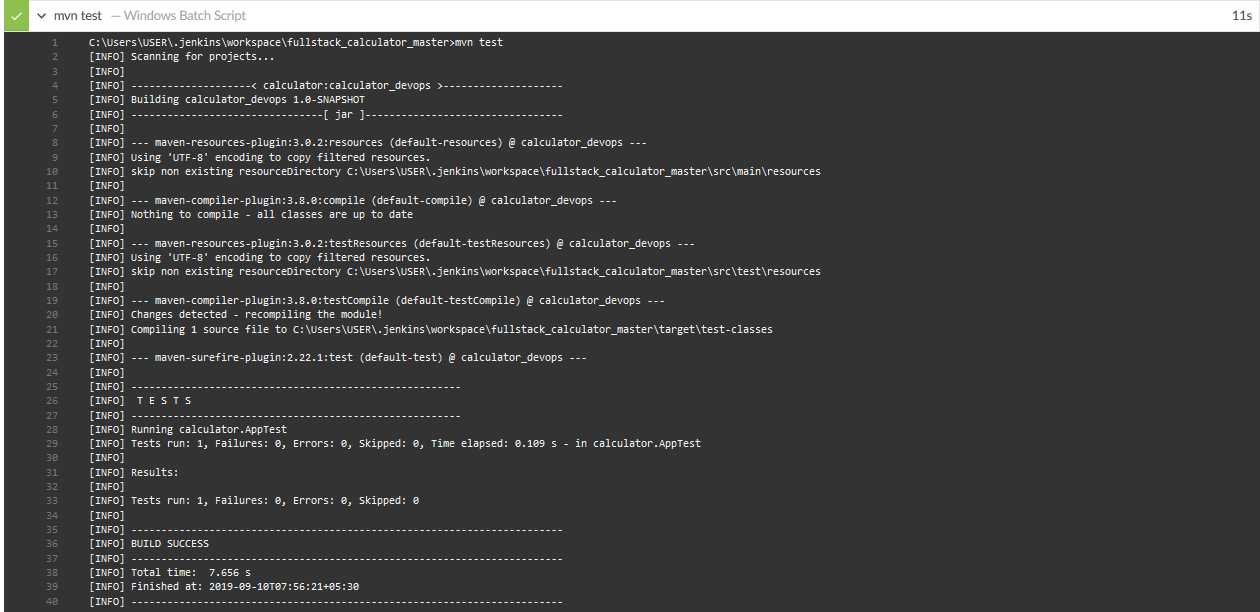
Click on individual stages to see the console output for each stage:
Clean
Compile
Test
5. Deploy the build artifacts to Nexus repository via Jenkins
Till now, Jenkins is used to automate the project work flow and execute maven goals on the project hosted on Git to create .jar files in the target. folder.
Here, we use Sonatype Nexus to deploy these artifacts.
Deployment in software development refers to making the application available to use.
Downloading and Configuring Nexus
-
Download Sonatype Nexus 3.18
-
Open command line with the path of bin/ folder of the Nexus binary downloaded and type the following command:
$ nexus.exe /run
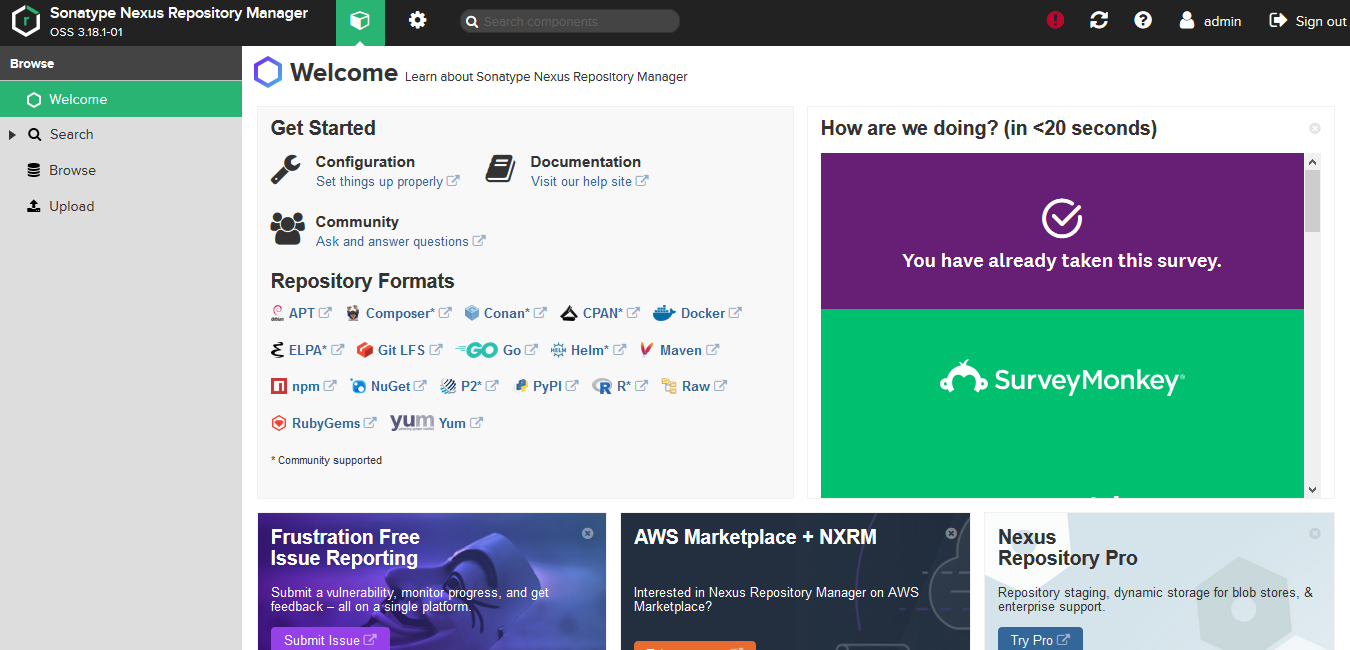
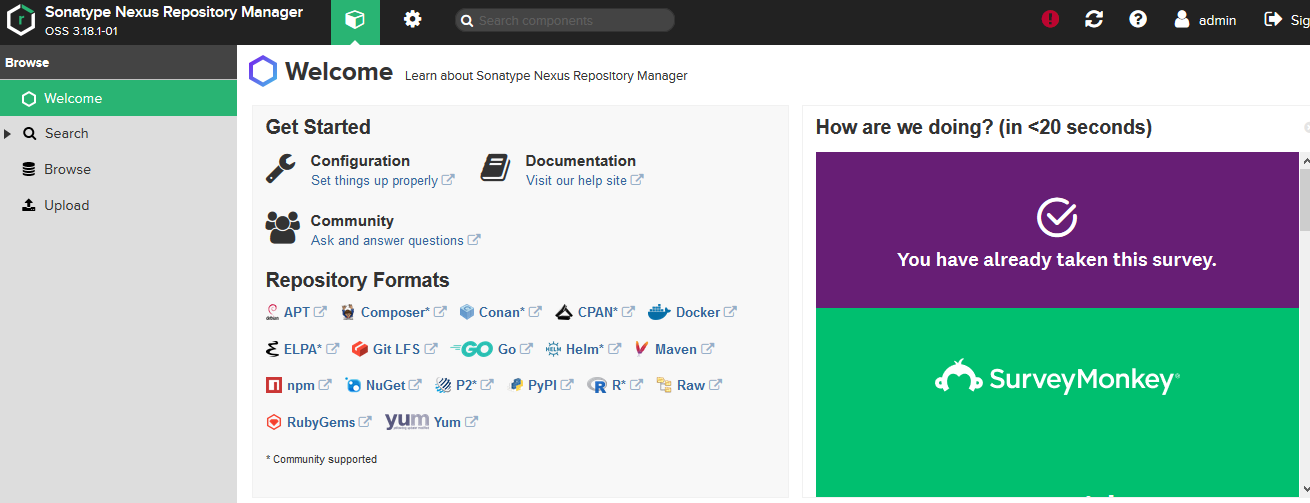
- Open the Nexus Dashboard in a web browser at localhost:8081 address.
- Create a new user to signup or sign in as the admin.
Default admin user name: admin
Default admin password: admin123
- Nexus Dashboard opens up.
Create Repositories on Nexus
Create Maven compatible repositories on Nexus where our binary executable artifacts will be stored.
- Click on Repository Settings button on the top bar of the Nexus Dashboard. The following dashboard opens up
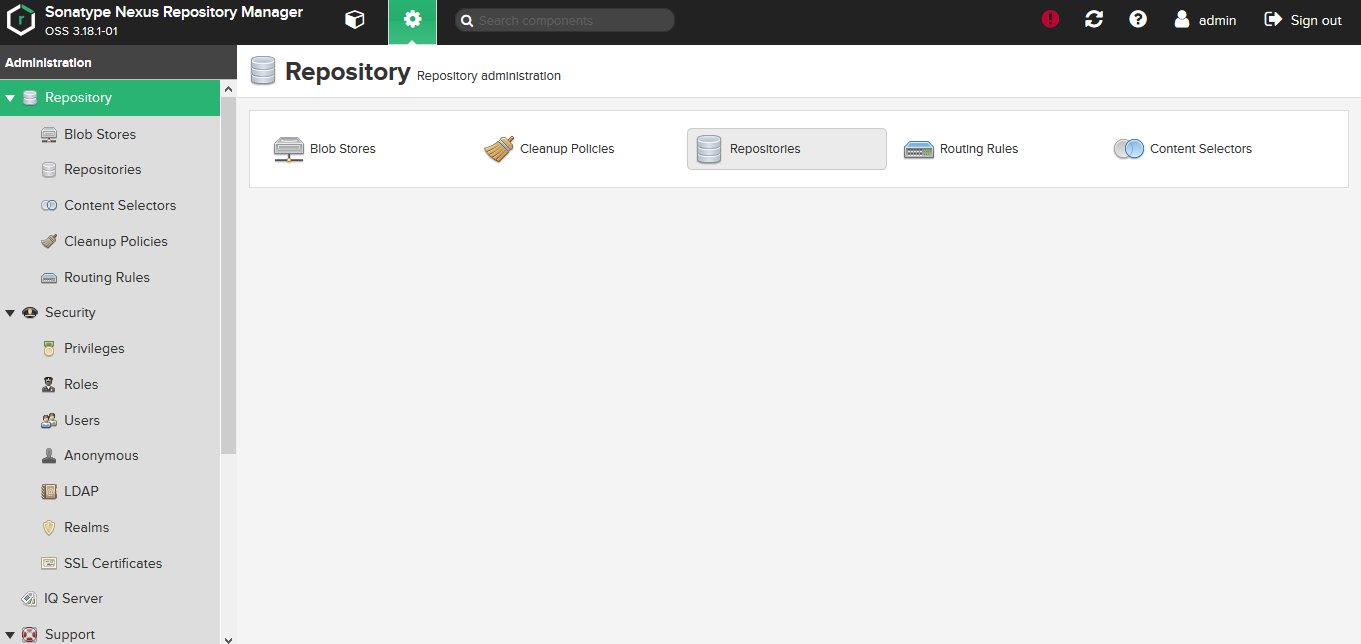
Click on Repositories.
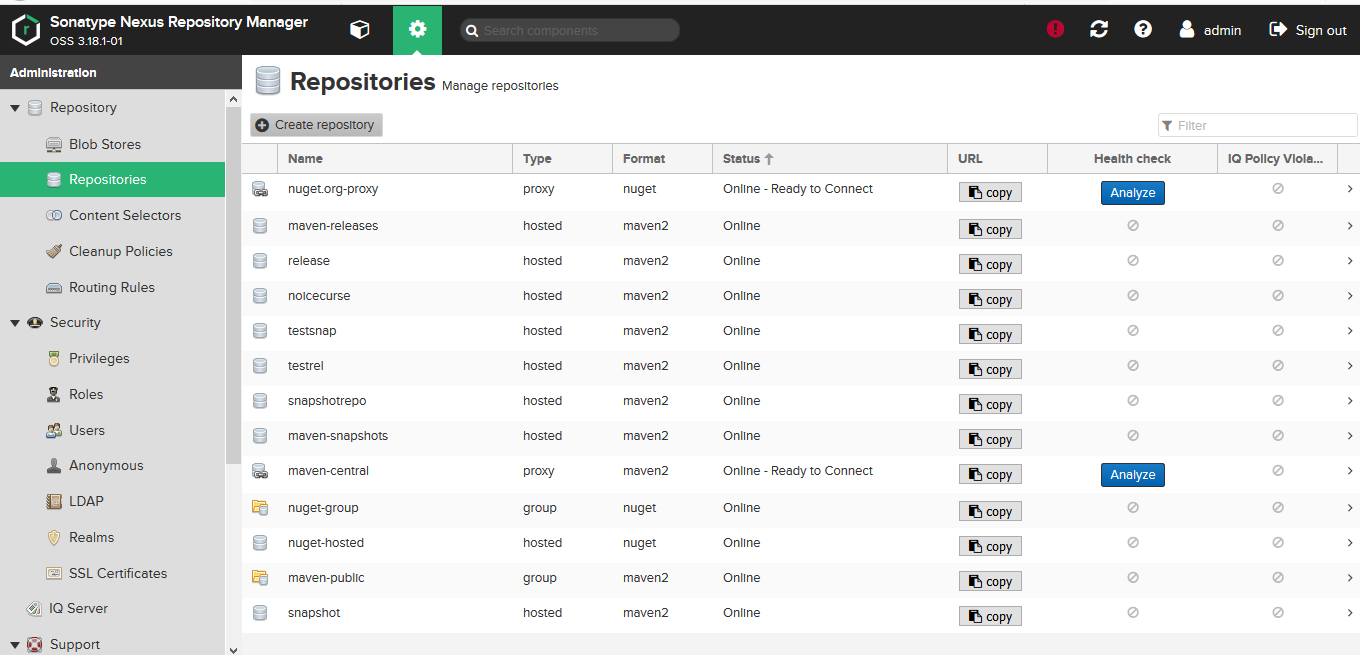
- Click on Create Repository button.
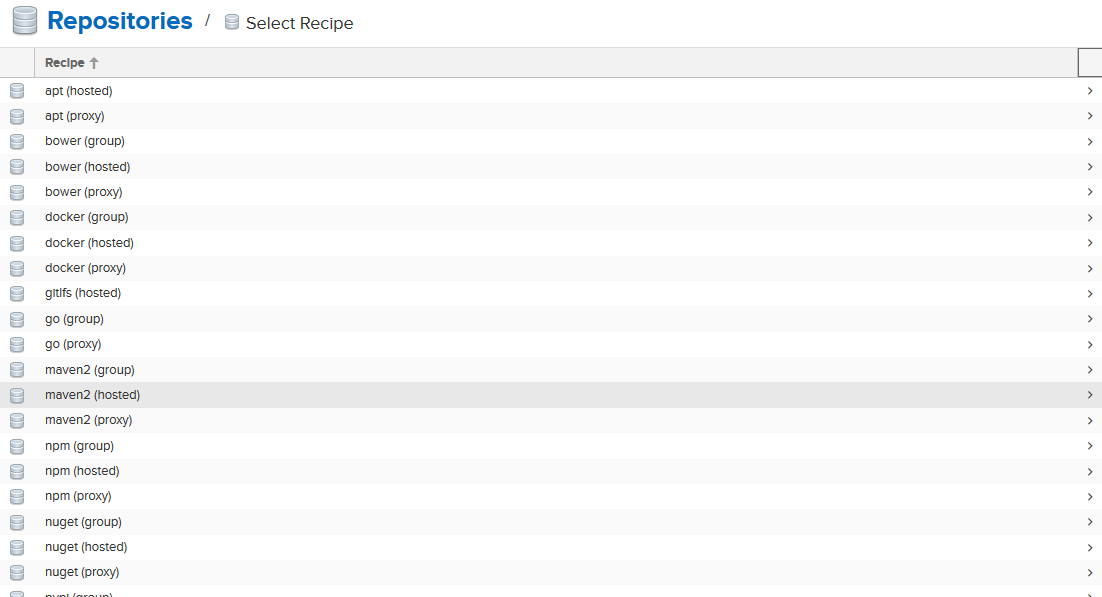
- Select Maven2(Hosted) in the Select Recipe page.
- Specify the name of the repository. Here, calculator is used as the artifact repository name.
Also, specify the Version policy as Snapshot.
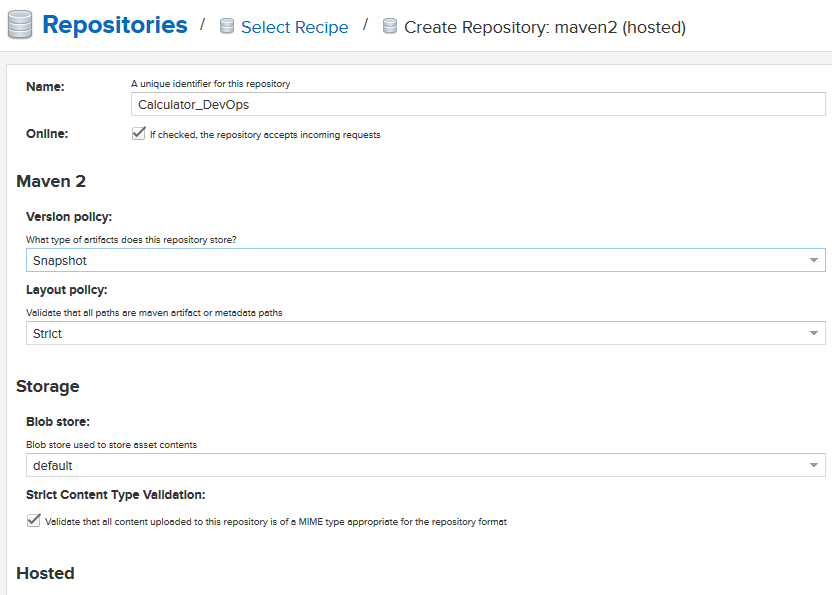
In the Deployment Policy, Specify Allow Redeploy
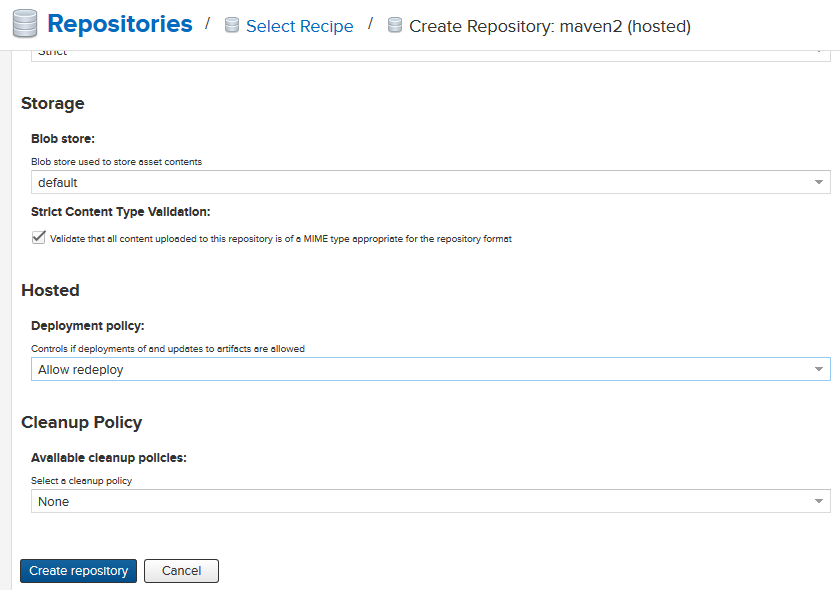
Click on Create Repository.
- The repositories dashboard opens up with success message for repository creation.
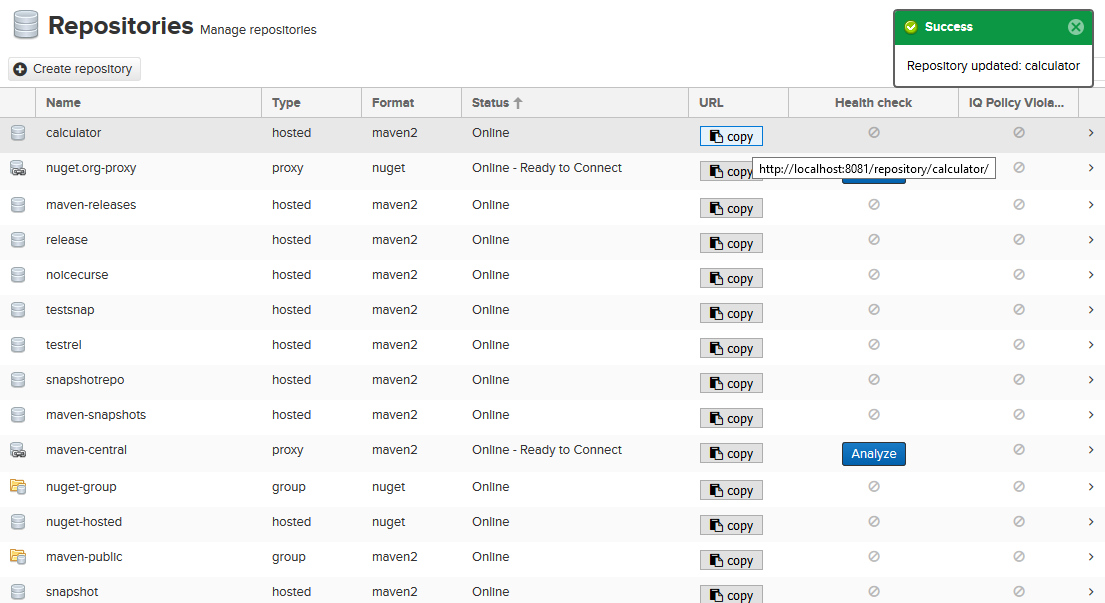
Click on Copy button under URL tag for the calculator repository.
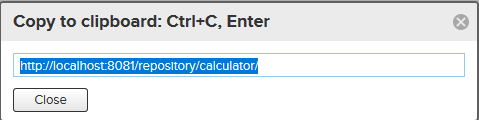
This link has to be configured with our Maven Settings on local machine and pom.xml file hosted on GitHub.
Configuring Repository link with Apache Maven settings on local machine
- Go to {path of Apache Maven on local machine}/conf/
- Open the settings.xml file
- Go to
<servers>tab and add following code
<server>
      <id>calculator</id>
      <username>admin</username>
      <password>admin123</password>
</server>
where,
- Id: the name of the repository created on the Nexus dashboard.
- Username: The name of the user having access rights to repository on Nexus. Here, admin user is used.
- Password: Authentication password of Nexus user specified above.
Save and close the settings.xml file
Configuring Repository link with POM.xml file hosted on GitHub
Edit the pom.xml file hosted on GitHub and add following code:
<distributionManagement>
  <snapshotRepository>
    <id>calculator</id>
    <name>calculator</name>
    <url>http://localhost:8081/repository/calculator/</url>
  </snapshotRepository>
</distributionManagement>
where,
- Id: The name of the repository
- Name: The name of the repository
- URL: The link of the Nexus repository
Automate the deployment of our binaries using Jenkins
- Go to Jenkins Dashboard and right click on the job created for current project DevOps_Calculator and click on Configure.
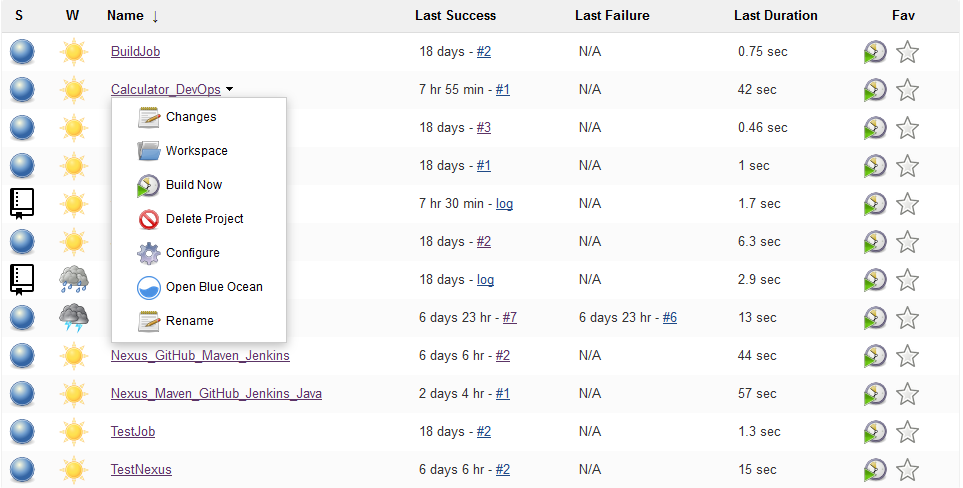
- In the Build Environment, add Deploy option in the Build steps.
Click on Save.
- On the project dashboard, click on Build Now
- See the console output for the Build
Search for Build Success message at last of the console output.
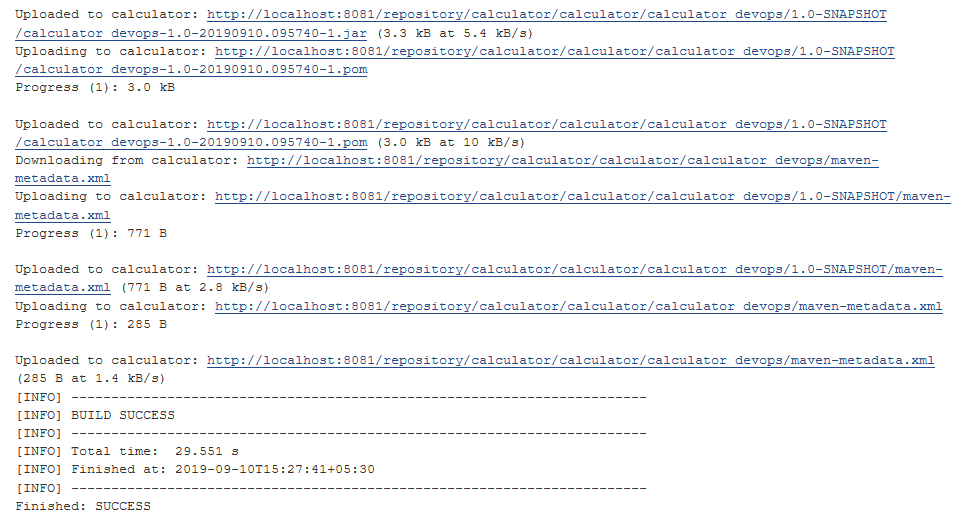
If Build Success message is shown, the binaries of our project are successfully deployed on Nexus.
Verify if the binaries are deployed on Nexus
- On the Nexus Dashboard sidebar, click on Browse.
- Select the calculator repository to check its content.
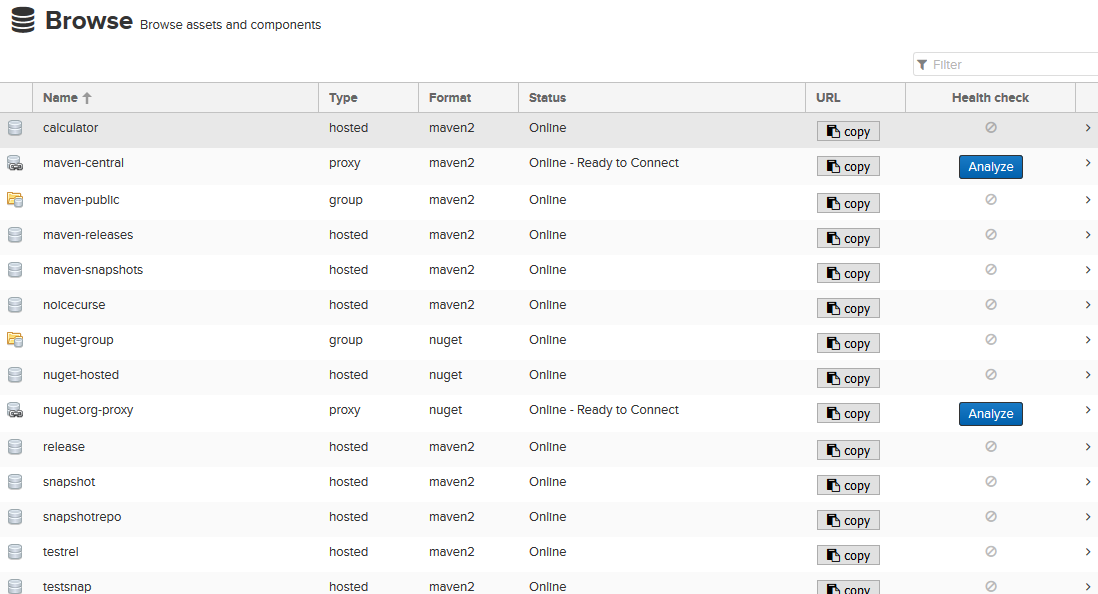
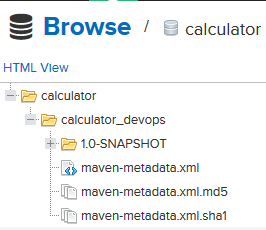
The above image shows that the binaries are successfully deployed on Nexus.
References/Further Reading
Full Stack Calculator project on Git
Apache Maven Command Line practical
Apache Maven using CMD Article