Open-Source Internship opportunity by OpenGenus for programmers. Apply now.
Game development is an exciting and interesting area to explore for people who have just finished learning web/app development, or any person who's enthusiastic about gaming and coding. To get started with game development, you must know at least one programming language such as C++, C#, Java or Python. Generally, to develop a 2D/3D game, it would be more convenient to learn a game engine so that much of the complexity of designing your game graphics, rendering audio, animation, etc. is abstracted. Keep in mind, game development requires many hours of creative and critical thinking to build up the logic for your game, consideration of all possible scenarios that can occur as well as delivering a smooth UX and a beautiful UI for the end users.
As a beginner who's never had any hands-on experience in game dev, you can use the PyGame library. It is a Python library that acts as a simple 2D gaming toolkit, providing features such as allowing you to draw sprites, providing support for sound, functionality for collision detection and more. It is, however, very rudimentary in comparison to other game engines which take into account physics, and help deal with advanced systems. But, it can be used to create beautiful and interesting games and is, most importantly, easy to learn and implement.
So, in this OpenGenus article, let us create a Dodgeball game in Python. You can customize your game along the way without having to stick to my design choices.
TABLE OF CONTENTS:
1. Basics of PyGame
2. Setting up Dodgeball
3. Adding additional functionality
4. Key takeaways
Pre-requisites: Knowledge of Python and Object-Oriented Programming in Python.
1. Basics of PyGame
There are some basic concepts and terms that you'll need to know when you start using Pygame to build your game and we'll go over those in this section.
- Surface- Is like a blank canvas in Pygame. You can fill color in it, put an image onto it or draw shapes on it.
- Screen- Is a special canvas in Pygame representing the game screen.
- Game Loop- Is the flow of control for the entire game. Keeps looping infinitely until a specific event occur, watches all input and handles it according to the programmed logic.
- Event- Is a certain action which occurs in the game duration upon trigger by the user or in a pre-programmed manner by the game itself.
- Sprite- Is an object which has attributes like size, color, etc. that can be customized as well as its own specific methods. Generally used to represent game characters as well as game objects.
- Rect- Represents a rectangular object that stores and manipulates rectangular areas. Used to control coordinates and movements.
2. Setting up Dodgeball
Install the Pygame package by running pip install pygame. Once you've done that, paste this basic code snippet onto a new Python file in your project directory.
import pygame
import sys
# address delay in exiting the game from exit screen


# initializing pygame library
pygame.init()


# setting up game screen
WIDTH = 600
HEIGHT = 800

screen = pygame.display.set_mode([HEIGHT, WIDTH]) # provide a list or tuple to define the screen size


# handle game running
while True: # game loop- controls whether the program should be running or when it should quit
    # if user clicks exit window quit game
    for event in pygame.event.get():
        if event.type == pygame.QUIT:
            # game_state = 0
            pygame.quit()
            sys.exit()


        # fill background color of screen: either a list or tuple is its argument
    screen.fill((137, 13, 15))

        # simply draw a circle on the screen
    pygame.draw.circle(screen, (0, 0, 0), (250, 250), 75)


    pygame.display.flip()
I have written detailed comments against each line to help you understand what is going on.
We call pygame.init() so that pygame is able to initialize all its modules, and we define the screen size i.e. the size of the game window which the user interacts with. After that, we define our game loop which is essentially the loop that keeps the game running until the user wants to exit. If the user clicks the exit window, we use pygame.quit() to quit Pygame and sys.exit() to exit from the program. As for what is to be displayed on the game screen, for now we keep it simple and render a circle on the screen. The syntax of the command is pygame.draw.circle(screen (the game screen which we have defined), color to draw with, coordinates of the center, radius). Use pygame.display.flip() to render your graphics on the game window. I have also filled the screen with a dark-red color: rgb(137, 13, 15). Now when you run your Python program, you should be able to see the aforementioned details on the game window and when you click the exit icon, the game should stop and the window must close. What you will notice if everything went smoothly is that there is an infinite number of frames per second, we'll tackle that issue shortly and slow down the fps so that the game is playable in the upcoming section. In case you face any issues, cross-check your code and check the documentation to make sure you are using all the methods in the proper intended way and using the proper syntax.
We have succesfully set up the skeleton for our dodgeball game.
To break down all the features that should be present in our game, let us list them out:
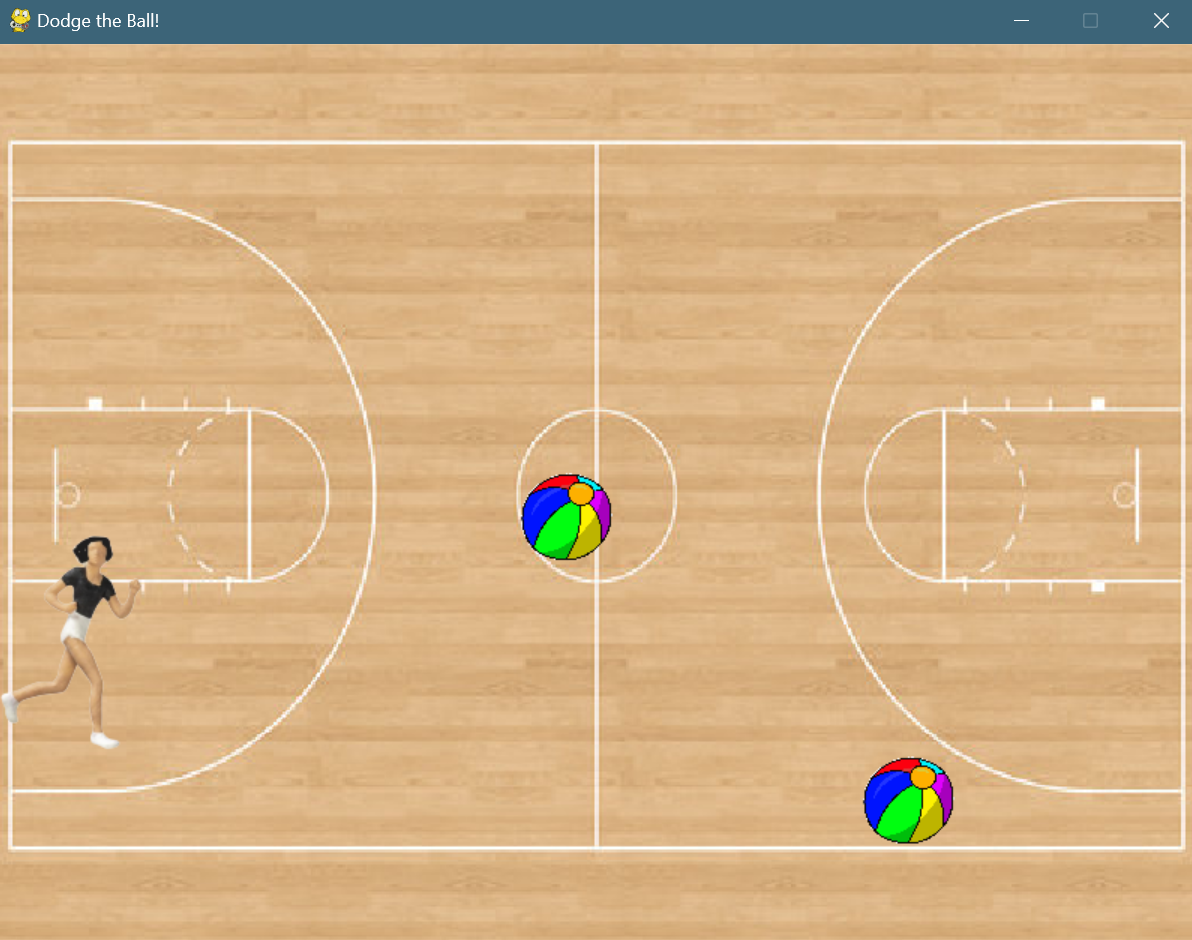
- Render a player, and enemies (balls) as the main components.
- Add audio to the game.
- Add a score tracker to the game.
- If a collision is detected the game must be ended.
- Enemies (balls) must constantly fly at the player at a constant rate per level.
Sprites in Pygame are objects with attributes and methods that represent our game characters.
We define the following classes in our game to modularize our code:
- Image - to load an image path and set its position on the screen
# extend pygame.sprite.Sprite using super() (inheritance, returns a delegate object to the parent and extends its functionality)
class Image:
    def __init__(self, path):
    # load the image path and optimize it for fast blitting as well as preserve its transparent are
        self.avatar = pygame.image.load(path).convert_alpha()
        self.avatar.set_colorkey((255, 255, 255)) # sets a specific color to be treated as transparent
        self.avatar = pygame.transform.smoothscale(self.avatar, (100, 150)) # scales the image to a new size while preserving and providing higher quality resolution
        self.rect = self.avatar.get_rect(
            center = (
                20,
                HEIGHT/2
            )
        )
- Game - to define the game player, define a group of enemies and a group of all the game sprites so that we can easily implement future functions which deal with those sprites in bulk, and load sound.
class Game:
    def __init__(self):
        self.player = Player()
        self.enemies = pygame.sprite.Group()
        self.all_sprites = pygame.sprite.Group()
        self.all_sprites.add(self.player)
        self.limit = 5 # to help with our score logic, we use it as a lower bound to determine whether to increase our score or not
        self.passbys = 0 # number of balls that have successfully passed by without collision
        main_sound.play()
- Player - we have images of the player for every direction it turns in, so here we would define the logic for changing the image of the player based on keyboard input and maintain the player's score as well.
class Player(pygame.sprite.Sprite):
    def __init__(self):
        super().__init__()
        image = Image("./positions/left.png")
        self.avatar = image.avatar
        self.rect = image.rect
        self.score = 0
    def update(self, pressed):
        if pressed[pygame.K_UP]:
            image = Image("./positions/up.png")
            self.avatar = image.avatar
            self.rect = self.avatar.get_rect(
                center = (
                    self.rect.centerx,
                    self.rect.centery - 10
                )
             )

        if pressed[pygame.K_DOWN]:
            image = Image("./positions/left.png")
            self.avatar = image.avatar
            self.rect = self.avatar.get_rect(
                center = (
                    self.rect.centerx,
                    self.rect.centery + 10
                )
             )

        if pressed[pygame.K_RIGHT]:
            image = Image("./positions/left.png")
            self.avatar = image.avatar
            self.rect = self.avatar.get_rect(
                center = (
                    self.rect.centerx + 10,
                    self.rect.centery
                )
             )

        if pressed[pygame.K_LEFT]:
            image = Image("right.png")
            self.avatar = image.avatar
            self.rect = self.avatar.get_rect(
                center = (
                    self.rect.centerx - 10,
                    self.rect.centery
                )
             )

        # prevent player from hurtling off screen
        if self.rect.left < 0:
            self.rect.left = 0
        if self.rect.top <= 0:
            self.rect.top = 0
        if self.rect.right > WIDTH:
            self.rect.right = WIDTH - 25
        if self.rect.bottom >= HEIGHT:
            self.rect.bottom = HEIGHT - 25
- Enemy - we load the enemy image and define its position on the game screen.
class Enemy(pygame.sprite.Sprite):
    def __init__(self):
        super().__init__()
        self.x = 20
        self.y = 10
        self.avatar = pygame.image.load("enemy.jpg").convert()
        self.avatar.set_colorkey((255, 255, 255))
        self.avatar = pygame.transform.scale(self.avatar, (80, 80))
        self.rect = self.avatar.get_rect(
            center = (
                random.randint(WIDTH + 20, WIDTH + 100),
                random.randint(0, HEIGHT)
            )
        )
        self.speed = random.randint(5, 20)
    def update(self):
        self.rect.move_ip(-self.speed, 0)
        if self.rect.right < 0:
            self.kill()
What about the logic for collision and for rendering enemies (balls) periodically on the screen? What if the balls go out of frame- will they still be shown on the game screen?
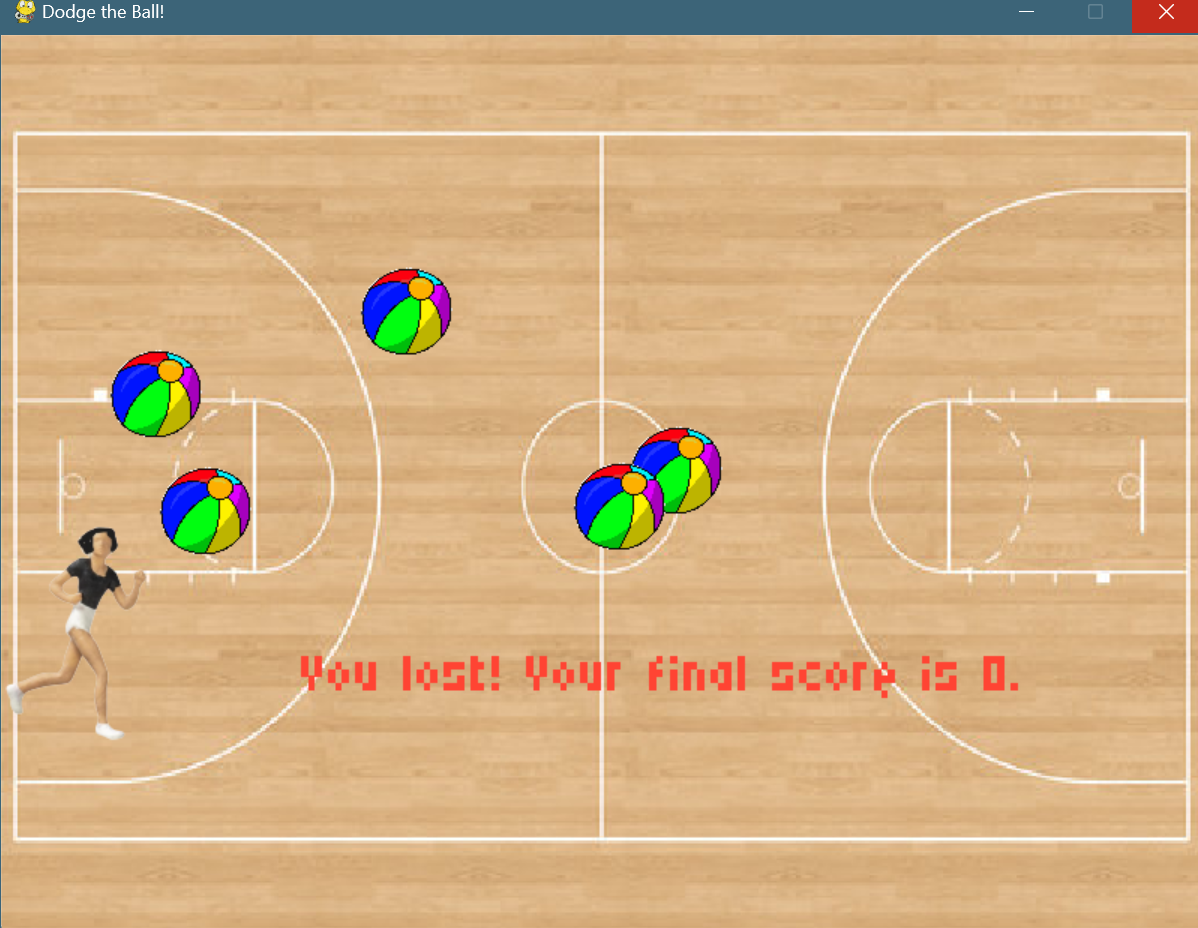
To handle the logic for collision within the game loop, we typically implement that inside our game loop and using Pygame's inbuilt spritecollideany(sprite1, sprite2) function, we kill the player, stop the retro sound and play the collision sound effect, we render a new screen displaying the player's final score, wait for a few seconds and ask the player whether they are interested to try again, if not quit pygame and exit, else we continue the game loop.
In addition, I have removed the circle and background color used for explanation in the previous section and replaced them with a bg image.
    pressed = pygame.key.get_pressed()
    game.player.update(pressed) # player's image changes based on direction
    game.enemies.update()  # enemy should whizz across the screen from the right to
    # the left and get killed when it goes out of frame
    background = pygame.image.load("bgimage.jpg")
    background = pygame.transform.scale(background, (HEIGHT, WIDTH))
    screen.fill((255, 255, 255))
    bg_rect = background.get_rect()
    screen.blit(background, bg_rect) # rendering the bg image (image of the
    # dodgeball court) on our game screen
    for entity in game.all_sprites: # game.all_sprites is a list of all sprite objects
        screen.blit(entity.avatar, entity.rect) # draws the entity's image onto the # surface defined for it
    # check for collisions
    if pygame.sprite.spritecollideany(game.player, game.enemies):
        # you lose! try again page
        game.player.kill()
        main_sound.stop()
        collision_sound.play()
        if event.type == pygame.K_ESCAPE:
            pygame.quit()
            sys.exit()
        else:
            game = Game()
            continue
        # flip display- updates contents of display to the screen, without this nothing appears
    pygame.display.flip()
    clock.tick(30) # program should maintain a rate of 30 fps
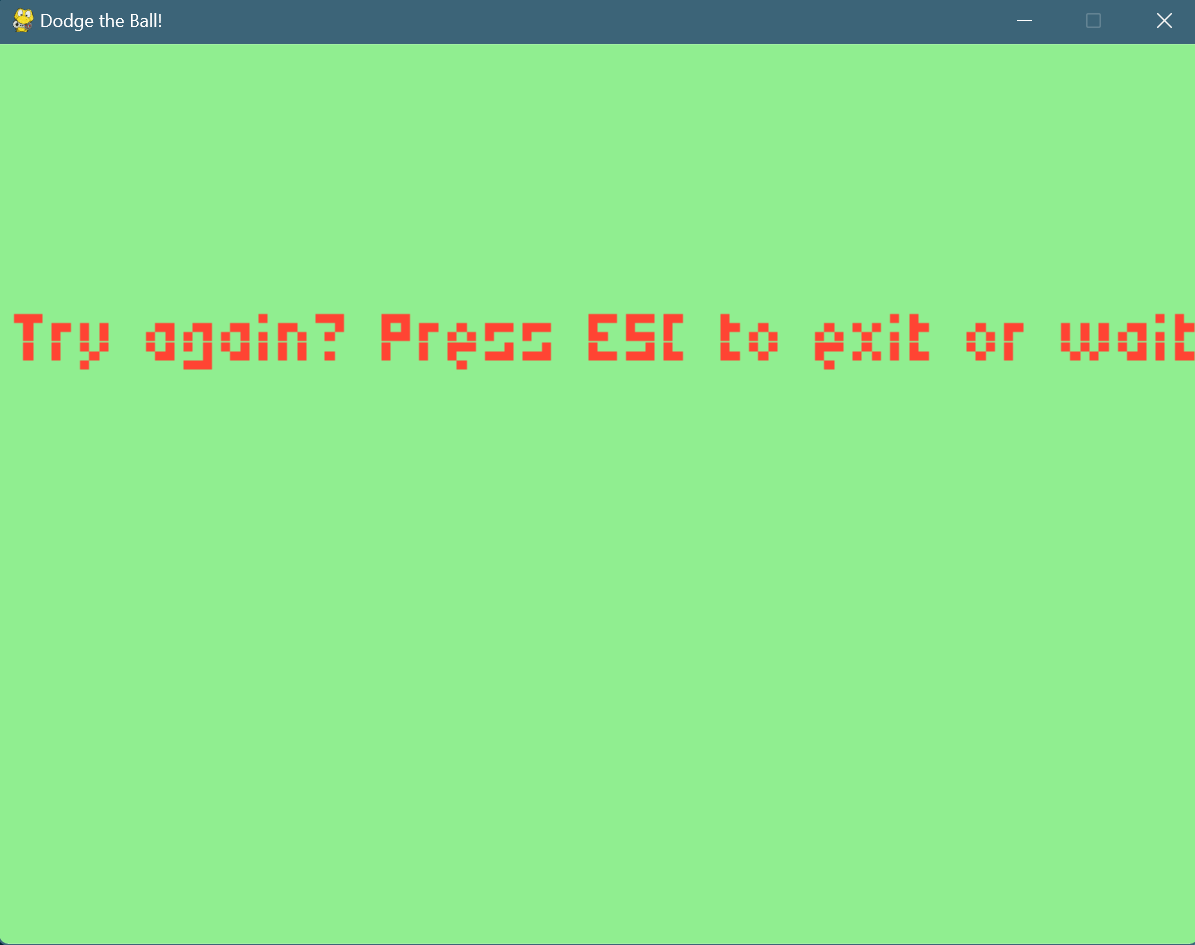
To use different game screens based on whether the player has lost or quit or just begun the game, we can use Pygame's render method to display the player's current score and show them that they have lost, and create a new screen to ask the player whether they wish to try again or quit:
        loser = pygame.font.Font('Micro5-Regular.ttf', 50)
        new_surf = loser.render(f"You lost! Your final score is {game.player.score}.", False, (255, 68, 51)) # create a surface off the text
        screen.blit(new_surf, (WIDTH/3, HEIGHT/2))
        pygame.display.flip()
        pygame.time.wait(1000)
        screen = pygame.display.set_mode([HEIGHT, WIDTH])
        screen.fill((144, 238, 144))
        intro_screen = pygame.font.Font('your_font.ttf', 70)
        intro = intro_screen.render("Try again? Press ESC to exit or wait to restart", False, (255, 68, 51))
        screen.blit(intro, (10, HEIGHT/5))
        pygame.display.flip()
        pygame.time.wait(2000)
For rendering enemies, we want our enemies i.e. the balls to constantly come into frame from the right as they do in dodgeball. To tackle this, we define a new event called ADD_ENEMY and use set_timer to have a constant influx of enemies after a pre-defined interval.
''' now we have to create a steady supply of enemies aka obstacles at regular intervals- create a custom event
and set its interval '''
ADD_ENEMY = pygame.USEREVENT + 1
pygame.time.set_timer(ADD_ENEMY, 1000)
We add the event-handling logic for it within the game loop :
elif event.type == ADD_ENEMY:
                new_enemy = Enemy()
                game.enemies.add(new_enemy)
                game.all_sprites.add(new_enemy)
                game.passbys += 1
                if game.passbys > game.limit:
                    game.player.score += 5
                    game.limit += 5
                print(game.player.score)
Lo and behold, the game is ready!


3. Adding additional functionality
Here are some suggestions for you to practice all you have learnt about PyGame so far, you can add on some additional features to the game and refer to the documentation as and when you get stuck.
- Implement a level feature- if your score hits a threshold, you get to a higher level and update the threshold. At each level upgrade, the speed of the incoming balls increases and it gets more difficult to score.
- Implement a dark mode level- once you have reached a sufficiently high level, you can make the court go dark as if someone has switched off the lights and focus a spotlight on the player, and one on the incoming ball.
- Add different ball types- instead of having the same type of ball coming in, you can add an extra bouncy ball, a super slow ball, a super fast one as well as one with a very large stride.
- Add bonuses- you can increase the player's score by a large amount if they manage to avoid colliding with a special ball such as one that is very fast/extra bouncy.
- Add a high score feature- Keep track of the highest score that the player has achieved till now.
- Implement a tutorial mode- Show the player how the game is meant to be played and what the game's rules are by implementing a simple tutorial before starting the game. Add an option to skip it as well.
Key takeaways
-
Introduction to Game Development:
- Game development is ideal for those familiar with web/app development or coding enthusiasts.
- Requires knowledge of programming languages (C++, C#, Java, Python).
- Learning a game engine is beneficial for handling game graphics, audio, and animation.
-
About PyGame:
- PyGame is a Python library for 2D game development.
- It simplifies creating games with features like sprite drawing, sound support, and collision detection.
-
Creating a Dodgeball Game:
-
Basics of PyGame:
- Install PyGame and set up a basic game window with pygame.init().
- Basic code includes setting up the game loop, handling events, and rendering graphics.
-
Setting Up Dodgeball:
- Features include rendering player and enemies, adding audio, scoring, and handling collisions.
- Use classes for game elements: Image, Game, Player, and Enemy.
- Implement collision detection and different game screens.
- Add functionality to periodically generate enemies and manage fps.
-
Adding Additional Functionality:
- Suggestions include implementing levels, dark mode, different ball types, bonuses, high scores, and a tutorial mode.
-
