
Get this book -> Problems on Array: For Interviews and Competitive Programming
Hello everyone. In this article, we are going to see an introduction to iOS development and build a basic iOS app using Swift and UIKit in the process by setting up our environment.
What is iOS
iOS previously known as iPhone OS is an operating system created by Apple and released in 2007.It is written in Swift,Objective C,C++ and some assembly code.Every year apple releases new version of iOS in every year.Latest release in 2020 is iOS 14.
How to get into iOS development

For iOS development the programming language used is Swift or Objective C.Before 2014 Objective C was primary language for iOS development which is not much beginner friendly.So in order to make more people to get into iOS development Apple introduced a whole new language called Swift in WWDC(World Wide Developer Conference) in 2014.Swift is a cute language which combines the simple TypeScript like syntax of with performance of C++ to give a language which is simple like Python but at the same time blazing fast like C++.
Question
Who developed Swift language in Apple
Environment setup needed for iOS development
For iOS development it is compulsory to have a Mac.It can be either iMac or MacBooks or even Mac-Mini.In additon it is also possible to get Mac OS running in PC by using Paid Cloud services which is suitable for starting out but it is always favourable to have a Mac.
IDE
For iOS development we use an IDE called Xcode which is the official IDE from Apple for developing applications for Apple devices like iPhone,iPad,Mac and even for Watches.
Xcode can be downloaded directly from Mac App store or from Apple developer website.
Programming language
If you are a beginner then you can start with Swift and not Objective C.Though there are some companies still use Objective C including Apple for their core OS development and companies with legacy codebase for their apps.After you get a good grip in Swift you can try Objective C.
FrameWorks
There are two framework options to make iOS apps
- UIKit
- Swift UI
UIKit
It is the most robust and powerful framework to build iOS apps using both Swift and Objective-C.It has been used most prominently for iOS developnment for past 10 year.
Swift UI
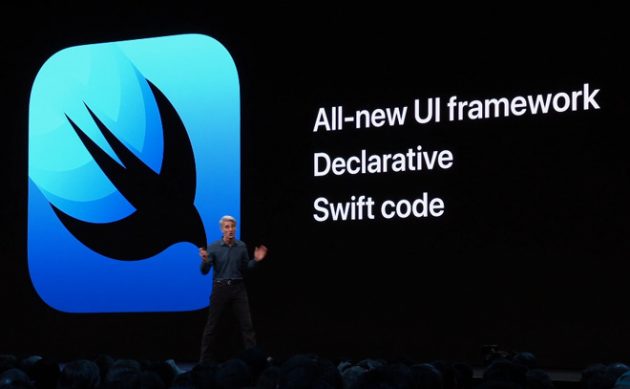
Swift UI is a brand new framework which has been developed completely from scratch for developing cross platform apps for apple ecosystem devices.It includes iOS,iPad OS,Watch OS,TVOS.It provides write once run anywhere feature.But in case of UIKit it is only for iOS and iPadOS development for Mac OS development there is AppKit and for watchOS there is WatchKit.Swift UI uses declarative programming style like Flutter.So it speeds up the development process.However there is one draw back It was introduced in 2019 and still relatively new. There several companies which still prefer UIKit.
SwiftUI vs UIKit
If you are a beginner then learning UIKit is must to get an iOS dev job before moving on to Swift UI.Although Swift UI is the future of iOS development but it is still new and takes some time for companines to adapt to it. If you are working in your hobby project and has less development time then you can use Swift UI for faster development.But mastering UIKit is must.And also there are several resources available for UIKit both in Swift and also in Objective C but Swift UI on other hand supports only Swift and not Objective C.And also learing UIKit will help you to learn other frameworks like Sprite kit for iPhone game development in Objective C or Swift.
Hello World in iOS
Enough of talk lets get into some actual coding.
- Open up your Xcode
- Create new Xcode project
- Select iOS and App (not Multiplatform)
You will be presented with a screen like this
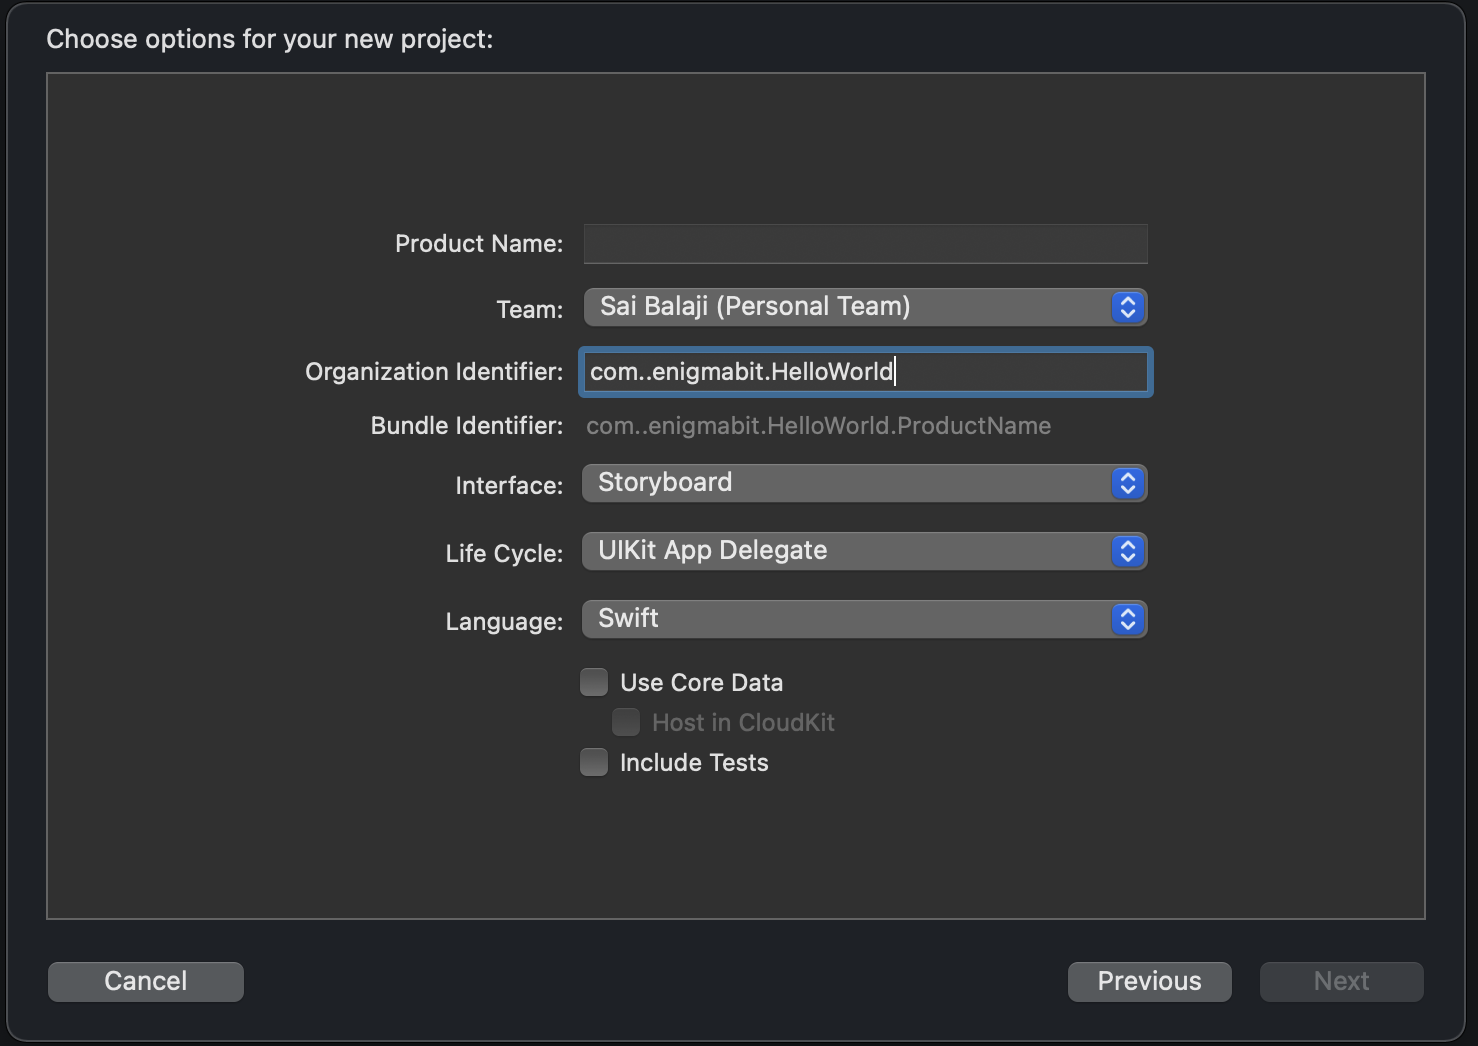
Product Name:
It is the name of your app
Team:
It is the developer account for this project if you are opening Xcode for first time then it will be none. It's ok leave it as none we can create a free developer account later.This developer account is needed if you want to test your app in physical device.
Organization Identifier:
It is an unique ID for your organisation it is similar to package name in Android Developement.
Interface:
It is the way in which we are going to design our app UI.Storyboard is a canvas in which you can drag and drop UI elements like buttons,labels etc.All things which can be done in storyboard can also be done using Swift code.For starters we can stick with storyboard after gaining some experience we can move to full code UI design.
LifeCycle:
It shows the App's life cycle which includes delegate methods which are called when app launches,exit,move to background etc.
Language:
As mentioned we are going to use Swift for this app and not Objective C
Use Core data:
Core data is a object graph used for data persistence it is similar to SQL-Lite in Android.In our case we are not going to use it.
Include Tests:
Uncheck it because in this app we are not going to perform Unit testing.
After creating the project You will be presented with a screen like this
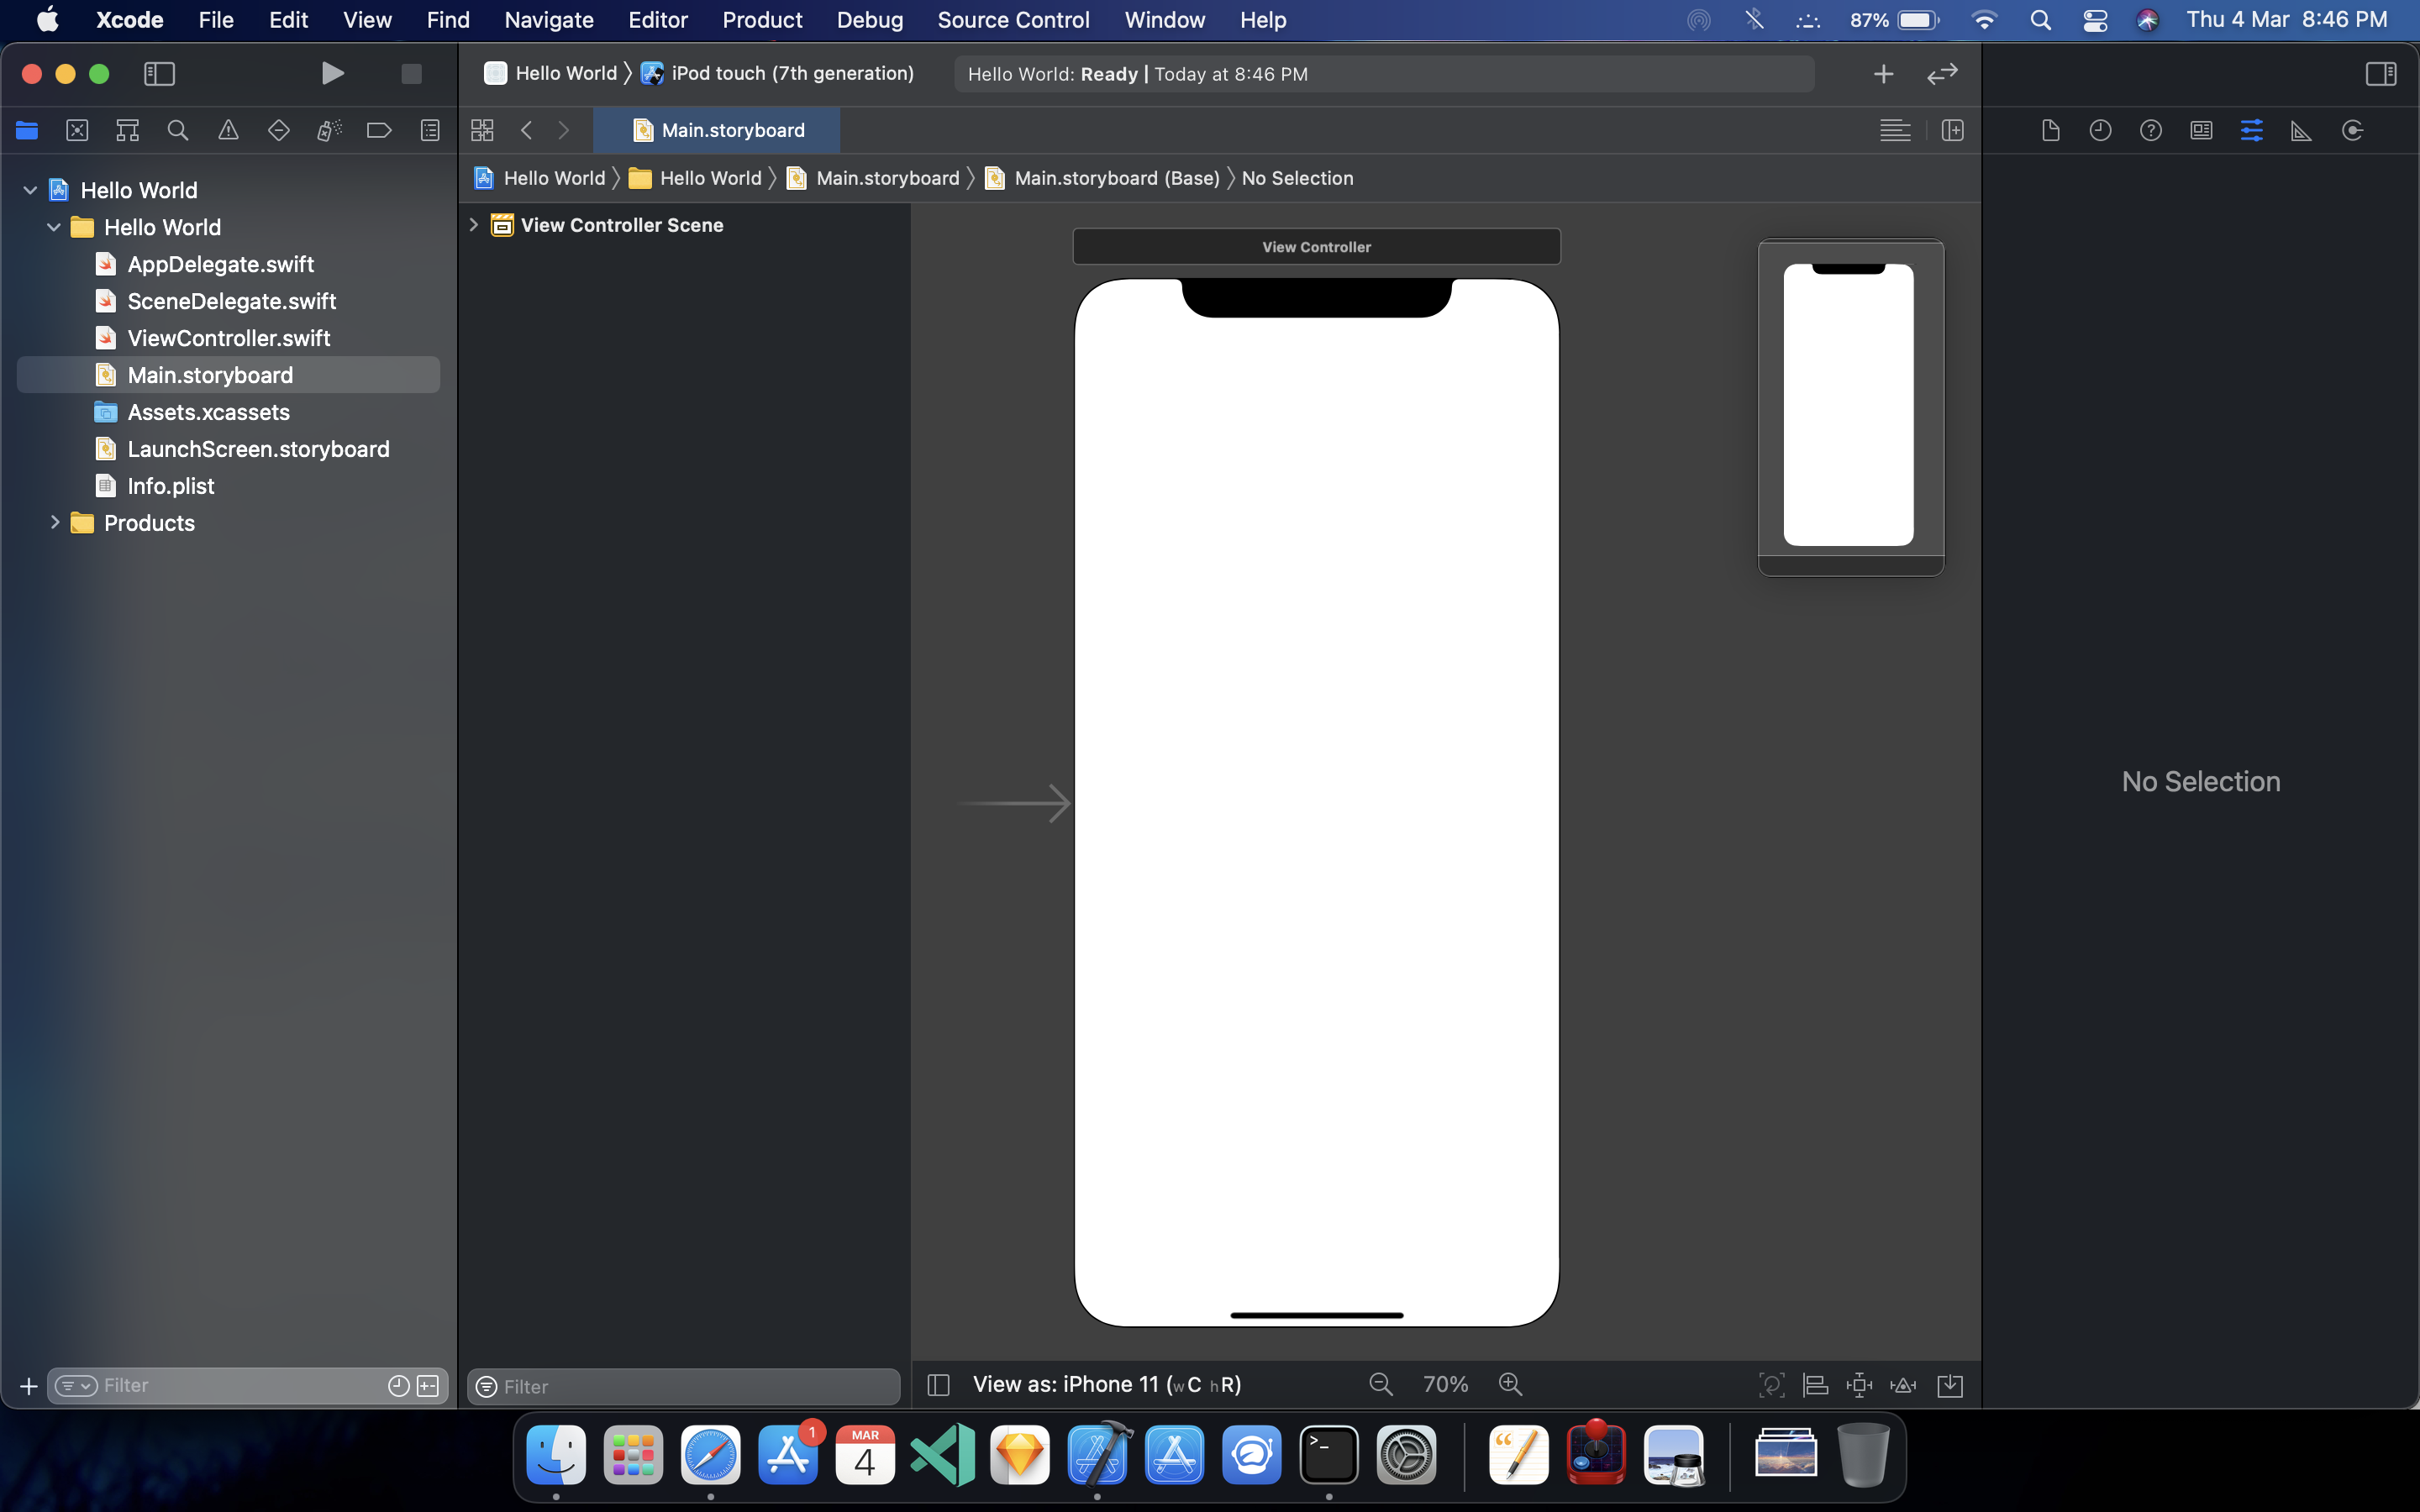
Project Structure
AppDelegate.swift
As mentioned earlier this file includes delegate methods which will be called when your app launches or user exits the app or when user put your app in background.Don't worry we will use this file in some rare cases like debugging,adding Firebase to our project etc.
ViewController.swift
It act as the brain for particular screen of your app.By default your app has a single screen(View Controller) which is shown in the storyboard it is the front end of the screen.But the actual implementation of what your app does when user interacts with the UI elements is coded in ViewController.swift
Assets.xcassets
This folder holds all image resources of your app like images,app icons.
Info.plist
This file uses dictionary data structure to store the permissions for your app for example permission to access user location.
LaunchScreen.storyboard
It is a screen which will be visible to user for few seconds when they lauch the app.It can be used to put your app logo or company logo.
Adding a button and label
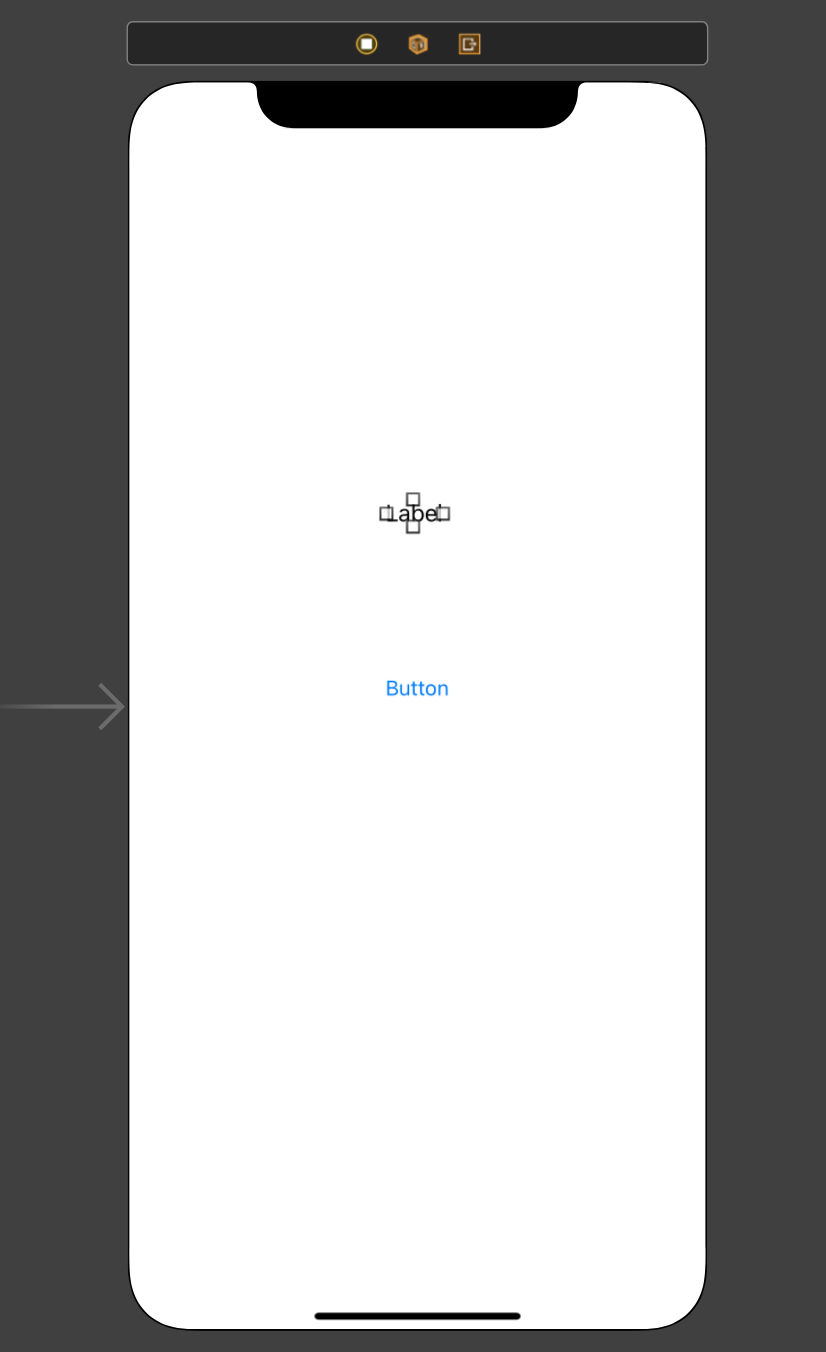
Click on the + button in toolbar it will open object window which has several controls select button and drag it to center of the screen in storyboard.
Now we have our UI ready time to hook the button with view controller.swift file and code what the button should do when pressed.
Press this button in Xcode to open up assistant editor and make sure you open ViewController.Swift file

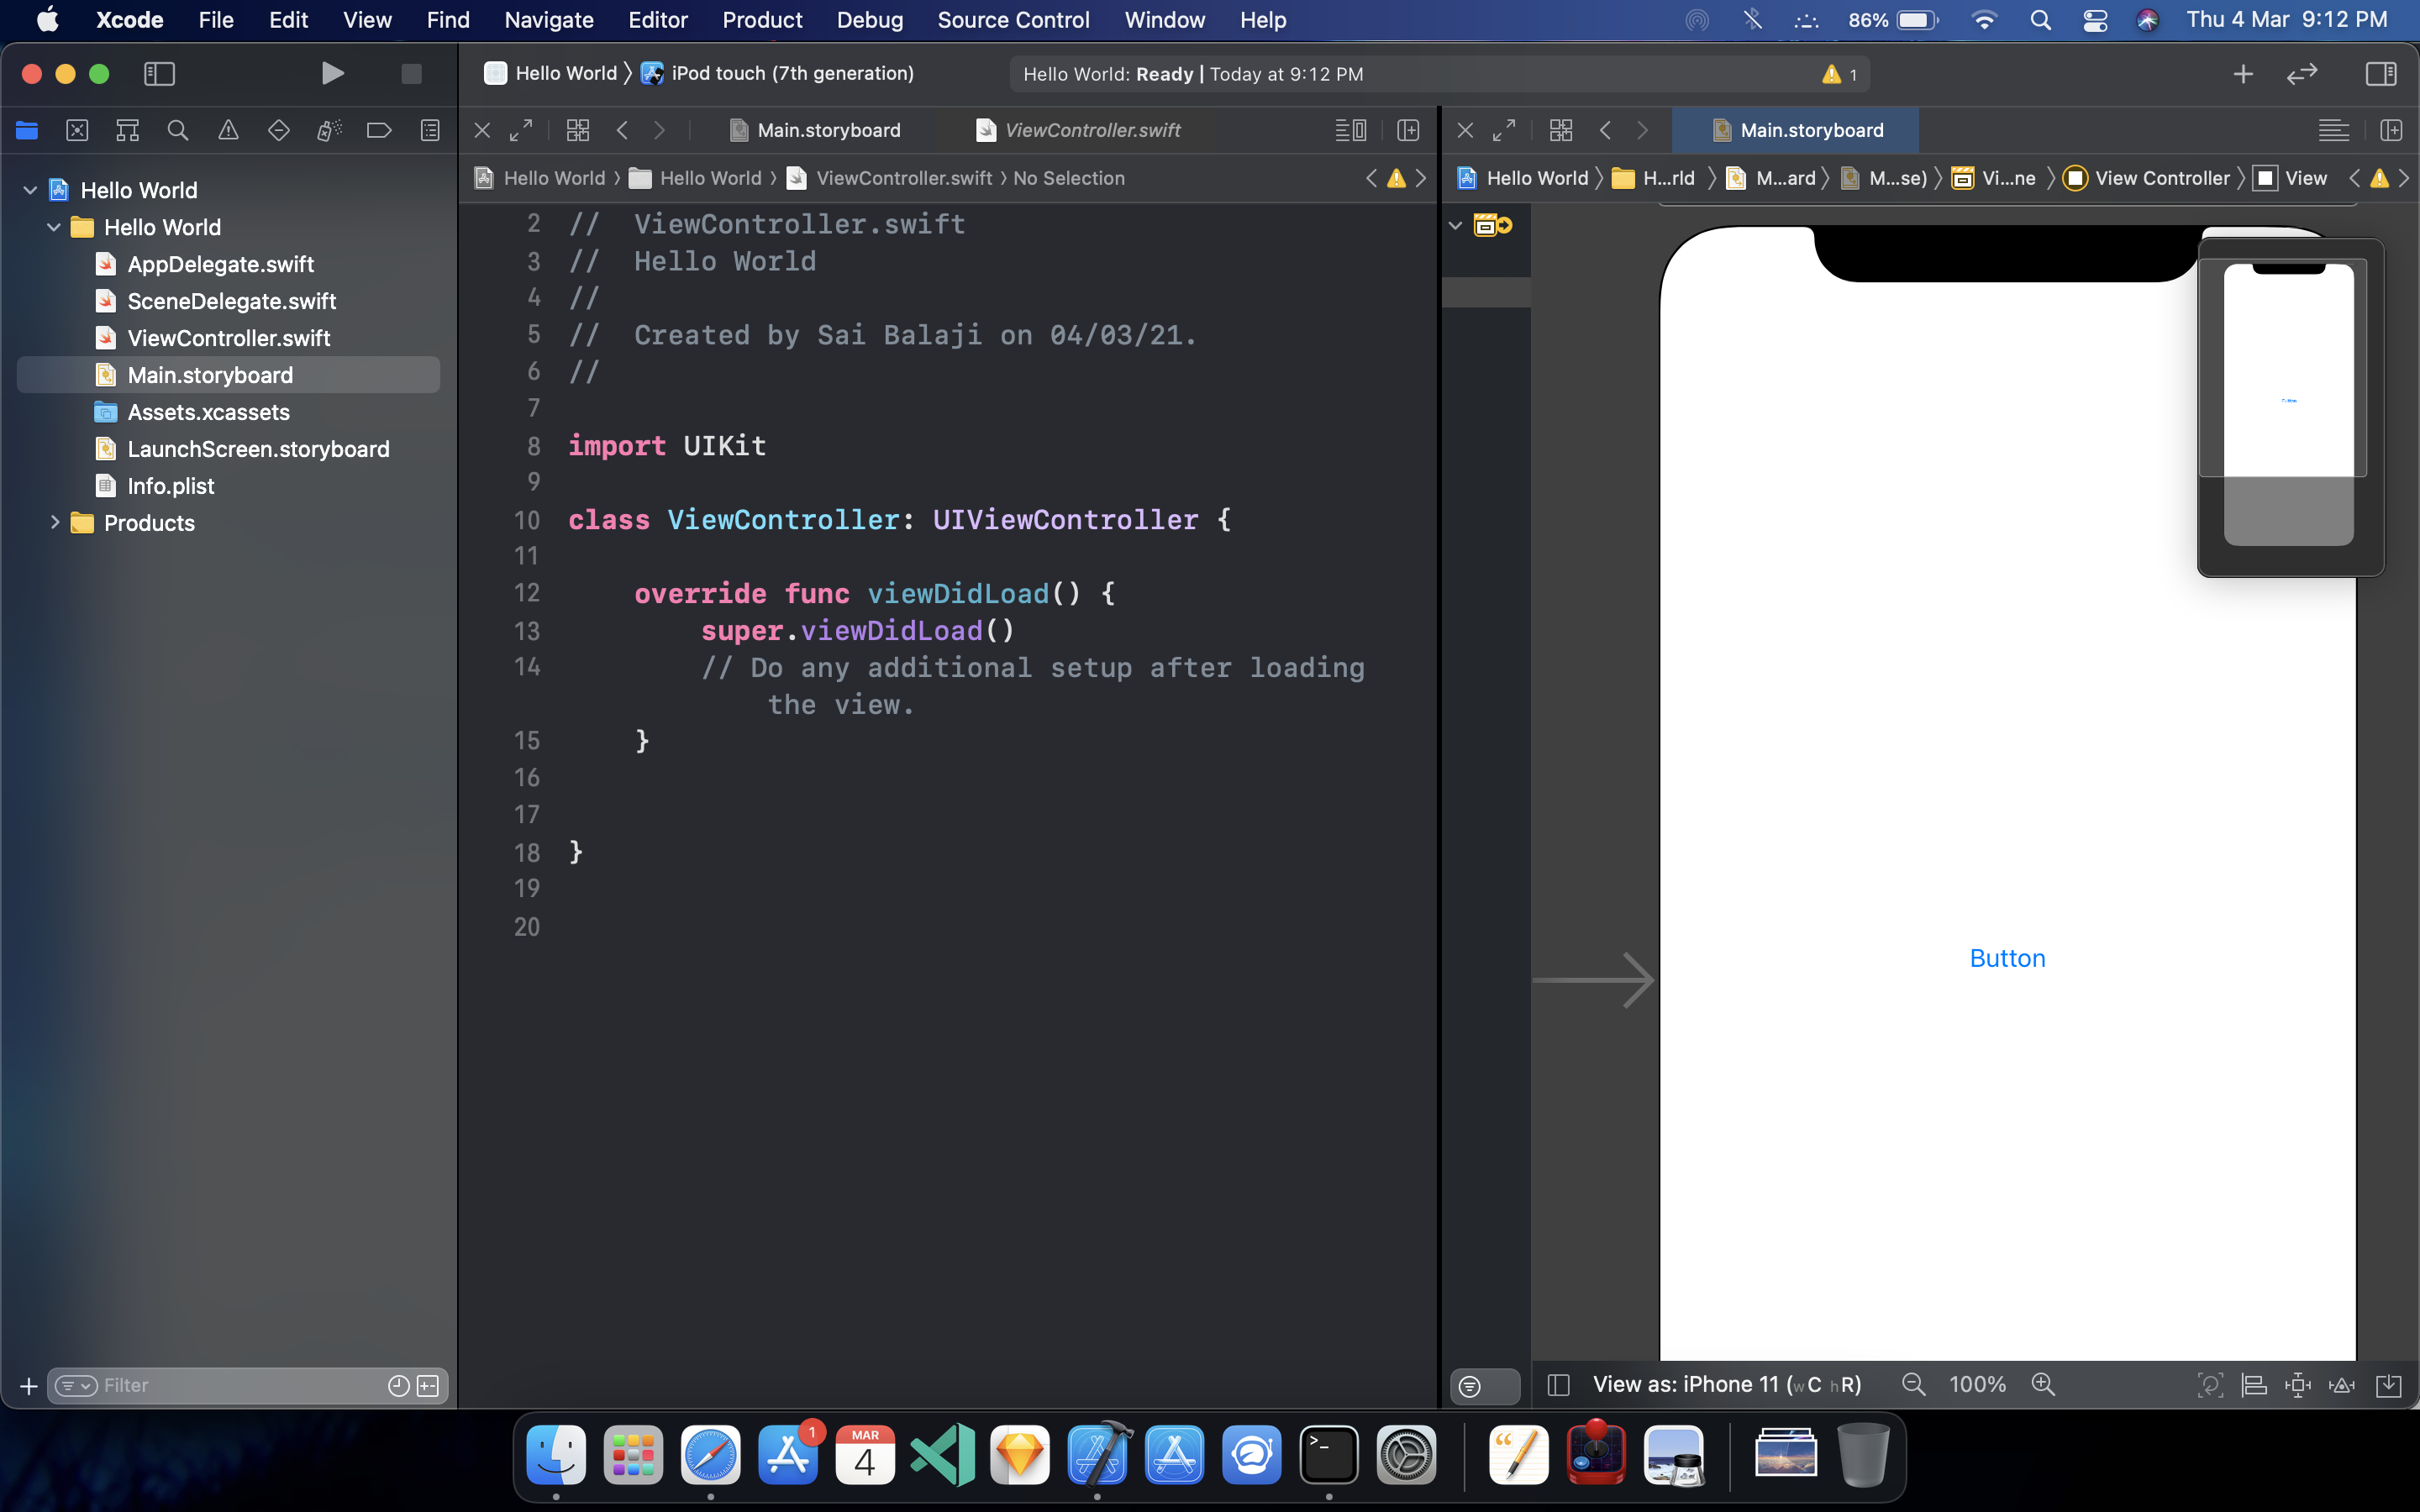
Now click on the button press and hold control key and drag it to the ViewController.swift file at bottom of viewDidLoad()
It will show a dialog as shown below
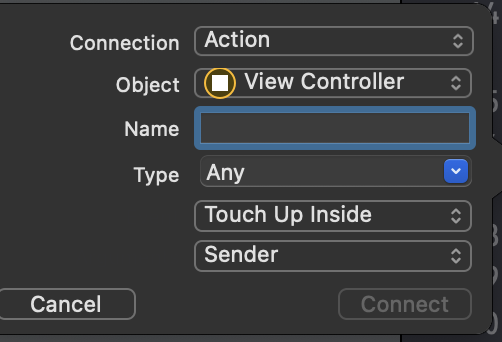
Give a name which will be the name of the method which will be called when the button is pressed and click connect.
It will create a method for you and add the print() statement inside the method it will print hello in console when ever the button is pressed
 @IBAction func btnclicked(_ sender: Any) {

        print("Hello World")

    }
Now press command + R to build and run your app.It will boot the simulator and deploy the app.You can also change the simulators like iPhone 8,iPhone 11 simulator etc.When you press the button it will print HelloWorld in Xcode console.

Let's alert the user with a pop up
Remove the print() in viewDidLoad() method and add the below lines of code
Here we create an instance for UIAlertViewController() and the call addAction() method which is used to specify the buttons added to the alert controller with title "Ok" and style default which means ordinary button and handler nil because we simply add this button to dismiss the alert and not to do any particular task.And we present the UIAlertViewController to the user.
 @IBAction func btnclicked(_ sender: Any) {

        let ac = UIAlertController(title: "Info", message: "You have been alerted", preferredStyle: .alert)
        ac.addAction(UIAlertAction(title: "Ok", style: .default, handler: nil))

        present(ac, animated: true, completion: nil)

    }
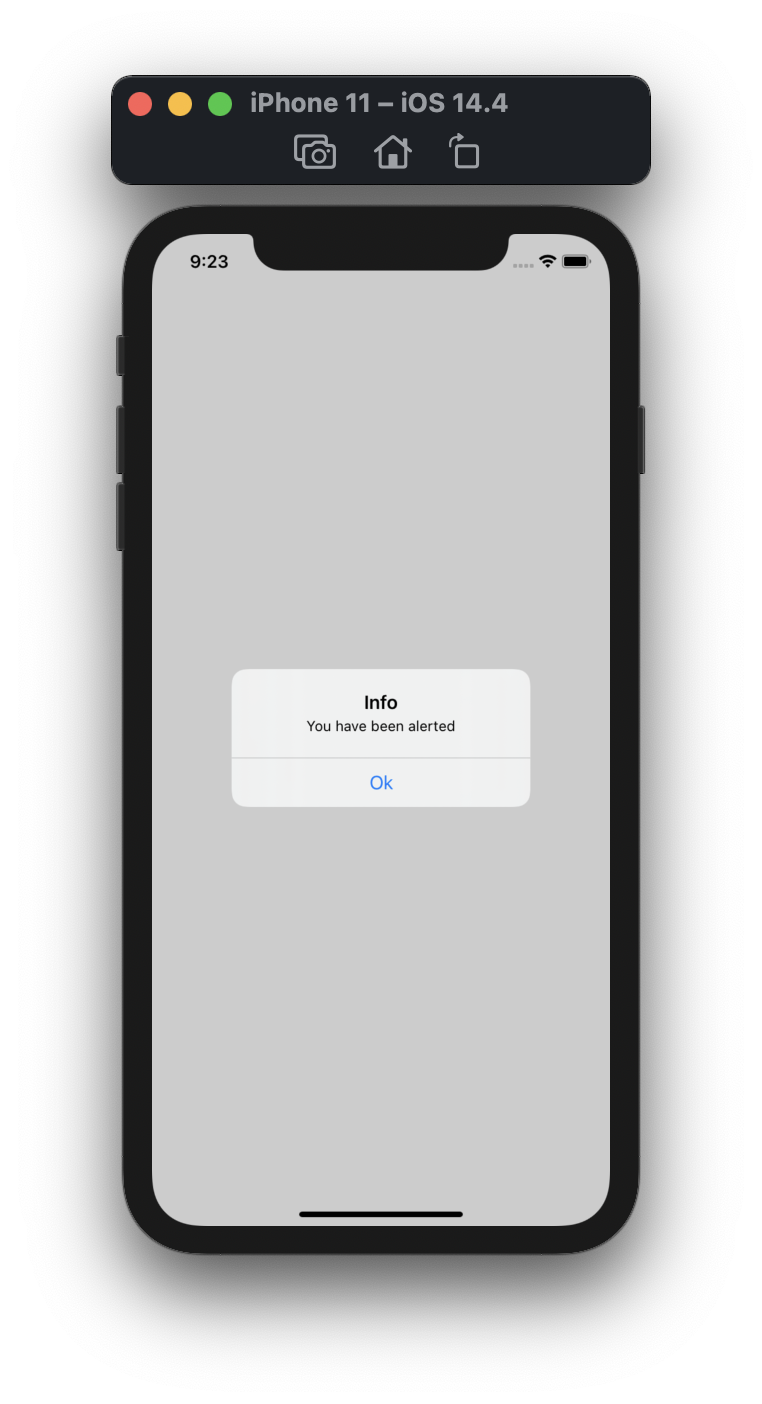
Press Command+R to build and run your app in Simulator now when you press the button it will display an alert when you press "Ok" the alert dialog will be dismissed.
Congratulations you have just made your first iOS app
Before ending this article, I'm giving you a quiz.
Question
Why Apple frameworks uses prefix like UI in UIKit elements like button,label etc.
Thanks for the read 😊