
I want to summaries why you all need to study this article which is about TESTING, We all love to use applications like WhatsApp, Instagram or Gmail and the developers who make these applications, run various test on them to make customer's (your) experience good.
In Unit Testing, individual modules are tested to determine if there are any issues in the code. There are many testing frameworks but the most popular are JUnit and TestNG.
JUnit testing is the unit testing framework for Java. It is developed by Erich Gamma and Kemp deck.
Unit test and source code are put in different folder and Standard Maven Convention is :
src/main/java -> for Java Classes
src/test/java -> for test Classes
Features of using JUnit
- It can test web application without server.
- It executes faster which increases quality.
- It is an open source framework.
- It uses annotations for specifying test.
- It is less complex, simple and takes less time.
- It can be automated which execute code, check results and provide feedback.
Benefits
- Extremely helpful for test driven-envirnment.
- Make code more readable and compatible.
- Standard framework for Java on all IDEs.
- Supports integration with other building systems.
JUnit & Maven
Junit Framework can be integrated with Eclipse, Ant and Maven, but in this article we will be using Maven.
JUnit Test Execution
JUnit test using Maven is executed in an arbitrary order. However there are various annotations used for execution of the tests based of various parameters. To activate this feature, annotate your test class with the @FixMethodOrder(MethodSorters.NAME_ASCENDING) annotation. You can also explicitly set the default by using the MethodSorters.DEFAULT parameter in this annotation. You can also use MethodSorters.JVM which uses the JVM defaults, which may vary from run to run.
JUnit Annotations
Test class contains the Junit tests which are further stored in form of methods.
- @test : identifies method as test method.
- @Before : It is executed before each test and prepare test enviroment.
- @After : It is executed after each test and is used to clean up the environment.
- @BeforeClass : It is executed once before all the tests are started, used to connect to the database.
- @AfterClass : It is executed once all the tests are executed to perform cleanup activity like disconnect database connection.
- @Test (timeout=100) : It fails if the execution takes more than 100 milliseconds.
Prerequisites
1. Eclipse installed with JVM and Maven Package.
Example
OPEN Eclipse to test addition of two numbers
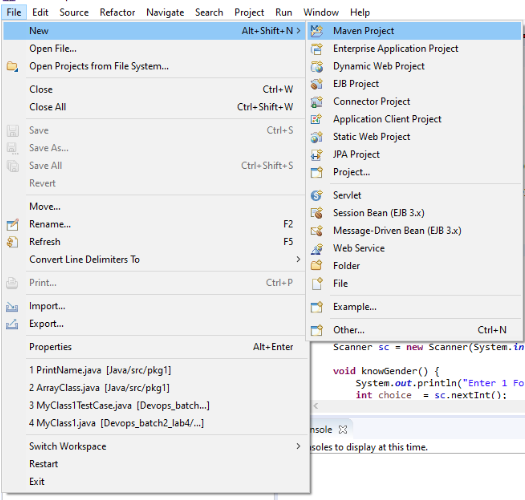
STEP 1 : Go to FILE and then to MAVEN PROJECTS
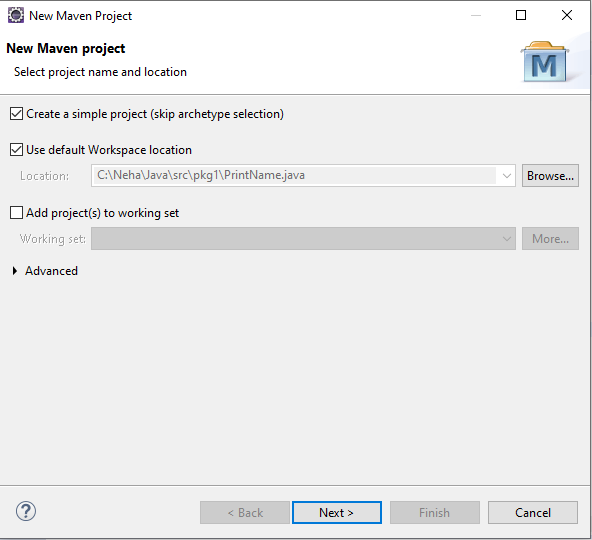
STEP 2 : Create a Simple Project
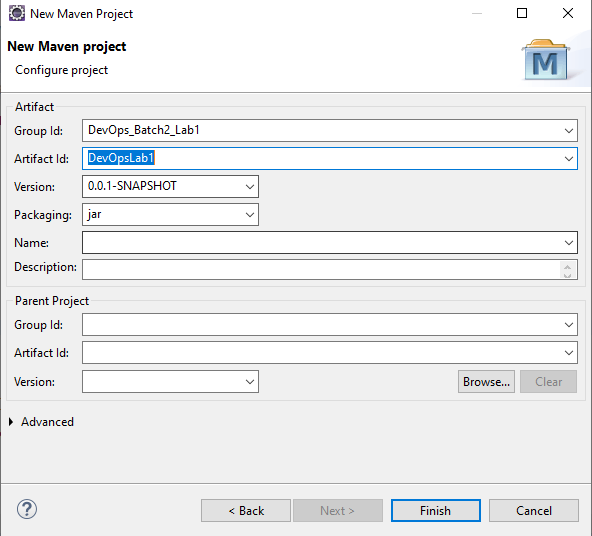
STEP 3 : Give artifact and group id
DevOps_Batch2_Lab1 -> Artifact Name
DevOpsLab1 -> GroupId (VIsible in project)
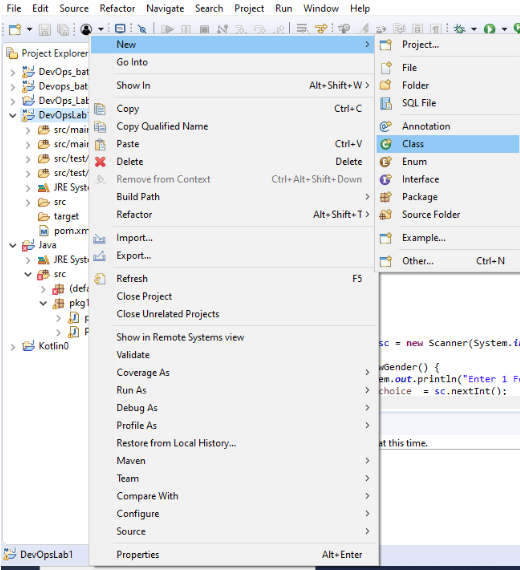
STEP 4 : Go to new and make a new class
STEP 5 : Give Class name
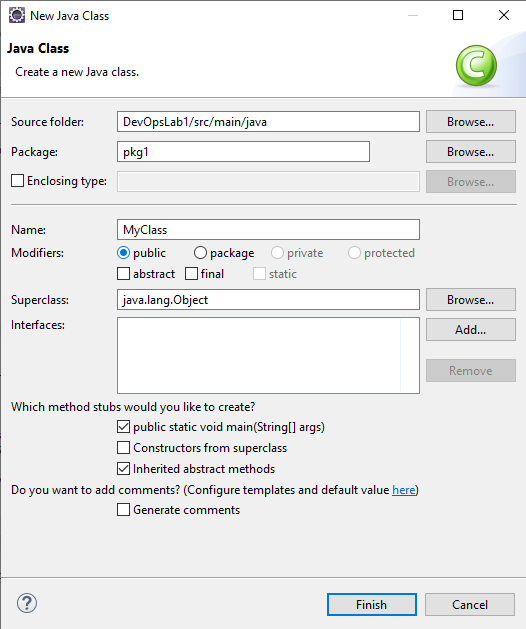
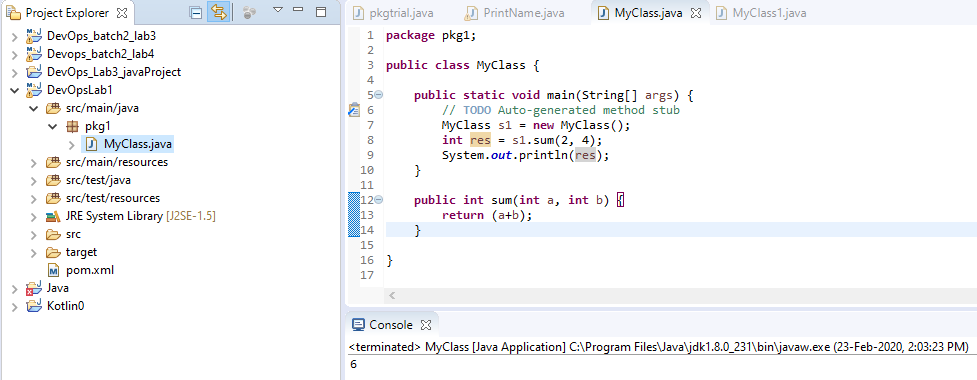
STEP 6 : Write code in java class
package pkg1;

public class MyClass {
	public static void main(String[] args) {
		// TODO Auto-generated method stub
		MyClass ob = new MyClass();
		int res = ob.sum(2, 4);
		System.out.println(res);
	}

	public int sum(int a, int b) {
		return (a+b);
	}
}
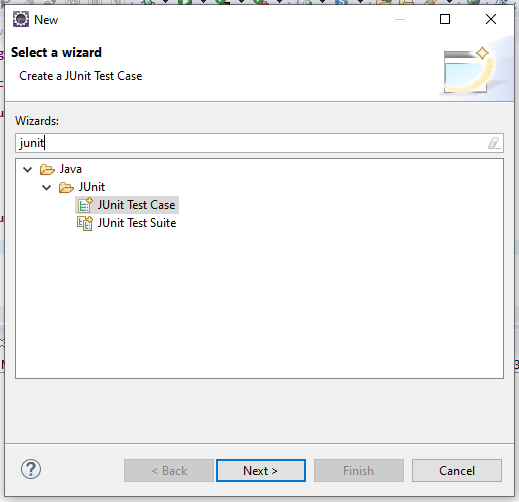
STEP 7 : Make JUnit test class file
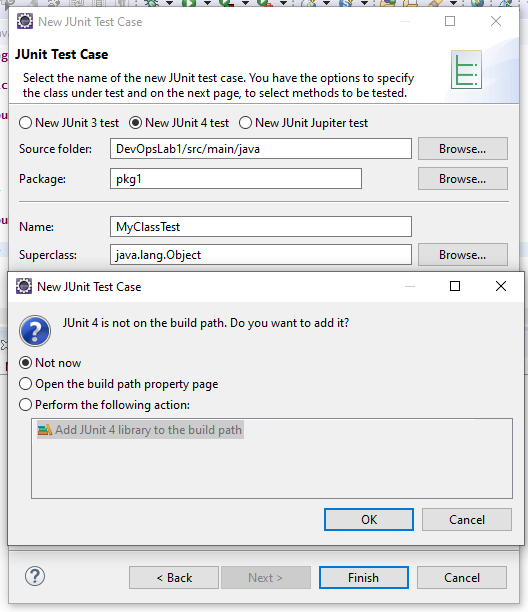
STEP 8 : Give name of junit test class and mark for dependencies.. as not now as we will put them manually.
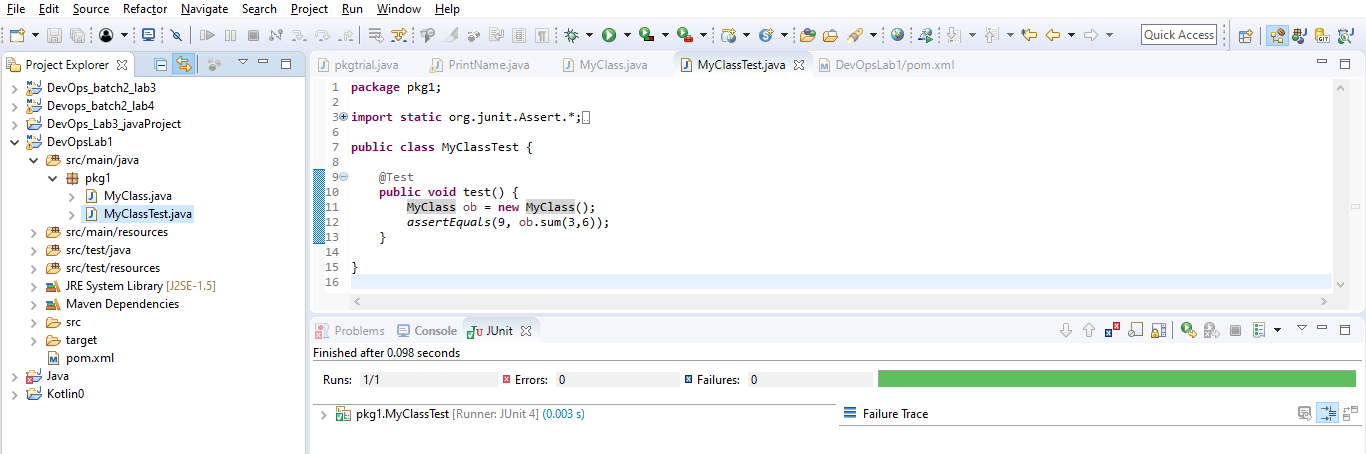
STEP 9 : Write code in Testfile.java
// Part of OpenGenus IQ
package pkg1;

import static org.junit.Assert.*;

import org.junit.Test;

public class MyClassTest {

	@Test
	public void test() {
		MyClass ob = new MyClass();
		assertEquals(9, ob.sum(3,6));
	}

}
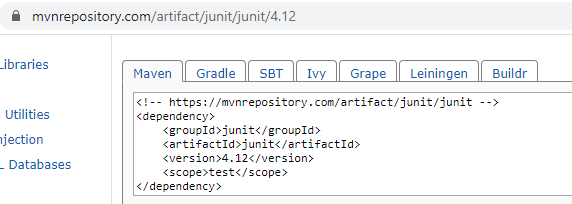
STEP 10 : Taking dependencies from internet and copying them
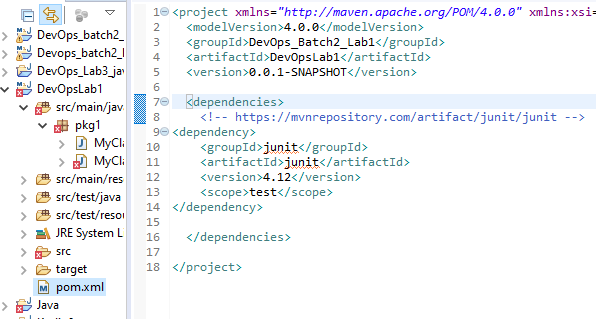
STEP 11 : Putting dependencies in pom.xml
<project xmlns="http://maven.apache.org/POM/4.0.0" xmlns:xsi="http://www.w3.org/2001/XMLSchema-instance" xsi:schemaLocation="http://maven.apache.org/POM/4.0.0 http://maven.apache.org/xsd/maven-4.0.0.xsd">
  <modelVersion>4.0.0</modelVersion>
  <groupId>DevOps_Batch2_Lab1</groupId>
  <artifactId>DevOpsLab1</artifactId>
  <version>0.0.1-SNAPSHOT</version>

  <dependencies>
<!-- https://mvnrepository.com/artifact/junit/junit -->
<dependency>
    <groupId>junit</groupId>
    <artifactId>junit</artifactId>
    <version>4.12</version>
    <scope>test</scope>
</dependency>

  </dependencies>

</project>
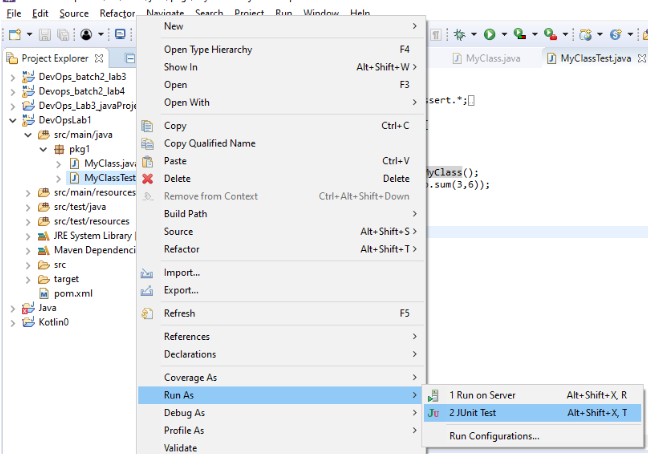
STEP 12: Go to Run as and test JUnit test case
STEP 13 : If it gives all green then it is success
With this article at OpenGenus, we will have a complete idea of JUnit Testing using Maven. Enjoy.