
This article presents an overview to develop a Minesweeper game from scratch with Graphical User Interface (GUI) using Python.
Contents
- Introduction
- Graphical User Interface of the game.
- Adding events triggered by left-click on a cell.
- Marking cells as mines.
- Displaying game results.
Introduction
- Minesweeper is a puzzle video game.
- The game consists of a grid of hidden square cells with mines randomly scattered throughout the board.
- The cells are opened when clicked and if the user clicks on a cell holding a mine then the user loses.
- The user has to clear the grid without setting off any mine.
- To help, each cell which is not a mine, when clicked on displays the number of mines in the surrounding eight cells.
- Once the user is sure that a cell is a mine, the user can right-click on that cell to mark it as a bomb. A bomb can be above, below, to the left, to the right or in the cells immediately diagonal to the given cell.
- The user wins the game if they clear all the empty cells without triggering any bombs.
Strategies to win
- Depending on the game mechanics- the first cell the user clicks on will never have a mine or bomb underneath it no matter whichever cell they click on. In another variation the first cell could be a bomb and hence it's dependent on luck.
- Focus on clearing the center of the grid first before going to the cells adjacent to the walls, this is because these cells have less number of neighbours and hence less information is obtained when opened.
- Identify patterns - as one keeps playing the game, they can get to see the number patterns and recognize where the mines are placed. There are two basic patterns that can be combined to form all the other patterns:
- 1-1 pattern : Whenever the 1-1 pattern starts from an edge, the third square over is empty, because the first 1 is touching two squares out of which one must contain a mine, since the second 1 is also touching a third square, it must be empty.
- 1-2 pattern : In the 1-2 pattern, the third square over is always a mine.
An example user interface of a Minesweeper game:
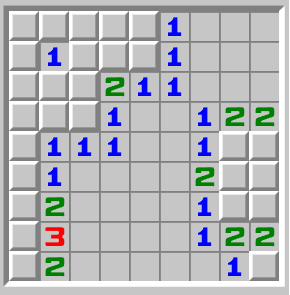
GUI of the game
- We use tkinter module to develop the graphical user interface of the game.
- The basic element in the GUI would be a window, a window is an instance of the class Tk.
- The window named 'root' will act as the top level window object and can contain all the other widgets like buttons, text labels and so on.
- Thus it acts as a container for all the other widgets. To create a window, instantiate the Tk class.
root = Tk() - To actually run and display the window, we need to run the Tkinter event loop. Now we set the title of the window and the background color and the empty window would look like this :
Title
root.title('Minesweeper')
Background color
root.configure(bg='#ffcc99')
To run the Tkinter event loop
root.mainloop()
Empty window with background color:
![]()
- Now inorder to structure the buttons and other widgets to be added, we make use of frames.
- The frame is an area that can contain other widgets and it is used to organize layouts.
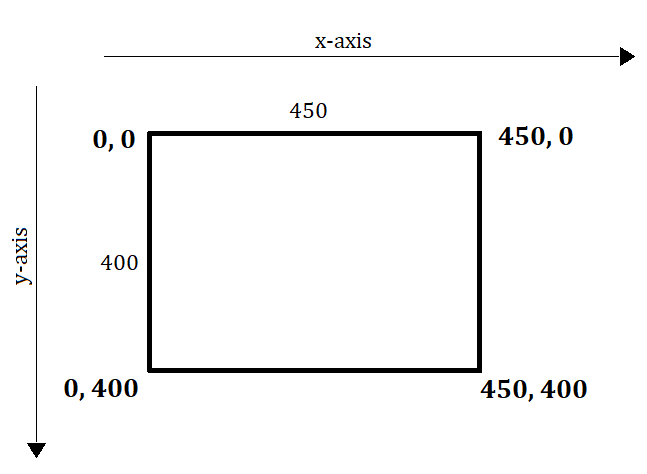
- The frames are created and placed at the pixel positions as follows.
- Assuming window dimensions as 400x450 (widthxlength)
Code to create and position 3 frames in the window
top_frame = Frame(root, bg='#ffcc99', width=700, height = 140)
top_frame.place(x = 0, y = 0)

left_frame = Frame(root, bg='#ffcc99', width = 250, height = 560)
left_frame.place(x = 0, y = 140)

center_frame = Frame(root, bg='#ffcc99', width = 500, height = 560)
center_frame.place(x=250, y = 140)
Final layout of the frames-

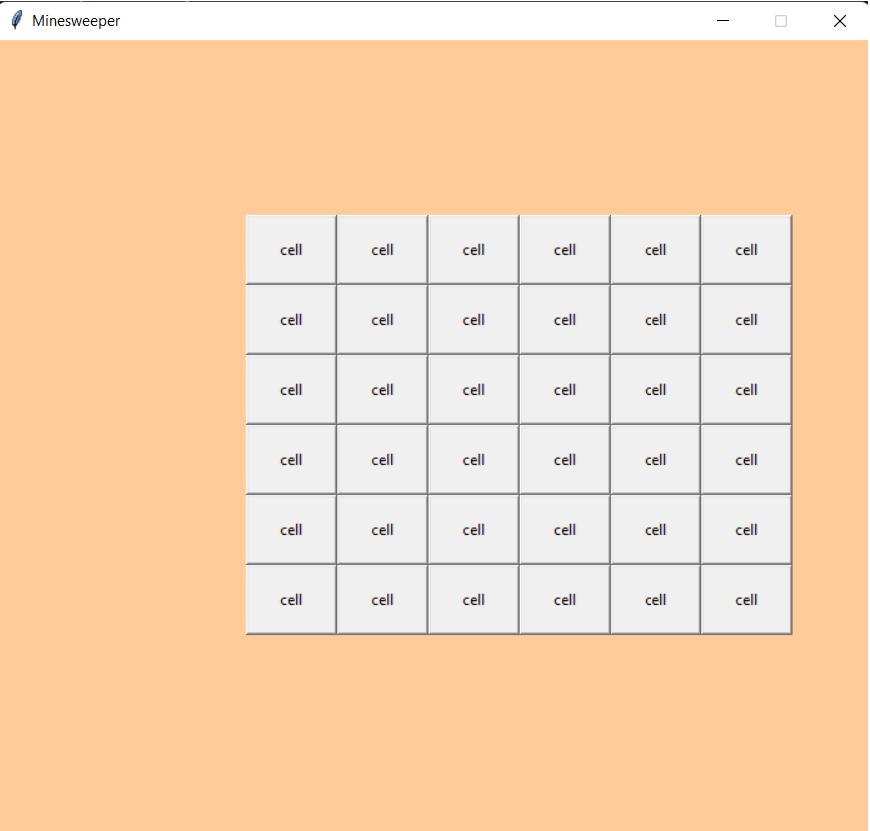
- Now we add the Minesweeper game cells using the Button class, to store additional information we create a new class called 'Cell' and populate the center frame with the cells as follows.
Events triggered by left-click
- Now we add the events to the buttons. Events are key presses, mouse clicks and so on.
- The left mouse button is defined by the event
, the rightmost mouse button by and the middle button by - To bind a method to an event, the bind function is used.
widget.bind(event, handler) - 'btn' is a button instance and the 'right_click_actions' is a method. So to bind the method 'right_click_actions' to the event of right click on the button 'btn',
btn.bind('<Button-3>', self.right_click_actions) - Now we need to randomly convert a few cells into mines using a method. This is done by importing the random module and using the sample function.
- We have to calculate the number of mines present around a given cell. To calculate that we have to get the surrounding cells of the given cell.
- If the given cell position is (x, y), we can get the surrounding cells by accessing the cells in the following coordinates:
(x-1, y-1)
(x-1, y)
(x-1, y+1)
(x, y-1)
(x+1, y-1)
(x+1, y)
(x+1, y+1)
(x, y+1)
For example,
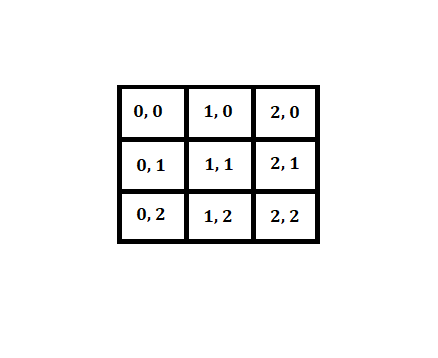
Example code to find all the surrounding cells of a given cell:
def surround_cells(self):
    surrounding_cells = [
        self.get_cell_by_axis(self.x - 1, self.y -1),
        self.get_cell_by_axis(self.x - 1, self.y),
        self.get_cell_by_axis(self.x - 1, self.y + 1),
        self.get_cell_by_axis(self.x, self.y - 1),
        self.get_cell_by_axis(self.x + 1, self.y - 1),
        self.get_cell_by_axis(self.x + 1, self.y),
        self.get_cell_by_axis(self.x + 1, self.y + 1),
        self.get_cell_by_axis(self.x, self.y + 1)
        ]

    surrounding_cells = [cell for cell in surrounding_cells if cell is not None]
    #print(surrounding_cells)
    return surrounding_cells
-
Now we remove the cells whose values are not available as it's not necessary that all the 8 surrounding cells would exist, for example for the cell (0, 0) the surrounding cells would be (0, 1), (1, 0) and (1, 1) only.
-
Now we have to find out the amount of mines in these surrounding cells to display in every clicked cell.
-
We do this by checking if each surrounding cell of a given cell is a mine or not using the previously set 'is_mine' property of the Cell class.
- If the cell is a mine then 'is_mine' will be set to True.
- If not then is_mine will be set to False.
- 'mines_len()' method returns the number of mines in the surrounding cells of a given cell.
def mines_len(self): i = 0 for cell in self.surround_cells: if cell.is_mine: i += 1 return i -
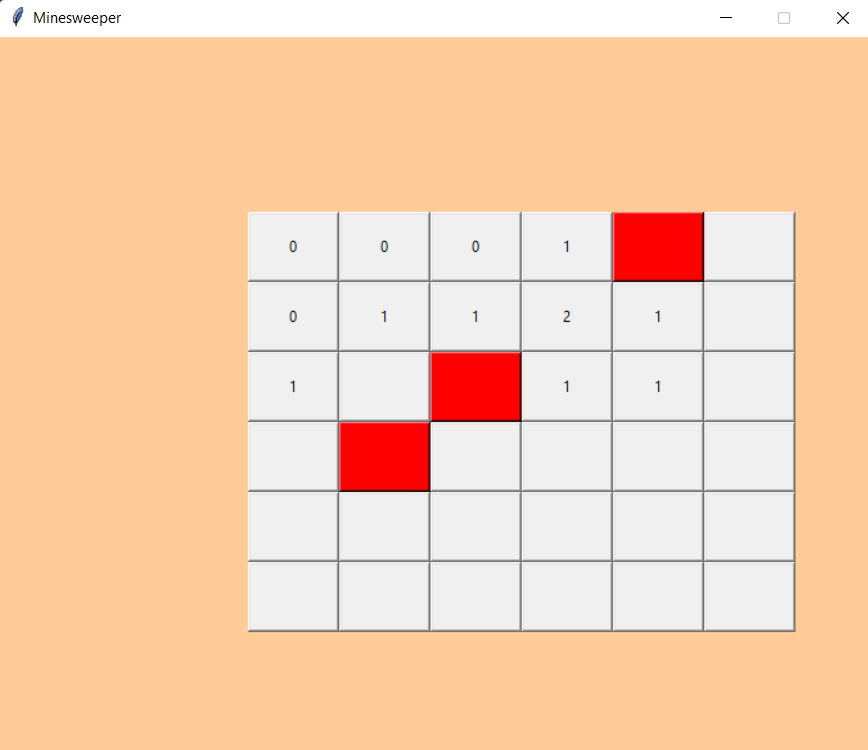
Now we can display the number of mines in the surrounding cells of a given cell in the cell itself on clicking it, if the cell is a mine then the red color background will be displayed in the cell instead.
-
Now we add the functionality of automatically displaying all the cells around a clicked cell which has zero mines surrounding it.
-
To do this, whenever a cell has zero mines surrounding it, we just access and display all the surrounding cells using the coordinates mentioned above.
- In the following code, we just display or open all the surrounding cells of a cell if the cell's 'mines_len' is 0, it means there are no mines around the cell.
if self.mines_len == 0:
    for obj in self.surround_cells:
        obj.show_cell()
- Now we display the cell count - the number of cells left unopened in the grid excluding the mine cells. We can do this by creating a variable which holds the original grid size. Now whenever an unopened cell is left-clicked on, we decrement the variable and display it as the cell count.
cell_count = 27
- Decrementing the 'cell_count' if the cell had not been open previously:
if not self.is_opened:
    Cell.cell_count -= 1
Marking cells as mines
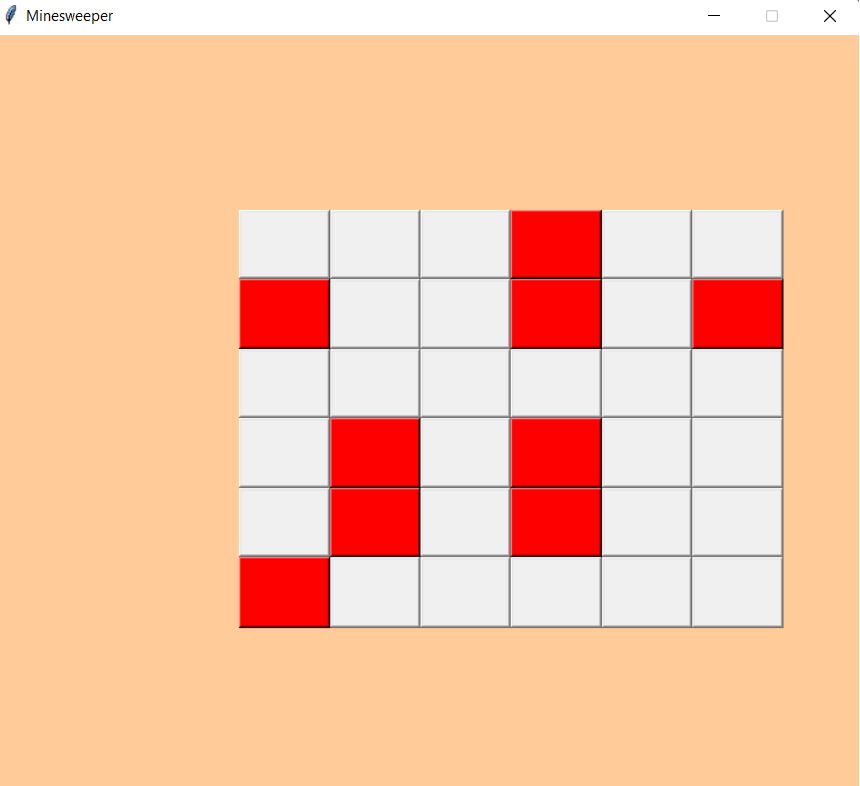
- Once we know that a cell is a mine we need a way to remember it so that we don't click on it, we can do this by changing the color of the cell whenever the cell is right-clicked on.
- We also need to undo the background color change when the user right-clicks on a cell already marked as a mine.
- To do this, we can change the background color of the cell whenever a cell is right-clicked on and mark the cell as a mine.
- Now whenever a cell is right-clicked on, we check if the cell is already marked as mine.
- If it is, then we undo the color change.
- If it is not marked as a mine or 'is_mine_cell' is not set to True already then we change the background color to mark it as a mine.
-
If 'is_mine_cell' is set to True then it means the cell was right-clicked on and background color is changed to orange and the cell is marked as a mine.
-
By default 'is_mine_cell' is False for every cell.
self.is_mine_cell = False -
Now if the cell is already marked as a mine and the user right-clicks on it we have to undo or reset the background color and set 'is_mine_cell' to 'False'.
-
The default colour for buttons is SystemButtonFace, so we reset the background color and set 'is_mine_cell' to 'False'.
self.cell_btn.configure(bg='SystemButtonFace')
self.is_mine_cell = False

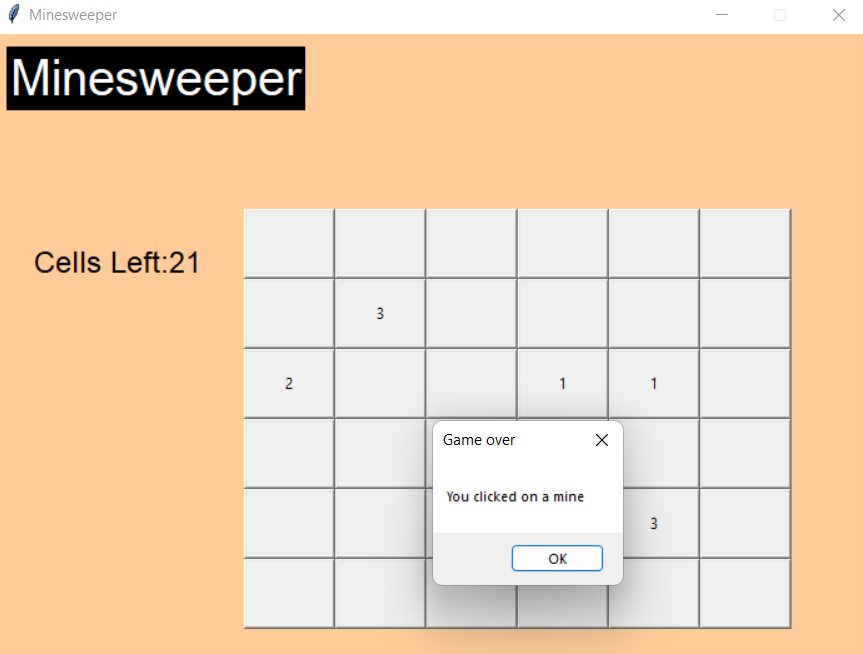
Displaying game results.
- We need to display a message if the user left-clicks on a mine that they have lost the game.
- If the cell-count reaches zero then it means that all the cells which are not mines have been discovered by the user and thus the user wins the game.
- To create and use the Windows user interface dialogbox, we use the ctypes foreign function library.
- MessageBoxW method displays a dialog box consisting of system icon and set of buttons.
ctypes.windll.user32.MessageBoxW(0, 'You clicked on a mine', 'Game over', 0)
If cell_count is equal to zero it means the user has won the game, congratulations message :
ctypes.windll.user32.MessageBoxW(0, 'Congratulations! You won!', 'Game over', 0)
Get the Complete Code: GitHub: minesweeper.