
Flutter has been one of the buzz word around in recent times. If you are in the field of Software development or to be more specific, Mobile App Development. No doubt, you must have heard about it at least once.
Why Flutter is gaining so much attention ?
There are many reasons of it but one of the biggest reason is, it has been developed by Google. And if something is released by a tech giant like Google, it's surely will get attention. Another reason is that, it's a powerful cross platform app development tool. Although its not the first one in the market, there had been many such tools including Xamarin and React Native. But every tool has some pros and cons and thats why it's development is still evolving.
Introduction to Flutter
As mentioned before, Flutter is a cross platform app developemnt tool developed by Google. Cross Platform means, one code of flutter has the ability to build apps for various platforms like Android, IOS and even Web.
Most of the people usually get confused that Flutter is a language, but NO, flutter is NOT a language. Flutter is a tool set and the language used id DART.
Dart is also developed by Google and shares some features as Kotlin. It is also an Object Oriented, class based language, and supports various things as other object oriented languages. It can also trans-compile into Javascript code.
The major concept of Flutter is build around Widgets. A widget can be anything, from a simple button to the whole screen or even the whole App. So, in easy words, Every thing in Flutter is a Widget
Some of the benefits of Flutter is :
- Fast Development Cycle
- Fast UI rendering
- Unique Design
- Native app performance
- Hot Reload and Restart
- Easy to learn
- Supported by Google
- Open Source Code
Setup Flutter on your machine
Things you need
-
Flutter : The best and the recommended way to install and setup Flutter on you machine can be found on this link. Please follow the installation guide thoroughly and don't skip.
-
Android Studio : Now, there are many developers who prefer Visual Studio Code for Flutter development because it's light weighted and powerful code editor. But I personally prefer Android studio because it comes with the Android toolchain, which is needed to run any Android app on a device and also for some Android customizations like setting proper launcher icon for the app or using the Android emulator for testing your app. So basically, Android studio gives you a complete environment to develop apps easily.
-
Xcode : If you are on a Mac, you should install Xcode, which you can get from the app store here. You will be needing Xcode to run and test iOS side of your Flutter app as along with it comes the iOS simulator.
Note : If you are targeting to develop an app for both iOS and Android, You should go for a Mac, as you can't test your app for iOS on windows. Windows can only help you with you android app developement.
Let's Start with our first App
Before starting our first app make sure you have, all the dependencies installed, to check that, open your terminal and write:
flutter doctor
If there comes any error try to fix it by going through the setup tutorial above or serch it on Google.
Now, start your IDE.
-
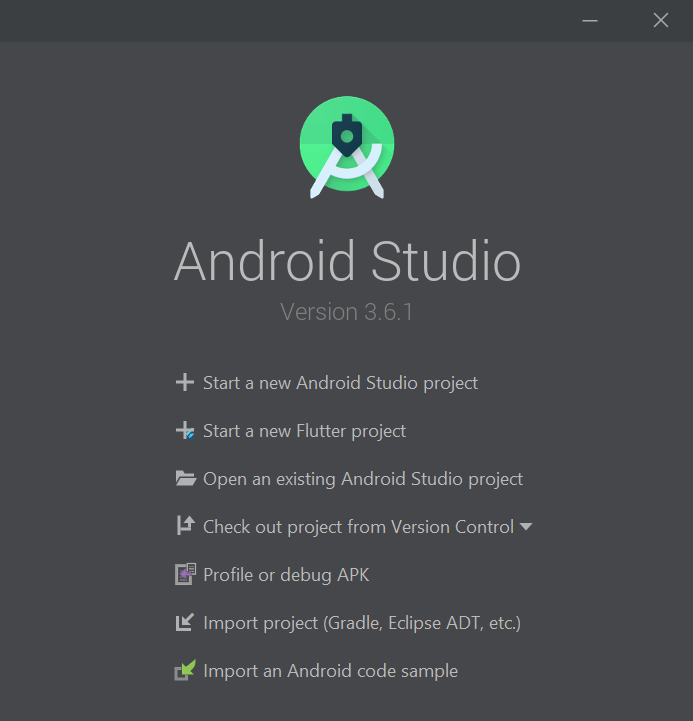
In Android Studio, you can start a new Flutter project by clicking on the Start a new Flutter project option.
-
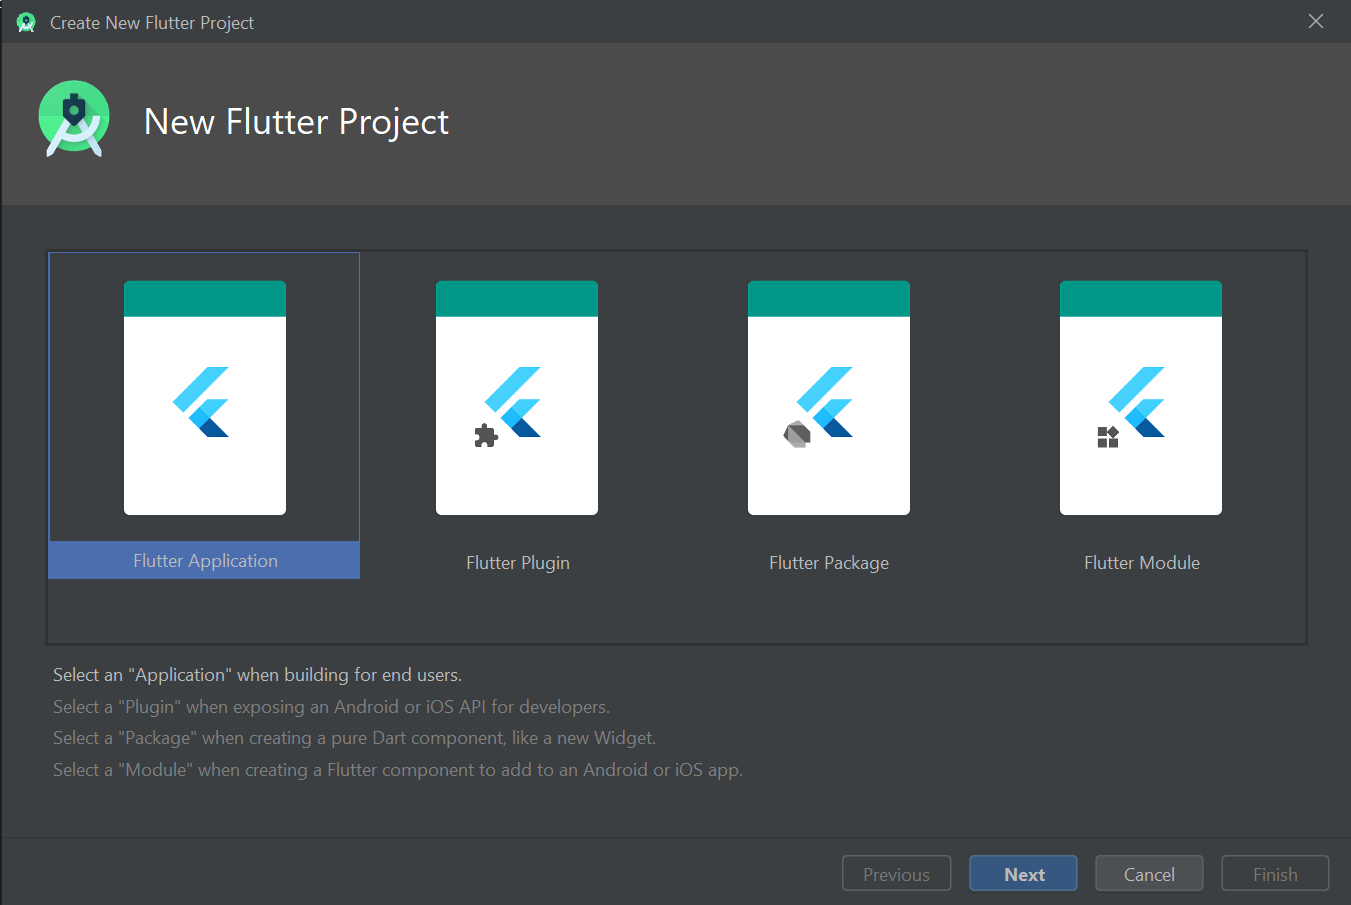
Then select Flutter Application option and click Next.
-
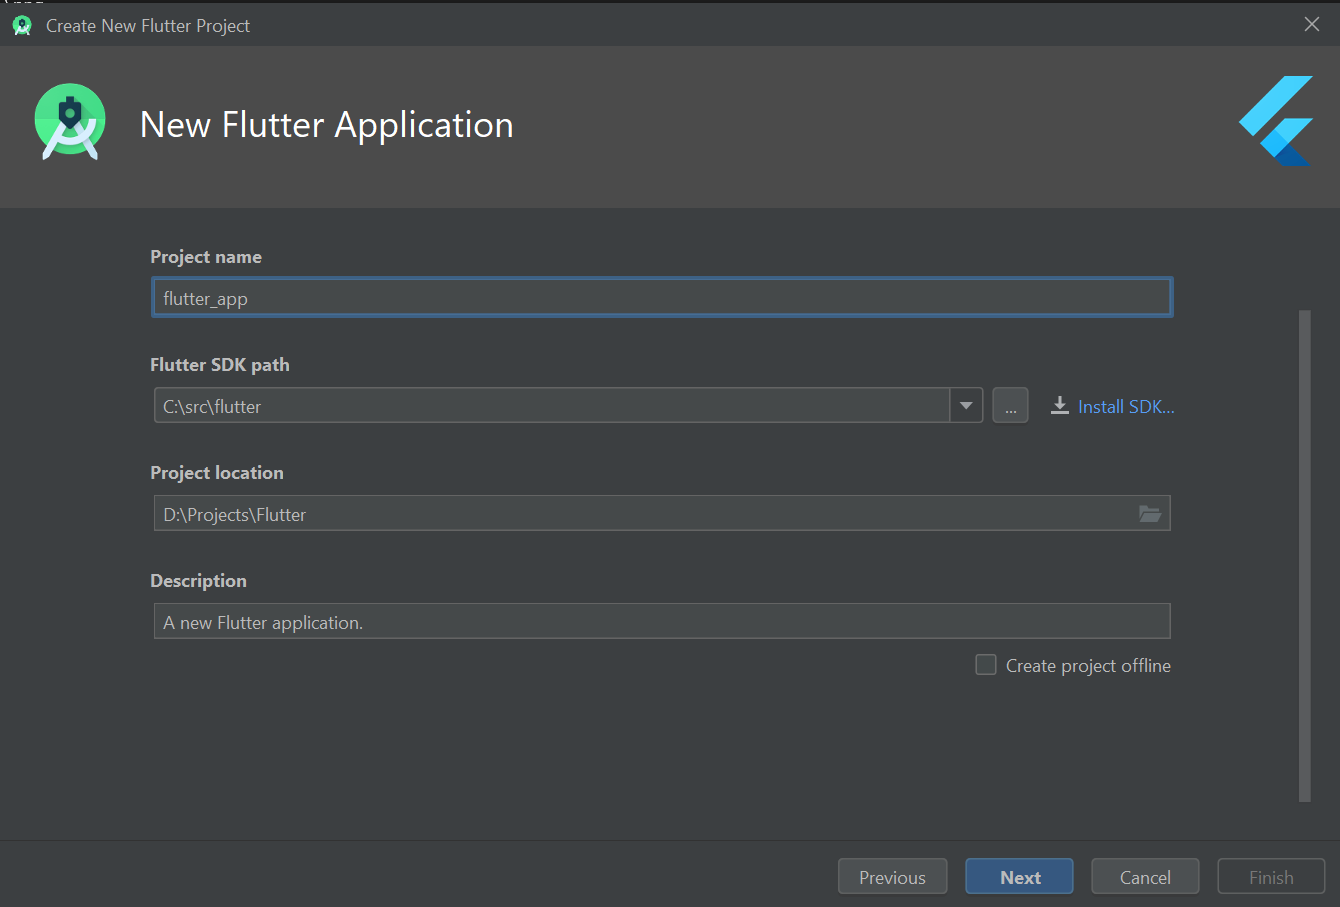
Enter the name of your app in Project name field. You need to provide the path where you placed your "flutter" folder, downloaded from GitHub in the Flutter SDK path. Then, specify where you want to store this Flutter project. After that you can provide a description of the project in the Description text field. Then, click on Next.
-
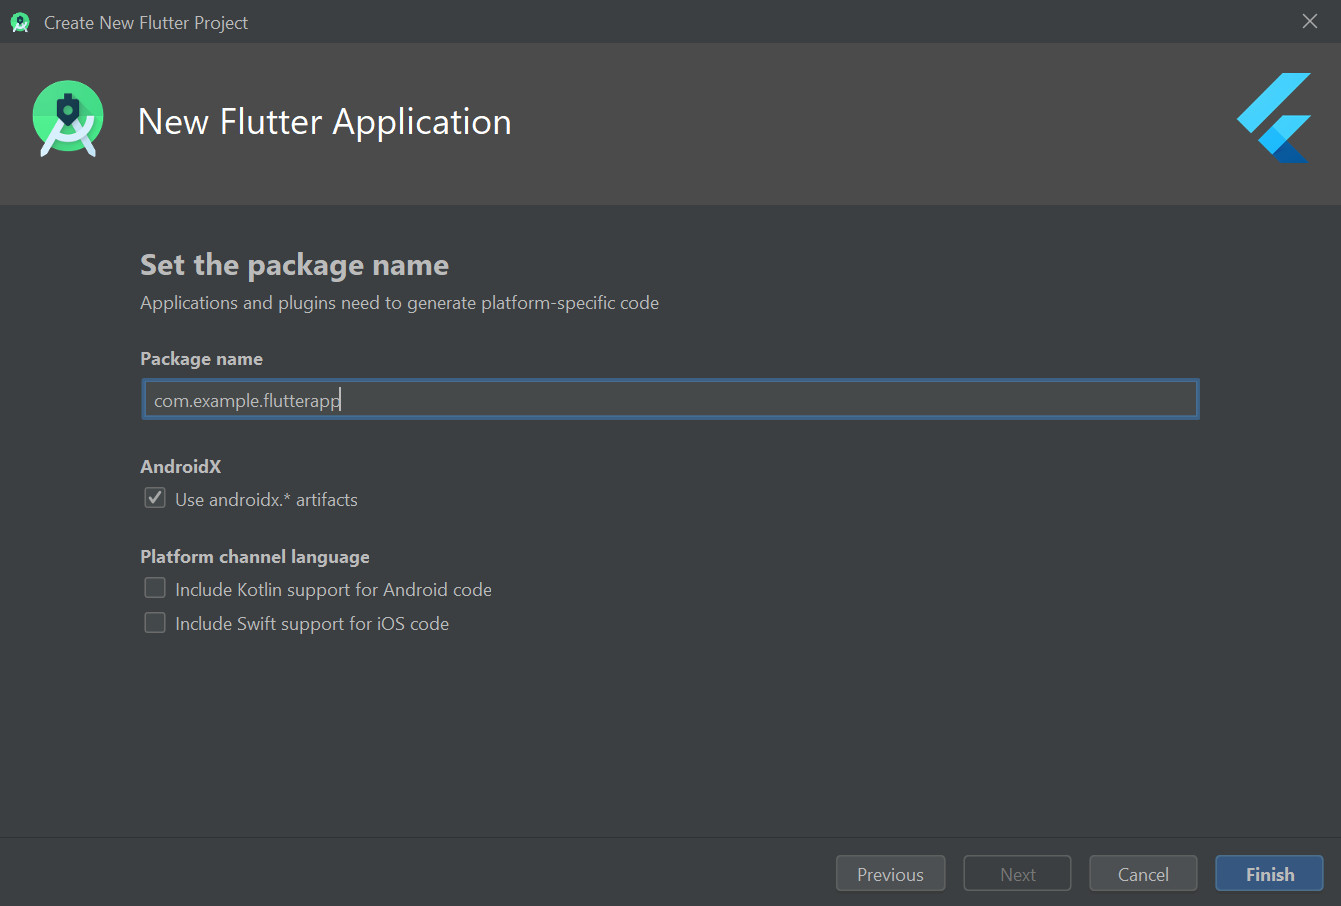
Now, Enter Company Domain in the field. If you do not have any company domain, then you can provide any name of your choice and end it with a .com. This domain is used to create a unique Package name of the app. Now, click on Finish and wait for the project build to finish.
-
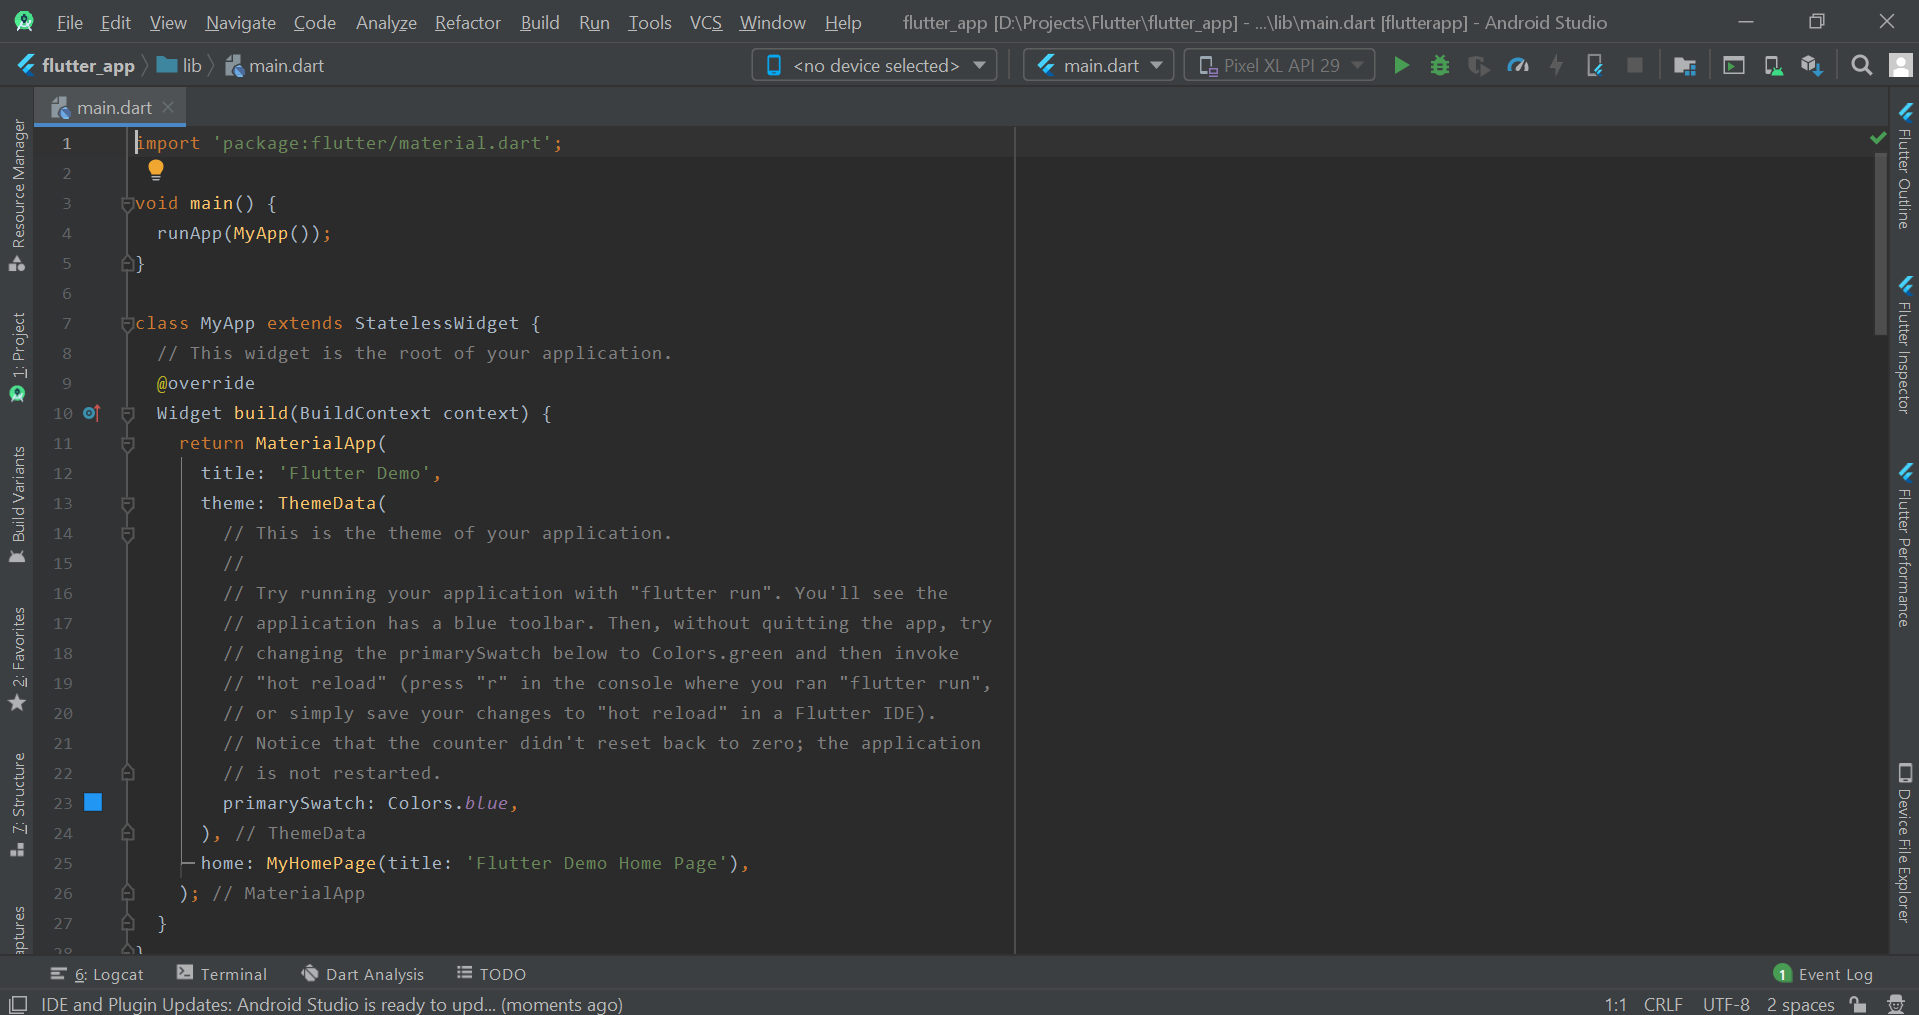
After the build gets over, you will reach the following screen where you will see a big chunk of code written.
-
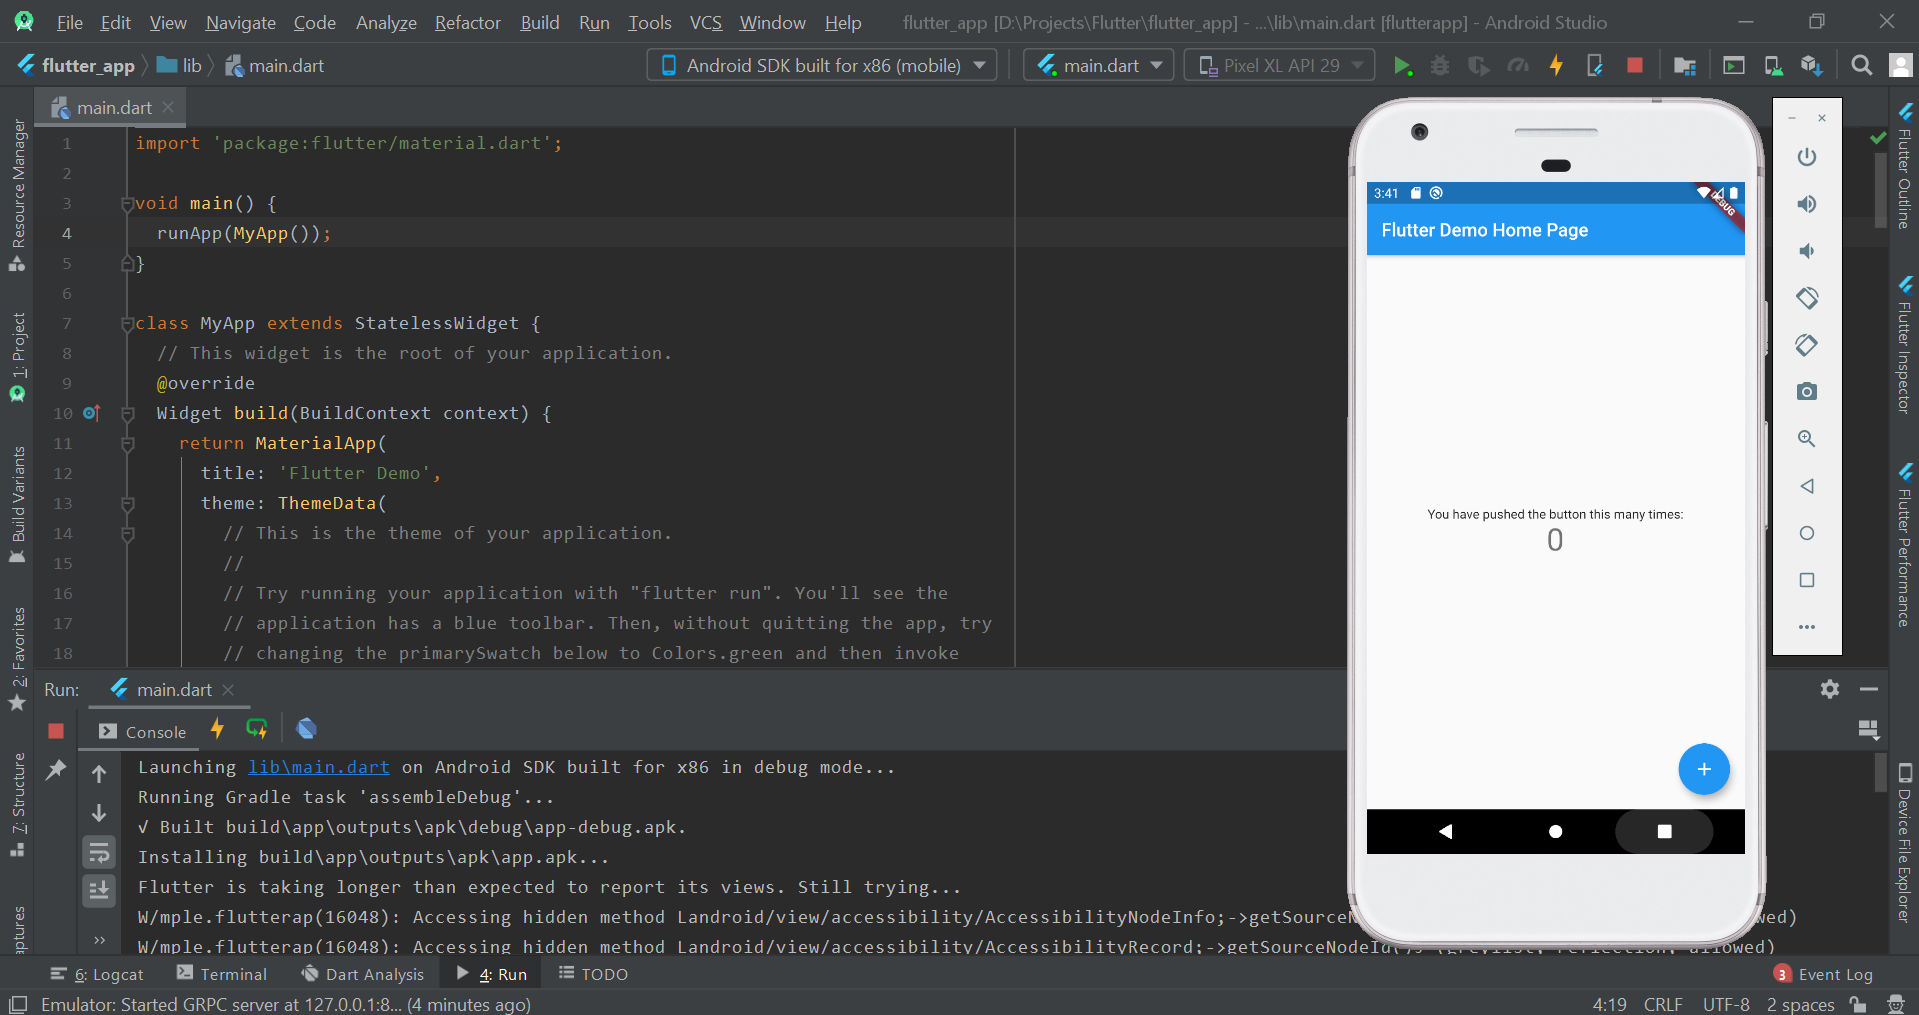
Now, if you want to run the app on any device or emulator, first click on the dropdown button where it is written no devices selected on the top menu bar and then select the device you want the app to run on. (You must have installed Your Android Simulator from AVD Manager)
If you are running on a real device then first connect your device to your system and enable "Developer options" in your phone's setting and turn on "USB debugging", then run the app.
-
To run the app, click on the Green play button on top, to start your first flutter app. In few minutes, the app will start in your emulator or device.
-
It would take some time to start for the first time, after it it would work in a flash.
-
In this app, you will see that when you click the Blue colored + button, the count on screen will increase. This is basically a template app which comes pre-written in Flutter.
In this article at OpenGenus, we covered a simple counter app which come pre-written when you start a new flutter project. For, now you may not be understanding the code and how this app is working, but in the next article we will dive deep into flutter and understand how it works.