
Get this book -> Problems on Array: For Interviews and Competitive Programming
In the fast-paced world of web development, an application's ability to perform CRUD operations (Create, Read, Update, Delete) is essential for a robust and user-friendly experience. In this OpenGenus guide, we will enhance our task tracking app by implementing update and delete functionality using Express.js. This expansion will provide users with a more dynamic and interactive task management system.
How to Use the Task Tracking App
Our task tracking app offers a straightforward user interface for managing your tasks. Here's a quick guide on how to use it:
- Add a New Task:
- Click on the search box.
- Type the task you want to do.
- Click the "Add Task" button to add the task.
Add Task
- Delete a Task:
When you're finished with a task or no longer need it, locate the task in the list.
Click the "Delete" button next to the task to remove it from the list.
Delete Task
Now, let's dive into the step-by-step process of building this interactive task tracking app.
Prerequisites:
To follow along with this tutorial, you’ll need to have the following installed on your machine:
Node.js: You can download it from the official website (https://nodejs.org/).
npm: Node.js comes with npm, the Node Package Manager, pre-installed.
Let’s get started!
Step 1: Set up the project
Create a new directory for the project and initialize a new Node.js project using npm:
mkdir task-tracking-app
cd task-tracking-app
npm init -y
Step 2: Install dependencies
We’ll be using Express.js as our web framework for this project. Install it along with other necessary packages:
npm install express body-parser
- express: A fast and minimalist web framework for Node.js.
- body-parser: Middleware to parse incoming request bodies.
Step 3: Project structure
Create the following directory structure for our project:
task-tracking-app
├── node_modules/
├── public/
│ ├── index.html
│ ├── app.js
├── .gitignore
└── package-lock.json
└── package.json
└── ├── app.js
Step 4: Implement the public folder
In the public directory, create a file named index.html to define the Task output interface:
<!-- public/index.html -->
<!DOCTYPE html>
<html lang="en">
<head>
  <meta charset="UTF-8">
  <meta name="viewport" content="width=device-width, initial-scale=1.0">
  <title>Task Tracking App</title>
</head>
<body>
  <h1>Task Tracking App</h1>

  <ul id="taskList"></ul>

  <form id="taskForm">
    <label for="taskInput">New Task:</label>
    <input type="text" id="taskInput" required>
    <button type="submit">Add Task</button>
  </form>

  <script src="app.js"></script>
</body>
</html>
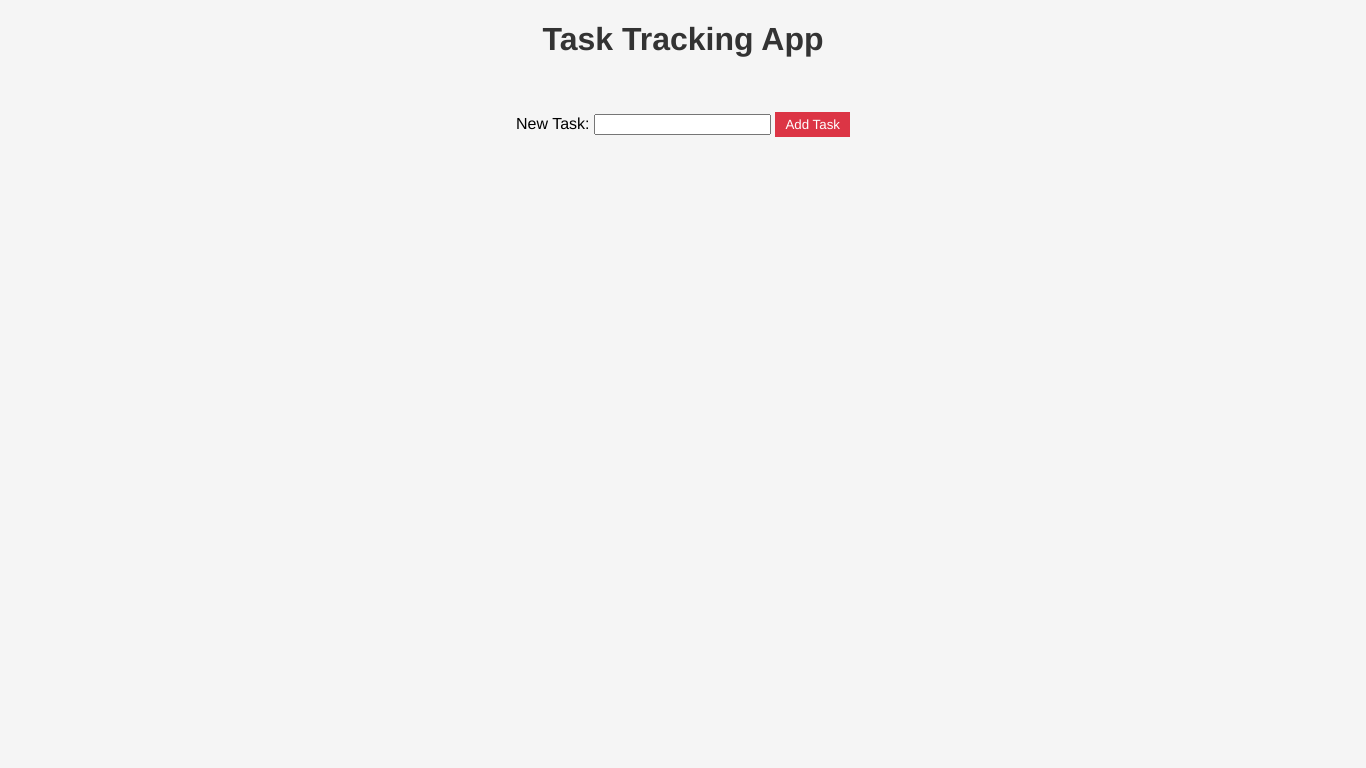
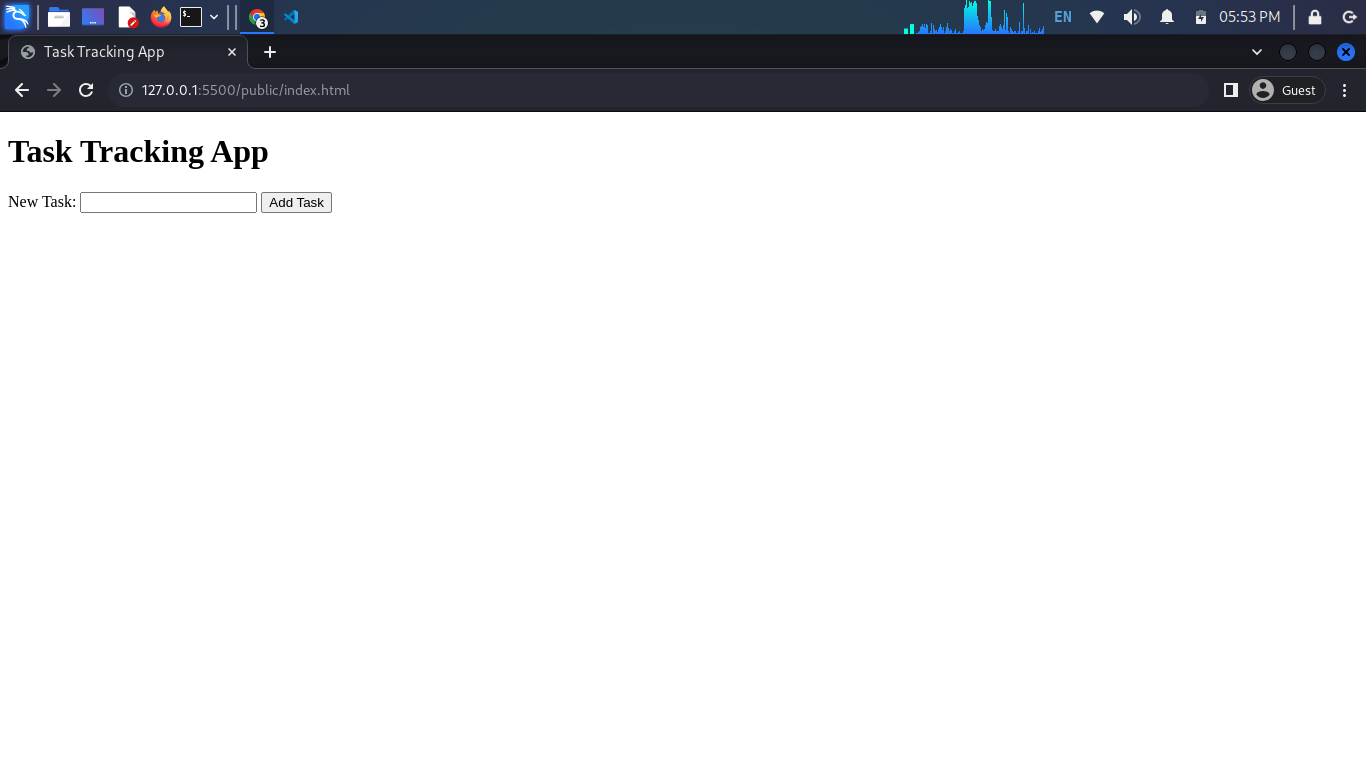
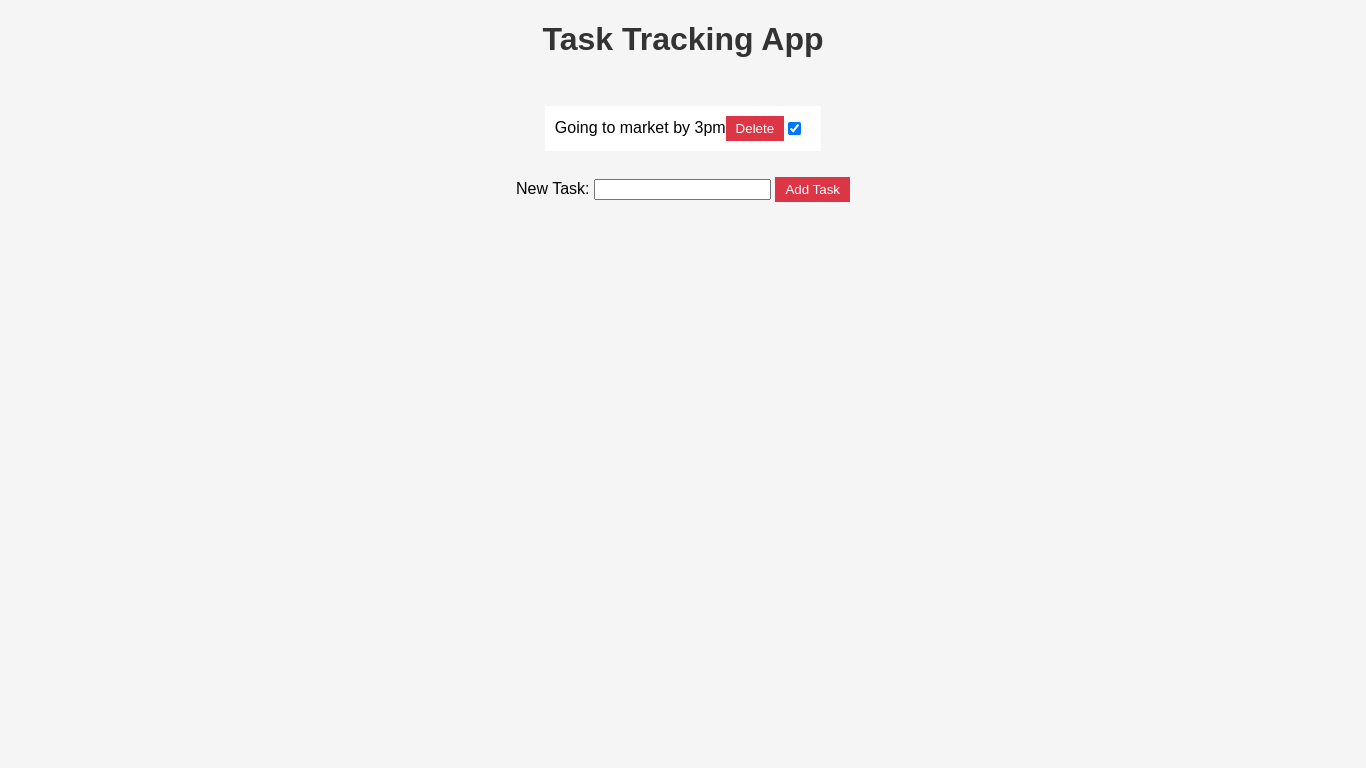
The output of the code above will look like this below:
Step 5: Set up Express and Create Routes
Now that our project structure is in place, it's time to set up Express and create routes for handling task-related operations.
First, create the app.js file in the root directory:
// app.js
const express = require('express');
const bodyParser = require('body-parser');

const app = express();
const port = 3000;

app.use(bodyParser.urlencoded({ extended: true }));
app.use(bodyParser.json());
app.use(express.static('public'));

const tasks = [];

// Define routes for CRUD operations

// Get all tasks
app.get('/api/tasks', (req, res) => {
  res.json(tasks);
});

// Add a new task
app.post('/api/tasks', (req, res) => {
  const newTask = {
    id: tasks.length + 1,
    description: req.body.description,
    completed: false,
  };

  tasks.push(newTask);
  res.json(newTask);
});

// Update task completion status
app.put('/api/tasks/:id', (req, res) => {
  const taskId = parseInt(req.params.id);
  const task = tasks.find(task => task.id === taskId);

  if (task) {
    task.completed = req.body.completed;
    res.json(task);
  } else {
    res.status(404).json({ error: 'Task not found' });
  }
});

// Delete a task
app.delete('/api/tasks/:id', (req, res) => {
  const taskId = parseInt(req.params.id);
  const taskIndex = tasks.findIndex(task => task.id === taskId);

  if (taskIndex !== -1) {
    const deletedTask = tasks.splice(taskIndex, 1)[0];
    res.json(deletedTask);
  } else {
    res.status(404).json({ error: 'Task not found' });
  }
});

app.listen(port, () => {
  console.log(`Server is running on http://localhost:${port}`);
});
API Requests Using Postman and cURL
Now, let's demonstrate how to interact with these routes using both Postman and cURL.
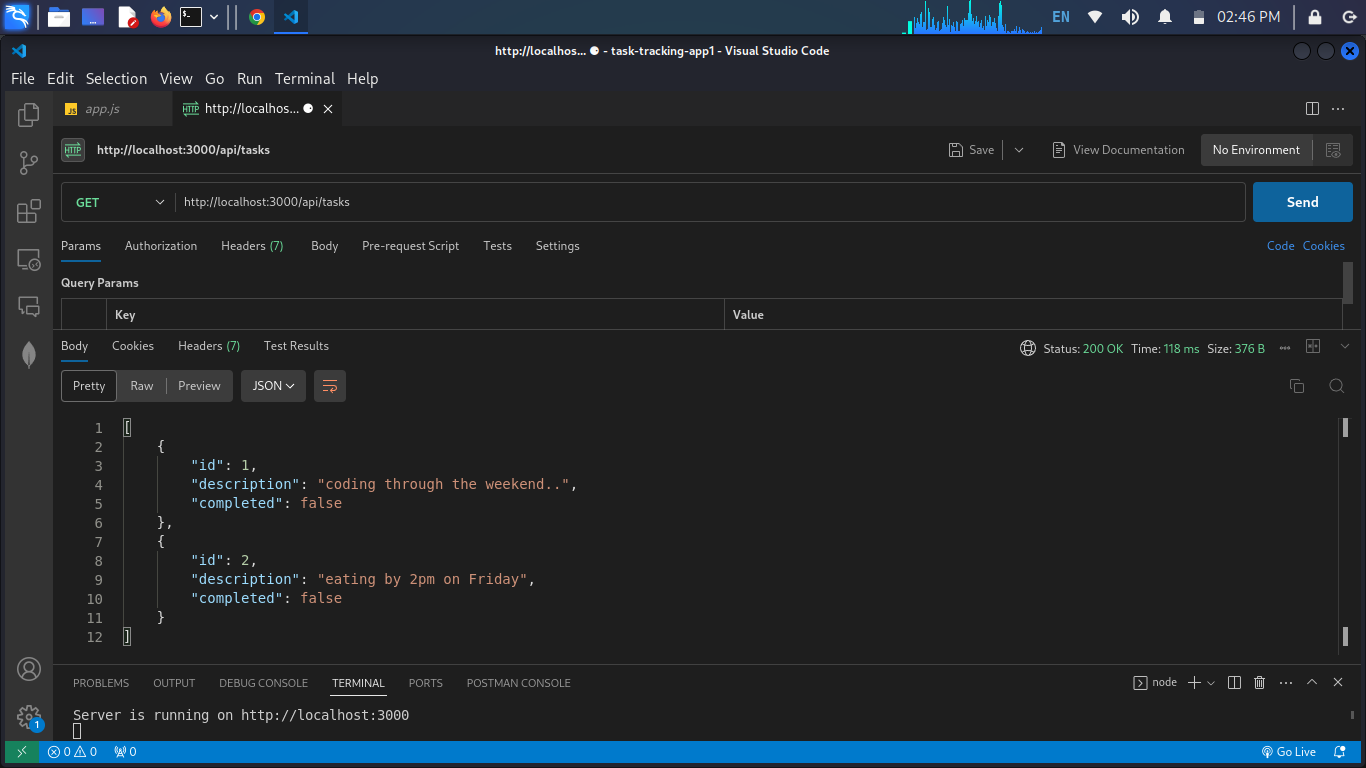
Using Postman:
-
Get all tasks:
- Method: GET
- URL:
http://localhost:3000/api/tasks
-
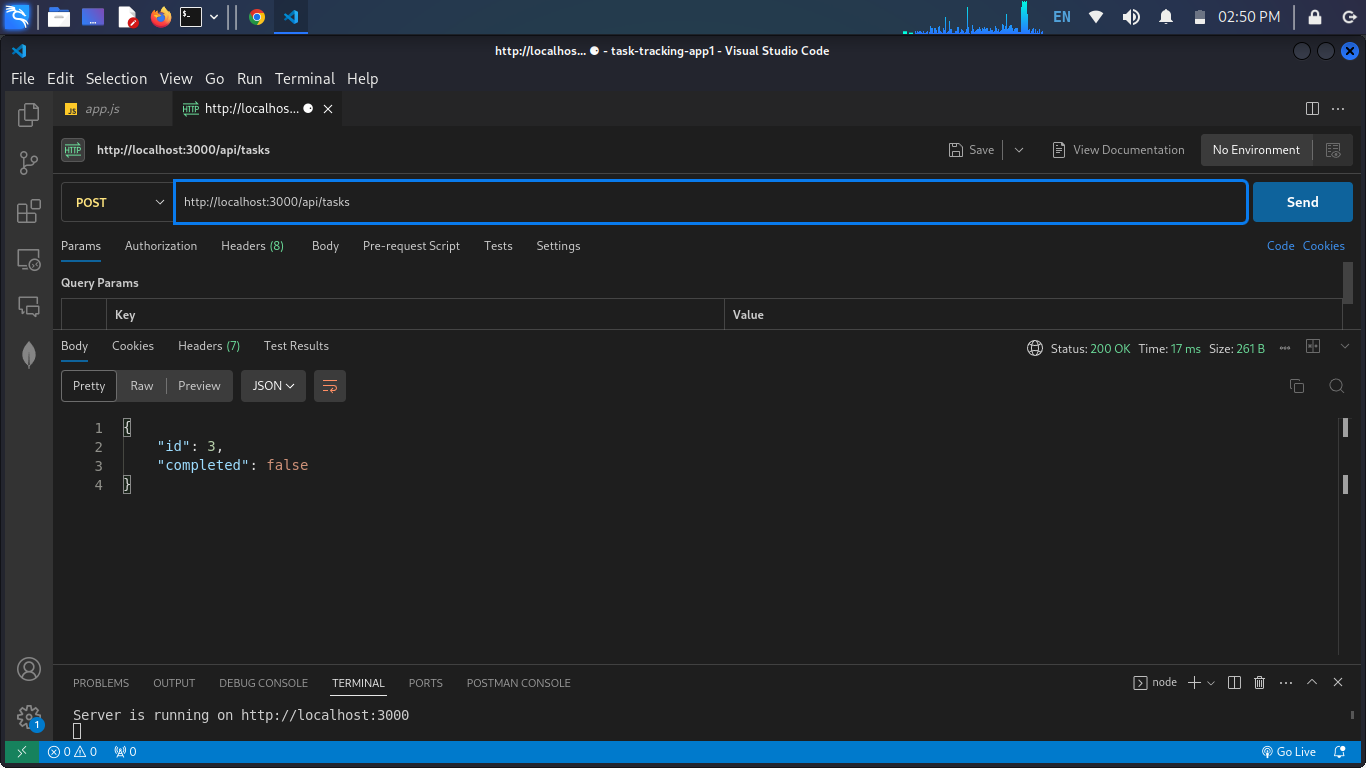
Add a new task:
- Method: POST
- URL:
http://localhost:3000/api/tasks - Headers:
Content-Type: application/json
- Body:
{
  "description": "Sample Task"
}
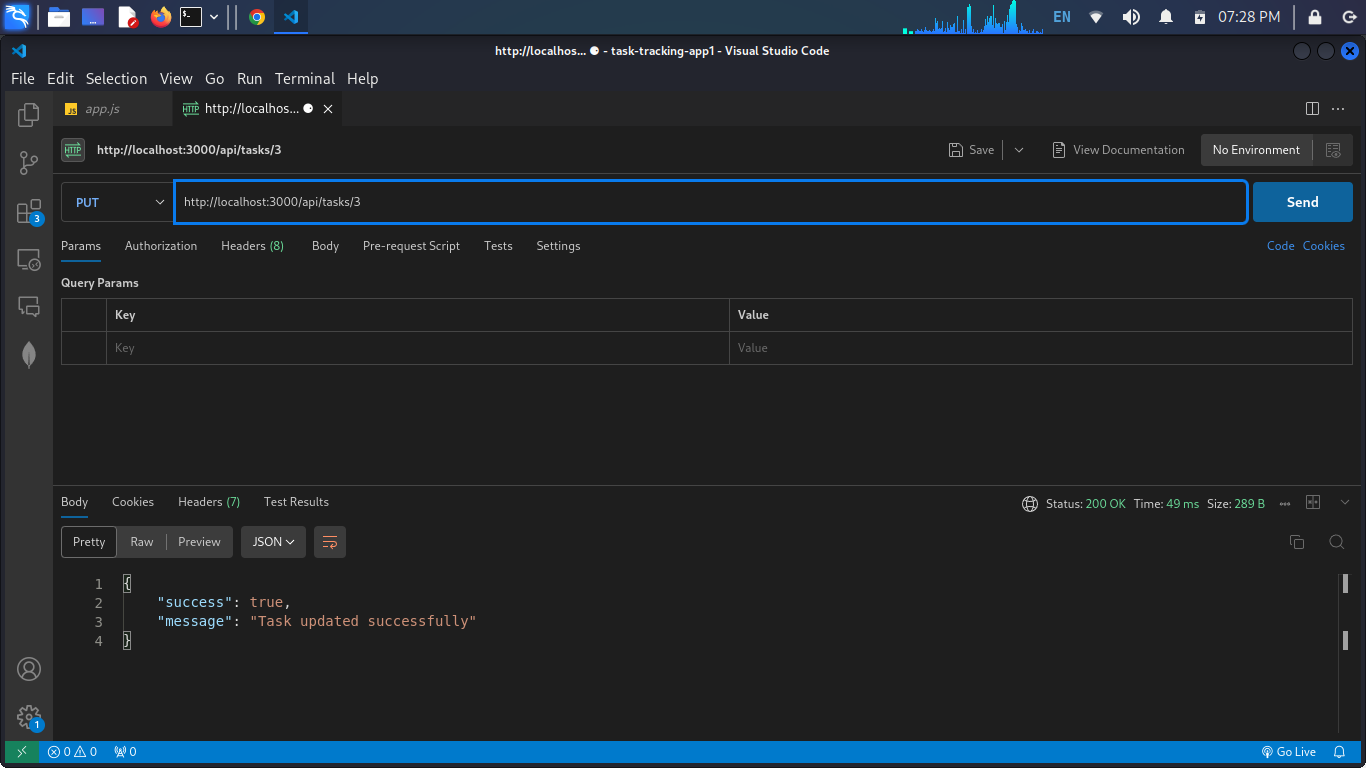
- Update task completion status:
- Method: PUT
- URL:
http://localhost:3000/api/tasks/{taskId}- Replace
{taskId}with the actual ID of a task
- Replace
- Headers:
Content-Type: application/json
- Body:
{
  "completed": true
}
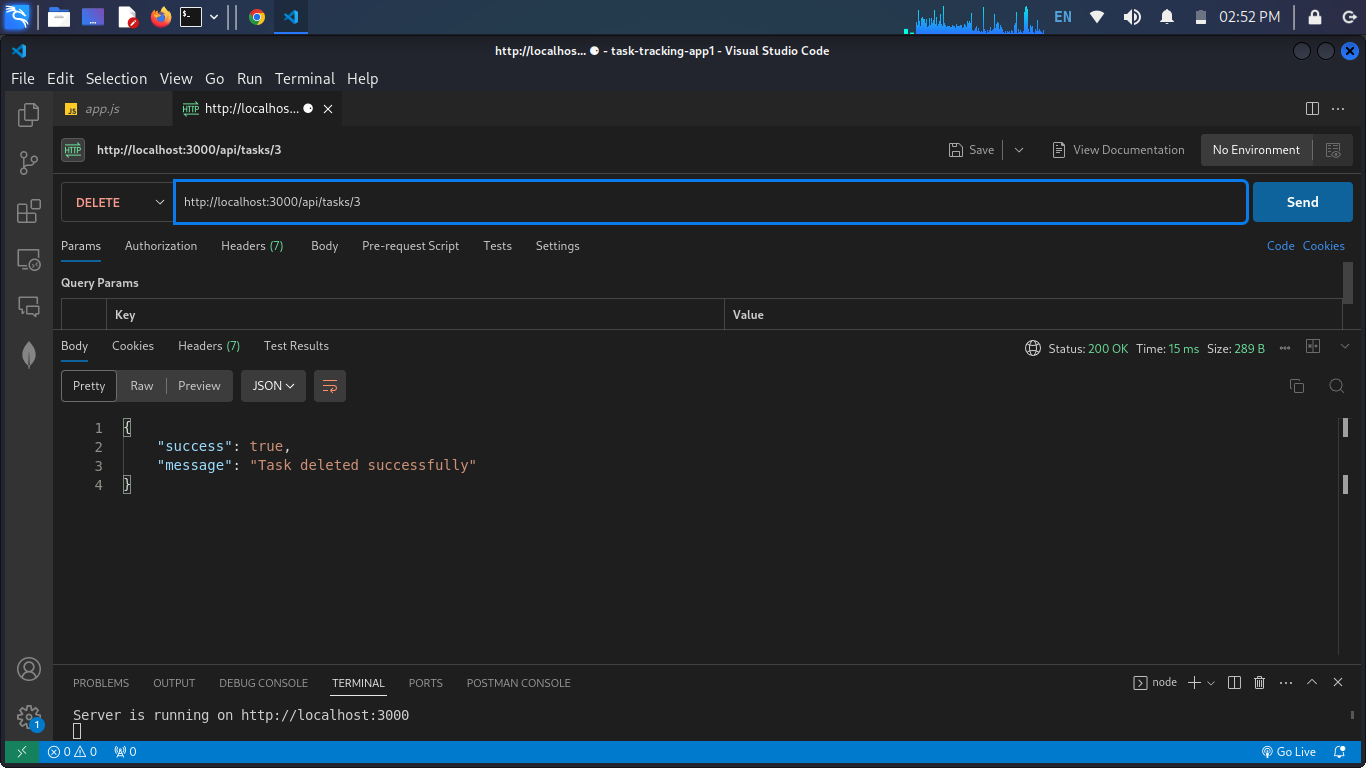
- Delete a task:
- Method: DELETE
- URL:
http://localhost:3000/api/tasks/{taskId}- Replace
{taskId}with the actual ID of a task
- Replace
Using cURL (Command Line):
-
Get all tasks:
curl http://localhost:3000/api/tasks -
Add a new task:
curl -X POST -H "Content-Type: application/json" -d '{"description": "Sample Task"}' http://localhost:3000/api/tasks -
Update task completion status:
curl -X PUT -H "Content-Type: application/json" -d '{"completed": true}' http://localhost:3000/api/tasks/{taskId}- Replace
{taskId}with the actual ID of a task
- Replace
-
Delete a task:
curl -X DELETE http://localhost:3000/api/tasks/{taskId}- Replace
{taskId}with the actual ID of a task
- Replace
Explanation:
- Express Setup: Importing the Express.js framework and setting up the server.
- Middleware Setup: Configuring middleware to handle URL-encoded and JSON data.
- Static File Serving: Serving static files from the 'public' directory.
- Routes Definition: Setting up routes for CRUD operations (GET, POST, PUT, DELETE).
- Server Start: Starting the server on the specified port (3000 in this case).
Step 6: Add Interactivity to Task Tracking App
public/app.js - Adding Interactivity to the Frontend
// public/app.js
document.addEventListener('DOMContentLoaded', () => {
  const taskList = document.getElementById('taskList');
  const taskForm = document.getElementById('taskForm');
  const taskInput = document.getElementById('taskInput');

  const fetchTasks = async () => {
    const response = await fetch('/api/tasks');
    const tasks = await response.json();

    taskList.innerHTML = '';
    tasks.forEach(task => {
      const li = document.createElement('li');
      li.textContent = task.description;

      const deleteButton = document.createElement('button');
      deleteButton.textContent = 'Delete';
      deleteButton.addEventListener('click', () => deleteTask(task.id));

      const updateCheckbox = document.createElement('input');
      updateCheckbox.type = 'checkbox';
      updateCheckbox.checked = task.completed;
      updateCheckbox.addEventListener('change', () => updateTask(task.id, updateCheckbox.checked));

      li.appendChild(deleteButton);
      li.appendChild(updateCheckbox);
      taskList.appendChild(li);
    });
  };

  const addTask = async (event) => {
    event.preventDefault();

    const response = await fetch('/api/tasks', {
      method: 'POST',
      headers: {
        'Content-Type': 'application/json',
      },
      body: JSON.stringify({ description: taskInput.value }),
    });

    if (response.ok) {
      taskInput.value = '';
      fetchTasks();
    }
  };

  const deleteTask = async (taskId) => {
    const response = await fetch(`/api/tasks/${taskId}`, {
      method: 'DELETE',
    });

    if (response.ok) {
      fetchTasks();
    }
  };

  const updateTask = async (taskId, completed) => {
    const response = await fetch(`/api/tasks/${taskId}`, {
      method: 'PUT',
      headers: {
        'Content-Type': 'application/json',
      },
      body: JSON.stringify({ completed }),
    });

    if (response.ok) {
      fetchTasks();
    }
  };

  taskForm.addEventListener('submit', addTask);
  fetchTasks();
});
Explanation:
- Event Listeners: Attaches event listeners to the task form for submission and dynamically renders tasks upon page load.
- fetchTasks Function : Completes the function to fetch tasks from the server and dynamically render them in the HTML.
- addTask Function: Handles the submission of the task form, sending a POST request to add a new task to the server.
- deleteTask Function: Handles the deletion of a task, sending a DELETE request to the server.
- updateTask Function: Handles updating the completion status of a task, sending a PUT request to the server.
- Event Listeners: Listens for changes in the checkbox and the submission of the task form, triggering the corresponding functions.
- Initial Fetch: Calls fetchTasks initially to load tasks when the page loads.
This completes the client-side implementation, making the task tracking app fully interactive. Users can now add, delete, and update tasks dynamically through the user interface.
Step 7: Enhance the Task Tracking App with Delete Functionality
public/app.js - Enable the Delete Button and Implement CRUD Operations
Continuing from the previous steps, let's add the necessary code to enable the delete button and implement the CRUD operations:
// public/app.js
document.addEventListener('DOMContentLoaded', () => {
  const taskList = document.getElementById('taskList');
  const taskForm = document.getElementById('taskForm');
  const taskInput = document.getElementById('taskInput');

  const fetchTasks = async () => {
    const response = await fetch('/api/tasks');
    const tasks = await response.json();

    taskList.innerHTML = '';
    tasks.forEach(task => {
      const li = document.createElement('li');
      li.textContent = task.description;

      const deleteButton = document.createElement('button');
      deleteButton.textContent = 'Delete';
      deleteButton.addEventListener('click', () => deleteTask(task.id));

      const updateCheckbox = document.createElement('input');
      updateCheckbox.type = 'checkbox';
      updateCheckbox.checked = task.completed;
      updateCheckbox.addEventListener('change', () => updateTask(task.id, updateCheckbox.checked));

      li.appendChild(deleteButton);
      li.appendChild(updateCheckbox);
      taskList.appendChild(li);
    });
  };

  const addTask = async (event) => {
    event.preventDefault();

    const response = await fetch('/api/tasks', {
      method: 'POST',
      headers: {
        'Content-Type': 'application/json',
      },
      body: JSON.stringify({ description: taskInput.value }),
    });

    if (response.ok) {
      taskInput.value = '';
      fetchTasks();
    }
  };

  const deleteTask = async (taskId) => {
    const response = await fetch(`/api/tasks/${taskId}`, {
      method: 'DELETE',
    });

    if (response.ok) {
      fetchTasks();
    }
  };

  const updateTask = async (taskId, completed) => {
    const response = await fetch(`/api/tasks/${taskId}`, {
      method: 'PUT',
      headers: {
        'Content-Type': 'application/json',
      },
      body: JSON.stringify({ completed }),
    });

    if (response.ok) {
      fetchTasks();
    }
  };

  taskForm.addEventListener('submit', addTask);
  fetchTasks();
});
Explanation:
- Delete Button Creation: For each task, a "Delete" button is created and associated with the deleteTask function.
- deleteTask Function: Handles the deletion of a task by sending a DELETE request to the server.
- Updated fetchTasks Function: After a task is deleted, fetchTasks is called to refresh the task list.
With this implementation, users can now delete tasks by clicking the "Delete" button next to each task in the task list. The app is now equipped with complete CRUD functionality.
Step 8: Implement Update Functionality for Task Completion Status
public/app.js - Enable the Update Checkbox and Implement CRUD Operations (Updated)
In this step, we'll enhance the task tracking app by enabling the update checkbox and implementing the functionality to update the completion status of tasks:
// public/app.js
document.addEventListener('DOMContentLoaded', () => {
  const taskList = document.getElementById('taskList');
  const taskForm = document.getElementById('taskForm');
  const taskInput = document.getElementById('taskInput');

  const fetchTasks = async () => {
    const response = await fetch('/api/tasks');
    const tasks = await response.json();

    taskList.innerHTML = '';
    tasks.forEach(task => {
      const li = document.createElement('li');
      li.textContent = task.description;

      const deleteButton = document.createElement('button');
      deleteButton.textContent = 'Delete';
      deleteButton.addEventListener('click', () => deleteTask(task.id));

      const updateCheckbox = document.createElement('input');
      updateCheckbox.type = 'checkbox';
      updateCheckbox.checked = task.completed;
      updateCheckbox.addEventListener('change', () => updateTask(task.id, updateCheckbox.checked));

      li.appendChild(deleteButton);
      li.appendChild(updateCheckbox);
      taskList.appendChild(li);
    });
  };

  const addTask = async (event) => {
    event.preventDefault();

    const response = await fetch('/api/tasks', {
      method: 'POST',
      headers: {
        'Content-Type': 'application/json',
      },
      body: JSON.stringify({ description: taskInput.value }),
    });

    if (response.ok) {
      taskInput.value = '';
      fetchTasks();
    }
  };

  const deleteTask = async (taskId) => {
    const response = await fetch(`/api/tasks/${taskId}`, {
      method: 'DELETE',
    });

    if (response.ok) {
      fetchTasks();
    }
  };

  const updateTask = async (taskId, completed) => {
    const response = await fetch(`/api/tasks/${taskId}`, {
      method: 'PUT',
      headers: {
        'Content-Type': 'application/json',
      },
      body: JSON.stringify({ completed }),
    });

    if (response.ok) {
      fetchTasks();
    }
  };

  taskForm.addEventListener('submit', addTask);
  fetchTasks();
});
Explanation:
- Update Checkbox Creation: For each task, an update checkbox is created and associated with the updateTask function.
- updateTask Function (Updated): Handles the update of a task's completion status by sending a PUT request to the server.
- Updated fetchTasks Function: After a task is updated, fetchTasks is called to refresh the task list.
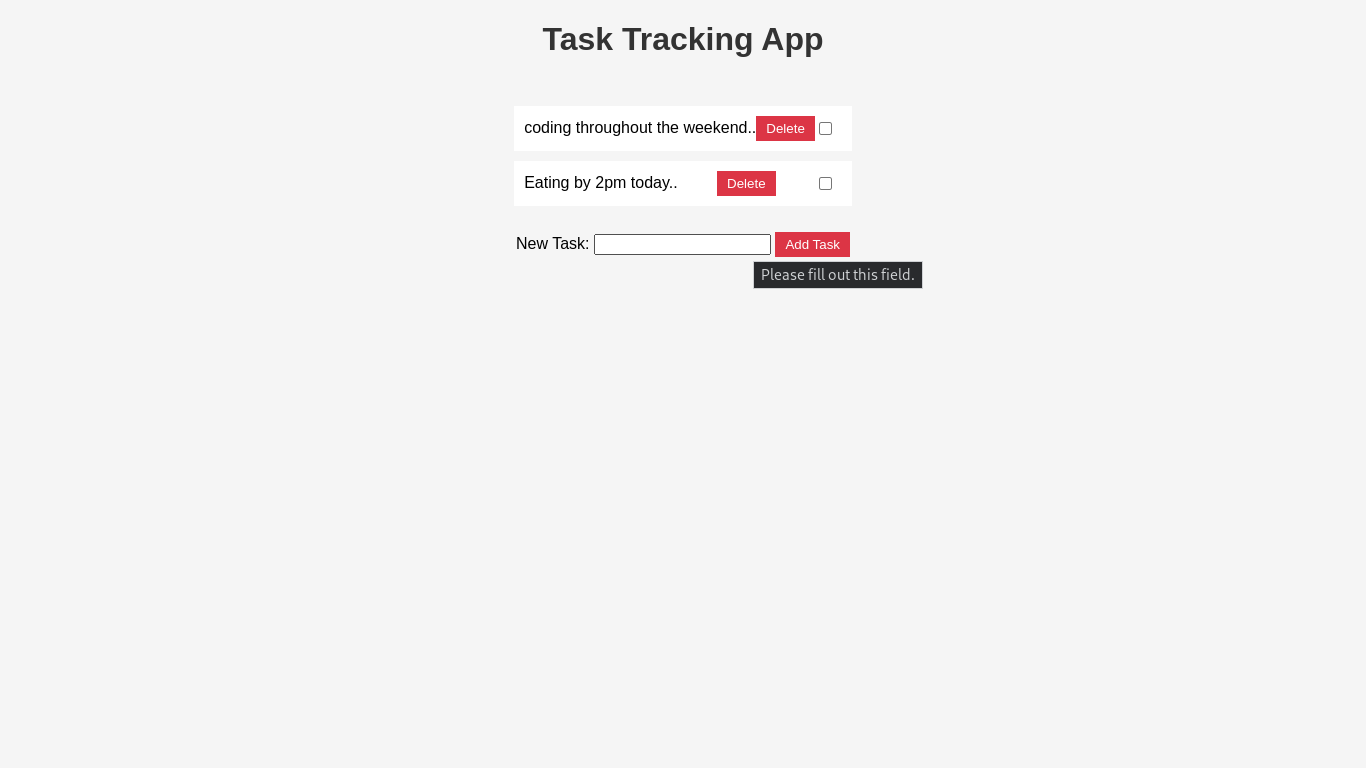
With this implementation, users can now mark tasks as complete or incomplete by checking or unchecking the update checkbox next to each task in the task list. The app now has complete CRUD functionality, allowing users to manage tasks seamlessly.
Step 9: Add Styling for a Better User Experience
public/styles.css - Enhance the User Interface with CSS
Create a new file styles.css in the public directory to add some basic styling to improve the user experience:
/* public/styles.css */

body {
  font-family: 'Arial', sans-serif;
  background-color: #f5f5f5;
  margin: 0;
  padding: 0;
  display: flex;
  flex-direction: column;
  align-items: center;
  justify-content: center;
}

h1 {
  color: #333;
}

#taskList {
  list-style: none;
  padding: 0;
}

li {
  background-color: #fff;
  margin: 10px 0;
  padding: 10px;
  display: flex;
  justify-content: space-between;
  align-items: center;
}

button {
  background-color: #dc3545;
  color: #fff;
  border: none;
  padding: 5px 10px;
  cursor: pointer;
}

input[type="checkbox"] {
  margin-right: 10px;
}
Link this CSS file in your public/index.html file by adding the following line inside the <head> section:
<link rel="stylesheet" type="text/css" href="styles.css">
Conclusion
We have successfully built a basic task tracking app with Node.js and Express.js, incorporating CRUD functionality. Users can now create, read, update, and delete tasks through a user-friendly interface. This project provides a solid foundation for further enhancements, such as user authentication, due dates, and notifications.
Remember to customize and expand the application based on your specific needs. Explore additional features and improvements to make the task tracking app even more powerful and user-friendly.
Happy coding!