
In this article on OpenGenus, we will explore an introduction to creating cross-platform desktop applications using Electron JS.
Table of contents:
- Introduction
- Features of Electron JS
- Installation
- Building your First App
- Quiz
Introduction
Electron JS, commonly known as Electron, is an open-source framework that allows developers to build cross-platform desktop applications using web technologies like HTML, CSS, and JavaScript. It’s an open source project started by Cheng Zhao, an engineer at GitHub. Electron enables the development of native applications for Windows, macOS, and Linux using a single codebase, which makes it a popular choice for building desktop applications with web technologies.
Features of Electron JS
Cross-platform Development: Electron allows developers to create applications that can run on multiple operating systems, such as Windows, macOS, and Linux, with a consistent user experience.Web Technologies: Electron allows developers to leverage their knowledge of web technologies like HTML, CSS, and JavaScript to build desktop applications.Main and Renderer Processes: Electron applications are structured into two main processes: the Main process and the Renderer process. The Main process runs the application's main script and manages system-level operations. Each window in an Electron application runs its own Renderer process, which handles rendering the application's user interface and processing web content.Node JS Integration: Electron applications have access to Node JS APIs, allowing developers to use server-side functionalities in their desktop applications.Package Management: Electron applications can be packaged and distributed using various package managers, such as Electron Forge, Electron Packager, or Electron Builder.
Installation
To install Electron JS for all operating systems (Windows, macOS, and Linux), we need to have Node JS and npm (Node Package Manager) installed on our system first, as Electron is based on Node JS.
Windows and macOS: Download the Node JS installer from the official website and follow the installation instructions. It is recommended to download the LTS version for stability.Linux: Use the package manager of your distribution to install Node JS.
sudo apt update
sudo apt install nodejs npm
Building your First App
Initialize the Project
For this tutorial, we'll build a basic desktop app that displays a window with a "Hello, Electron!" message.
Electron apps are scaffolded using npm, with the package.json file as an entry point. Start by creating a folder and initializing an npm package within it with npm init.
mkdir my-electron-app && cd my-electron-app
npm init
This command will prompt you to configure some fields in your package.json. Entry point should be main.js with author, license, and description can be any value, but will be necessary for packaging later on.
Install Electron into app's devDependencies, which is the list of external development-only package dependencies not required in production.
npm install electron --save-dev
main.js
Create a main.js file in the root folder of the project. This script controls the main process, which runs in a Node.js environment.
const { app, BrowserWindow } = require('electron')

let mainWindow

function createWindow() {
  mainWindow = new BrowserWindow({
    width: 800,
    height: 600,
    webPreferences: {
      nodeIntegration: true,
    },
  })

  mainWindow.loadFile('index.html');

  mainWindow.on('closed', () => {
    mainWindow = null;
  })
}

app.on('ready', createWindow)

app.on('window-all-closed', () => {
  if (process.platform !== 'darwin') {
    app.quit()
  }
})

app.on('activate', () => {
  if (mainWindow === null) {
    createWindow()
  }
})
This code creates a basic Electron application with a main window, loads an HTML file, and handles window close and app lifecycle events.
Importing Modules: Importing necessary modules (app and BrowserWindow) from Electron.Main Window Variable: Declaring mainWindow to store a reference to the main browser window.Creating the Main Window: The createWindow function creates the main window with specific configurations.Loading an HTML File: The main window loads the index.html file.Handling Window Close: The code handles the window close event by setting mainWindow to null.Electron App Lifecycle Events: The application sets up event listeners for app lifecycle events.app.on('ready', ...): Creates the main window when the app is ready.app.on('window-all-closed', ...): Quits the app when all windows are closed (except macOS).app.on('activate', ...): Creates a new main window when the app is activated (on macOS).
index.html
Create a index.html file in the root folder of the project. his file will contain the HTML content that will be displayed in the Electron window.
<!DOCTYPE html>
<html>
<head>
  <title>Hello, Electron!</title>
  <link rel="stylesheet" href="styles.css">
</head>
<body>
  <h1>Hello, Electron!</h1>
  <script src="renderer.js"></script>
</body>
</html>
This code represents the main web page for an Electron application.
- Specifies the document type, sets the page title, and links an external CSS file (style.css).
- Contains a heading "Hello, Electron!" as the main content.
- Includes an external JavaScript file (renderer.js) for dynamic behavior.
style.css
Create a style.css file in the root folder of the project. In the index.html file, we'll add a <link> tag to include a CSS file.
body {
  font-family: Arial, sans-serif;
  background-color: #f0f0f0;
  margin: 0;
  padding: 0;
  display: flex;
  justify-content: center;
  align-items: center;
  height: 100vh;
}

h1 {
  color: #333;
}
These CSS styles will be applied to the HTML elements when the HTML file is loaded in the Electron application's main window. The content will be centered both horizontally and vertically, and the heading will be displayed in a dark gray color. The body will have a light gray background color.
renderer.js
Create a renderer.js file in the root folder of the project. In the index.html file, we'll add a <script> tag to include a JavaScript file.
document.addEventListener('DOMContentLoaded', () => {
  const heading = document.querySelector('h1');

  heading.addEventListener('click', () => {
    heading.style.color = getRandomColor();
  });

  function getRandomColor() {
    const letters = '0123456789ABCDEF';
    let color = '#';
    for (let i = 0; i < 6; i++) {
      color += letters[Math.floor(Math.random() * 16)];
    }
    return color;
  }
});
When the HTML document is loaded, the JavaScript code sets up a click event listener on the heading element. When the user clicks on the heading, the getRandomColor() function is called to generate a random color, and the heading's text color is updated to the newly generated color. This results in the heading changing its color to a random value each time it is clicked.
getRandomColor() Function: It generates a random hexadecimal color value. The random color is created using a 6-character hexadecimal string (e.g., '#RRGGBB'). Each character represents a pair of hexadecimal digits defining the red (R), green (G), and blue (B) components of the color. Clicking the <h1> element changes its text color to a new random color each time it is clicked.
package.json
{
  "name": "my-electron-app",
  "version": "1.0.0",
  "description": "Simple Electron App",
  "main": "main.js",
  "scripts": {
     "start": "electron ."
  },
  "keywords": [
    "color"
  ],
  "author": "My Name",
  "license": "ISC",
  "devDependencies": {
    "electron": "^25.3.1"
  }
}
The start script runs the Electron application using the "electron" command, which loads the current directory ("." indicates the current directory) as the application.
Start the app
Run the following command in your terminal to start the Electron app:
npm start
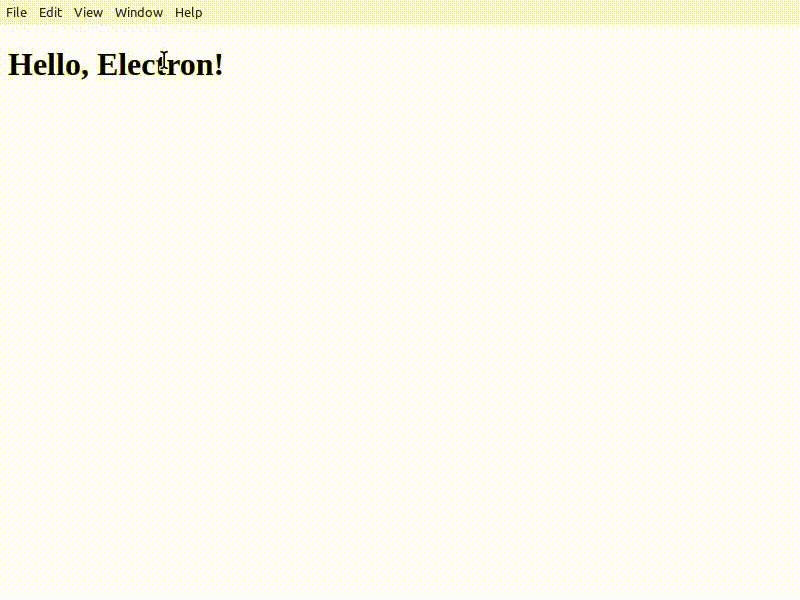
Now, your Electron app will open with the "Hello, Electron!" message centered on the window. When you click on the message, the text color will change randomly due to the added JavaScript.
Output
Packing the Application
Electron does not have any tooling for packaging and distribution bundled into its core modules. Once you have a working Electron app in dev mode, you need to use additional tooling to create a packaged app you can distribute to your users. Electron Forge is an all-in-one tool that handles the packaging and distribution of Electron apps.
npm install --save-dev @electron-forge/cli
npx electron-forge import
Once the conversion script is done, Forge should have added a few scripts to your package.json file.
  //...
  "scripts": {
    "start": "electron-forge start",
    "package": "electron-forge package",
    "make": "electron-forge make"
  },
  //...
To create a distributable, use your project's new make script, which runs the electron-forge make command.
npm run make
- It will first run electron-forge package under the hood, which bundles your app code together with the Electron binary. The packaged code is generated into a folder.
- It will then use this packaged app folder to create a separate distributable for each configured maker.
After the script runs, you should see an out folder containing both the distributable and a folder containing the packaged application code.
package.json
{
  "name": "my-electron-app",
  "version": "1.0.0",
  "description": "Simple Electron app",
  "main": "main.js",
  "scripts": {
    "start": "electron-forge start",
    "package": "electron-forge package",
    "make": "electron-forge make"
  },
  "keywords": [
    "color"
  ],
  "author": "My Name",
  "license": "ISC",
  "devDependencies": {
    "@electron-forge/cli": "^6.2.1",
    "@electron-forge/maker-deb": "^6.2.1",
    "@electron-forge/maker-rpm": "^6.2.1",
    "@electron-forge/maker-squirrel": "^6.2.1",
    "@electron-forge/maker-zip": "^6.2.1",
    "@electron-forge/plugin-auto-unpack-natives": "^6.2.1",
    "electron": "^25.3.1"
  },
  "dependencies": {
    "electron-squirrel-startup": "^1.0.0"
  }
}
.gitignore
The .gitignore file specifies which files and directories to avoid tracking with Git. You should place a copy of GitHub's Node.js gitignore template (https://github.com/github/gitignore/blob/main/Node.gitignore) into your project's root folder to avoid committing your project's node_modules folder.
Publishing the Application
Electron Forge has Publisher plugins that can automate the distribution of your packaged application to various sources. Forge cannot publish to any repository on GitHub without permission. The easiest way to do this is to create a new personal access token (PAT) with the public_repo scope (https://github.com/settings/tokens/new) , which gives write access to your public repositories.
Linux/MacOS, set an environment variable in the Terminal:
export GITHUB_TOKEN=your_github_token
Windows, set an environment variable in the Command Prompt:
set GITHUB_TOKEN=your_github_token
Forge's GitHub Publisher is a plugin that needs to be installed in your project's devDependencies:
npm install --save-dev @electron-forge/publisher-github
forge.config.js
Once you have electron-forge/publisher-github installed, you need to set it up in your Forge configuration.
module.exports = {
  publishers: [
    {
      name: '@electron-forge/publisher-github',
      config: {
        repository: {
          owner: 'github-username',
          name: 'repository-name'
        },
        prerelease: false,
        draft: true
      }
    }
  ],
  makers: [
    {
      name: '@electron-forge/maker-zip',
      platforms: ['linux'],
      config: {
      }
    }
  ]
}
Makers are Electron Forge's way of taking your packaged application and making platform specific distributables like DMG, EXE, or Flatpak files ( "platforms": ["darwin", "linux", "win32"]).
Add Forge's publish command to your npm scripts.
  //...
  "scripts": {
    "start": "electron-forge start",
    "package": "electron-forge package",
    "make": "electron-forge make",
    "publish": "electron-forge publish"
  },
  //...
This command will run your configured makers and publish the output distributables to a new GitHub release.
npm run publish
By default, this will only publish a single distributable for your host operating system and architecture. You can view them in releases section in your repository(github-username/repository-name/releases). The name of this release will correspond to the version field in your project's package.json file.