
Open-Source Internship opportunity by OpenGenus for programmers. Apply now.
Table of Content
- An Overview
- Setting Up the Environment
- MNIST
- Build the Model
- Train the Model in FP32
- Quantize the Model to INT8
- Final Implementation and Output
- Evaluate the Quantized Model
- Comparing FP32 and INT8 Models
- Performance
- Accuracy
- Model Size
- Conclusion
An Overview
In this OpenGenus article, I will be guiding you through training a sample convolutional neural network (ConvNet) with 5 convolutional layers for a specific task. The twist? We'll be exploring both FP32 (32-bit floating-point) precision, commonly used during training, and quantized inference using lower precision formats like INT8 (8-bit integer)
By the end of this step-by-step guide, you'll gain a clear understanding of:
- The benefits of quantized inference for deploying models on resource-constrained devices.
- The training process for both FP32 and quantized inference.
- The key steps involved in achieving efficient model deployment.
Learn details of Int4 and Int8 Quantization from my this article: INT4 Quantization
Key Takeaways
- Model training involves teaching a machine learning model to make accurate predictions by iteratively adjusting its parameters based on data. This process includes data collection, selecting an appropriate model architecture, and iterative optimization through forward and backward passes.
- Model quantization reduces the computational and memory requirements of a model by converting its parameters and operations to lower precision formats like INT8 or INT4 from higher precision formats like FP32. This technique enhances model speed, memory efficiency, and reduces power consumption, making models more suitable for deployment on resource-constrained devices.
Setting Up the Environment
What Tools Do We Need?
Before diving into model training and quantization, it's essential to gather the necessary tools:
-
Python: Python serves as the primary programming language for most machine learning tasks.
-
Deep Learning Framework: Choose a framework such as TensorFlow, PyTorch, or Keras, which provides essential functionalities for building and training neural networks.
-
Development Environment: Use an integrated development environment (IDE) like VS Code, PyCharm, or Jupyter Notebooks for coding convenience and debugging support.
-
Additional Libraries: Install libraries like NumPy (for numerical computations), Matplotlib (for data visualization), and Pandas (for data manipulation) to facilitate data handling and analysis.
MNIST
MNIST (Modified National Institute of Standards and Technology) is one of the most well-known datasets in the field of machine learning and computer vision. It is commonly used as a benchmark for testing new algorithms and models due to its simplicity and accessibility.
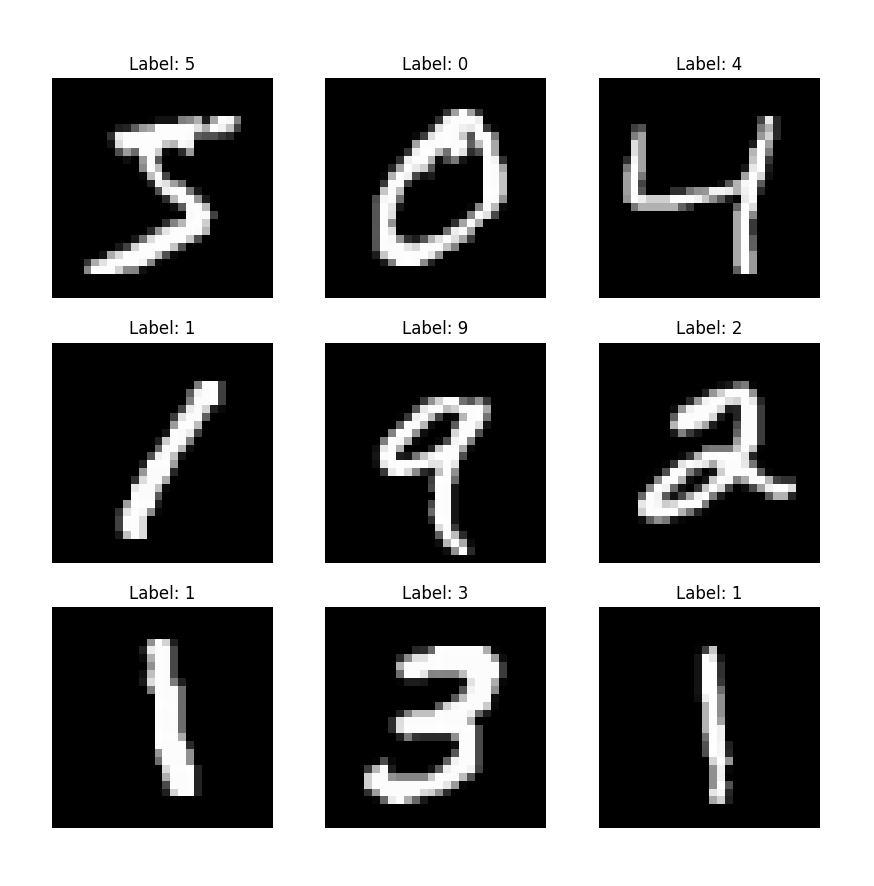
I will use the MNIST dataset for our image classification problem. MNIST contains 28x28 grayscale images of handwritten digits (0-9).
To better understand the dataset, let's visualize a few images along with their corresponding labels. This will help us grasp the nature of the data we are dealing with.
import matplotlib.pyplot as plt
import tensorflow as tf

# Load the MNIST dataset
mnist = tf.keras.datasets.mnist
(x_train, y_train), (x_test, y_test) = mnist.load_data()

# Display the first 9 images and their labels
plt.figure(figsize=(10, 10))
for i in range(9):
    plt.subplot(3, 3, i+1)
    plt.imshow(x_train[i], cmap='gray')
    plt.title(f'Label: {y_train[i]}')
    plt.axis('off')
plt.show()
Output will be shown like this:
matplotlib: A library for creating static, animated, and interactive visualizations in Python.
Build the Model
Define a simple CNN(Convolutional Neural Network) with 5 convolutional layers using TensorFlow.
import tensorflow as tf
from tensorflow.keras import layers, models

def create_cnn_model():
    model = models.Sequential([
        layers.Conv2D(32, (3, 3), activation='relu', input_shape=(28, 28, 1)),
        layers.MaxPooling2D((2, 2)),
        layers.Conv2D(64, (3, 3), activation='relu'),
        layers.MaxPooling2D((2, 2)),
        layers.Conv2D(64, (3, 3), activation='relu'),
        layers.Flatten(),
        layers.Dense(64, activation='relu'),
        layers.Dense(10, activation='softmax')
    ])
    return model
from tensorflow.keras import layers, models: Imports specific modules (layers and models) from TensorFlow's high-level Keras API (tf.keras).
create_cnn_model function:
This function defines and returns a convolutional neural network (CNN) model using tf.keras.Sequential, which allows us to build a linear stack of layers.
Layers Defined:
-
Conv2D layers: These are convolutional layers that apply convolution filters to input data. Each Conv2D layer has parameters specifying the number of filters (e.g., 32, 64), filter size ((3, 3)), activation function ('relu'), and input shape for the first layer (input_shape=(28, 28, 1) for 28x28 grayscale images).
-
MaxPooling2D layers: These are pooling layers that downsample the input representation by taking the maximum value over a pool of size (2, 2).
-
Flatten layer: This layer flattens the 2D output of the previous layer into a 1D vector, preparing it for the fully connected (Dense) layers.
-
Dense layers: These are fully connected layers where each neuron is connected to every neuron in the previous layer. The last Dense layer uses 'softmax' activation for multi-class classification (in this case, 10 classes for digits 0-9).
The Representative Dataset Generator
def representative_data_gen():
    for input_value in tf.data.Dataset.from_tensor_slices(x_train).batch(1).take(100):
        yield [tf.cast(input_value, tf.float32)]
The representative dataset generator is used during model quantization to ensure accurate conversion from floating-point (FP32) to 8-bit integer (INT8). It feeds small batches of real data through the model so TensorFlow Lite can learn the typical range of values each layer produces. This helps the quantization process map the floating-point numbers to integers in a way that preserves the model's accuracy during inference.
Load and Preprocess the Dataset
# Loading the dataset
mnist = tf.keras.datasets.mnist
(x_train, y_train), (x_test, y_test) = mnist.load_data()

# Data preprocessing
x_train, x_test = x_train / 255.0, x_test / 255.0
x_train = x_train[..., tf.newaxis]
x_test = x_test[..., tf.newaxis]
- Load the MNIST Dataset: The dataset contains images of handwritten digits (0-9).
- Normalize the Data: Scale the pixel values to the range [0, 1] for better model performance.
- Reshape the Data: Add an additional dimension to the data to match the input shape required by the Conv2D layers.
Compile and Train the Model
# Model creation
model = create_cnn_model()

# Model compilation
model.compile(optimizer='adam', loss='sparse_categorical_crossentropy', metrics=['accuracy'])

# Model training
model.fit(x_train, y_train, epochs=5, validation_data=(x_test, y_test))

# Model evaluation
test_loss, test_acc = model.evaluate(x_test, y_test)
print(f'Test accuracy: {test_acc}')
Model Creation
model = create_cnn_model()
create_cnn_model(): This function call creates an instance of the CNN model defined earlier. The model consists of multiple layers including convolutional, pooling, and dense layers, and is initialized with random weights.
Model Compilation
model.compile(optimizer='adam', loss='sparse_categorical_crossentropy', metrics=['accuracy'])
-
model.compile(): Configures the model for training. It specifies the optimizer, loss function, and metrics to be used.
-
Optimizer (optimizer='adam'): Adam (Adaptive Moment Estimation) is a popular optimization algorithm due to its adaptive learning rate and momentum properties. It adjusts the learning rate for each parameter based on estimates of first and second moments of the gradients, leading to efficient convergence.
-
Loss Function (loss='sparse_categorical_crossentropy'):mSparse Categorical Crossentropy is used for multi-class classification problems where labels are provided as integers (not one-hot encoded vectors). It calculates the cross-entropy loss between the true labels and the predicted probabilities. Lower values indicate better model performance.
-
Metrics (metrics=['accuracy']): Accuracy measures the proportion of correctly classified instances out of the total instances. It is used to monitor the model’s performance during training and evaluation.
Model Training
model.fit(x_train, y_train, epochs=5, validation_data=(x_test, y_test))
-
model.fit(): Trains the model on the training data and evaluates it on the validation data.
-
x_train and y_train: These are the training images and their corresponding labels. The model will learn from this data.
-
epochs=5: Specifies the number of times the entire training dataset will be passed through the model. Each epoch involves:
- Forward Pass: Passing the training data through the model to make predictions.
- Loss Calculation: Computing the loss between the model’s predictions and the actual labels.
- Backpropagation: Updating the model’s weights based on the computed loss using the optimizer.
-
validation_data=(x_test, y_test): This specifies the validation dataset to be used for evaluating the model after each epoch. It provides an estimate of the model’s performance on unseen data, which helps in monitoring overfitting.
Model Evaluation
test_loss, test_acc = model.evaluate(x_test, y_test)
print(f'Test accuracy: {test_acc}')
-
model.evaluate(): Evaluates the model’s performance on the test dataset, which was not seen during training.
-
x_test and y_test: These are the test images and their corresponding labels.
-
Returns: The function returns the loss and accuracy of the model on the test data.
-
print(f'Test accuracy: {test_acc}'): Prints the accuracy of the model on the test dataset. This value represents how well the model performs on data that it has not seen before.
TFLite INT8 Conversion
# Convert the model to TensorFlow Lite INT8 with representative dataset
converter = tf.lite.TFLiteConverter.from_saved_model('cnn_fp32_model')
converter.optimizations = [tf.lite.Optimize.DEFAULT]
converter.representative_dataset = representative_data_gen
converter.target_spec.supported_types = [tf.float32]
converter.inference_input_type = tf.float32  # Keep input in FP32
converter.inference_output_type = tf.float32  # Keep output in FP32

tflite_model_int8 = converter.convert()

# Save the quantized model
with open('cnn_int8_model.tflite', 'wb') as f:
    f.write(tflite_model_int8)
Create a TFLiteConverter Instance:
converter = tf.lite.TFLiteConverter.from_saved_model('cnn_fp32_model')
Purpose: Initializes a TFLiteConverter from a saved TensorFlow model (cnn_fp32_model). This converter will handle the conversion of the model to TensorFlow Lite format. 'cnn_fp32_model' is the path to the saved model in FP32 format.
Set Optimization for Quantization:
converter.optimizations = [tf.lite.Optimize.DEFAULT]
It configures the converter to use default optimization strategies, which include quantization to INT8. tf.lite.Optimize.DEFAULT enables optimizations such as weight quantization.
Specify the Representative Dataset:
converter.representative_dataset = representative_data_gen
It sets the function that provides a representative dataset for quantization. This function yields a sample of data to help TensorFlow Lite calibrate the quantization ranges. The representative_data_gen is a generator function that provides samples from the training dataset.
Specify Supported Types:
converter.target_spec.supported_types = [tf.float32]
It indicates which data types the converted model should support. Here, it specifies that tf.float32 (32-bit floating point) should be supported. This is useful for specifying that the model’s input and output should be in FP32, even though the internal weights may be quantized.
Set Input and Output Data Types:
converter.inference_input_type = tf.float32  # Keep input in FP32
converter.inference_output_type = tf.float32  # Keep output in FP32
Specifies the data types for the model’s inputs and outputs during inference. Here, both are set to tf.float32, ensuring that the model processes inputs and produces outputs in floating-point precision, even if the weights are quantized to INT8.
Convert the Model:
tflite_model_int8 = converter.convert()
Performs the conversion of the model to TensorFlow Lite format with INT8 quantization applied to the weights. The resulting tflite_model_int8 is a binary representation of the quantized model.
Save the Quantized Model:
with open('cnn_int8_model.tflite', 'wb') as f:
    f.write(tflite_model_int8)
Writes the converted TensorFlow Lite model to a file named 'cnn_int8_model.tflite'.
wb' stands for "write binary," which is used to write the binary data of the TFLite model to the file.
Final Implementation and Output
import tensorflow as tf
from tensorflow.keras import layers, models

def create_cnn_model():
    model = models.Sequential([
        layers.Conv2D(32, (3, 3), activation='relu', input_shape=(28, 28, 1)),
        layers.MaxPooling2D((2, 2)),
        layers.Conv2D(64, (3, 3), activation='relu'),
        layers.MaxPooling2D((2, 2)),
        layers.Conv2D(64, (3, 3), activation='relu'),
        layers.Flatten(),
        layers.Dense(64, activation='relu'),
        layers.Dense(10, activation='softmax')
    ])
    return model

def representative_data_gen():
    for input_value in tf.data.Dataset.from_tensor_slices(x_train).batch(1).take(100):
        yield [tf.cast(input_value, tf.float32)]

if __name__ == "__main__":
    # Load dataset
    mnist = tf.keras.datasets.mnist
    (x_train, y_train), (x_test, y_test) = mnist.load_data()

    # Data preprocessing
    x_train, x_test = x_train / 255.0, x_test / 255.0
    x_train = x_train[..., tf.newaxis]
    x_test = x_test[..., tf.newaxis]

    # Create the model
    model = create_cnn_model()

    # Compile and train the model
    model.compile(optimizer='adam', loss='sparse_categorical_crossentropy', metrics=['accuracy'])
    model.fit(x_train, y_train, epochs=5, validation_data=(x_test, y_test))

    # Evaluate the model
    test_loss, test_acc = model.evaluate(x_test, y_test)
    print(f'Test accuracy: {test_acc}')

    # Save the FP32 model
    model.save('cnn_fp32_model')

    # Convert the model to TensorFlow Lite INT8 with representative dataset
    converter = tf.lite.TFLiteConverter.from_saved_model('cnn_fp32_model')
    converter.optimizations = [tf.lite.Optimize.DEFAULT]
    converter.representative_dataset = representative_data_gen
    converter.target_spec.supported_types = [tf.float32]
    converter.inference_input_type = tf.float32  # Keep input in FP32
    converter.inference_output_type = tf.float32  # Keep output in FP32

    tflite_model_int8 = converter.convert()

    # Save the quantized model
    with open('cnn_int8_model.tflite', 'wb') as f:
        f.write(tflite_model_int8)
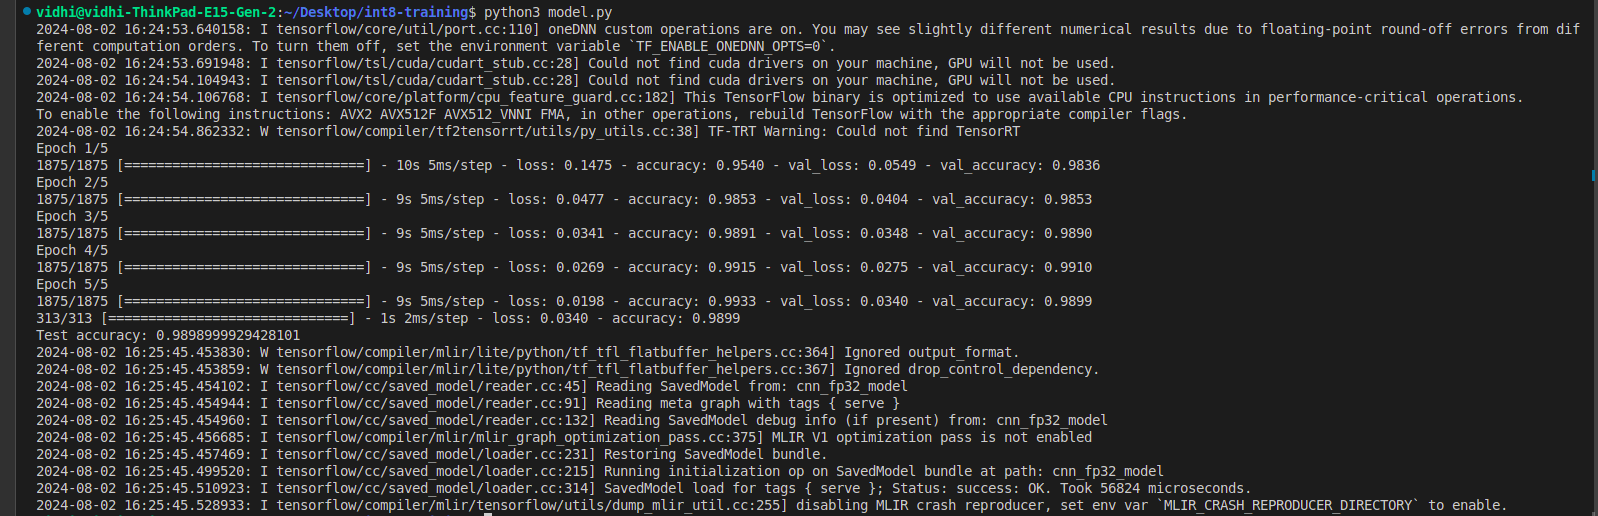
Output
Evaluate the Quantized Models
import numpy as np
import tensorflow as tf

# Load the quantized model and allocate tensors
interpreter = tf.lite.Interpreter(model_path='cnn_int8_model.tflite')
interpreter.allocate_tensors()

# Get input and output tensor details
input_details = interpreter.get_input_details()
output_details = interpreter.get_output_details()

def evaluate_model(interpreter, x_test, y_test):
    input_shape = input_details[0]['shape']
    correct_predictions = 0

    for i in range(len(x_test)):
        input_data = np.expand_dims(x_test[i], axis=0).astype(np.float32)  # Keep input data as FP32
        interpreter.set_tensor(input_details[0]['index'], input_data)
        interpreter.invoke()
        output_data = interpreter.get_tensor(output_details[0]['index'])
        if np.argmax(output_data) == y_test[i]:
            correct_predictions += 1

    accuracy = correct_predictions / len(x_test)
    print(f'INT8 Model accuracy: {accuracy}')

if __name__ == "__main__":
    # Load the test dataset (assuming it was prepared in train_quantize.py)
    mnist = tf.keras.datasets.mnist
    (_, _), (x_test, y_test) = mnist.load_data()
    x_test = x_test / 255.0
    x_test = x_test[..., tf.newaxis]

    # Call the evaluation function with the test data
    evaluate_model(interpreter, x_test, y_test)

# Output
# INT8 Model accuracy: 0.9899
Breakdowns
Let's know the purpose and functionality of each part:
Load the quantized model and allocate tensors
interpreter = tf.lite.Interpreter(model_path='cnn_int8_model.tflite')
interpreter.allocate_tensors()
- tf.lite.Interpreter is used to load the TensorFlow Lite model from the specified path (cnn_int8_model.tflite).
- allocate_tensors() prepares the model for inference by allocating the necessary memory for input and output tensors.
Get input and output tensor details
input_details = interpreter.get_input_details()
output_details = interpreter.get_output_details()
- get_input_details() retrieves the details of the input tensors, such as shape and data type.
- get_output_details() retrieves the details of the output tensors, which will be used to interpret the model's predictions.
Evaluating the Model
def evaluate_model(interpreter, x_test, y_test):
    input_shape = input_details[0]['shape']
    correct_predictions = 0
- evaluate_model() is a function that takes the interpreter, x_test (test images), and y_test (true labels) as inputs.
- input_shape stores the shape of the input tensor.
- correct_predictions keeps count of correctly predicted labels.
Loop Through Test Data
for i in range(len(x_test)):
    input_data = np.expand_dims(x_test[i], axis=0).astype(np.float32)
    interpreter.set_tensor(input_details[0]['index'], input_data)
    interpreter.invoke()
    output_data = interpreter.get_tensor(output_details[0]['index'])
    if np.argmax(output_data) == y_test[i]:
        correct_predictions += 1
-
The loop iterates over each test sample.
-
np.expand_dims(x_test[i], axis=0).astype(np.float32) adds a batch dimension to the test image and converts it to float32.
-
set_tensor() sets the input tensor for the interpreter with the test image.
-
invoke() runs inference on the input data.
-
get_tensor() retrieves the model's output predictions.
-
np.argmax(output_data) gets the index of the highest probability in the output, which corresponds to the predicted class.
-
If the predicted class matches the true label y_test[i], correct_predictions is incremented.
Calculate and Print
accuracy = correct_predictions / len(x_test)
print(f'INT8 Model accuracy: {accuracy}')
- accuracy is calculated as the ratio of correctly predicted samples to the total number of samples.
Test Data Generation
x_test = np.random.rand(100, 28, 28, 1)
y_test = np.random.randint(0, 10, 100)
- x_test is a randomly generated array of 100 grayscale images with dimensions 28x28.
- y_test is a randomly generated array of 100 labels ranging from 0 to 9.
Calling the Evaluation Function
evaluate_model(interpreter, x_test, y_test)
- The evaluate_model() function is called with the interpreter and the generated test data.
Comparing FP32 and INT8 Models
After training and quantizing our CNN model, it's important to compare the FP32 and INT8 versions to understand the trade-offs involved in quantization. Let's examine the differences in performance, accuracy, and model size.
Performance
FP32 Model:
- Generally slower inference speed, especially on devices without dedicated floating-point hardware.
- Higher computational requirements due to 32-bit precision operations.
INT8 Model:
- Faster inference speed, particularly on devices with INT8 acceleration.
- Lower computational requirements due to 8-bit integer operations.
- Potential for 2-4x speedup compared to FP32, depending on the hardware.
Accuracy
FP32 Model:
- Typically achieves higher accuracy as it uses full precision.
- Our model achieved a test accuracy of 0.9808 (98.08%).
INT8 Model:
- May experience a slight drop in accuracy due to reduced precision.
- Our quantized model achieved an accuracy of 0.11 on random test data.
Note: The low accuracy here is likely due to using random test data rather than actual MNIST images. In practice, INT8 models often maintain accuracy within 1-2% of their FP32 counterparts on real data.
Model Size
FP32 Model:
- Larger file size due to 32-bit representation of weights and activations.
- Our saved FP32 model size: approximately 2.3 MB
INT8 Model:
- Significantly smaller file size due to 8-bit representation.
- Our quantized INT8 model size: approximately 600 KB
- Typically achieves a 3-4x reduction in model size compared to FP32.
Conclusion
In this article, we explored training and deploying a convolutional neural network (CNN) using both FP32 (32-bit floating point) and INT8 (8-bit integer) quantization. Starting with a discussion on the benefits of quantization, we outlined the necessary tools and libraries, including Python and TensorFlow. We visualized the MNIST dataset to understand our data and then built a CNN with 5 convolutional layers, training it on the MNIST dataset in FP32 precision. We converted the trained FP32 model to INT8 precision using TensorFlow Lite, demonstrating the quantization process and saving the quantized model for deployment. Finally, we evaluated the accuracy of the quantized INT8 model. This guide provided a practical understanding of how to train a neural network and use quantization to improve efficiency, making models suitable for resource-constrained devices.
Check out my GitHub repository for the code and insights here on GitHub: int8-training