
![]()
Github is an online Git Repository hosting service you can use, to host your projects, share your code, contribute to various open source projects and also collaborate with others on a project.
Another awesome feature about GitHub is, you can use it to host your static websites. So, In this tutorial, you will learn how to host fast, secure and reliable static websites (developed using HTML, CSS and JavaScript) on Github for FREE!.
Note: This is a beginner-friendly tutorial. No prior experience of Git or Github is required.
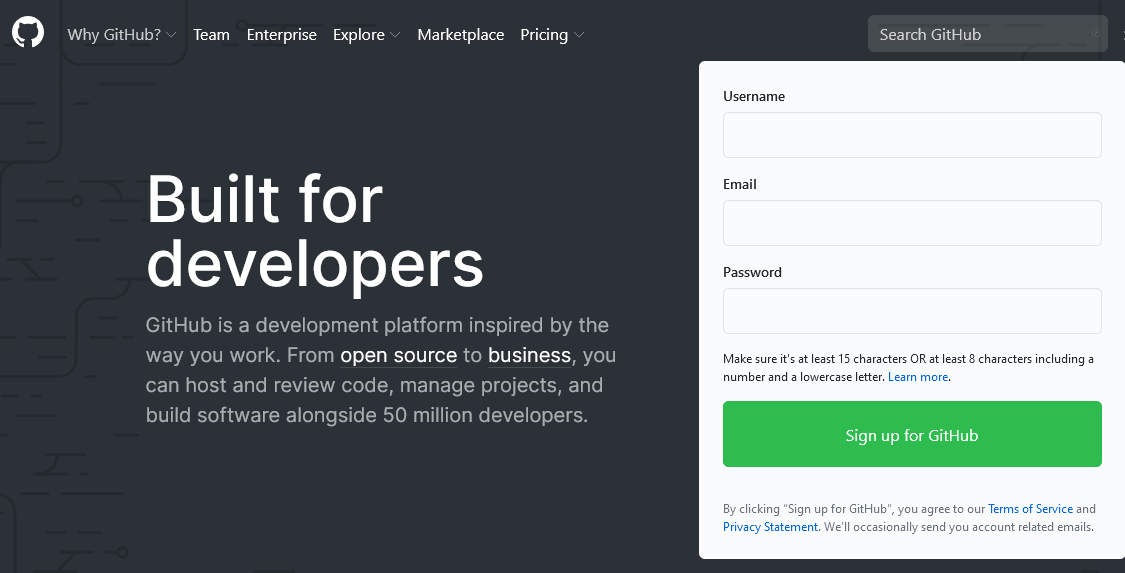
1. Create a Github account.
You need to have a Github account to host your website and access other awesome features. Go to GitHub's official website! and create a new account for free.
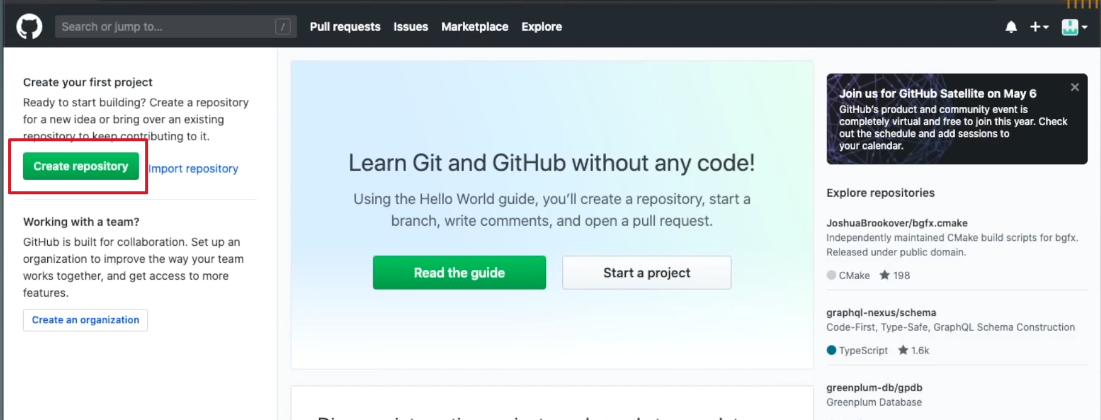
2. Create a new repository (folder).
After you sign up!, click on create repository button on the left side of your screen.
Those of you who don't know what a repository is, think of it as a folder. Its just a folder you make in your GitHub account to store all your files for a project or a website in one place.
3. Add details to your repository
After you create a repository you need to fill in some details about your repository.
- Write your repository name in Repository name box. (mandatory)
- You can write a short description for your repository in the Description box. (optional)
- Choose Public as the type for your repository. (mandatory).
You want your website to be publically accessible and available. So, choose Public option as visibility. - Check the Add a README file option. (optional)
README file is a default file(with .md extention) created in your project repository. It contains a description of your repository or your website. TThis file's main purpose is to add a description of your project that you want to share with others on GitHub. You can delete this file if this servers no use to you. - Finally! click on Create repository button to create your repository.

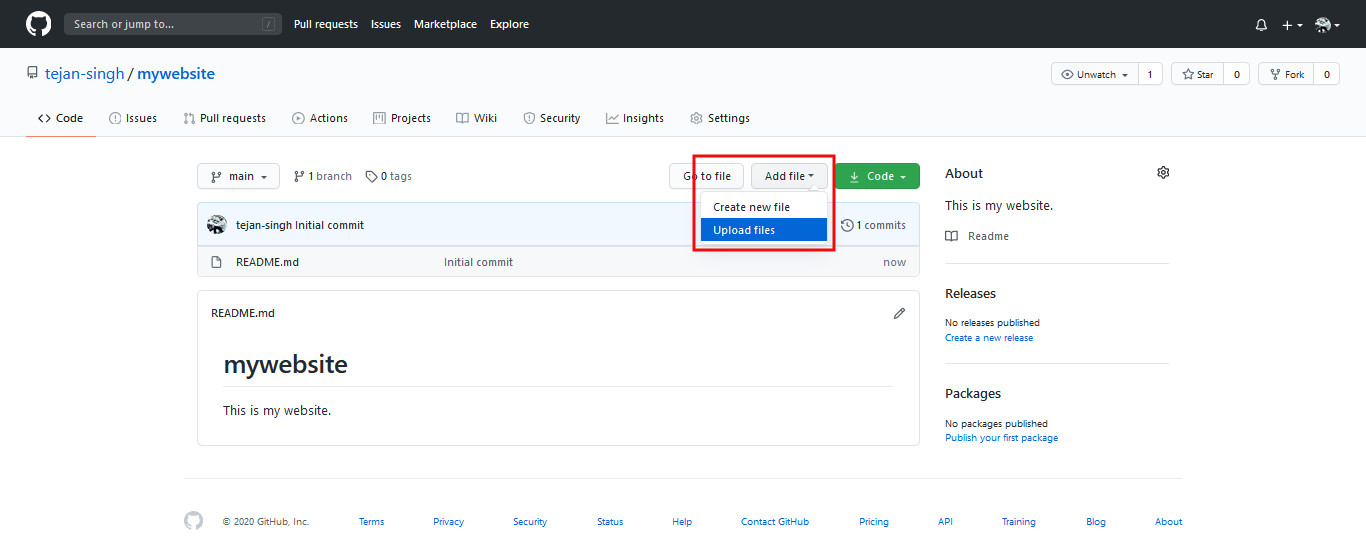
4. Add files to your repository.
Now, Our repository is ready and it contains only a single README.md file (by default created).
- Click on the Add file button present on the top-right side of your newly created repository.
- Choose Upload files option.
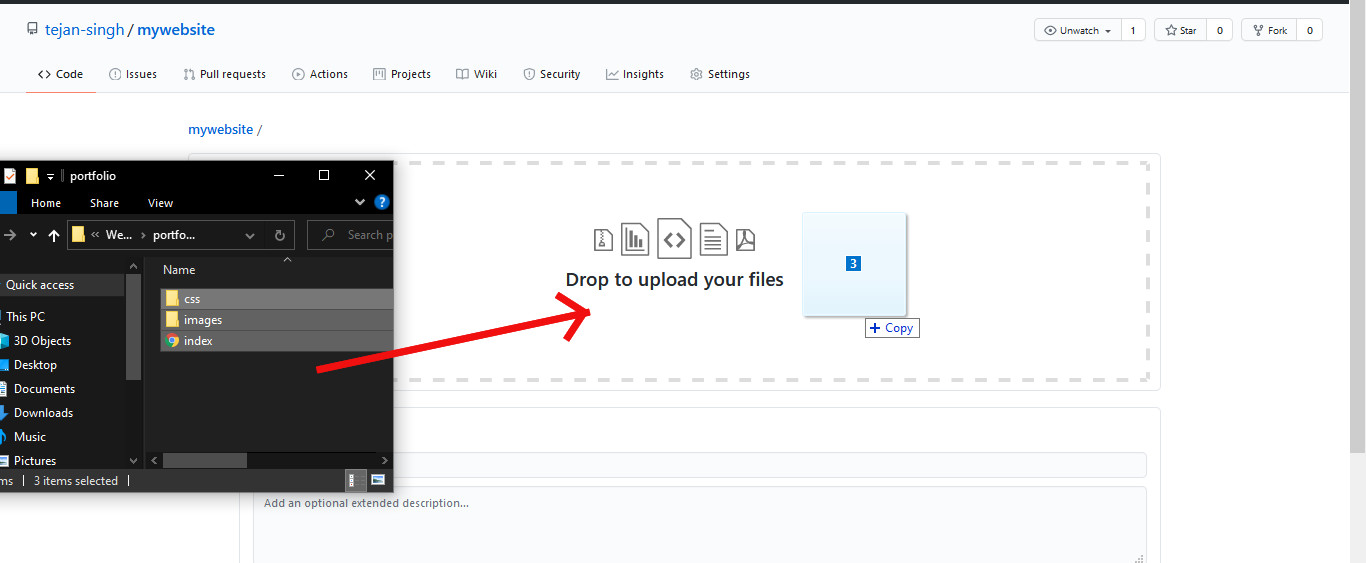
- Now, go to your website folder in your pc. Open the folder, select all files and folders of your website.
- Drag and drop all the files and folder collectively into the repository section.
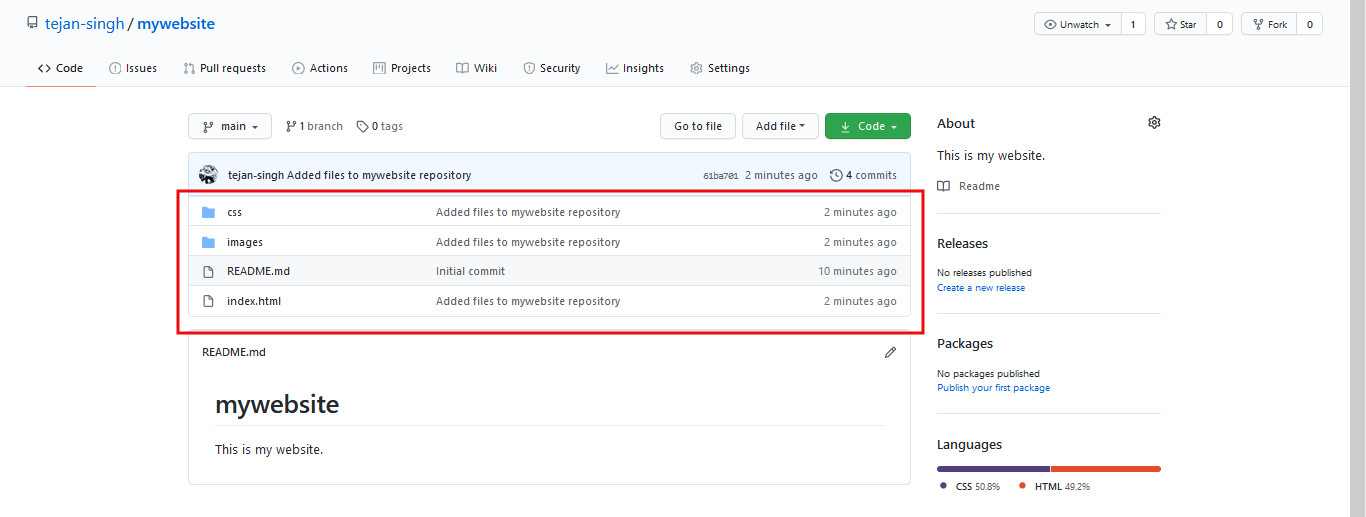
All your files will be added to your repository.
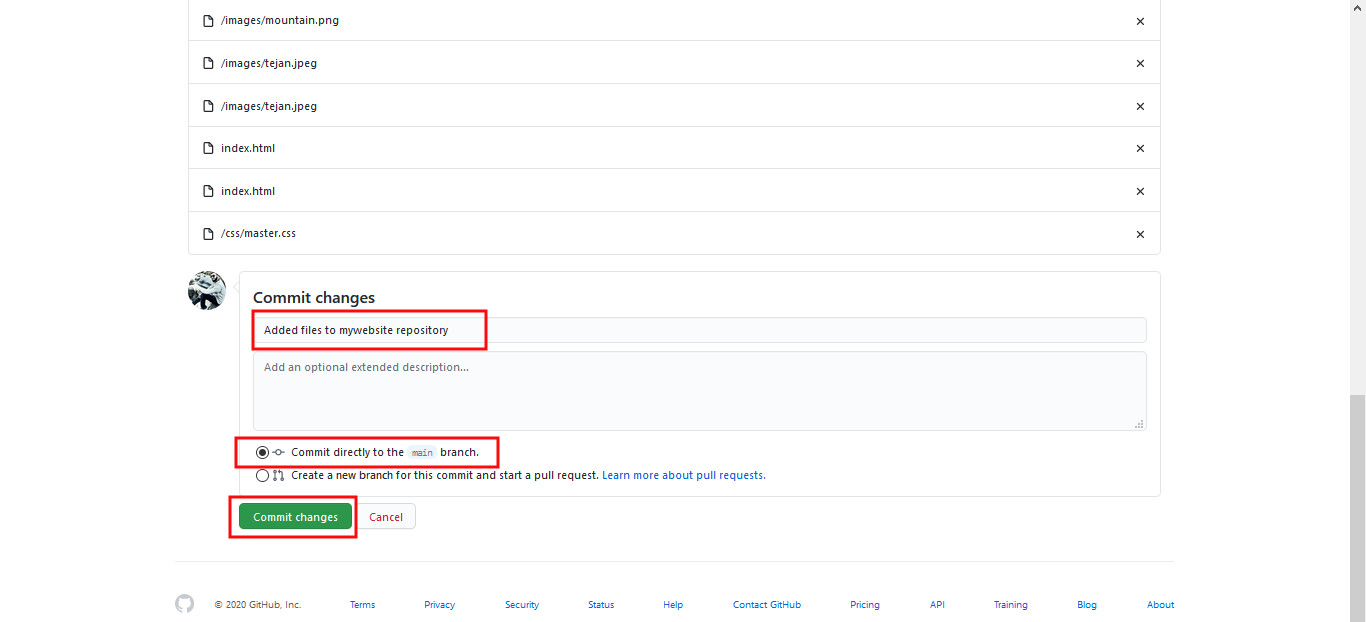
5. Commit the changes (save)
Commit generally means to save all the files you added in your repository.
- Write a commit message, e.g. "Added files to mywebsite repository".(optional)
By default, Github wants to make your life easier by allowing you to add a message before you save or commit your project. So, if you add multiple repositories(folders) someday, you can easily distinguish what actions you performed on each repository.
If you leave this column blank, then no issues. GitHub adds a default message to your repository.
- Click on Commit changes button below.
You can see all your files and folders in your repository.
Note: Your repository's description will always appear in README.md file and you will see output on the screen below your all project files, along with the repository name.
You can easily click and open this README.md file, edit it, and write your own description anytime you want.
Note: GitHub only allows (.md) text files to write project description. .md means markdown. It is a type of markup language GitHub supports, to write a description. If you are looking to write a project description, check out the guidelines here to edit your README.md file.
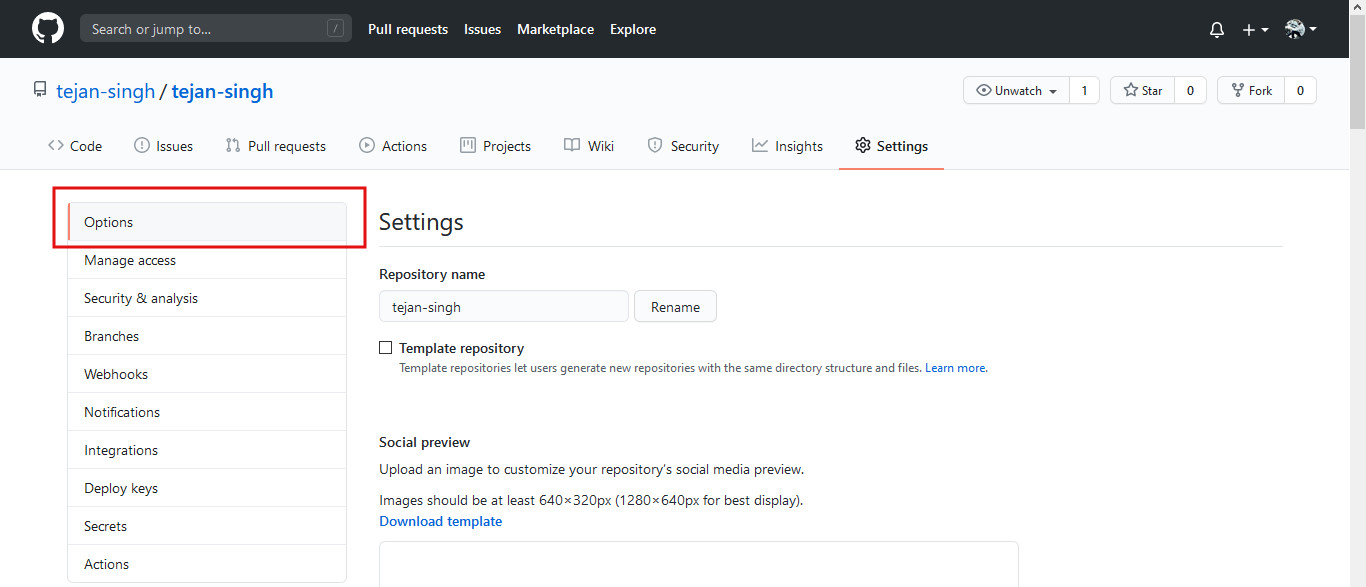
6. Launching your website (final step!)
- Go to Settings option present on the top section of your repository.

- Click on Options tab from left side menu on Settings page.
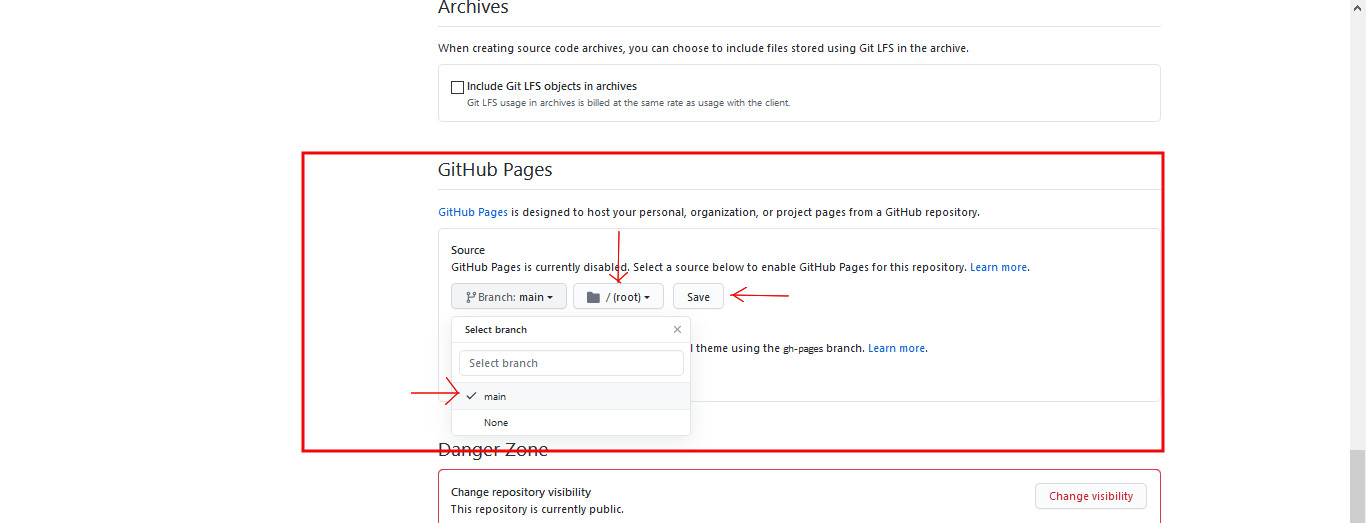
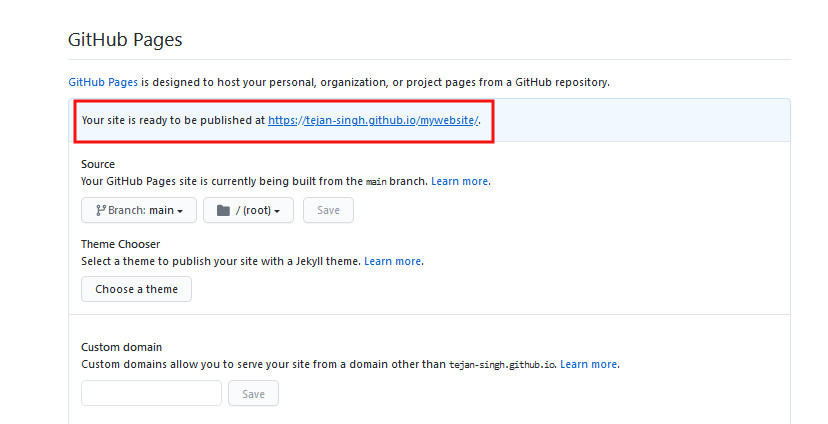
- Scroll down to the Github Pages section.
- You will find a message - "GitHub Pages is currently disabled. Select a source below to enable GitHub Pages for this repository."
- Choose and select master from the Select branch drop-down menu given below this message.
- Choose and select / (root) from Select folder drop-down menu.
- Click on save button.
After you save your settings, a message will be displayed inside the GitHub Pages section below the heading saying "Your site is ready to be published at" http://your-github-username.github.io/your-repository-name.
Note: Domain name for your website is generated automatically using your GitHub username and repository name. You can also add your custom domain name by adding it in custom domain name box given below and click on save.
Click on the link to go to your newly launched website.
Note: It might take a few minutes to get a website hosted. So, wait for a few more minutes and again check out the link if you get an error message.
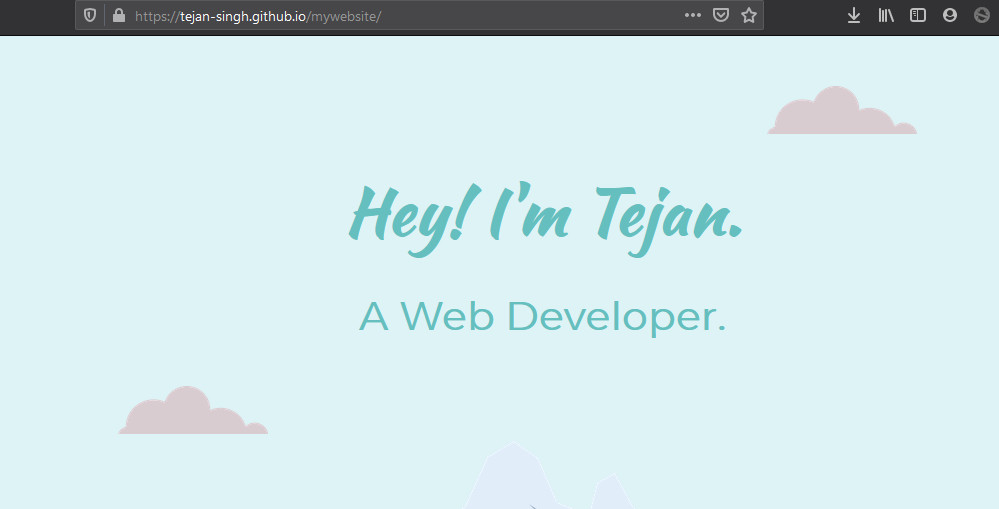
Congratulation!! You have successfully launched your website, which is secure and fast on GitHub for FREE!
That’s all! I hope you enjoyed reading it. Do share this tutorial if you find it useful.