Open-Source Internship opportunity by OpenGenus for programmers. Apply now.
In this article, we have developed a Python script to create GitHub issues and added features like adding a comment, label and others. We have used GitHub API for this.
Table of contents:
- Introduction
- Before we start: Introduce Github APIs & Tokens
- Basic Script: Create one issue using Python to upload to Github
- Create multiple issues at the same time
- Commenting & Adding Labels under an issue
Introduction
Github is a place where you can find useful open-source applications, scripts or extensions to facilitate your work and real life.
When we use open-source tools, we may find that some of the functions have bugs. Then we can create issues to let the contributors know about it and fix it.
However, if we need to manage and update a bunch of issues, it would be time-consuming to create one by one. Hence, we can write some simple Python scripts to automate the process.
This article aims at automating 3 functions:
- Creation of issues;
- Commenting under selected issue;
- Selecting labels for selected issue.
Besides, if you use your Github Repository as a software testing simulation or use the Github issue to store daily planners, you can also find this script helpful.
Before we start: Introduce Github APIs & Tokens
To realize the function, we need to gather these information beforehand:
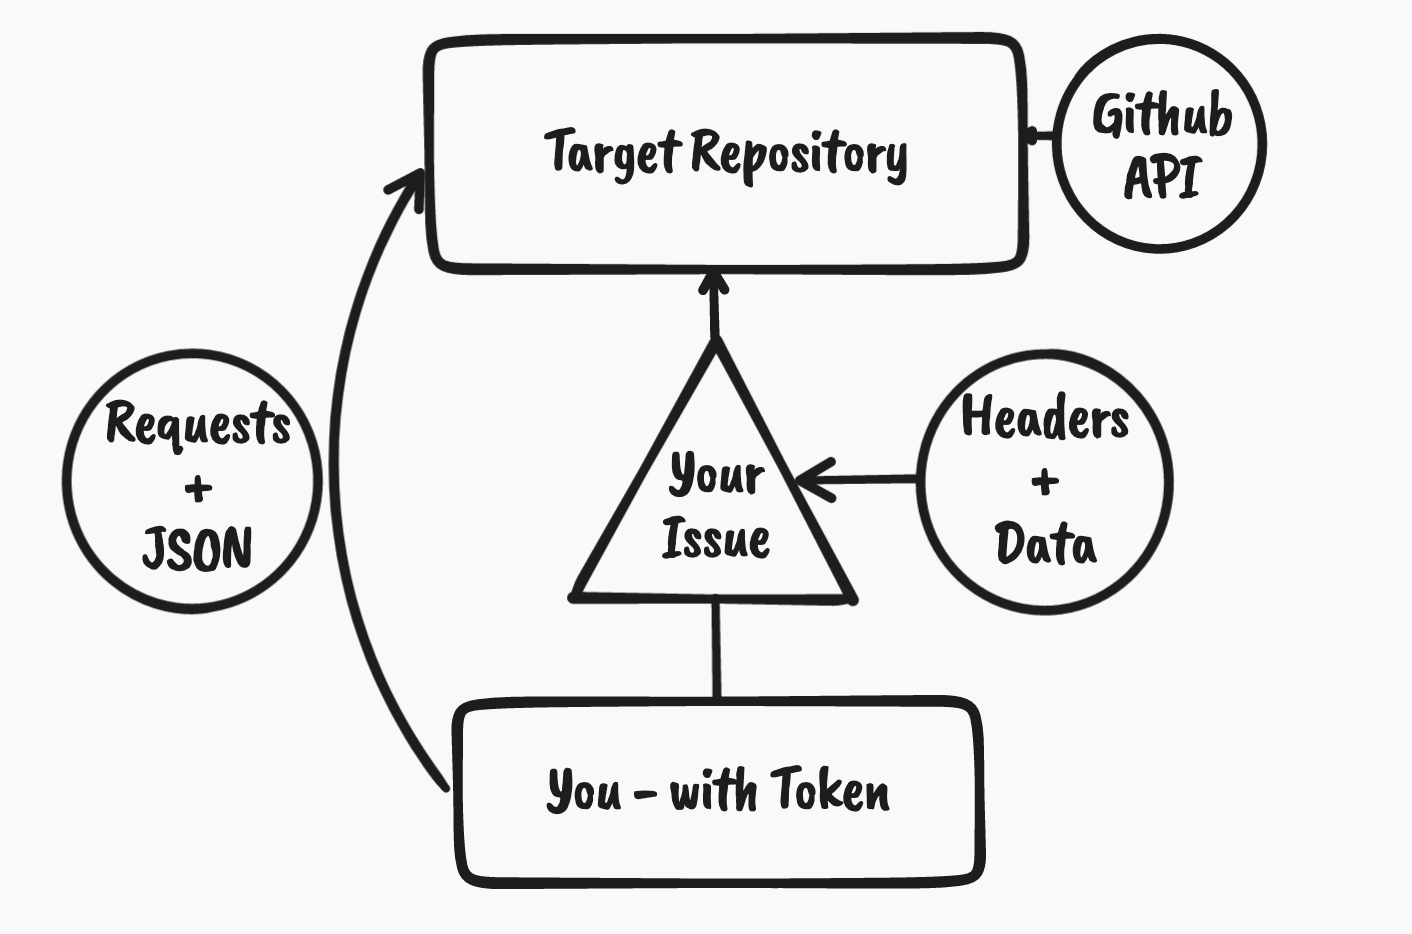
The Github API
- Github API can help us build our own automation workflows by retriving and having access to public data.
- There are 2 kinds of APIs: REST and GraphQL. Here we use the Github REST API to reach out to the target repositories.
Your Github Personal Access Token
- Personal Access Token (PAT) is the authentation method to log you in and use Github API.
- The Token is the only method for loggin in. Github has stopped to support the Userame-Password login method in third-party developer operation support.
- Copy your Token through: " Profile--Settings--Developer settings--Generate new token. "
- It only occurs once, so you need to save it very carefully in your local Key Chains. Specific tutorial can be found at Github Official Documentation.
Target username & repository
- You will need this information to create the target URL for putting your issues in.
- Taking myself as an example: I want to create an issue inside my exercise project cocktail-chatbot, so I need to have my username and the repository name at first:

0. Basic Script: Create one issue using Python to upload to Github
//
Coding logic explained:

Libraries used:
- requests: The Python library to send HTTP requests.
- json: The Python library to transfer data as text that can be sent over a network.
(Note: If requests and json are not on your device, you need to install it on your Terminal in advance to prevent errors occured.)
How to use API in your target URL:
- Since we need to deal with the issue part of a repository, the endpoint of our API is /issues.
- Github provides us a list of all endpoints to the API, you can find more at api.github.com.
Sample Codes:
#Automatic creation of issues in Github Repository

"""
Step 0:
Import libraries needed;
Create token as a string
"""

import requests
import json
token = "ghp_u4zCgjAXI1En***************"

"""
Step 1:
Create contents for the issue you want to post
"""
headers = {"Authorization" : "token {}".format(token)}
data = {"title": "Found a bug"}

"""
Step 2:
Generate your target repository's URL using Github API
"""
username = input("Enter Github username: ")
Repositoryname = input("Enter repository name: ")
url = "https://api.github.com/repos/{}/{}/issues".format(username,Repositoryname)

"""
Step 3:
Post your issue message using requests and json
"""
requests.post(url,data=json.dumps(data),headers=headers)
Specific funtions explained:
- {}.format() :Use the content in the parenthesis to fill in the curly brackets. The format wording here is a little bit misleading.
- requests.post(url --required, data --optional, headers --optional ):Post your target contents on the website that was represented by the url variable.
- json.dumps(): Turn Python data into JSON strings to fit the need of HTTP data transfer.
Outputs:
- After running this script, in your Python IDE, you can input the information of your target repository following the wording as below:

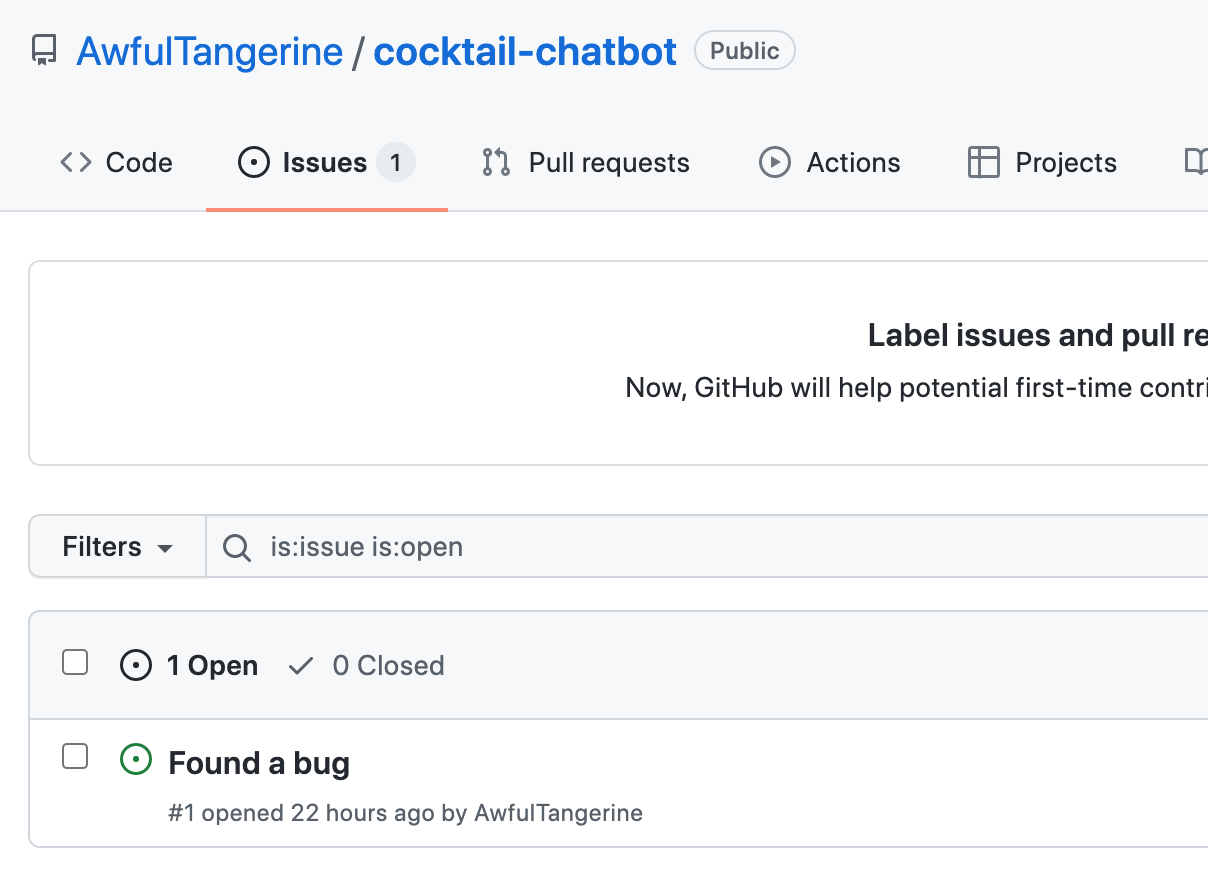
- Then, if you look back to your target repository, you can see that an issue titled "Found a bug" has been successfully created.

1. Create multiple issues at the same time
It seems easy if we simply run these codes. However, it's a little bit unnecessary using this script just for posting one issue.
Is there any possible way to improve this script so that it can create a bunch of different issues to this repository? Let's have a try.
After trying several times, I found that nothing else needs to change except for the data part:
-
First, we can create a list containing several dictionaries and each of them stands for a new issue.
-
Then, we need to add a for loop to replicate the request process of adding the elements of issues onto my repository.
#These codes remain the same
import requests
import json
token = "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"
headers = {"Authorization" : "token {}".format(token)}

#Create a list containing different issues
data_lib = [{"title": "Bug still not solve"}, {"title": "Add a new feature"}, {"title": "Rewrite the README"}]

#These codes remain the same
username = input("Enter Github username: ")
Repositoryname = input("Enter repository name: ")
url = "https://api.github.com/repos/{}/{}/issues".format(username,Repositoryname)

#Add a for loop to repeat the request and posting process
for data in data_lib:
    requests.post(url,data=json.dumps(data),headers=headers)
Output:

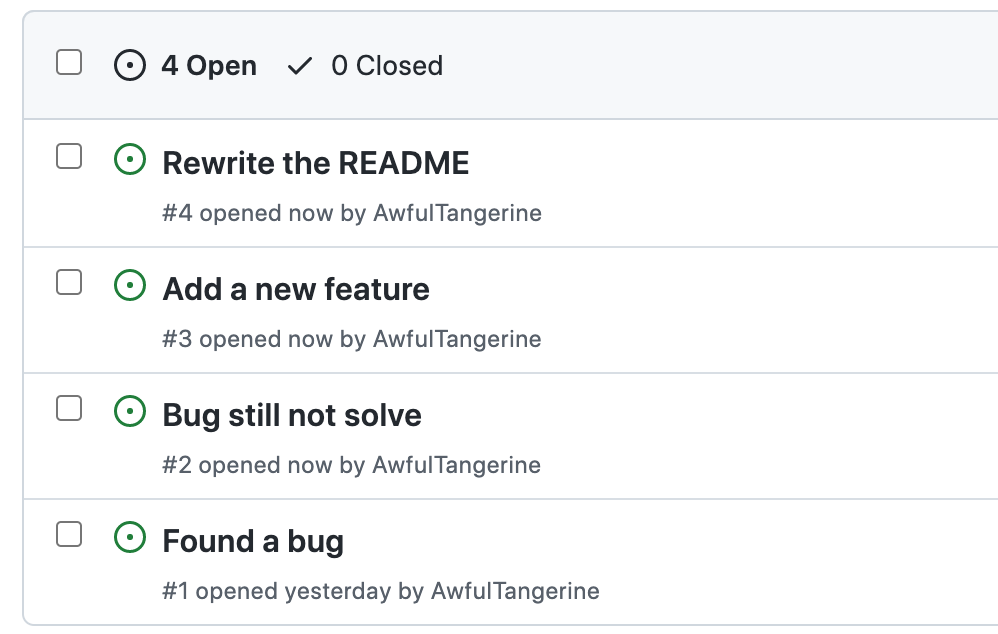
After running, we can see that three extra issues are opened at exactly the same time!
Besides this trial, you can also change other parts of this code to match your automation needs.
For example, you can also remove the input function in the repository part, setting a definite repository link url for your own workflow.
2. Commenting & Adding Labels under an issue
Based on the previous explorations, we can comment or add labels using the same logic.
The logic and functions needed remain the same, while several parts in the script need to change:
- Use functional programming instead to make the calling more readable;
- Change the url for the Github API by specifying the issue number and comment/labelling funtions;
- Change the data needed to post. For specific parameters that varied from functions, pleace refer to Github's official documentation on using REST API:
Here are the additional codes for example:
2.1 Creating comments
def comment_under_issue(issue_number, comment_text):
    url_comment = "https://api.github.com/repos/{}/{}/issues/{}/comments".format(username,Repositoryname,str(issue_number))
    comment = {"body": str(comment_text)}
    requests.post(url_comment,data=json.dumps(comment), headers = headers)

#comment_under_issue(4,"testtest")
Outputs:


Here we successfully created a comment "testtest" to issue #4.
2.2 Adding labels
The adding labels function also shares the same logic.
def add_label(issue_number, label_type):
    url_add_label = "https://api.github.com/repos/{}/{}/issues/{}/labels".format(username,Repositoryname,str(issue_number))
    label = {"labels": [label_type]}
    requests.post(url_add_label,data=json.dumps(label), headers = headers)

#add_label(3,"enhancement")
Outputs:

-
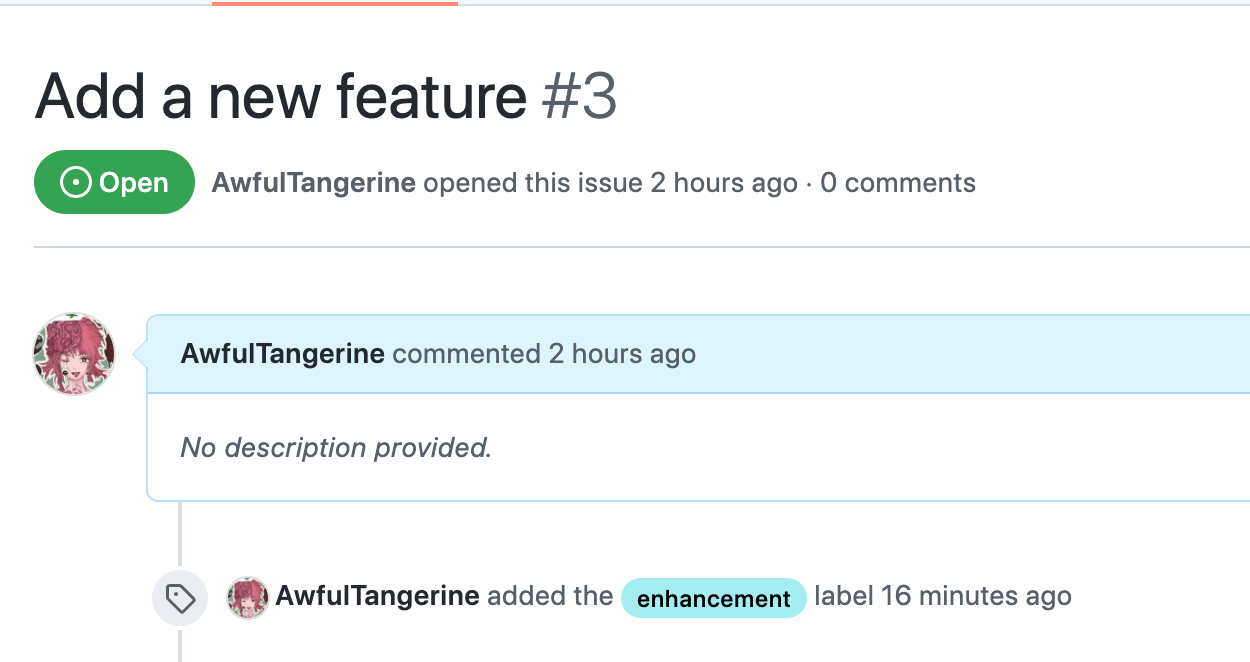
Here we successfully created an enhancement label to issue #3.
-
While adding labels, here are a few important notes to keep an eye on:
- The API is called by labels, not label. Do not misspell.
- Labels should be stored in a list and the type should be string, or it would return nothing.
- If you create a label that dosen't belong to the current label groups under this repository, it would return nothing.
Question
What is the function used to post issues onto the Github repository?
With this article at OpenGenus, you must have the complete idea of developing a Python script to create Github issues.
