
In this article, we will be going over all the steps to prepare you to be able to open a webpage and log in using Python and some third-party applications. This is for developers at any level I will be going in-depth so everyone can fully understand this process.
Table of contents
- Setting up your workspace
- Downloading The necessary Tools
- How to hide our passwords
- Reviewing Imports
- Brief Part About Web Scraping
- Writing the Script
- Running The Program!
1. Setting up Your Workspace
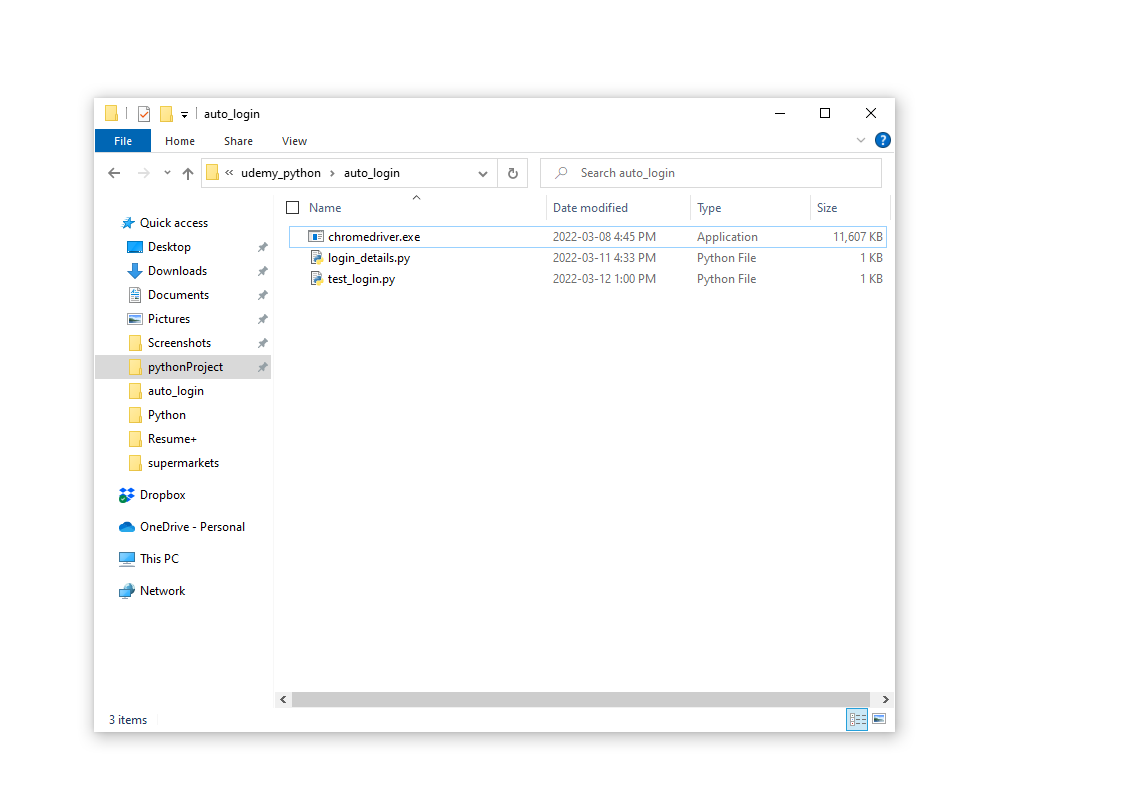
First things first whenever we start working on a script, we want to make sure our set up is proper and organized. We will start by creating a folder I will be naming my folder auto_login. We will be holding 3 files total in this folder and it should look like this.
2. Downloading The necessary Tools
ChromeDriver
In this project, we will be making use of some 3rd party applications. The first one we will be using is called ChromeDriver You can download the program here.
Once on the page choose the appropriate link for your chrome version. Then you will choose the appropriate link according to your system. If you are on windows the 32bit link works regardless. You will then be downloading a zip file. Once downloaded we will move this zip file and extract it into the folder we have created. If you get stuck here, here is a video of how to download ChromeDriver for windows and for Mac.
Selenium
Selenium is a great program for working with automation and web applications, we will be using it for these exact purposes. The installation process for selenium is simple, you open the command prompt by searching up "cmd" on your computer. Open the command prompt and enter the following command:
pip install selenium
If you need more help with this installation or you run into issues, click here. Otherwise, let's move on.
3. How to hide our Passwords
If we must show our passwords while using this program we are not really able to show it off to our friends and where is the fun in that? In this article, I will show you a way to keep your login information hidden so you can share this with friends and not have worries about security. We will be creating another file and call it "login_details.py". We are going to keep this file as basic as possible inserting only 2 lines of code:
username = "username"
password = "password"
That is it, we will be importing this file into our code so when we want to show anyone our file the username and password will be hidden in our secret file.
4. Reviewing Necessary Imports
from selenium import webdriver
from selenium.webdriver.common.by import By
import login_details
This first part is where we import the modules required for the program. Beginning with Webdriver, it allows us to use our Python code to create test scripts. It is a web framework that allows for cross-browser testing. This tool will allow us to connect to a bunch of APIs and use them to test our web application.
The next line: from selenium.webdriver.common.by import By. This line allows us to locate elements By a specific name like the variables ID or class_name. This is important as the find_element() is a key part of this program and understanding it is crucial.
The last line: import login_details. If you have not learned already, this is how our program is able to communicate to our secret passwords doc and get us that information. Without this, we have no username and password.
5. Brief Part on Web scraping
An important part of being able to use the web for automation is web scraping. This is the practice of using bots to grab the content of sites. We will need to locate certain IDs for this program and this is good knowledge to have about the internet and chrome. When we will be using the function find_element(By.id, "ID") We need to locate that ID first because the function needs it, I will show you how to do this. Let's go to LinkedIn's sign-in page. I recommend going incognito for this, as it can make the process much easier. Whenever you want to find out about the properties of an object right-click on the object and then click inspect. So, hover over the "Email" box and inspect it. We can then see all properties, we are looking for the id which looks like, id="username". This is how you find the properties of certain objects. Once you inspect the email we are looking for a piece of code that looks like this, then we are copying id which is "username".
<input id="username" name="session_key" type="text"
       aria-describedby="error-for-usrername"
       requiredvalidation="email|tel" class autofocus
       aria-label="Email or Phone">
6. Writing the Script
With the folder all set up and our other files in the same folder as our Python scripts, we can begin coding! Let's name our file "test_login.py" We will start by bringing in our username and passwords from our login_details.py file. It will look like this:
username = login_details.username
password = login_details.password
We need to access the Webdriver and specifically for chrome which we will do with the following line:
driver = webdriver.chrome()
This line is responsible for creating an instance of Webdriver for chrome. If you wanted to use a different browser, swap out chrome for the other browser. Once we have created an instance we need to now go to our page. We use the driver.get() function to do so. This function will go to the page we input and wait for the following link to load fully. Here is what it looks like in our code, we are going to use LinkedIn for our example. Optional code is to put the browser to full screen once loaded which is shown under the driver.get().
driver.get("https://www.linkedin.com/uas/login?")
driver.maximize_window()
Now all that needs to be done is to input our login info and hit sign-in. We will do this with the find_element() function. As well as the send.keys() function, this is used to send our information and actually input it into the browser. It looks like this.
driver.find_element(By.ID, "login_field").send_keys(username)
driver.find_element(By.ID, "password").send_keys(password)
driver.find_element(By.XPATH,"//*[@id=\"organic-div\"]/form/div[3]/button").click()
Once you have followed all these steps, we are good to go.
7. Running The Program
from selenium import webdriver
from selenium.webdriver.common.by import By
import login_details

username = login_details.username
password = login_details.password

driver = webdriver.Chrome()
driver.get("https://www.linkedin.com/uas/login?")
driver.maximize_window()

driver.find_element(By.ID, "username").send_keys(username)
driver.find_element(By.ID, "password").send_keys(password)
driver.find_element(By.XPATH,"//*[@id=\"organic-div\"]/form/div[3]/button").click()
Before we begin let's make sure the folder is set up correctly so after everything is done the folder should hold 3 files. Our main script which is called test_login.py, the username and password file, called "login_details", and finally chromdriver.exe.
Let's make sure our program works and begin using our first bot. Above is the entire code needed to run our program lets go back into the command prompt and go to our folder we created. Use the following script to run the program, where file_name is the name of your file.
python file_name.py
There you have it a self login bot with selenium, congratulations for making it this far, good luck!