
In this article, we have explored how to send browser notifications from Chrome extensions.
Browser Notifications
Notifications are useful when a particular application needs to catch the user's attention.
A notification can inform the user about an alert or event. The user can then either respond to that action or dismiss the notification.
It could also be produced as a result of a background process or when the extension needs some user response.
Chrome extensions are programs written to extend the browser functionality. We will now explore how to send a notification from the chrome extension.
Building a basic chrome extension
Before we learn how to send notifications from the chrome extension, we need to know the basics of a chrome extension and it's parts.
It is covered in detail in this article
Just as a primer, an extension contains a mandatory manifest file along with html and javascript scripts.
Using the chrome.notifications api
Browser notifications from the chrome extension can be sent using the chrome.notifications api.
This rich notifications api lets you create the notifications using some templates and show them to your user.
We can consider this as an example for a basic notifications template.
var notify = {
  type: "basic",
  title: "OpenGenus Foundation",
  message: "https://iq.opengenus.org",
  iconUrl: "icon128.png"
}
The type indicates the type of tthe notification. The title field indicates the title of the notification. The message indicates the message you need to send. iconUrl indicates a url to an icon.
Let's send a notification
Create a new folder
Make a new folder and create a file manifest.json in it.
Put the following contents in it.
{
    "manifest_version": 2,
    "name": "Notification Extension",
    "version": "1.0",
    "description": "This is the notification extension",
    "icons": {
        "128": "icon128.png",
        "48": "icon48.png",
        "16": "icon16.png"
    },

    "background" : {
        "scripts" : ["background.js"]
      },


    "permissions": ["notifications"],
    "browser_action": {
        "default_icon": "icon16.png",
        "default_popup": "index.html"
    }
}
We need to add some extra things to ensure that notifications work, permissions mean the permission given to this extension, it requires the notification permission to send
the notification. The background indicates the background script, we leave it as an empty file for now.
Create index.html file
Create an index file as our popup and add the following contents to it.
<!DOCTYPE html>
<html>
    <head>
        <title>Notification Extension</title>
    </head>
    <body>
        <h1>Notification Extension</h1>
       <script src = "send.js"></script>
    </body>
</html>
Here we link a file send.js as a script to our popup, this would contain the logic for firing the notification.
Create send.js file
This file contains our logic for sending the notification. Add the following contents to it.
var options = {
type: "basic",
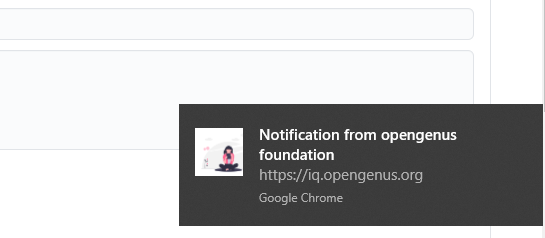
title: "Notification from opengenus foundation",
message: "https://iq.opengenus.org",
iconUrl: "icon128.png"
};
chrome.notifications.create(options, callback);
function callback(){
console.log('Popup done!')
}
Here, the options object represents the template for our notification as discussed above. We use the chrome.notifications.create function to create the notification.
The first argument taken is the option template and the next argument is the callback function which is a simple console.log.
Testing the extension.
Load the extension according to the steps mentioned here
Click on the puzzle icon next to your address bar, you should see our notification.
Checkout the complete code here