
Xiaolin Wu's Line Drawing Algorithm is a recognized Line Drawing Algorithm in Computer Graphics which is used to produce Anti-aliased lines. In this article, we have explored this in depth.
Table of contents:
- What is Xiaolin Wu's Line Drawing Algorithm?
- What are Line Drawing Algorithms in Computer Graphics?
- What are Anti-aliased Lines?
- Working of the Xiaolin Wu's Line Drawing Algorithm
- Implementation in Python
- Code walk-through / Pseudo-code
- Applications and Advantages of Xiaolin Wu's Line Drawing Algorithm
- Time & Space Complexity
What is Xiaolin Wu's Line Drawing Algorithm?
Xiaolin Wu's Line Drawing Algorithm is a recognized Line Drawing Algorithm in Computer Graphics which is used to produce Anti-aliased lines. This algorithm was invented by Xiaolin Wu and it was first presented in 1991 by means of an article in a magazine.
The two keywords here are:
- Line Drawing Algorithm
- Anti-aliased Lines
Let's understand as to what these keywords mean and represent in order for us to have a better understanding of the algorithm.
What are Line Drawing Algorithms in Computer Graphics?
In Computer Graphics, a Line Drawing Algorithm is an algorithm which is used to produce or represent line segments on any discrete graphical media, such as pixel-based displays.
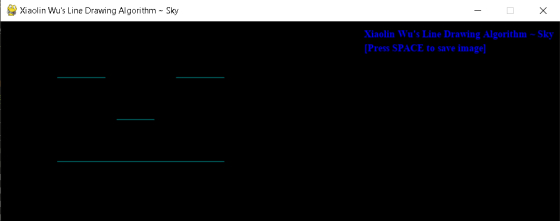
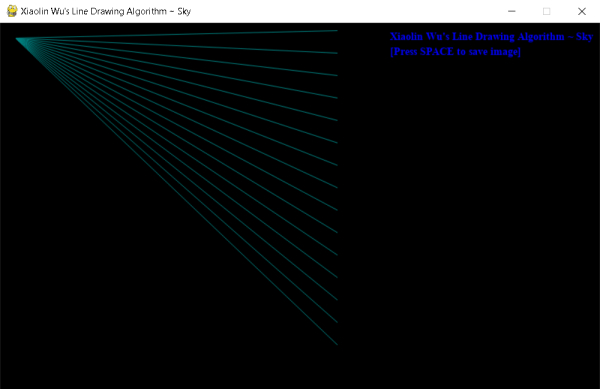
Here is an example of the Xiaolin Wu's Line Drawing Algorithm, which is one of the most recognized Line Drawing Algorithm, in working practice.
What are Anti-aliased Lines?
When any basic element such as a line, square, etc. is drawn on any discrete graphical media, the specified grid cells (at the position of the element) are either replaced with the element's colour or are left unchanged. Due to this process, the edges of the element or the shape appear to be jagged, which can be visually unappealing to the human eye, unless you are specifically going for that kind of an effect.
Aliasing is a term that is used to describe this phenomenon, i.e., the jagged appearance around the edges of any given object.
The application of methods to reduce the effect of aliasing is collectively known as Anti-aliasing.
Lines/shapes that have underwent the process of any form of Anti-aliasing are known are Anti-aliased lines/shapes.
Aliased line
Close-up


Anti-aliased line
Close-up


Now that you know as to what Line Drawing Algorithms and Anti-aliased lines mean, you can put two and two together and have a basic idea about the Xiaolin Wu's Line Drawing Algorithm, because after all, it is a Line Drawing Algorithm that produces anti-aliased lines.
If you want to create shapes that are visually appealing to the human eye (no jagged edges), then which algorithm should you use?
Working of the Xiaolin Wu's Line Drawing Algorithm
The basis of the algorithm is to draw pairs of pixels straddling the line, which are coloured according to their proximity (gradient). Pixels which are to be drawn at the end points of lines are handled separately and also the lines which are less than one pixel long are to be handled as a special case.
Algorithm
The following algorithm is generic and might not correspond exactly with the implementation code, however, the main concept or the algorithm used is roughly the same with some changes here and there because of the usage of PIL (Python Image Library) and Pygame.
define function fill_colour(x, y, bgt) as
    plot the pixel at point (x, y) with brightness bgt, wherein bgt
    is to be specified/calculated within the range of 0 to 1.

# fractional part of x
define function fPart(x) as
    return x - int(x)

# remaining fractional part of x
define function rfPart(x) as
    return 1 - fpart(x)

#function to draw the line
define function draw_line(x1,y1,x2,y2) as
    steep = True if abs(y2 - y1) > abs(x2 - x1) else False

    dx = x2 - x1
    dy = y2 - y1

    if steep == True, then do
        swap x1 with y1, x2 with y2 & dx with dy
    end if
    if x1 > x2 then do
        swap x1 with x2 & y1 with y2
    end if

    gradient = dy / dx
    yIntersection = y1 + rfPart(x1) * gradient
    if dx == 0.0 then do
        gradient = 1.0
    end if

    # handling of the first endpoint
    endX = round(x1)
    endY = y1 + gradient * (endX - x1)
    xGap = rfPart(x1 + 0.5)
    pxlXa = endX
    pxlYa = int(endY)
    if steep == True then do
        fill_colour(pxlYa, pxlXa, rfPart(endY) * xGap)
        fill_colour(pxlYa + 1, pxlXa, fPart(endY) * xGap)
    else do
        fill_colour(pxlXa, pxlYa, rfPart(endY) * xGap)
        fill_colour(pxlXa, pxlYa + 1, fPart(endY) * xGap)
    end if
    yIntersection += gradient

    # handling of the second endpoint
    endX = round(x1)
    endY = y2 + gradient * (endX - x2)
    xGap = fPart(x2 + 0.5)
    pxlXb = endX
    pxlYb = int(endY)
    if steep == True then do
        fill_colour(pxlYb, pxlXb, rfpart(endY) * xGap)
        fill_colour(pxlYb + 1, pxlXb, fpart(endY) * xGap)
    else do
        plot(pxlXb, pxlYb, rfpart(endY) * xGap)
        plot(pxlXb, pxlYb + 1, fpart(endY) * xGap)
    end if

    #main loop
    if steep == True then do
        for i from (pxlXa + 1) to (pxlXb - 1) do
           start loop
                fill_colour(int(yIntersection), i, rfPart(yIntersection))
                fill_colour(int(yIntersection) + 1, i, fPart(yIntersection))
                yIntersection += gradient
           end loop
    else do
        for i from (pxlXa + 1) to (pxlXb - 1) do
           start loop
                fill_colour(i, int(yIntersection), rfPart(yIntersection))
                fill_colour(i, int(yIntersection) + 1, fPart(yIntersection))
                yIntersection += gradient
           end loop
    end if
end function
Implementation in Python
import pygame, os
from PIL import Image

class wuzAlgorithm:
    def __init__(self, img, point1, point2, clr):
        self.image = img
        self.colour = clr
        self.x1, self.y1 = point1
        self.x2, self.y2 = point2
        self.dx, self.dy = self.x2 - self.x1, self.y2 - self.y1
        self.steep = abs(self.dy) > abs(self.dx)
        self.calc_details()
        self.startX, self.endX = self.calc_endPoint(point1) + 1, self.calc_endPoint(point2)
        self.draw_lines()


    def calc_points(self, xCoOrd, yCoOrd):
        return ((xCoOrd, yCoOrd), (yCoOrd, xCoOrd))[self.steep]


    def fPart(self, x):
        return x - int(x)


    def rfPart(self, x):
        return 1 - self.fPart(x)


    def calc_endPoint(self, point):
        x, y = point
        return int(round(x))


    def fill_colour(self, point, alpha=1):
        colour = tuple(map(lambda background, foreground: int(round(alpha * foreground + (1-alpha) * background)), self.image.getpixel(point), self.colour))
        self.image.putpixel(point, colour)


    def calc_details(self):
        if self.steep:
            self.x1, self.x2, self.y1, self.y2, self.dx, self.dy = self.y1, self.y2, self.x1, self.x2, self.dy, self.dx
        if self.x2 < self.x1:
            self.x1, self.x2, self.y1, self.y2 = self.x2, self.x1, self.y2, self.y1
        self.gradient = self.dy / self.dx
        self.yIntersection = self.y1 + self.rfPart(self.x1) * self.gradient


    def draw_lines(self):
        for x in range(self.startX, self.endX):
            y = int(self.yIntersection)
            self.fill_colour(self.calc_points(x, y), self.rfPart(self.yIntersection))
            self.fill_colour(self.calc_points(x, y + 1), self.fPart(self.yIntersection))
            self.yIntersection += self.gradient


class wuzWindow:
    def __init__(self):
        pygame.init()
        self.width, self.height = 800, 600
        self.resolution = self.width, self.height
        self.screen = pygame.display.set_mode(self.resolution)
        self.display = pygame.Surface(self.resolution)
        self.clock = pygame.time.Clock()


    def display_line(self, img, point1, point2, clr):
        self.wuzAlgo = wuzAlgorithm(img, point1, point2, clr)
        self.mode, self.size, self.data = img.mode, img.size, img.tobytes()
        self.output_image = pygame.image.fromstring(self.data, self.size, self.mode)


    def load_window(self):
        self.display.fill('black')
        self.screen.blit(self.display, (0, 0))
        self.screen.blit(self.output_image, (0,0))


    def save_image(self):
        #os.chdir(r"C:\Users\rebor\Desktop\Skywalker\Internships\OpenGenus\Xiaolin Wuz Algorithm")
        directory = os.getcwd() + r"\Wu's Line Drawing Algorithm Output.jpg"
        pygame.image.save(self.screen, directory)
        print("Image has been successfully saved at the following location:\n", directory)


    def run_window(self, img, start, end, step):
        self.buttonFont = pygame.font.SysFont('times new roman', 14, bold=True)
        t1 = self.buttonFont.render("Xiaolin Wu's Line Drawing Algorithm ~ Sky", True, (0, 0, 255))
        t2 = self.buttonFont.render('[Press SPACE to save image]', True, (0, 0, 255))
        pygame.display.set_caption("Xiaolin Wu's Line Drawing Algorithm ~ Sky")
        for line in range(start, end, step):
            self.display_line(img, (20, 20), (450, line), (0, 128, 128))
        # self.display_line(img, (80, 80), (150, 80), (0, 128, 128))
        # self.display_line(img, (250, 80), (320, 80), (0, 128, 128))
        # self.display_line(img, (165, 140), (220, 140), (0, 128, 128))
        # self.display_line(img, (80, 200), (320, 200), (0, 128, 128))
        # Remove these comments to create a smiley face! =) -_-
        # (Don't forget to remove the for loop first)
        while True:
            self.load_window()
            for event in pygame.event.get():
                if event.type == pygame.QUIT:
                    exit()
                if event.type == pygame.KEYDOWN:
                    if event.key == pygame.K_SPACE:
                        self.save_image()
            self.screen.blit(t1, (self.width - 280, self.height - self.height + 10))
            self.screen.blit(t2, (self.width - 280, self.height - self.height + 30))
            pygame.display.flip()
            self.clock.tick(60)


black = (0, 0, 0)
image = Image.new("RGB", (500, 500), black)
obj1 = wuzWindow()
obj1.run_window(image, 10, 450, 30)
Code walk-through / Pseudo-code
- Create a new image object through PIL (Python Image Library) with the desired settings.
- Create an object of the wuzWindow class.
- When the object of the wuzWindow class is created, some required parameters and features in order for the pygame window to run properly are setup through the init() method of the wuzWindow class.
- Call the run_window() method of the wuzWindow class through its object by passing the required arguments which are described in the next point.
- The image object has to be passed as the first argument, then the starting point, the ending point and the incremental value for the x-axis has to be passed as the second, third and fourth argument respectively.
- In the run_window() method, firstly the simple fonts that are going to be displayed on the output window are rendered. This is a trivial operation.
- Then the display_line() method of the wuzWindow class is called with the required arguments (described in the next point). This method can be called as many times by the user to draw the desired amount of lines. It can be called from within a loop as well.
- The first argument to be passed is the image object itself, the second argument is the starting point of the line (x, y), the third argument is the ending point of the line (x, y) and the last argument of the line is the colour of the line in the form of a tuple (R, G, B).
- In the display_line() method, an object of the wuzAlgorithm class is created by passing the required arguments (described in the next point).
- The arguments to be passed are exactly the same as display_line's arguments, in the same order.
- As soon as the object of the wuzAlgorithm class is created with the required arguments, the flow of control of the program goes to the init() method of the wuzAlgorithm class.
- In the init() method of the wuzAlgorithm class, the parameters are initialized and setup properly in the form of instance attributes.
- The value of the variable steep is setup depending upon the values of dy and dx.
- The calc_details() of the wuzAlgorithm class is called. No arguments are required for this method.
- Inside the calc_details() method, value swapping is performed if deemed necessary depending upon the value of the variables steep, x1 & x2.
- Some more variables are setup and then the control goes back to the init() method of the wuzAlgorithm class.
- The values of the starting point and the ending point on the x-axis are calculated.
- Lastly, the draw_lines() method of the wuzAlgorithm class is called.
- Inside the draw_lines() method, the main loop for drawing the lines is executed.
- The loop starts from the starting point of the x-axis and continues till the ending point is reached.
- {For loop begins}
- Inside the loop, the value of the variable yIntersection is rounded-off to become an integer value. For example, 6.984 will be rounded off to 6.
- The fill_colour() method of the wuzAlgorithm class is called with the required arguments (described in the next point).
- The first argument is the point where the colour has to be filled and the second argument is basically the opacity of the colour. The value of the second parameter can either be passed manually or else it will be defaulted to a value of 1 (in which case the colour won't be transparent at all).
- The fill_colour() method is called once again, but this time we are going to move down by one pixel in terms of the y-axis. This is how anti-aliasing is applied in this algorithm.
- The value of the variable gradient is added to the variable yIntersection.
- {End of for loop}
- Once the loop is completely over, the control goes back to the run_window() method of the wuzWindow class.
- At this point, the line/lines have already been drawn onto the display screen of our pygame window. But now we have to ensure that the display window stays on the user's screen until the exit button is pressed so that the user can actually see the final output.
- To do that, the main pygame window loop is placed in the run_window() method.
- {While loop begins}
- The load_window() method of the wuzWindow class is called. This method simply sets up our display for the pygame window.
- A for loop inside the while loop checks for two events (described in the next point).
- Event 1: If the cross button is pressed, then the program will stop and the pygame window will be closed.
Event 2: If the space button is pressed, then the save_image() function of the wuzWindow class is called which will simply save the image at a specified directory. - All the contents of the pygame window are updated on a frame-by-frame basis (flip() method).
- The FPS (frames per second) for our pygame window is set to 60.
- {End of while loop}
Implementation Output
Applications and Advantages of Xiaolin Wu's Line Drawing Algorithm
- It can be implemented in a game or any other software where quality in terms of visual appearance is the priority.
- It performs anti-aliasing.
- It is a considerably fast algorithm (although not the fastest).
- It can handle the scenarios when the line endpoints do not lie exactly on the integer points of the pixel grid.
- It can be used with interpolation or even rasterization to produce some visually stunning effects.
Time & Space Complexity
The time and space complexity of the Xiaolin Wu's Line Drawing Algorithm are:
- Worst case: Θ(n)
- Average case: Θ(n)
- Best case: Θ(n)
- Space complexity: Θ(1)
Where n is the number of intermediate points between end and start point of a line.
The complexity will also increase exponentially if the total amount of lines being drawn is also increased.
With this article at OpenGenus, you must have the complete idea of Xiaolin Wu's Line Drawing Algorithm.