
In this article, we have explained the ideas of REST and CRUD and developed a Simple CRUD Application with Django Rest Framework.
Table of contents:
- Introduction to REST and CRUD
- Time to Setup
- Time to Code
- Let us Test our code
We will get started now with our Simple CRUD Application with Django Rest Framework.
Introduction to REST and CRUD
Ever wondered how your favorite web applications work? like Twitter, Facebook and so on, Yes they look fabulous but what really makes them tick; Its a little thing known as a REST API; so what is a REST API?
An API is an application programming interface. It is a set of rules that allow programs to talk to each other. The developer creates the API on the server and allows the client to talk to it.
REST determines how the API looks like. It stands for “Representational State Transfer”. It is a set of rules that developers follow when they create their API. One of these rules states that you should be able to get a piece of data (called a resource) when you link to a specific URL.
A REST API communicates with that beautiful front-end you see through HTTP Requests by those specified urls; So you can perform operations like Create a facebook account, Read your facebook posts, Update your facebook password and if you happen to have beef with Mark Zukerberg, Delete your facebook account.
Take note of the actions Create, Read, Update and Delete; they are the very basic rules that makes an API to be considered RESTful, typically to create a resource we would utilize a POST request to a url in our API, GET to Read, PUT to update and DELETE to delete.
Time to Setup
I would advise you to read up on HTTP VERBS, without further ado, lets get our hands a little dirty
First things first, make sure you have python installed on your PC or Mac.
Let's create a folder for our project.
mkdir simple-todo-application
Open the folder with your favorite code editor and create a requirements.txt in the root folder of simple-todo-application
In your requirements.txt file you should have this
Django==3.1.3
djangorestframework==3.12.2
Before we do any installing, lets create an isolated environment for our project, Its best pratice to do this, because it could get confusing differentiating between the packages you in your global python environment and the one you require in your application, so best to create a virtual environment so all the packages you use are unique to your application. How'd we do that?
Make sure you are in the application folder and run the command you have below:
N.B: If you have python 3 and python 2, you might want to run python3 instead of python if you want to create an isolated environment in python 3
python -m venv ./venv
You should have a ./venv folder in your application folder. Now activate the isolated environment, so all our packages will be installed there, a virtual environment is activated differently for Mac OSX and Windows.
Mac OSX
source venv/bin/activate
Windows
.\venv\Scripts\activate.bat
After activating, you should see (venv) in your terminal, you can install the packages, we stated in the requirements.txt by using the command below:
pip install -r requirements.txt
Next let's bootstrap the django application:
django-admin startproject app
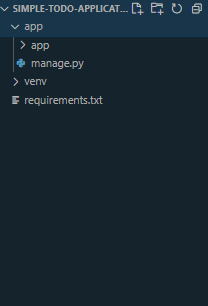
you have the following folders in your application directory:
Time to Code
Next lets create an app for our todo, make sure you cd app before running the command below:
django-admin startapp todo
You should have a new directory todo created and it should have the following files and folder.
    ./todo
        ./migrations
        __init__.py
        admin.py
        apps.py
        models.py
        tests.py
        views.py
Create two additional files serializers.py and urls.py in the directory ./todo.
Don't worry you will know why those two files exist pretty soon.
First, in the ./app/app folder, go to the settings.py and add to INSTALLED_APPS, todo app and rest_framework.
    .
    .
    # Application definition
    INSTALLED_APPS = [
        'django.contrib.admin',
        'django.contrib.auth',
        'django.contrib.contenttypes',
        'django.contrib.sessions',
        'django.contrib.messages',
        'django.contrib.staticfiles',
        'rest_framework', # add this
        'todo' # add this too
    ]
First let's define the model for our todo, Go to the models.py file in the ./app/todo and you should have this below:
    from django.db import models

    class Todo(models.Model):
        title = models.CharField(max_length=255)
        description= models.TextField()
        deadline = models.DateTimeField()
        isCompleted= models.BooleanField(default=False)
A Model basically defines how our database tables are going to be structured, In this tutorial we are not going to focus too much on the database we will use, so we will go by with the default Django sqlite db (isn't django awesome?).
After creating our model, we need to migrate that model to our tables in our db.
First you'd run:
python manage.py makemigrations
This will detect any models created and make the migrations file and then we create the tables by using the command below:
python manage.py migrate
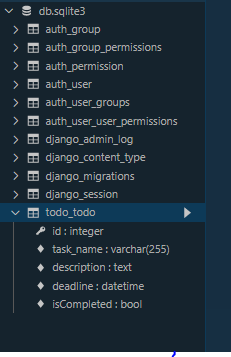
We should have our tables created that is our todo Table and some other default tables that come with django (We will not talk about that now)
If you have an sqlite Explorer, your DB should have the following tables.
We'd also create a serializer for the todo in the serializers.py file in the todo folder.
A Serializer allows us to convert complex data types to native python data types and then convert back to JSON or XML
    from rest_framework import serializers
    from .models import Todo

    class TodoSerializer(serializers.ModelSerializer):
        class Meta:
            model = Todo
            fields = "__all__"
Remember the little intro about REST API, let's create the CRUD endpoints for our todo; so we can create, read, update and delete todos.
In the views.py in your todo folder, lets define what happens when retrieve a request to perform CRUD on our todo.
First, let's add a function to get a single todo from the DB when the user either passes an id or not.
    from django.http.response import Http404
    from django.shortcuts import render
    from rest_framework.views import APIView
    from .models import Todo
    from .serializers import TodoSerializer
    from rest_framework.response import Response

    class TodoAPIView(APIView):

        # READ a single Todo
        def get_object(self, pk):
            try:
                return Todo.objects.get(pk=pk)
            except Todo.DoesNotExist:
                raise Http404

        def get(self, request, pk=None, format=None):
            if pk:
                data = self.get_object(pk)
                serializer = TodoSerializer(data)

            else:
                data = Todo.objects.all()
                serializer = TodoSerializer(data, many=True)

                return Response(serializer.data)
Now let's add a function to create a todo.
    .
    .
    def post(self, request, format=None):
        data = request.data
        serializer = TodoSerializer(data=data)

        # Check if the data passed is valid
        serializer.is_valid(raise_exception=True)

        # Create Todo in the DB
        serializer.save()

        # Return Response to User

        response = Response()

        response.data = {
            'message': 'Todo Created Successfully',
            'data': serializer.data
        }

        return response
What if we wanted to change the deadline for a todo, we need to use put inherited from the API view class.
    .
    .
    def put(self, request, pk=None, format=None):
        # Get the todo to update
        todo_to_update = Todo.objects.get(pk=pk)

        # Pass the instance to update to the serializer, and the data and also partial to the serializer
        # Passing partial will allow us to update without passing the entire Todo object
        serializer = TodoSerializer(instance=todo_to_update,data=request.data, partial=True)

        serializer.is_valid(raise_exception=True)
        serializer.save()
        response = Response()

        response.data = {
            'message': 'Todo Updated Successfully',
            'data': serializer.data
        }

        return response
Now for the last operation i.e. deleting a todo.
    .
    .
    def delete(self, request, pk, format=None):
        todo_to_delete =  Todo.objects.get(pk=pk)

        # delete the todo
        todo_to_delete.delete()

        return Response({
            'message': 'Todo Deleted Successfully'
        })
You have your views.py looking like this:
    from django.http.response import Http404
from django.shortcuts import render
from rest_framework.views import APIView
from .models import Todo
from .serializers import TodoSerializer
from rest_framework.response import Response

class TodoAPIView(APIView):

    # READ a single Todo
    def get_object(self, pk):
        try:
            return Todo.objects.get(pk=pk)
        except Todo.DoesNotExist:
            raise Http404

    def get(self, request, pk=None, format=None):
        if pk:
            data = self.get_object(pk)
        else:
            data = Todo.objects.all()

        serializer = TodoSerializer(data, many=True)

        return Response(serializer.data)

    def post(self, request, format=None):
        data = request.data
        serializer = TodoSerializer(data=data)

        serializer.is_valid(raise_exception=True)

        serializer.save()

        response = Response()

        response.data = {
            'message': 'Todo Created Successfully',
            'data': serializer.data
        }

        return response

    def put(self, request, pk=None, format=None):
        todo_to_update = Todo.objects.get(pk=pk)
        serializer = TodoSerializer(instance=todo_to_update,data=request.data, partial=True)

        serializer.is_valid(raise_exception=True)

        serializer.save()

        response = Response()

        response.data = {
            'message': 'Todo Updated Successfully',
            'data': serializer.data
        }

        return response

    def delete(self, request, pk, format=None):
        todo_to_delete =  Todo.objects.get(pk=pk)

        todo_to_delete.delete()

        return Response({
            'message': 'Todo Deleted Successfully'
        })
But we are not done, we'd have to setup routes so that our front-end can communicate with our REST API and create todos.
In the urls.py in our todo folder, we'd define the routes:
    from django.urls import path
    from .views import TodoAPIView

    urlpatterns = [
        path('todo', TodoAPIView.as_view()),
        path('todo/<str:pk>', TodoAPIView.as_view()) # to capture our ids
    ]
We still not done, our front-end can still communicate, so we need to add the urls for our todo to the global urls.py file located in our ./app where we found the settings.py file and we add the todo urls as below:
    from django.contrib import admin
    from django.urls import path, include

    urlpatterns = [
        path('admin/', admin.site.urls),
        path('api/', include('todo.urls'))
    ]
Now we can perform CRUD using the endpoint /api/todo.
We have sucessfully crreated a CRUD application with Django Rest Framework, but our work is not complete until we document so our front-end developers are not lost.
Let us Test our code
Make sure you have a REST Client installed either Postman or Insonmia.
Personally I prefer Insomia.
I'd Create a Todo First as shown below:
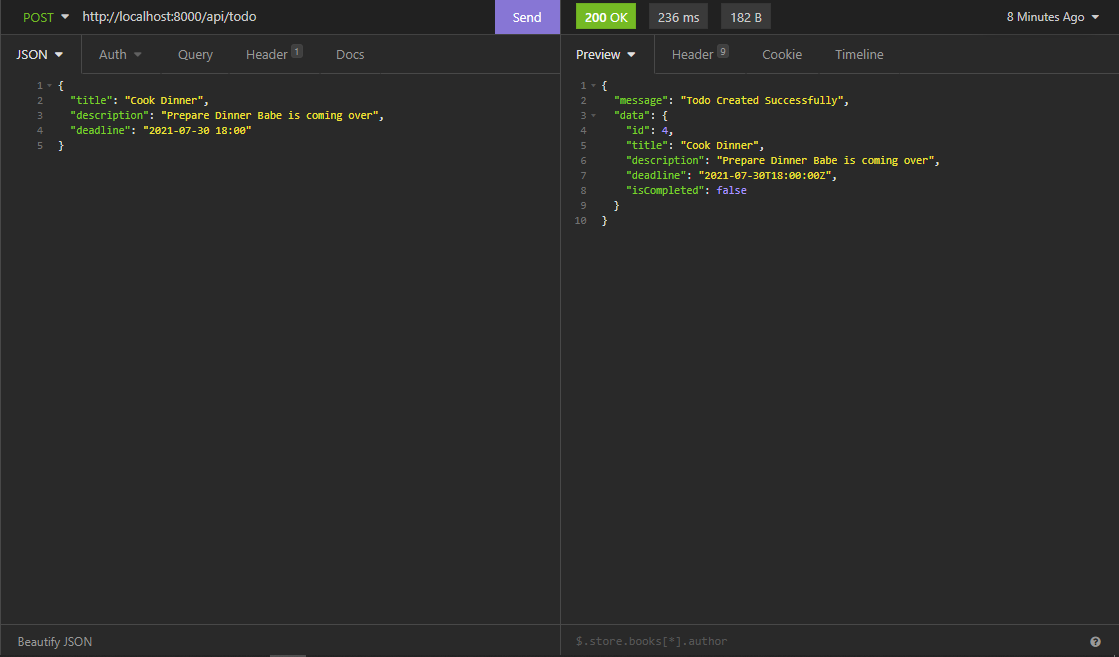
As you can see, I don't pass the isCompleted as part of my request cause I have already set a default value, when we defined the model, but if you want to overrite the default you can pass it.
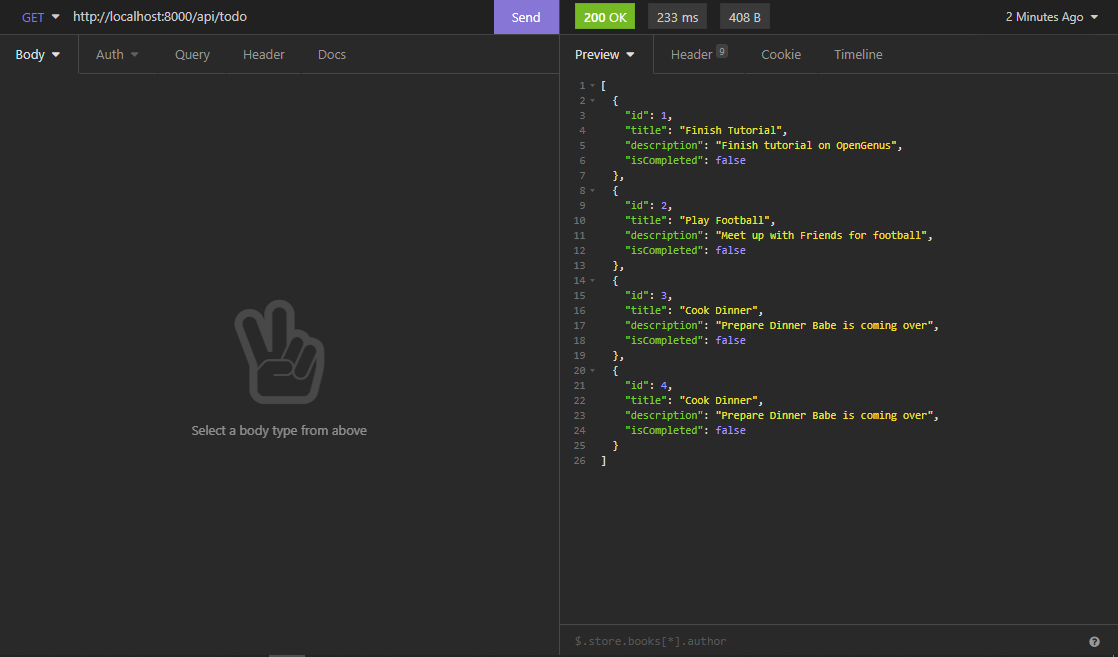
I'd add some more todos, Go ahead and create some more as well.
Let's get all the todos you've added.
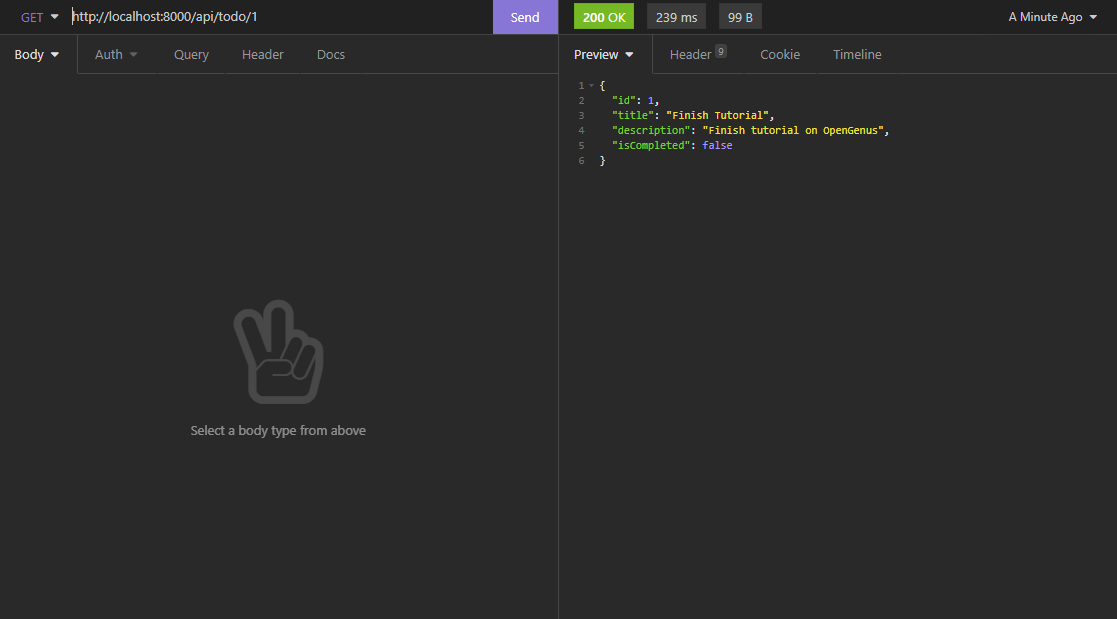
What if we just wanted to one todo, take note of the id field, we would pass part of our routes as localhost:8000/api/todo/{id} as below:
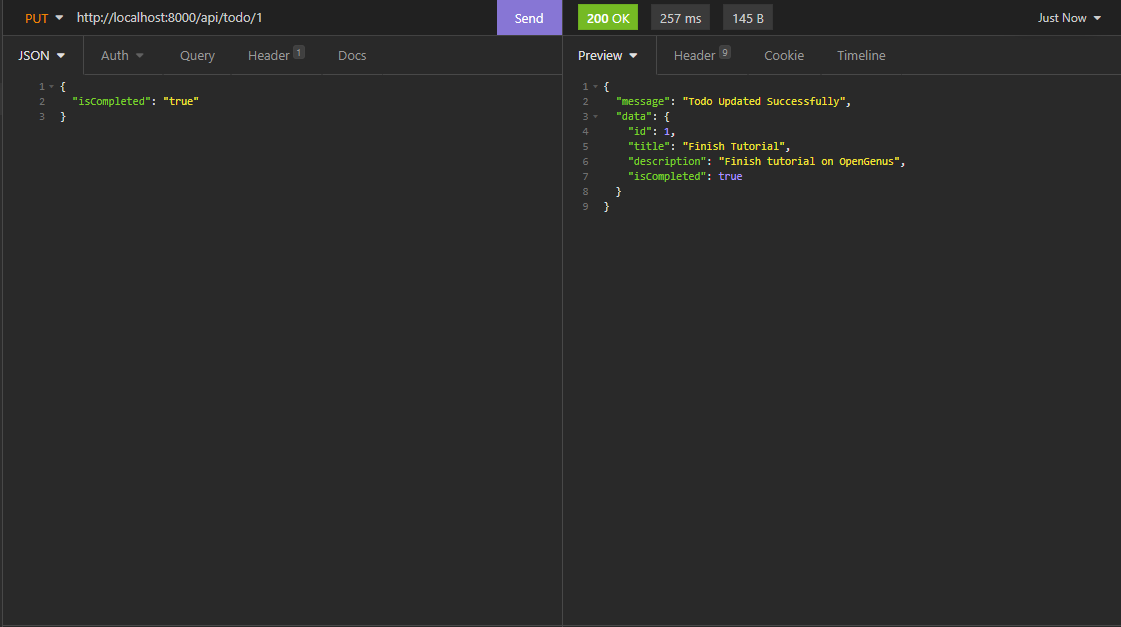
So I think I am done with the task I created for myself to finish writing this tutorial, So I will just go ahead and update the isCompleted to True as shown below:
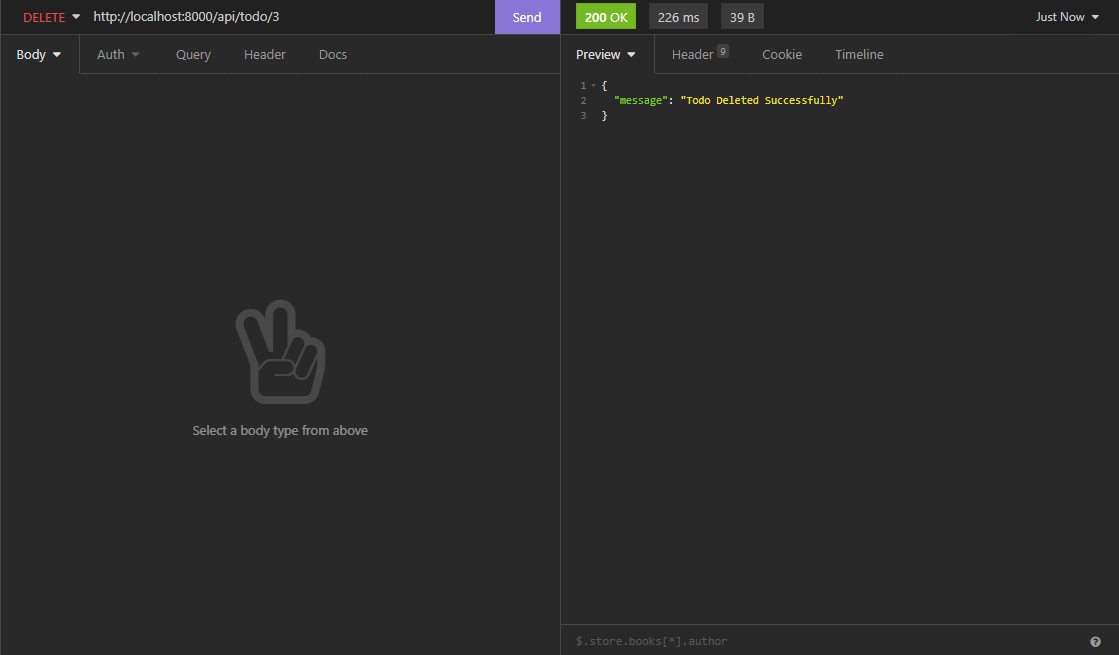
Okay, Now that's done, we can simply delete a todo, let's say I don't want to do task 3 anymore.
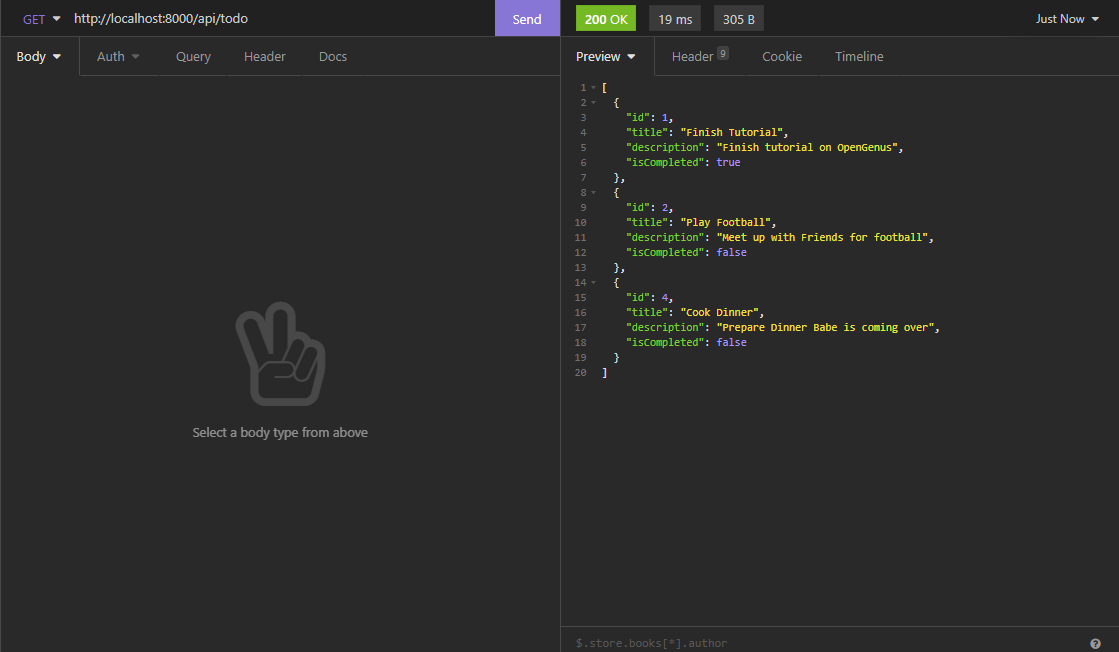
Lets get all todos to check if the todo actually got deleted.
There you go, with this article at OpenGenus, we have successfully created a CRUD application, now go forth and build the next facebook. Cheeers!