
Get this book -> Problems on Array: For Interviews and Competitive Programming
In this article, we will be learning about Google Colaboratory, an excellent tool for data scientists.
Table of Contents
- Introduction
- Setup
- Creating a Notebook
- Adding and Running Code
- Markdown
- Shell Commands
- Working with Files (Uploading and Downloading)
- Downloading / Exporting Code
Introduction
Google Colaboratory, or Colab for short, is a free, web-based Jupyter notebook environment. It allows you to write and execute Python code, document your code using Markdown, visualize datasets, and much more. It requires very little setup and runs entirely in the browser. It is commonly used for machine learning, data analysis, and education.
Setup
Colab requires little setup. All you need is a Google Account and a browser.
To get started, open this link.
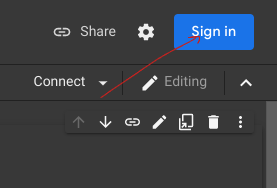
Then, go to the upper right-hand corner and click "Sign in".
Creating a Notebook
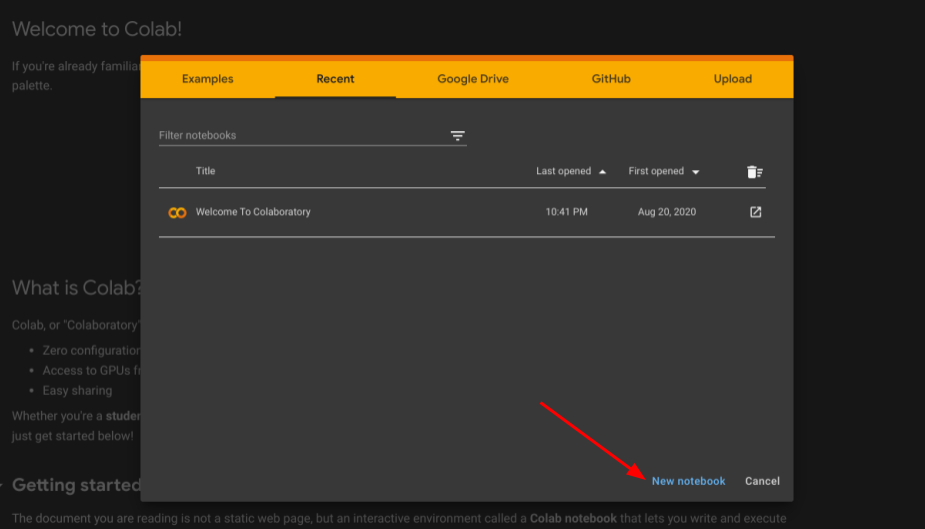
After signing in, you will see a menu to open a notebook. You can select any notebook you have previously created, or you can create a new notebook.
Click "New notebook" to create a new notebook.
This is what the new notebook will look like:
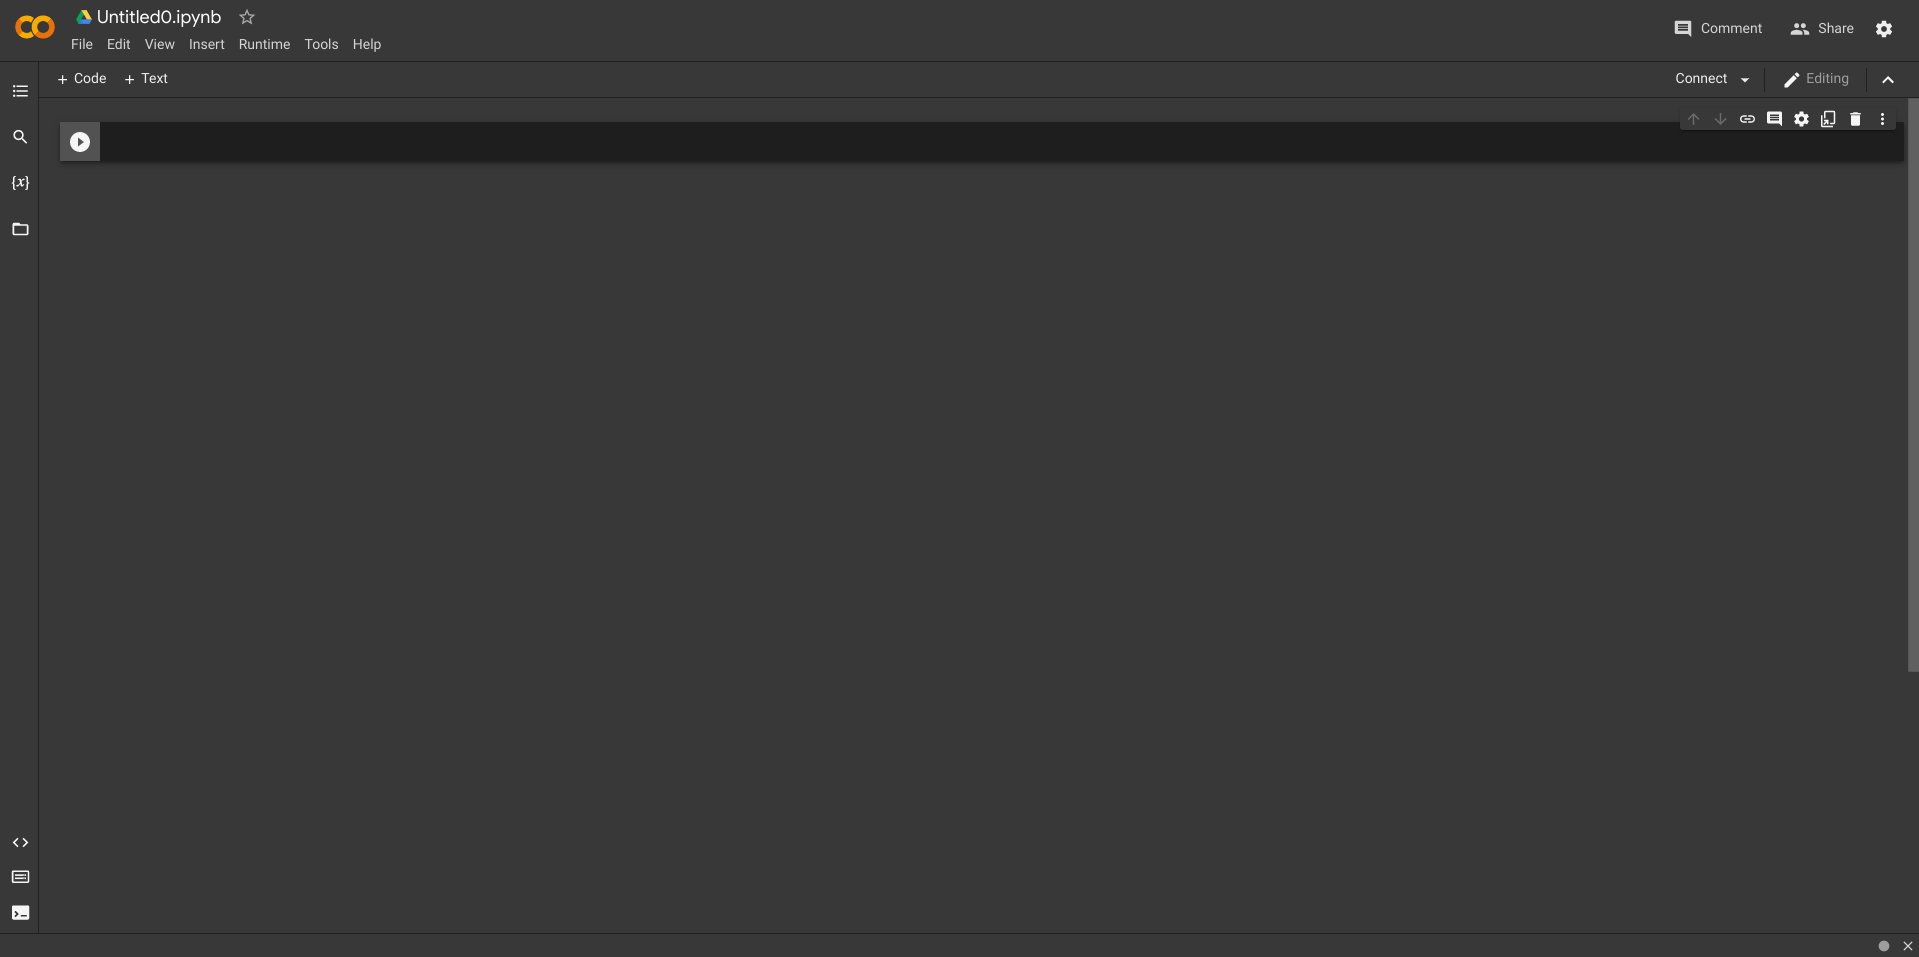
By default, new notebooks in Google Colab are named "Untitled[x].ipynb".
You can rename the notebook by clicking on the name and typing the new name. Let's call this notebook "first.ipynb".
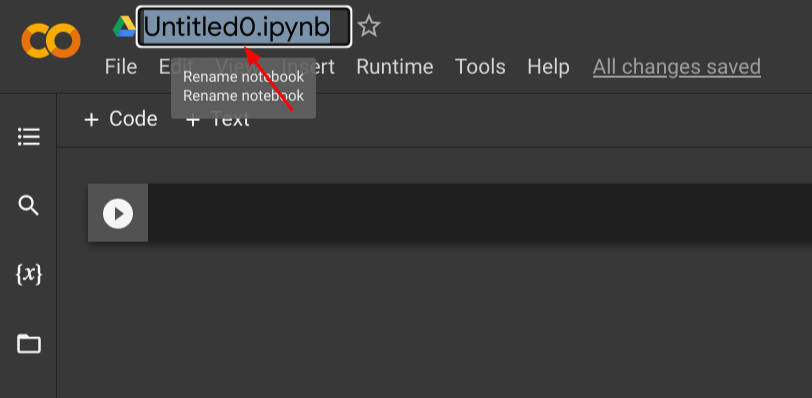
You can rename the notebook as shown above.
Adding and Running Code
By default, Colab has one code cell to begin with, but you can add more. You can write and execute Python code using these cells. For example, let's try writing and executing the following code.
name = input("What is your name?")
print("Hello " + name + "!")
You can execute this code by clicking the play button, as shown below:

Alternatively, you can use the keyboard shortcut Ctrl + Enter to execute code.
There are multiple ways to add more code cells, as listed below:
- Insert → Code Cell
- Hover near the bottom of the previous code cell → Click '+ Code'
- Click '+ Code' in the top left corner of the screen
- Keyboard Shortcut:
Ctrl + M B
Markdown
Not only do Colaboratory and Jupyter notebooks support code cells, but they also allow for text cells, where you can document your code or describe something in detail. These text cells use a type of language called Markdown, which is used to format text.
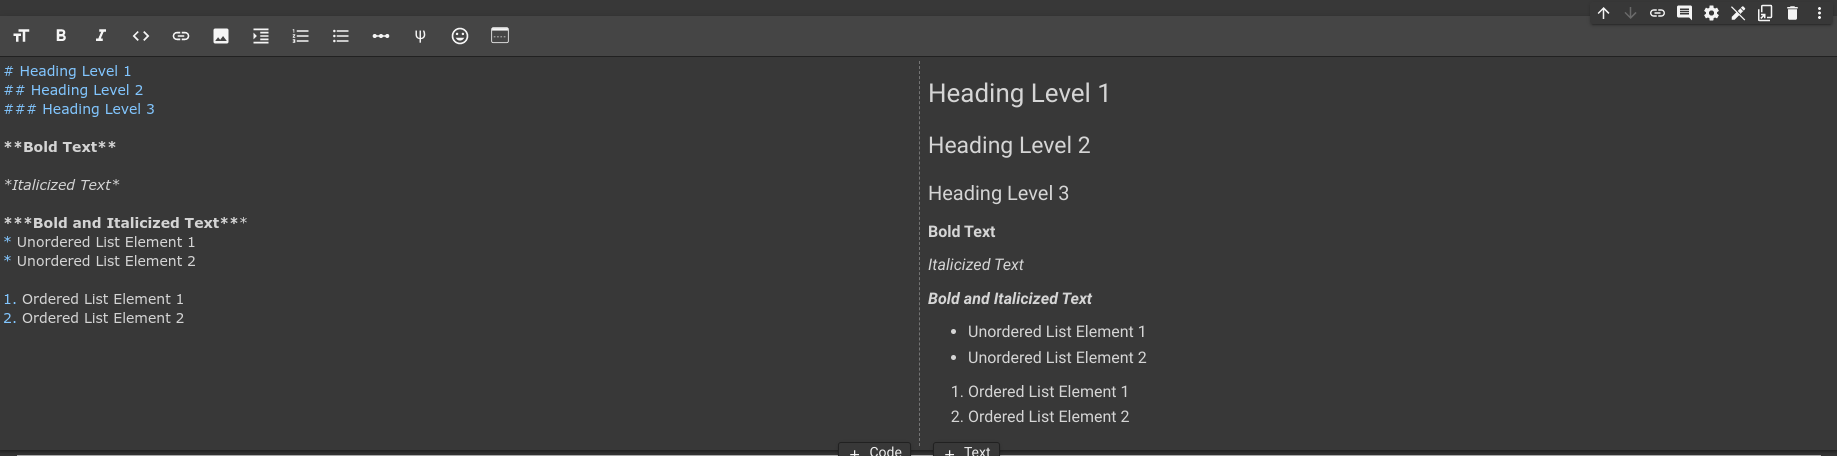
Here is some basic markdown syntax you can use.
# Heading Level 1
## Heading Level 2
### Heading Level 3
**Bold Text**
*Italicized Text*
***Bold and Italicized Text***
* Unordered List Element 1
* Unordered List Element 2
1. Ordered List Element 1
2. Order List Element 2
Typing the Markdown shown above into a text cell in Colab gives the following output:
Colab also provides an easy Markdown editor that allows you to format text like you would in a word processing application like Google Docs or Microsoft Word. You can add images, code, links, and LaTeX (commonly used for mathematical formulas).
Shell Commands
Any command that works using the command-line/terminal can be used in Jupyter Notebook environments using the ! character.
For example, we can list the contents of the working directory using the ls command:
!ls
Output:
sample_data
sample_data is a folder that is provided by default in Google Colab. It contains some sample datasets, including a California housing dataset from the 1990 US Census and a small sample of the MNIST dataset.
Shell commands are very useful when you want to install Python libraries. Google Colab comes with a lot of pre-installed libraries, but there are still some that are not included in Colab by default. One example of this is tsfresh, a library for time-series analysis. We can install it by using the following command:
!pip install tsfresh
Working with Files
One of the most important components of machine learning, if not the most important, is data. But how would we access that data in Google Colab?
Google Colab provides several ways of interacting with files. Depending on how much data you have and how often you will be using it, one option may be better than the others.
Accessing local files using the file explorer
Uploading
First, click on the files icon, as shown below.
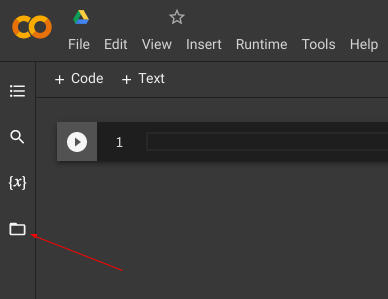
If you haven't started a session yet, it may take some time to load.
Next, click the upload button. This will allow you to browse your local file system, where you can select files or directories to upload.
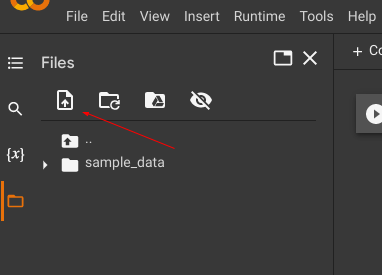
Note that uploaded files get deleted when the runtime is recycled.
Downloading
Using Colab's file explorer, we can download a file by right-clicking on it and selecting "Download".
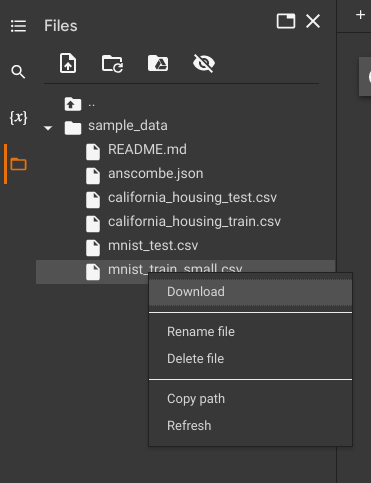
Additionally, if you hover over a file in the file explorer, you can see its file size and the date it was last modified.
Accessing local files using code
Uploading
For this step, we need to import the files module from the google.colab library.
from google.colab import files
f = files.upload()
This prompts the user to select a file from their local file system.
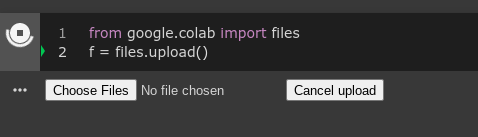
The uploaded file will now show up in the file explorer to the left.
Downloading
The google.colab library provides a method to download files, called files.download.
This method takes in an argument of the file path. We can access the file path by going to the file explorer, right-clicking, then clicking "Copy path".
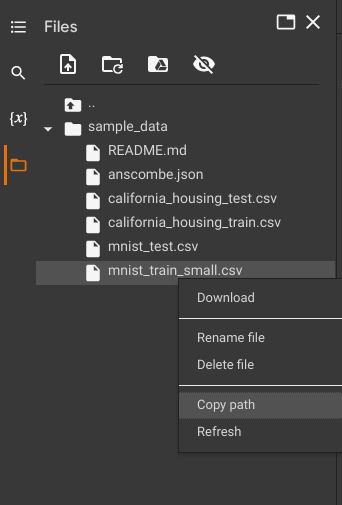
Then, we paste this path into the files.download method:
files.download("/content/sample_data/mnist_train_small.csv")
Accessing files by mounting Google Drive
One disadvantage of the previous two methods shown is that they do not allow for persistent file storage. In other words, we must re-upload the file for each session. This can be time-consuming, especially if the size of the file(s) is large.
Mounting Google Drive solves this problem. It allows you to access files from your Google Drive, and since files won't be deleted at the end of your Colab session, it can be very useful.
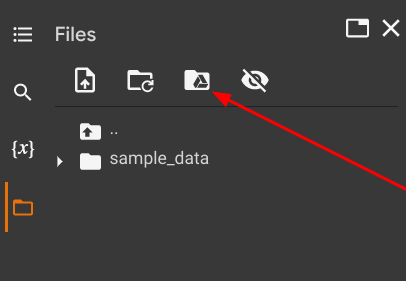
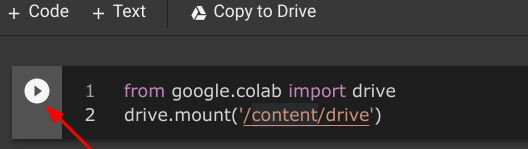
To mount your Google Drive, go to the files tab and click the Google Drive logo, as shown below.
This adds a new code cell to the beginning of the notebook. Run this code cell to mount Drive. It will ask you to enable a few permissions in order for Colab to be able to access your Google Drive files.
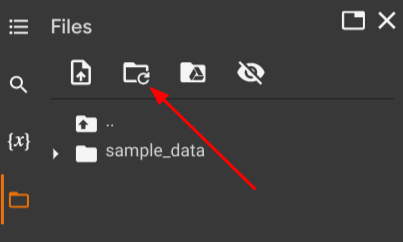
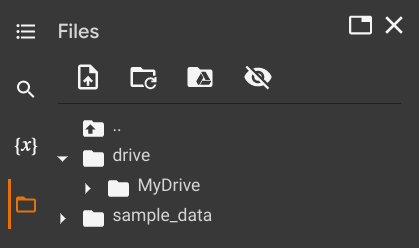
After you have allowed Colab to access your Google Drive files, you will be able to see your Google Drive files in the file explorer.
Click the refresh button:
Downloading and Sharing Code
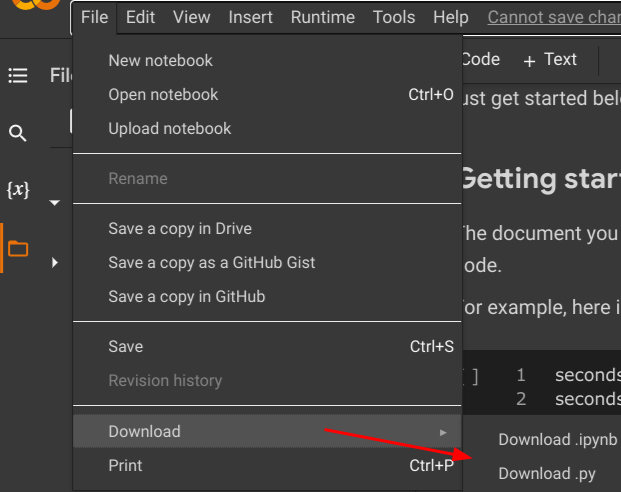
Google Colab can export code in two formats - .ipynb and .py.
The .ipynb extension represents IPython notebook, the former name for Jupyter notebook. This format retains all the Markdown and cell outputs and exports the notebook exactly as it currently looks. This file format is understood by other Jupyter notebook environments, so you can edit this file using other editors.
The .py extension represents a Python file. It can be run using a Python interpreter with a command similar to this one:
python main.py
In .py files, Colab keeps the Markdown, except as multi-line comments using triple quotes:
"""
Markdown
goes
here
"""
To download code, go to File → Download. Then, select the file format you would like to export the code as.
Conclusion
In this article at OpenGenus, we learned the basics of Google Colab, a widely used and very useful tool for data scientists, researchers, and students.
That's it for this article, and thank you for reading.