In this article, we're going to discuss HTML FORMS.
A recap about HTML!
What is HTML?
HTML is a shortening (of a word) for Hypertext Markup Language. The markup language is a language containing a set of tags understood by browsers. It is the first (or most important) language used for formatting web pages.
HTML pages or more professionally called Web Pages contains the following:
HyperText: (Hyperlink) this allows you to navigate between several pages or within the same page.
Text: this refers to the actual content moreover the information that is displayed.
Markup: this refers to the tags. Tags are not case sensitive.
However, Browsers do not display the HTML tags, yet they use them to elucidate and configure the content of the page.
Now, HTML is widely used to format web pages with the help of different tags available in HTML language.
Let's Dive in!
Forms in HTML
HTML Forms are one of the most primary parts of every website. HTML Forms have a variety of options by using HTML Forms, we can create registration forms, data entry forms, login forms, feedback form, inquiry forms, etc.
HTML Forms are used to collect information from users, such as a user name, email address, passwords, etc.
There are various sorts of form controls that you can use to gather information utilizing HTML forms such as:
- Text field
- Checkboxes
- Radio Button
- Password field
- Submit button
- Dropdown lists
- Multiline text input
- Reset Button, etc
Creating a HTML Form
To create a form we must use the HTML <form tag>. The <form tag> is a data tag what does this means is we must ensure our tags are closed (<form/>). There are a few important attributes in a <form tag> such as name, action, and method.
Attributes along with their Descriptions
- Name: uniquely identify the form in scripts
- id: uniquely identify the form in scripts
- action: address of processing page
- method: get (default) or post
- get method is not secured :
- values of form controls get the display in the query string which gets display in the address bar.
- post method is secured
- values of form controls don't get the display in the query string which gets display in the address bar.
Here is an example:
    <!DOCTYPE html>
    <html lang="en">
    <head>
       <meta charset="UTF-8">
       <meta name="viewport" content="width=device-width, initial-scale=1.0">
       <title>Example form</title>
    </head>
    <body>
       <form>
          <label for="fname">First name:</label><br>
          <input type="text" id="fname" name="fname" value="John"><br>
          <label for="lname">Last name:</label><br>
          <input type="text" id="lname" name="lname" value="Doe"><br>
        </form>
    </body>
    </html>

<form>
  <label for="fname">First name:</label><br>
  <input type="text" id="fname" name="fname" value="John"><br>
  <label for="lname">Last name:</label><br>
  <input type="text" id="lname" name="lname" value="Doe"><br>
</form>
The input text field
Earlier, we learned that the <form> tag is the container for various input controls. Now, let's take a look at the Input Text field.
To accept the text of the user we must create a text control or an input box. For us to do this, we need to use the <input> tag. Just as previously mentioned with the <form> tag, the <input> tag also has attributes such as "Type."
Input attributes:
- type="text" : creates a text box
- max length: controls the number of character to be input
- value: default value of the input field
- Name: uniquely identify the field in scripts
- id: uniquely identify the field in scripts
The following is an example:
    <form>
      <label for="fname">**First name:**</label><br>
      <input type="text" id="fname" name="fname">
    </form>
Password Field
Here we will discuss how you can create a password field. We learned earlier that the <input> tag is an inline tag. For us to build the password field, we must use the <input> tag - we must then set the attribute as password.
Example of a password field:
      <!DOCTYPE html>
    <html lang="en">
    <head>
       <meta charset="UTF-8">
       <meta name="viewport" content="width=device-width, initial-scale=1.0">
       <title>Password field</title>
    </head>
    <body>
       <form>
          <label for="username">Username:</label><br>
          <input type="text" id="username" name="username" value="username"><br>
          <label for="pwd">Password:</label><br>
          <input type="password" id="pwd" name="pwd" value="password">
        </form>
    </body>
    </html>
Submit Button
To submit the information filled in the form we must create a submit button. To create a submit button, using the <input> tag with the type as submit.
Here is an example HTML code for a form with email --
      <!DOCTYPE html>
    <html lang="en">
    <head>
       <meta charset="UTF-8">
       <meta name="viewport" content="width=device-width, initial-scale=1.0">
       <title>Password field</title>
    </head>
    <body>
       <form>
          <label for="username">Username:</label><br>
          <input type="text" id="username" name="username" value="username"><br>
          <label for="pwd">Password:</label><br>
          <input type="password" id="pwd" name="pwd" value="password">
        </form>
    </body>
    </html>
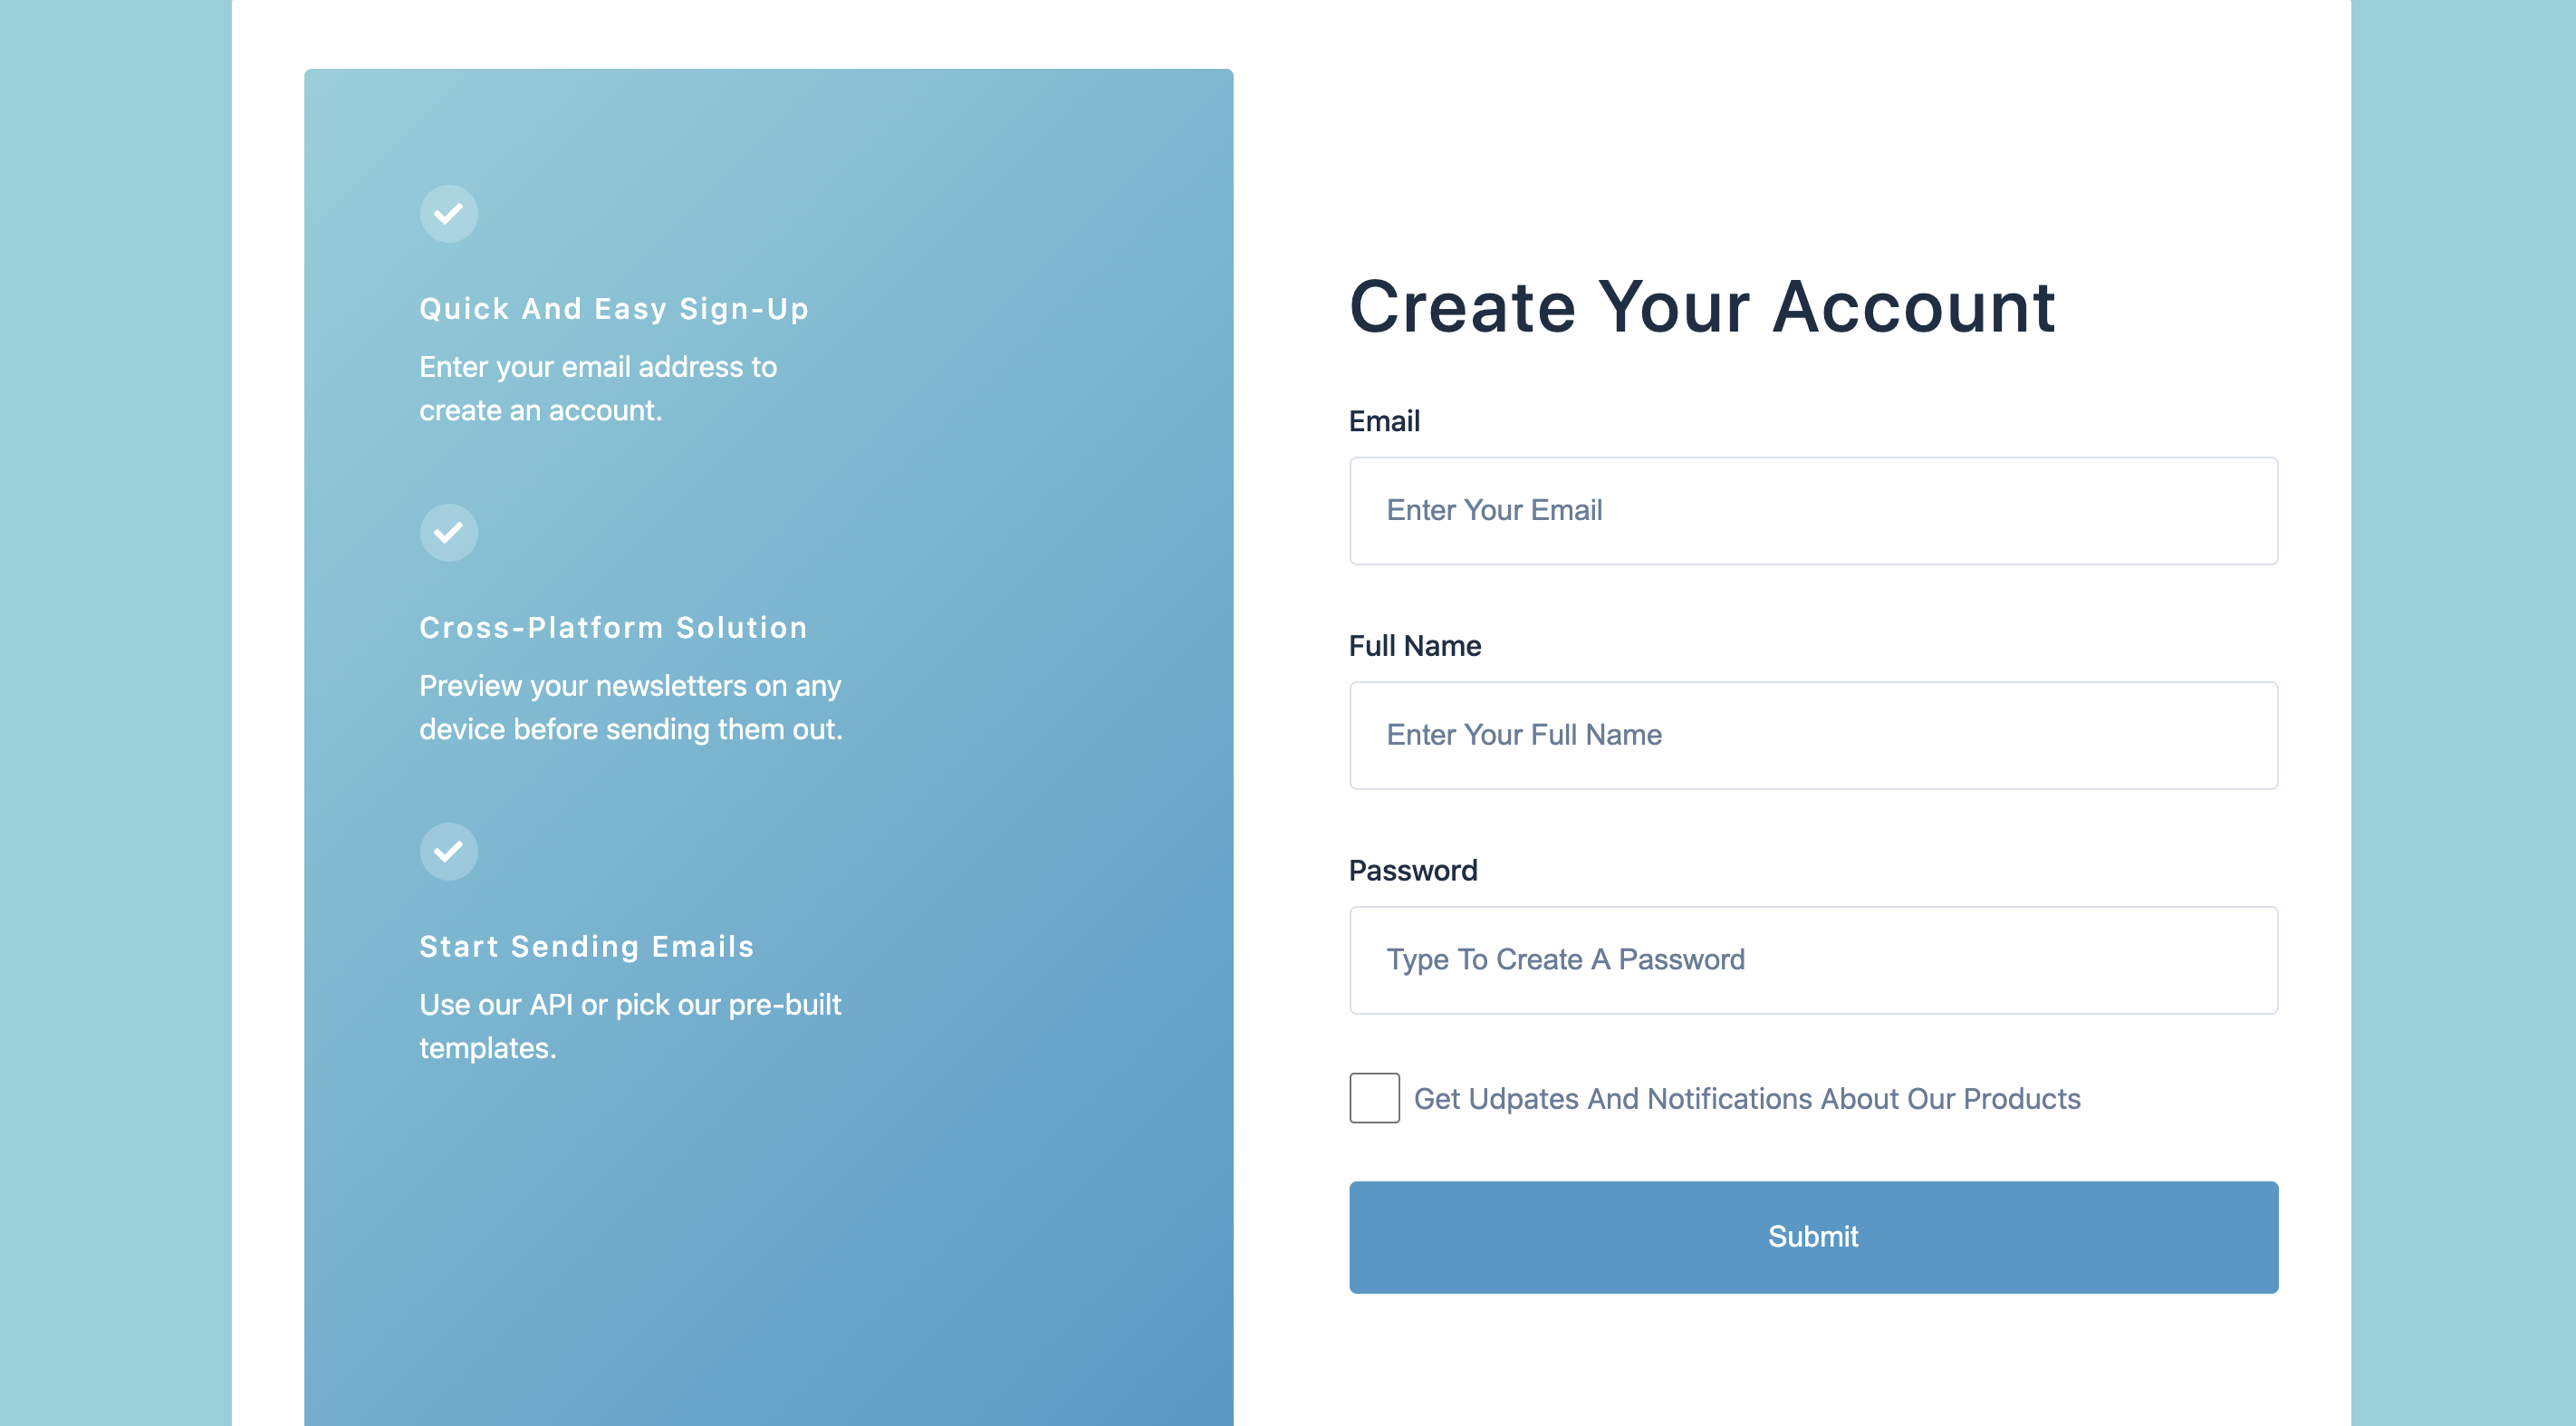
To wrap up let's take a look at a form I created, displaying various form controls.
Here is the code --
       <!DOCTYPE html>
    <html lang="en">
      <head>
        <meta charset="UTF-8" />
        <meta name="viewport" content="width=device-width, initial-scale=1.0" />
        <title>Sign Up Form Complete</title>
        <!-- css -->
        <link rel="stylesheet" href="./style.css" />
        <!-- font awesome -->
        <link
          rel="stylesheet"
          href="https://cdnjs.cloudflare.com/ajax/libs/font-awesome/5.14.0/css/all.min.css"
        />
      </head>
      <body>
        <main>
          <div class="container">
            <section class="services">
              <!-- single service -->
              <article class="service">
                <span class="icon">
                  <i class="fas fa-check"></i>
                </span>
                <h4>quick and easy sign-up</h4>
                <p>Enter your email address to create an account.</p>
              </article>
              <!-- single service -->
              <article class="service">
                <span class="icon">
                  <i class="fas fa-check"></i>
                </span>
                <h4>cross-platform solution</h4>
                <p>
                  Preview your newsletters on any device before sending them out.
                </p>
              </article>
              <!-- single service -->
              <article class="service">
                <span class="icon">
                  <i class="fas fa-check"></i>
                </span>
                <h4>start sending emails</h4>
                <p>Use our API or pick our pre-built templates.</p>
              </article>
            </section>
            <form class="form">
              <h2>create your account</h2>
              <div class="form-control">
                <!-- input -->
                <label for="email">email</label>
                <input
                  type="email"
                  id="email"
                  class="form-input"
                  placeholder="enter your email"
                />
              </div>
              <!-- input -->
              <div class="form-control">
                <label for="name">full name</label>
                <input
                  type="text"
                  id="name"
                  class="form-input"
                  placeholder="enter your full name"
                />
              </div>
              <!-- input -->
              <div class="form-control">
                <label for="password">password</label>
                <input
                  type="password"
                  id="password"
                  class="form-input"
                  placeholder="type to create a password"
                />
              </div>
              <div class="updates">
                <input type="checkbox" name="" id="" />
                <p>get udpates and notifications about our products</p>
              </div>
              <button type="submit" class="btn">submit</button>
            </form>
          </div>
        </main>
      </body>
    </html