
Open-Source Internship opportunity by OpenGenus for programmers. Apply now.
Why are images important in design? Not only in website design but also in other aspects of our lives. If you visit two websites, one with images and one without, what would be your first reaction? You would be more inclined to be attracted to the one that has images. That's because our brains can easily consume images as compared to text.
In this article, we have explored some properties that can be used to style images. These properties will come in handy as we design our websites.
Table of content:
- How to add images to HTML content?
- Width property
- Height property
- The border Property
- The object-fit property
- The border-radius property
- The opacity property
We will explore the topic now.
How to add images to HTML content?
We use the img tag in HTML to add an image to our HTML content. We then have to specify two attributes for the image tag. The src and alt attributes.
The src attribute is the required attribute. It specifies where our image is in our project path.
The alt attribute acts as a placeholder if the image can't be displayed or found. It gives us a description of the image.
Example:
HTML
<img src="images/my_cat-ink.png" alt="My lovely cat">
Here, the image is located in the images folder.
The image properties we'll cover include:
- Setting the width.
- Setting the height.
- Adding borders to images.
- The object-fit property.
- Using the border-radius property to add a rounding effect to images.
- Opacity.
We shall be using the image below to see how we can apply these properties.

The height and width properties can be specified using two units of measurements:
- Pixels or commonly abbreviated as px
- Percentage (%)
1. Width property
The width of an image is set by using the width property.
Example using px
CSS
img {
    width: 200px;
}
Example using percentage
CSS
img {
    width: 25%;
}
2. Height property
The height of an image can be set by using the height property.
Example using px
CSS
img {
    height: 200px;
}
Example using percentage
CSS
img {
    height: 40%;
}
We can use pixels or percentages to set the width and the height of images. If you need your image to be responsive, it is advisable to go for percentages as your image will resize depending on the device.
3. The border Property
To add a border to an image, we use the border property.
The border property is shorthand for three properties:
- Border-width: this specifies the width of the border.
- Border-style: specifies what style the border will be. There are several values that can be applied. We'll explore them soon.
- Border-color: specifies the color of the border.
When specifying the border, the order is:
border: border-width border-style border-color
Example using the border shorthand
CSS
img: {
     border: 3px solid green;
}
Result

Example without the border shorthand
CSS
img: {
     border-width: 2px;
     border-style: solid;
     border-color: green;
}
The values of the border-color property can be set using:
- Color names: i.e red
- Hexadecimal: i.e #ff0000
- RGB values: rgb(255,0,0)
- HSL values: i.e hsl(0, 100%, 50%)
The border-width property can be specified using units such as px, percentage(%), rem, and em.
The border-style property has several values. These include:
- Solid: draws a solid line around the image.
- Dashed: draws square dashes around the image
- Dotted: draws a dotted line around the image.
- Double: draws two lines around the image
- None: this is the default value where no border is drawn.
- Hidden: the border is invisible.
Example
HTML
<img class="solid-border" src="images/my_cat-ink.png" alt="My lovely cat">
CSS
.solid-border: {
     border-style: solid;
}
.dashed-border: {
     border-style: dashed;
}
.dotted-border: {
     border-style: dotted;
}
.double-border: {
     border-style: double;
}
.none-border: {
     border-style: none;
}
.hidden-border: {
     border-style: hidden;
}
4. The object-fit property
Let's say an image is in a container for example a div element, the object-fit property defines how an image will resize within the div.
The object-fit property has several values:
- Cover: this preserves the aspect ratio of the image while filling the container. If the aspect ratio of the container is smaller than the aspect ratio of the image, the image is cropped to fit the container.
- Contain: the image preserves its aspect ratio but gets resized to fill the container.
- Fill: this is the default value. Here the image gets resized to fill the container. It does not preserve the aspect ratio of the image. The image gets stretched to fit the container.
- Scale-down: the image will choose either none or contain to obtain the smallest possible size of the image.
- None: the image does not get resized.
Example
HTML
<div class="container">
    <img src="images/my_cat-ink.png" alt="My lovely cat">
</div>
CSS
.container {
  display: flex;
  align-items: center;
  justify-content: center;
  width: 300px;
  height: 300px;
  background-color: grey;
}
img {
    width: 300px;
    height: 300px;
    object-fit: none;
}
img {
    object-fit: cover;
}
img {
    object-fit: contain;
}
img {
    object-fit: fill;
}
img {
    object-fit: scale-down;
}
Result
- Fill(Default)
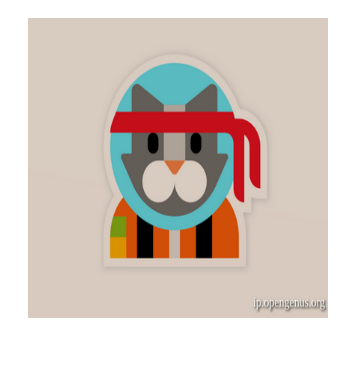
- Cover
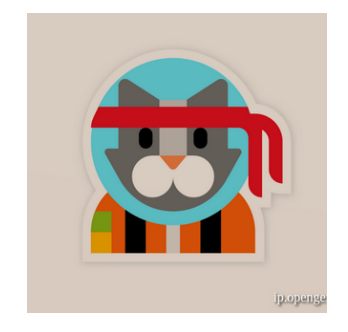
- Contain
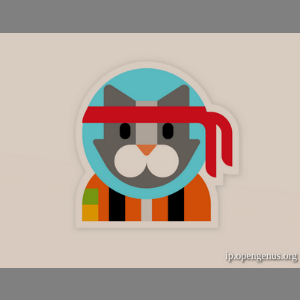
- Scale-down
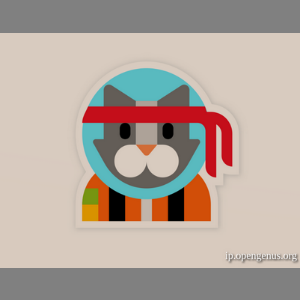
- None

5. The border-radius property
This property enables us to create rounded images by rounding the borders around the image.
Example
CSS
img {
    width: 200px;
    height: 200px;
    border-radius: 10px;
    object-fit: cover;
}
Result

The units used for border-radius include pixels(px) and percentage(%).
To make a rounded image, we set the border-radius value to 50% and specify same values for width and height.
Example
CSS
img {
    width: 200px;
    height: 200px;
    object-fit: cover;
    border-radius: 50%;
}
Result

6. The opacity property
To create transparent images, we can use the opacity property. It can take a range of values between 0.0 and 1.0. The default value is 1. To make the image more transparent, use a value lower than 1. The lesser the value the more transparent your image will be.
Example
CSS
img {
    opacity: 0.5;
}
Result

To have a more in-depth understanding of these properties let's look at some questions:
Question 1
Which of these properties will add a rounded border to an image?
Question 2
What is the default value of the object-fit property?
With this article at OpenGenus, you must have the complete idea of Image properties and styling in CSS. Enjoy.
