
Get this book -> Problems on Array: For Interviews and Competitive Programming
Reading time: 40 minutes | Coding time: 15 minutes
While CSS is getting powerful day by day, it still lacks certain features (such as code reuse) that makes it harder to maintain when the projects get bigger and more complex.
There are many CSS methodologies (such as OOCSS, SMACSS) that help us write more maintainable CSS code, but these methodologies alone aren’t enough to solve the problem of maintaining large CSS codebases.
That’s where Sass comes into play. Sass provides us features and tools that regular CSS doesn’t have, using Sass we can write more readable, maintainable and reusable CSS code.
What is Preprocessing
CSS on its own can be fun, but stylesheets are getting larger, more complex and harder to maintain. This is where a preprocessor can help. Sass lets you use features that don't exist in CSS yet like variables, nesting, mixins, inheritance and other nifty goodies that make writing CSS fun again.
Once you start tinkering with Sass, it will take your preprocessed Sass file and save it as a normal CSS file that you can use in your website.
The most direct way to make this happen is in your terminal. Once Sass is installed, you can compile your Sass to CSS using the sass command. You'll need to tell Sass which file to build from and where to output CSS to. For example, running sass input.scss output.css from your terminal would take a single Sass file, input.scss and compile that file to output.css.
You can also watch individual files or directories with the --watch flag. The watch flag tells Sass to watch your source files for changes and re-compile CSS each time you save your Sass. If you wanted to watch (instead of manually build) your input.scss file, you'd just add the watch flag to your command, like so:
sass --watch input.scss output.css
You can watch and output to directories by using folder paths as your input and output and separating them with a colon. In this example:
sass --watch app/sass:public/stylesheets
Sass would watch all files in the app/sass folder for changes and compile CSS to the public/stylesheets folder.
![]()
What is Sass?
If you know CSS or if you are learning CSS, then you must have heard about Sass. Sass is a CSS preprocessor, a superset of CSS that adds features that aren’t available in regular CSS.
A CSS preprocessor is a language that extends CSS, adds features to CSS and gets compiled into regular CSS. A CSS preprocessor helps developers to write cleaner and easier to understand CSS code.
Some well-known CSS preprocessors are SASS, LESS and Stylus.
Sass or SCSS?
There are two syntaxes available for Sass.
-
SCSS:
SCSS known as Sassy CSS is a newer and most used version of Sass. It has a similar syntax to CSS because it’s a language extension or a superset of CSS. So a valid CSS is also a valid SCSS. Its file extension is.scss. -
Sass:
Sass is an older syntax of Sass. It uses indentation rather than brackets. Its file extension is.sass.
In this article, I will use SCSS syntax of Sass.
Installing Sass
Browsers do not understand Sass, for browsers to understand the Sass code we write, we have to convert it into regular CSS code. We do this by running Sass compiler which converts our Sass code to into regular CSS code.
Getting Started:
Before starting, you must have npm installed on your computer, which comes bundled with Node.js, you can install it from here.
Folder Structure:
Let’s first create the below folder in which we will install Sass.
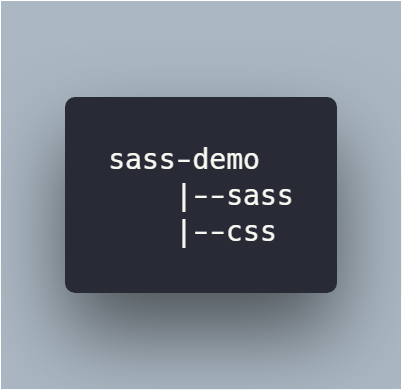
You can create the above directories with these commands:
mkdir sass-demo
cd sass-demo
mkdir -p sass css
Initialize the Project Directory:
All projects that use the node package manager (npm) must be initialized. To initialize the project enter below command in a terminal. This will create a package.json file.
npm init -y
Installing node-sass:
node-sass is a sass compiler. This command will install node-sass as dev dependency.
npm install node-sass --save-dev
Compiling Sass Code to CSS:
Create an npm script to compile the Sass code into CSS code. Add this script inside the script section of the package.json file.
"compile-sass": "node-sass sass/main.scss css/style.css"
Here main.scss is our main Sass file and style.css is the compiled CSS file.
We can also add a --watch flag. The watch flag tells Sass compiler to watch your source files for changes and re-compile CSS each time you save your Sass files.
For example:
"compile-sass": "node-sass sass/main.scss css/style.css --watch"
Finally, we can compile our Sass code into CSS by running below command in the terminal.
npm run compile-sass
Sass Features
Now that we know what Sass is and how to install Sass, let’s dive into various features of Sass that makes it so powerful.
Variables
Think of variables as a way to store information that you want to reuse throughout your stylesheet. You can store things like colors, font stacks, or any CSS value you think you'll want to reuse. Sass uses the $ symbol to make something a variable.
Here's an example:
SCSS SYNTAX
$font-stack: Helvetica, sans-serif;
$primary-color: #333;

body {
  font: 100% $font-stack;
  color: $primary-color;
}
SASS SYNTAX
$font-stack: Helvetica, sans-serif
$primary-color: #333

body
  font: 100% $font-stack
  color: $primary-color
CSS OUTPUT
body {
  font: 100% Helvetica, sans-serif;
  color: #333;
}
When the Sass is processed, it takes the variables we define for the $font-stack and $primary-color and outputs normal CSS with our variable values placed in the CSS. This can be extremely powerful when working with brand colors and keeping them consistent throughout the site.
Nesting
When writing HTML you've probably noticed that it has a clear nested and visual hierarchy. CSS, on the other hand, doesn't.
Sass will let you nest your CSS selectors in a way that follows the same visual hierarchy of your HTML. Be aware that overly nested rules will result in over-qualified CSS that could prove hard to maintain and is generally considered the bad practice.
With that in mind, here's an example of some typical styles for a site's navigation:
SCSS SYNTAX
nav {
  ul {
    margin: 0;
    padding: 0;
    list-style: none;
  }

  li { display: inline-block; }

  a {
    display: block;
    padding: 6px 12px;
    text-decoration: none;
  }
}
SASS SYNTAX
nav
  ul
    margin: 0
    padding: 0
    list-style: none

  li
    display: inline-block

  a
    display: block
    padding: 6px 12px
    text-decoration: none
CSS OUTPUT
nav ul {
  margin: 0;
  padding: 0;
  list-style: none;
}
nav li {
  display: inline-block;
}
nav a {
  display: block;
  padding: 6px 12px;
  text-decoration: none;
}
You'll notice that the ul, li and selectors are nested inside the nav selector. This is a great way to organize your CSS and make it more readable.
Partials
You can create partial Sass files that contain little snippets of CSS that you can include in other Sass files. This is a great way to modularize your CSS and help keep things easier to maintain. A partial is simply a Sass file named with a leading underscore. You might name it something like partial.scss. The underscore lets Sass know that the file is only a partial file and that it should not be generated into a CSS file. Sass partials are used with the @import directive.
Import
CSS has an import option that lets you split your CSS into smaller, more maintainable portions. The only drawback is that each time you use @import in CSS it creates another HTTP request. Sass builds on top of the current CSS @import but instead of requiring an HTTP request, Sass will take the file that you want to import and combine it with the file you're importing into so you can serve a single CSS file to the web browser.
Let's say you have a couple of Sass files, reset.scss and base.scss. We want to import reset.scss into base.scss.
SCSS SYNTAX
// reset.scss
html,
body,
ul,
ol {
  margin:  0;
  padding: 0;
}
// base.scss
@import 'reset';
body {
  font: 100% Helvetica, sans-serif;
  background-color: #efefef;
}
SASS SYNTAX
// reset.sass
html,
body,
ul,
ol
  margin:  0
  padding: 0

// base.sass
@import reset
body
  font: 100% Helvetica, sans-serif
  background-color: #efefef
CSS OUTPUT
html,
body,
ul,
ol {
  margin:  0;
  padding: 0;
}
body {
  font: 100% Helvetica, sans-serif;
  background-color: #efefef;
}
Notice we're using @import 'reset'; in the base.scss file. When you import a file you don't need to include the file extension .scss. Sass is smart and will figure it out for you.
Mixins
Some things in CSS are a bit tedious to write, especially with CSS3 and the many vendor prefixes that exist. A mixin lets you make groups of CSS declarations that you want to reuse throughout your site. You can even pass in values to make your mixin more flexible. Good use of a mixin is for vendor prefixes. Here's an example for transform.
SCSS SYNTAX
@mixin transform($property) {
  -webkit-transform: $property;
  -ms-transform: $property;
  transform: $property;
}
.box { @include transform(rotate(30deg)); }
SASS SYNTAX
=transform($property)
  -webkit-transform: $property
  -ms-transform: $property
  transform: $property
.box
  +transform(rotate(30deg))
CSS OUTPUT
.box {
  -webkit-transform: rotate(30deg);
  -ms-transform: rotate(30deg);
  transform: rotate(30deg);
}
To create a mixin you use the @mixin directive and give it a name. We've named our mixin transform. We're also using the variable $property inside the parentheses so we can pass in a transform of whatever we want. After you create your mixin, you can then use it as a CSS declaration starting with @include followed by the name of the mixin.
Extend/Inheritance
This is one of the most useful features of Sass. Using @extend lets you share a set of CSS properties from one selector to another. It helps keep your Sass very DRY. In our example, we're going to create a simple series of messaging for errors, warnings and successes using another feature which goes hand in hand with extending, placeholder classes. A placeholder class is a special type of class that only prints when it is extended and can help keep your compiled CSS neat and clean.
SCSS SYNTAX
/* This CSS will print because %message-shared is extended. */
%message-shared {
  border: 1px solid #ccc;
  padding: 10px;
  color: #333;
}

// This CSS won't print because %equal-heights is never extended.
%equal-heights {
  display: flex;
  flex-wrap: wrap;
}

.message {
  @extend %message-shared;
}

.success {
  @extend %message-shared;
  border-color: green;
}

.error {
  @extend %message-shared;
  border-color: red;
}

.warning {
  @extend %message-shared;
  border-color: yellow;
}
SASS SYNTAX
/* This CSS will print because %message-shared is extended. */
%message-shared
  border: 1px solid #ccc
  padding: 10px
  color: #333

// This CSS won't print because %equal-heights is never extended.
%equal-heights
  display: flex
  flex-wrap: wrap

.message
  @extend %message-shared

.success
  @extend %message-shared
  border-color: green

.error
  @extend %message-shared
  border-color: red

.warning
  @extend %message-shared
  border-color: yellow
CSS OUTPUT
/* This CSS will print because %message-shared is extended. */
.message, .success, .error, .warning {
  border: 1px solid #ccc;
  padding: 10px;
  color: #333;
}

.success {
  border-color: green;
}

.error {
  border-color: red;
}

.warning {
  border-color: yellow;
}
What the above code does is tells .message, .success, .error and .warning to behave just like %message-shared. That means anywhere that %message-shared shows up, .message, .success, .error and .warning will too. The magic happens in the generated CSS, where each of these classes will get the same CSS properties as %message-shared. This helps you avoid having to write multiple class names on HTML elements.
You can extend most simple CSS selectors in addition to placeholder classes in Sass, but using placeholders is the easiest way to make sure you aren't extending a class that's nested elsewhere in your styles, which can result in unintended selectors in your CSS.
Note that the CSS in %equal-heights isn't generated, because %equal-heights is never extended.
Operators
Doing math in your CSS is very helpful. Sass has a handful of standard math operators like +, -, $\ast$, / and %. In our example, we're going to do some simple math to calculate widths for an aside & article.
SCSS SYNTAX
.container {
  width: 100%;
}

article[role="main"] {
  float: left;
  width: 600px / 960px * 100%;
}

aside[role="complementary"] {
  float: right;
  width: 300px / 960px * 100%;
}
SASS SYNTAX
.container
  width: 100%

article[role="main"]
  float: left
  width: 600px / 960px * 100%

aside[role="complementary"]
  float: right
  width: 300px / 960px * 100%
CSS OUTPUT
.container {
  width: 100%;
}

article[role="main"] {
  float: left;
  width: 62.5%;
}

aside[role="complementary"] {
  float: right;
  width: 31.25%;
}
We've created a very simple fluid grid, based on 960px. Operations in Sass let us do something like take pixel values and convert them to percentages without much hassle.
Conclusion
We have learned what Sass is, how to install it locally and discussed it’s features that makes it so powerful. Sass adds basic programming capabilities to CSS.
Using Sass, we can perform basic calculations, reuse code using mixins and create functions. Sass makes maintenance of CSS so much easier in bigger projects.