
Let us begin by breaking down the title, and what it actually means.
Single Page Applications
A Single Page Application is a website that reloads certain components of itself rather than reloading or refreshing the entire website, in response to user actions.
For example, if a user clicks on a button labelled as Change color, this action (clicking the buttton) will just change the color of the button rather than reloading the entire webpage just to change the color of a button.
Flask
Flask is a Pallets Project, according to which:
Flask is a lightweight WSGI web application framework. It is designed to make getting started quick and easy, with the ability to scale up to complex applications.
Flask is a microframework, written in Python, and is used to create extensible web applications with simple design. It lets the user take control and hence, is very flexible, in the sense that the user can mould a basic flask application into any type of web application he/she wants.
AJAX
AJAX (Asynchronous JavaScript) is a set of web development techniques using many web technologies on the client side to create asynchronous web applications. With Ajax, web applications can send and retrieve data from a server asynchronously (in the background) without interfering with the display and behaviour of the existing page.
AJAX is a technology that we can use in order to get more information from a server without needing to replace an entire existing page with a new one. Hence, AJAX lets us get information from some website or some web server, and incorporate it into the page we're already on without replacing it with a new page.
What all this means
Combining all these, a Single page application with Flask and AJAX means a website (or rather, a Single Page Application) made using HTML, CSS and Javascript (as the front-end), utilising Flask as a server or backend. The steps involved are:
- The Javascript part sends requests (requests for information) to the flask server dynamically, using AJAX, to update a part of the application.
- After the server receives the request, it processes the request and then sends back the required information to the front-end.
- The front-end gets back the response from the server and updates the front-end, or the website, which we see, with the new, just-received information.
To demonstrate how a Single Page Application works, we will be creating a simple voting web application using Flask as the backend and using AJAX to dynamically update the content of the front-end of the application.
An example
NOTE: All the source code can be found here.
Configuration and setup
Let us start by opening a terminal, making a directory for our application and changing into it.
mkdir vote-app
cd vote-app
Our first step will be to create a virtual environment. A virtual environment is self-contained directory that contains all the packages that are required to run a specific application in that directory. We can create a virtual environment inside the vote-app directory by running the following command:
python3 -m venv voteapp-env
To activate the virtual environment on Unix or MacOS:
source voteapp-env/bin/activate
To activate it on Windows:
voteapp-env\Scripts\activate.bat
After the virtual environment has been activated, we need to install Flask. To do so, run:
pip install flask
That's it. We are all set up to start building our appplication!
Creating the server
To start creating the server, we first have to make a file application.py, which contains the main code for the server. To do so, first run the following in the vote-app directory:
touch application.py
Now, open application.py in a text editor or an IDE and enter the following line:
from flask import Flask
Since we are creating a flask web server, we should first import the Flask module.
app = Flask(__name__)
Since we want to create a new flask web application, we want the current file (denoted by __name__) to be a flask application. To do this, we added the given code to application.py.
Now, we count the total number of votes:
votes = 0
We declared a variable votes and initialised it to 0.
We now need to define what should happen when the user goes to the default route (route which is present by default when we visit a website). For example, when we visit Google's website, the default route is /, because https://www.google.com/ is the default site that occurs when we visit google.com.
@app.route("/")
def index():
This defines the default route, i.e. when the user visits / on our website, he/she is shown what is defined in the index function. The first line, @app.route("/") is called a decorator.
Now, we need to show the user a webpage when the user enters the "/" route. To do this, we need to import another function, render_template from flask. What this does, is that it renders a template, an html file when called. So our first line becomes:
from flask import Flask, render_template
And, our index() function becomes:
def index():
    return render_template("index.html")
This renders index.html when we visit our website's default (/) route.
But wait, where is index.html?
index.html is stored inside a directory named templates inside the vote-app directory. Flask automatically identifies the templates directory and by default renders all the template .html files from this directory. Let us create this index.html file. On the terminal, inside vote-app:
mkdir templates
cd templates
touch index.html
cd ../
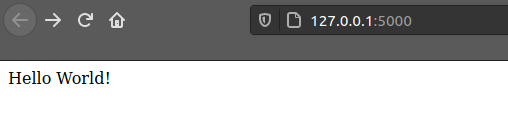
Opening index.html inside an editor, we put the following basic Hello-world code:
<!DOCTYPE html>
<html lang="en">
    <head>
        <meta charset="UTF-8">
        <meta name="viewport" content="width=device-width, initial-scale=1.0">
        <title>Vote App</title>
    </head>
    <body>
        Hello World!
    </body>
</html>
To run our minimal server, we go back to the terminal, and define two environment variables:
FLASK_ENV: Defines the mode in which we want to run our application.FLASK_APP: Defines the main file which contains the main server code.
export FLASK_ENV=development
export FLASK_APP=application.py
(Use set instead of export on Windows)
Then, to run the server, run:
flask run
The terminal then must show an output like this (Note that Debugger PIN may be different for different users):
 * Serving Flask app "application.py" (lazy loading)
 * Environment: development
 * Debug mode: on
 * Running on http://127.0.0.1:5000/ (Press CTRL+C to quit)
 * Restarting with stat
 * Debugger is active!
 * Debugger PIN: 115-697-089
If we then visit http://127.0.0.1:5000/ on the browser, voila! We see the Hello-World website running!
At this point, our application.py file should look like this:
from flask import Flask, render_template

app = Flask(__name__)

votes = 0

@app.route("/")
def index():
    return render_template("index.html")
And our directory structure should be looking like this:
vote-app
    -- voteapp-env
        -- ...
    -- application.py
    -- templates
        -- index.html
Buttons and vote-count in HTML
Since we are creating a kind of voting system, we need a counter to keep track of the number of votes, a button so that the user can upvote, and another button so that the user can downvote.
To do so, we need to create two buttons in HTML, and display a counter for votes.
Hence, we add the following part to the body tag of the index.html file:
    <body>
        Votes: <span id="count">{{ votes }}</span>
        <br><br>
        <button id="up">UP</button>
        <br>
        <button id="down">DOWN</button>
    </body>
Now , what is {{ votes }}?
Flask uses a templating language called Jinja, which essentially lets us use python variables in HTML. Hence, we can define and operate on variables in Python, and use them for output in HTML. But we can't use Jinja variables in HTML just like that!
We first have to pass in the variables from the server to the HTML template. To do so, we have to add the votes variable as an argument to the render_template function we return in the index function in application.py. So, the default route in application.py now looks like this:
@app.route("/")
def index():
    return render_template("index.html", votes=votes)
The first votes variable, which is being assigned the value, is the variable which is shown on the screen through the HTML file. The second votes variable, which assigns the value, is the one which is being operated upon in the server.
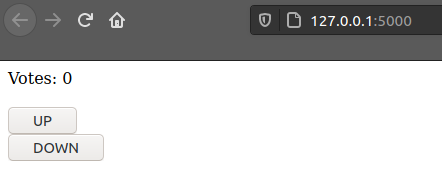
Our webpage should now look like this:
Creating the server endpoints
Endpoints mean the URLs to which the application sends requests. In our case, we need something to send requests to. We need that the front-end Javascript part send request to the server so that the server gives back a response. To do so, we need a URL where the requests are sent, and then these endpoints send back the response to the front-end.
Hence, we need two endpoints, one if the user clicks the UP button, and one if the user clicks the DOWN button. So, we can define two more routes:
@app.route("/up", methods=["POST"])
def upvote():
    global votes
    votes = votes + 1
    return str(votes)

@app.route("/down", methods=["POST"])
def downvote():
    global votes
    if votes >= 1:
        votes = votes - 1
    return str(votes)
Here, we use an additional parameter in @app.route(), methods which defines the type of requests that are acceptable by this route. In our case, both of our routes should accept only a POST request, because we 'POST' a request to our server from the front-end.
The votes variable has been defined as global, as in global votes, because we are operating on the variable inside a function, and that should reflect in the global variable votes.
Finally, we have operated upon the votes variable. If a POST request is sent to the /up route, the server increases the vote count by one, and then returns the updated count. Similarly, if a POST request is sent to the /down route, the server decreases the vote count by one (keeping in mind it does not go down to less than 0!), and then returns the updated count. We have returned the votes count casted as a string, because, we just have to display a string on our webpage.
Hence, finally, our server, that is, application.py should look like this:
from flask import Flask, render_template

app = Flask(__name__)

votes = 0

@app.route("/")
def index():
    return render_template("index.html", votes=votes)

@app.route("/up", methods=["POST"])
def upvote():
    global votes
    votes = votes + 1
    return str(votes)

@app.route("/down", methods=["POST"])
def downvote():
    global votes
    if votes >= 1:
        votes = votes - 1
    return str(votes)
Sending AJAX requests to the server
Now that we have our server all set up, we now need to send AJAX requests from the front-end to the server, to update to information (count of votes, in this case) on the front-end. We start by defining a <script> tag inside the html tag of index.html to write javascript code.
    <script type="text/javascript">
    </script>
Note that we could as well have defined a new file for javascript.
Now, we need to add an event handler to the javascript file. Event handler triggers a function after listening to particular events on the HTML webpage, like clicking a button, scrolling to the bottom, etc. In this case, we look for an event called DOMContentLoaded, which gets triggered when all the required contents of the webpage have been loaded.
document.addEventListener('DOMContentLoaded', () => {
    //things to do when the page has been loaded
});
Here, the last part , () => {} is an arrow function.
Hence, this javascript code essentially means that after the HTML page contents have been loaded, we trigger a function (which we will define soon).
We now need to see if a button has been clicked on the page. If so, we need to first find which button has been clicked, and send a request to the server accordingly.
To do so, we first query for all buttons on the page, and for each button in the group of all buttons, we check for a button click.
document.querySelectorAll('button').forEach(button => {
    button.onclick = () => {
        // send request to server accordingly
    };
});
We now identify which button has been clicked through the id of the button. Remember, we defined the ids of the buttons while defining them in HTML. The id for the UP button is up and for the DOWN button is down.
Hence, button.id = up for the UP button and button.id = down for the DOWN button.
Hence, if the UP button is clicked, we send a POST request to the /up endpoint in the server, and to the /down endpoint for the DOWN button.
Now, to send an AJAX request to the server, we use XMLHttpRequest.
We first define a new XMLHTTPRequest to send requests to the server. Then, we define the method with which to send the request (GET or POST) and the endpoint to which to send the request (/up or /down in this case).
Here, the endpoint is same as the id of the button which has been clicked. So, it is safe to consider the endpoint as /${button.id}, where ${} enclosed within backticks(`) acts as a placeholder for variables in a string.
document.addEventListener('DOMContentLoaded', () => {
    document.querySelectorAll('button').forEach(button => {
        button.onclick = () => {
            const request = new XMLHttpRequest();
            request.open('POST', `/${button.id}`);
        });
    });
});
Here, we have defined a new XMLHttpRequest and opened it, as a POST request, to the endpoint /${button.id}. So, if the user clicks on the UP button, it's id is up, so a POST request is sent to the /up endpoint. And likewise for the /down endpoint.
We now need to define what should happen after the request has been loaded, that is, after the front-end receives a response from the server. We get a request element back from the server, and request.responseText gives us the string that is returned from the server (in this case, it's the vote count). After we receive this response text, we then update the <span> element with id="count", which contains the vote count, with the newly received count from the server.
After defining how and where to send the request and what should happen when we receive a response, we need to actually send the request to the server. This is done by the request.send() method.
document.addEventListener('DOMContentLoaded', () => {
    document.querySelectorAll('button').forEach(button => {
        button.onclick = () => {
            const request = new XMLHttpRequest();
            request.open('POST', `/${button.id}`);
            request.onload = () => {
                const response = request.responseText;
                document.getElementById('count').innerHTML = response;
            };
            request.send();
        };
    });
});
This code snippet shows the complete javascript code that is used to send request to the server dynamically, receive a response, and update the HTML page.
Our final index.html file should now look like this:
<!DOCTYPE html>
<html lang="en">
    <head>
        <meta charset="UTF-8">
        <meta name="viewport" content="width=device-width, initial-scale=1.0">
        <title>Voting App</title>
    </head>
    <body>
        Votes: <span id="count">{{ votes }}</span>
        <br><br>
        <button id="up">UP</button>
        <br>
        <button id="down">DOWN</button>
    </body>

    <script type="text/javascript">
        document.addEventListener('DOMContentLoaded', () => {
            document.querySelectorAll('button').forEach(button => {
                button.onclick = () => {
                    const request = new XMLHttpRequest();
                    request.open('POST', `/${button.id}`);
                    request.onload = () => {
                        const response = request.responseText;
                        document.getElementById('count').innerHTML = response;
                    };
                    request.send();
                };
            });
        });
    </script>
</html>
If we now run the server with flask run, we should see that initially, the vote count is 0. If we now press the UP button, the count goes up by 1, and if we press DOWN, the count decreases by 1. And all of this happens dynamically, that is, without the page being reloaded once. A reload of the entire page is not needed just for an increase or decrease in the vote count.
Summary
We now have a working single page application!
To quickly summarize what happens when we click the button:
- The front-end (javascript) identifies which key has been pressed, whether it is UP or DOWN.
- Depending on which button has been pressed, it sends an AJAX request to the appropriate function in the server.
- The server then recognizes the action which needs to be performed and performs the given action, that is, it decreases the vote count by 1 if DOWN is pressed and increases the count by 1 if UP is pressed.
- The server then returns the count to the front-end as a string response.
- The front-end then replaces the vote-count on the screen with the updated count.
And all of this is done without needing a reload of the page once!
This was just a very basic single page application. We can create very complex single-page applications based on this basic idea.
Many large tech companies employ this idea of single-page applications, such as Gmail, Twitter, Facebook, etc.
Some reasons why single-page applications are better than the default multi-page applications are:
- SPAs are fast and responsive because most resources like HTML, CSS, Javascript are loaded only once throughout the lifetime of the application.
- SPAs result in better user experience because of simple layouts: just rendering and reloading components as and when needed.
- SPAs result in better caching of data, since most of the time, the application sends only one request to the server, and stores the response, using it when required. It can even use this data later when offline.
This was just a broad overview of what Flask and single-page applications are capable of.