Open-Source Internship opportunity by OpenGenus for programmers. Apply now.
Table of Contents:
- Introduction
- Connect Four
- Overall Implementation Strategy
- Game Structure
- General Flow
- Initial Game Template
- Game Board and Columns
- Game Front-End
- Games Grid Design
- Adjustment of Grid Size Depending on Screen
- Game Logic
- Function to Check for Wins
- Event Listeners
- Conclusion
Introduction
In this article at OpenGenus, we dive into the world of web development to explore the development of Connect Four game using HTML, CSS, and JavaScript. As we delve into the development process, we'll discover the crucial steps involved in constructing the game board, implementing game logic, and designing a user-friendly interface. We'll explore how HTML sets the foundation, CSS enhances the visual appeal, and JavaScript enables the core functionalities of the game.
Connect Four:
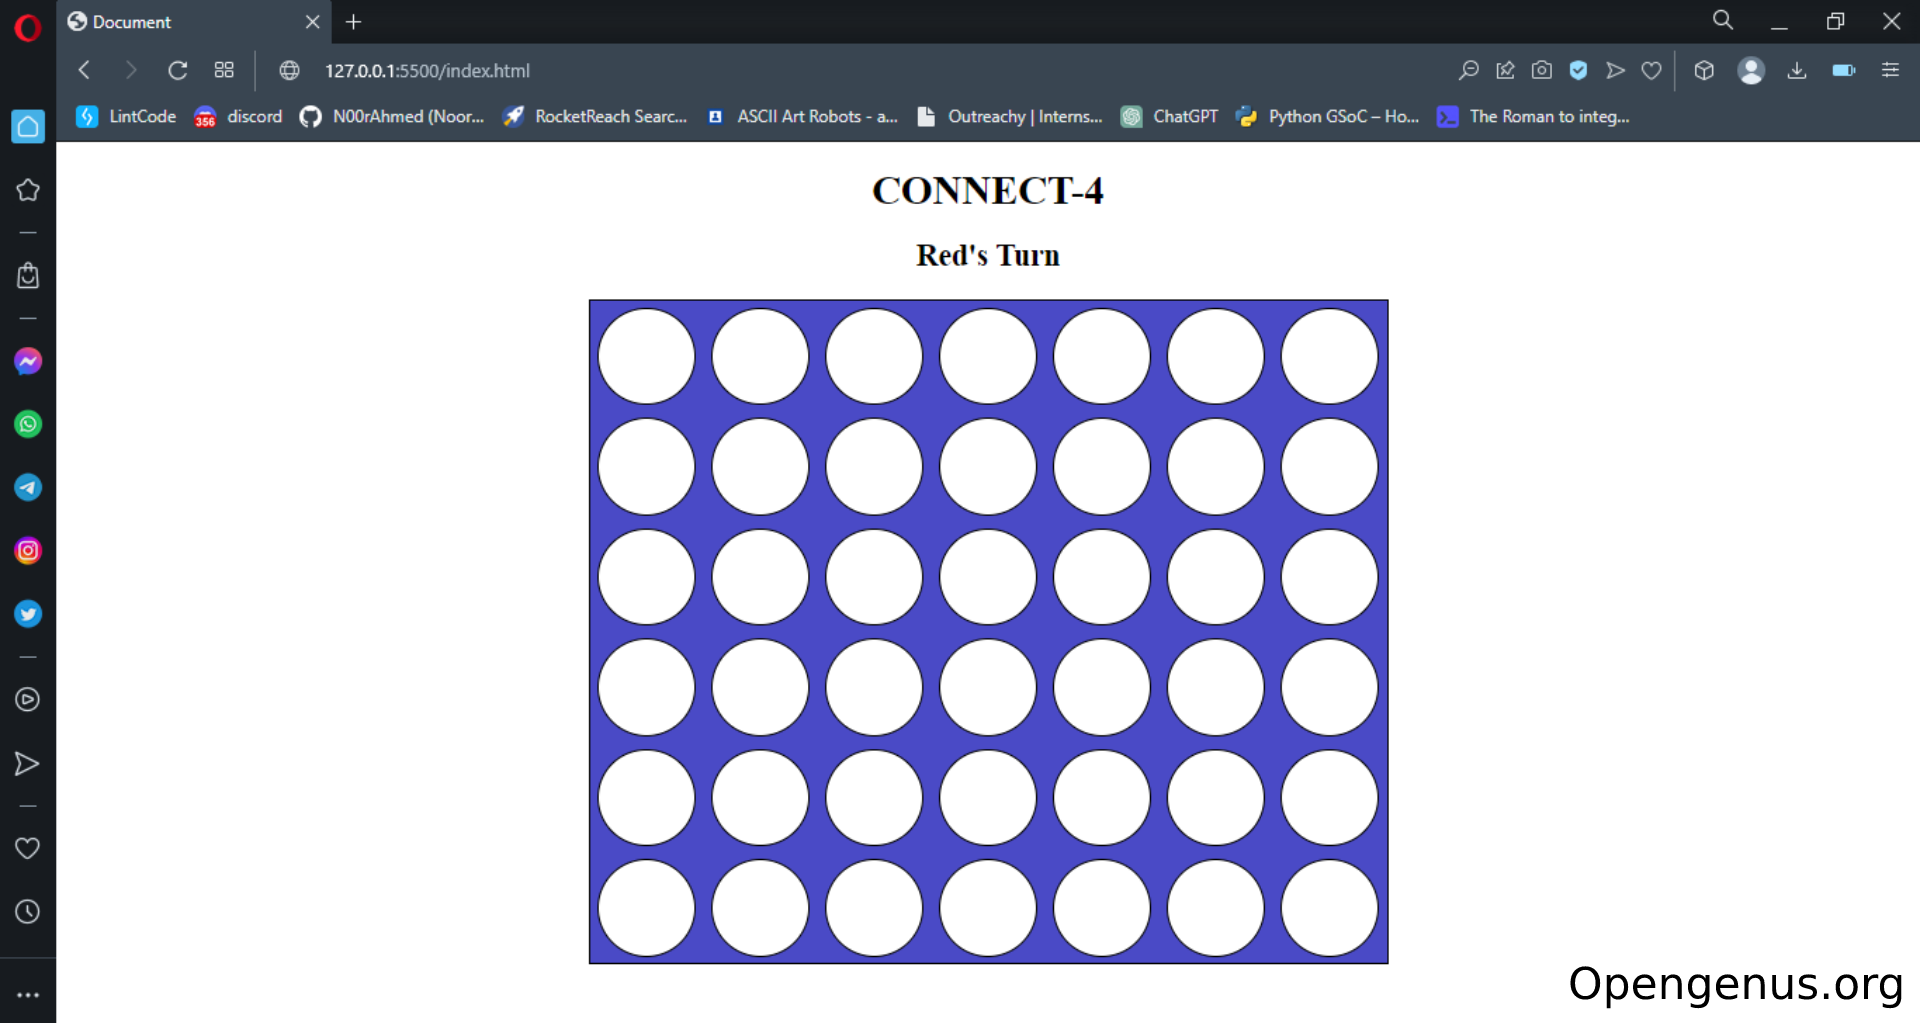
Connect Four is a classic two-player strategy game that is played on a rectangular grid. The objective of the game is to be the first player to connect four of their own colored discs in a row, either horizontally, vertically, or diagonally. Each player takes a turn to put their disk in their chosen place. Here we will see what our web application looks like and how to implement the rules of the game.
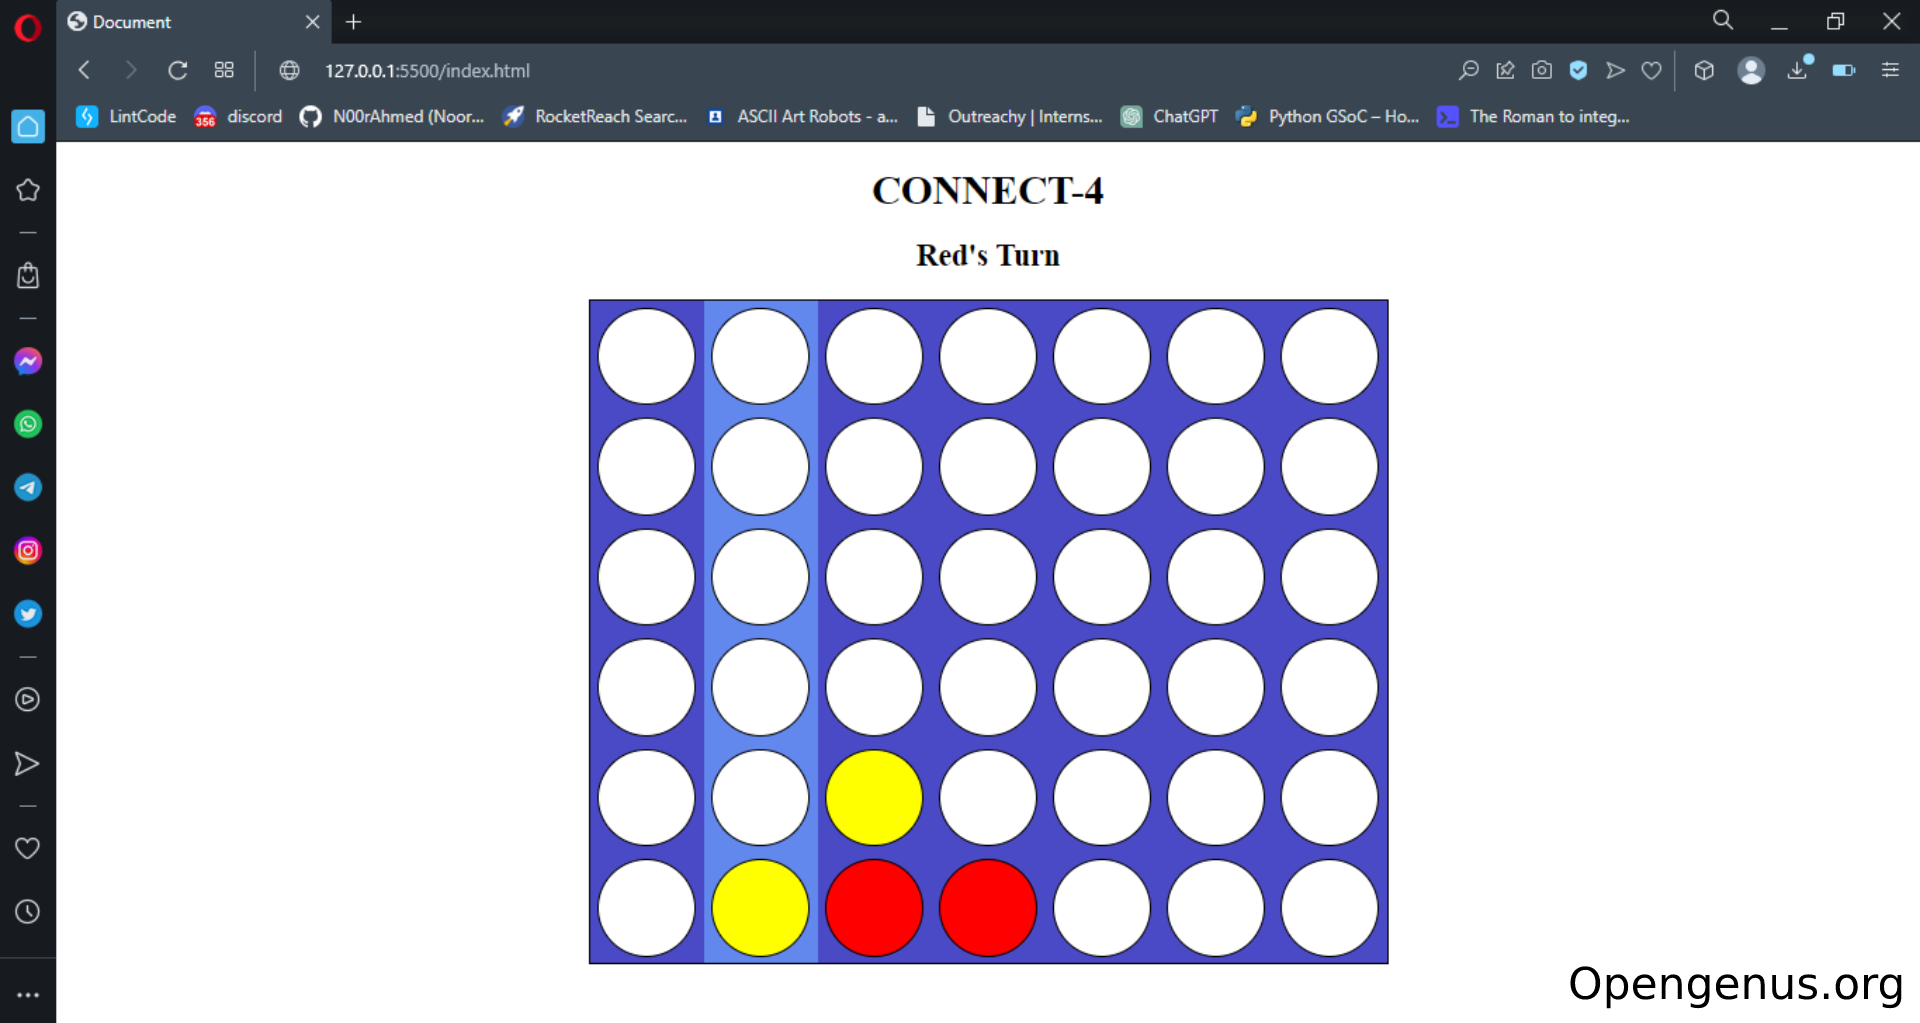
Here is our connect four game running in the browser by using a vscode extension called live server. We will be playing the game as the red counter.


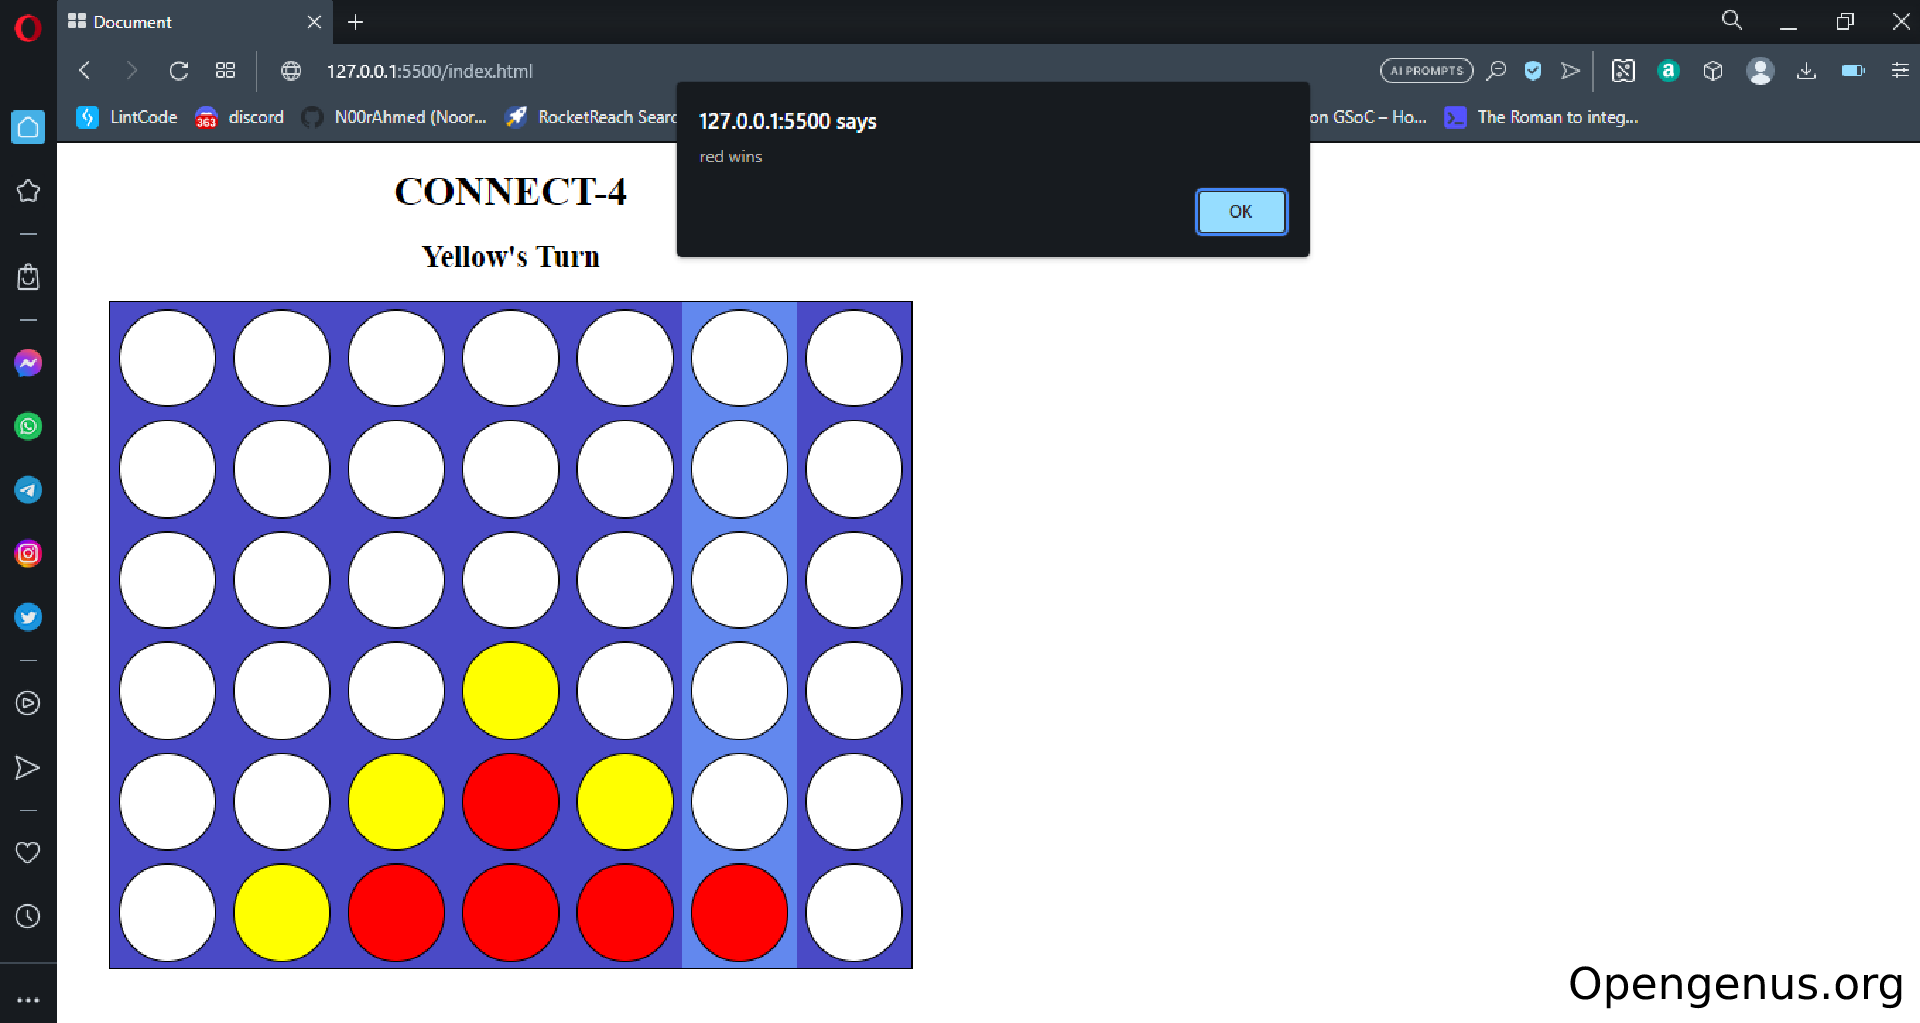
In this demo we are playing as the red disk and as you can see in the game in order to win you have to get four disks of your colour connecting horizontally, vertically, or diagonally. I started the game by placing my disk in the third column and the disk goes straight to the bottom for each player. If there is already a disk in that place then another disk can be put on top of it. After placing the disk in the 3rd column, the second player places their disk in the 2nd column and then we place the disk in the 4th column. After that the second player puts their disk on the third column which is now above my disk, then we can place our disk in the fourth column so that we can connect the disks from across and also from the top.

The second player places their disk on the 3rd column which then blocks my attempt at connecting my disks from the top. Then we can place our disk in the 5th colmn to have a chance at connecting our disks across and the second player places their disk in the fifth column aswell which is now on top of our disk. Finally we can put a red disk in the 6th column connecting all four disks making you the winner.
Overall Implementation Strategy
Game Structure:
- The game will consist of 7 columns and 6 rows with each player having objectives and challenges
- Players will see progression in winning the game as they come closer to connecting their disks
- The game has straught forward rules with each player having one turn in placing their disks after the other
General Flow:
- The game will start with the initial screen of the grid where each player can select which column they want to place their disk in
- The game will display who's turn it is to place the disk
- Once a player has connected four disks they wil have won the game and there will be a small popup saying they have won
- Upon completion of the game the player can click the ok button in the popup which will refresh the page to start a new game
- The new game will then carry out the same requests as we have previously talked about
Initial Game Template
Here is my html code:
<! -- Game Front End  -->
<!DOCTYPE html>
<html lang="en">

<head>
    <meta charset="UTF-8">
    <meta http-equiv="X-UA-Compatible" content="IE=edge">
    <meta name="viewport" content="width=device-width, initial-scale=1.0">
    <title>Document</title>
    <! -- links tags  used to link css for styling  -->
    <link rel="stylesheet" href="styles.css">
</head>

<body>

</body>
<! -- script tag used to link javascript file for the game logic -->
<script src="script.js"></script>

</html>
This code above is a html template create by typing ! and enter which generates a basic template. Here I have used the script tags to link my javascript file, script.js which contains all of the logic of this web applicaion. Also I have used the link tag to link my css file, styles.css which is used for creating the majority of the UI for this application.
Game Board and Columns
<! -- Game Front End  -->
    <h1>CONNECT-4</h1>
    <h2 id="whosturn">Red's Turn</h2>

    <div class="board">

        <ul class="column" id="c1">
            <p id="c1r6"></p>
            <p id="c1r5"></p>
            <p id="c1r4"></p>
            <p id="c1r3"></p>
            <p id="c1r2"></p>
            <p id="c1r1"></p>
        </ul>
        <!-- Repeat the above ul element for other columns (c2 to c7) -->


    </div>
This web page was made using HTML and CSS to have matrix of round shapes. Each shape will have an unique ID like c1r6 denoting column 1 and row 6. The code above creates a grid-based layout with seven columns and six rows using ul and li elements. In total 7 ul class columns like this were created but here I'm just showing one and each column represents a potential move in the game. The game board is represented by the div element with the class "board" It has seven columns, each represented by a ul element with a unique ID (c1 - c7). Inside each column, there are six p elements with unique IDs (c1r6, c1r5, c1r4, etc.). These p elements represent the individual cells of the game board where the game pieces can be placed.
Game Front-End
Here is the CSS:
/* Game UI Design */

*{
  margin: 0;
  padding: 0;
}
body{
  display: grid;
  place-items: center;
}

h1{
  text-align: center;
  margin: 20px 0 20px 0;
}
h2{
  text-align: center;
  margin-bottom: 20px;
}

.board{
  display: grid;
  grid-template-columns: repeat(7,1fr);
  border: 2px solid black;
 width: 630px;
 background-color: rgb(74, 74, 198);


}
In the CSS code above the board is styled displayed as a grid with seven equally sized columns. The first few lines use the universal selector (*) to set the margin and padding of all elements to 0. This ensures that there are no default margins or paddings applied. The body selector sets the display property to grid and uses place-items: center to horizontally and vertically center the content of the body.
The board class selector sets the display property to grid and uses grid-template-columns to create a grid layout with 7 columns, each having equal width (1fr). It adds a 2px solid black border and sets the width to 630 pixels. The background color is set to an RGB value of (74, 74, 198), which represents a shade of blue. The ul selector sets the display property to grid and uses place-items: center to center the content of the unordered list.
Games Grid Design
ul{
  display: grid;
  place-items: center;

}

ul p{
  margin: 5px;
  width: 75px;
  height: 75px;
  border: 2px solid black;
  border-radius: 100px;
  background-color: white;
}

ul:hover{
  cursor: pointer;
  background-color: rgb(98, 136, 238);
}
Here the ul p selector targets the paragraphs (p) within the unordered list. It sets a margin of 5 pixels and sets the width and height to 75 pixels, creating a square shape. It adds a 2px solid black border and gives it a border-radius of 100 pixels, making the square appear as a circle. The background color is set to white.
The ul:hover selector applies styles when hovering over the unordered list. It changes the background color to an RGB value of (98, 136, 238), which represents a lighter shade of blue. It also changes the cursor to a pointer.
Adjustment of Grid Size Depending on Screen
@media(max-width:700px){
  .board{
      width: 500px;
  }
  ul p{
      width: 55px;
      height: 55px;

  }

}
@media(max-width:520px){
  .board{
      width: 400px;
  }
  ul p{
      width: 40px;
      height: 40px;

  }

}
@media(max-width:420px){
  .board{
      width: 320px;
  }
  ul p{
      width: 30px;
      height: 30px;

  }

}
Here the @media queries define responsive styles for different screen sizes. The first @media query applies when the maximum width is 700 pixels. It reduces the width of the board to 500 pixels and reduces the size of the squares to 55 pixels.
The second @media query applies when the maximum width is 520 pixels. It further reduces the width of the board to 400 pixels and reduces the size of the squares to 40 pixels.
The third and final @media query applies when the maximum width is 420 pixels. It further reduces the width of the board to 320 pixels and reduces the size of the squares to 30 pixels.
Game Logic
Here is the code for the JavaScript:
// Game Logic

// Variables to track current position in each column
val_c1 = 1
val_c2 = 1
val_c3 = 1
val_c4 = 1
val_c5 = 1
val_c6 = 1
val_c7 = 1

// Variable to track whose turn it is
turn = 1
Here above we can see that the variables val_c1, val_c2, val_c3, val_c7 are initialized to 1. These variables are used to keep track of the current position in each column where the next piece will be placed. The variable turn is initialized to 1 and is used to determine whose turn it is in the game.
Function to Check for Wins
// Function to check for a win
function check(player) {
    setTimeout(() => {

        for (i = 1; i <= 7; i++) {
            for (j = 1; j <= 3; j++) {
                if (document.getElementById(`c${i}r${j}`).style.backgroundColor == `${player}` && document.getElementById(`c${i}r${j + 1}`).style.backgroundColor == `${player}` && document.getElementById(`c${i}r${j + 2}`).style.backgroundColor == `${player}` && document.getElementById(`c${i}r${j + 3}`).style.backgroundColor == `${player}`) {
                    alert(`${player} wins`)
                    location.reload()
                }

            }
        }

        for (i = 1; i <= 6; i++) {
            for (j = 1; j <= 4; j++) {
                if (document.getElementById(`c${j}r${i}`).style.backgroundColor == `${player}` && document.getElementById(`c${j + 1}r${i}`).style.backgroundColor == `${player}` && document.getElementById(`c${j + 2}r${i}`).style.backgroundColor == `${player}` && document.getElementById(`c${j + 3}r${i}`).style.backgroundColor == `${player}`) {
                    alert(`${player} wins`)
                    location.reload()
                }

            }

        }

        for (i = 1; i <= 4; i++) {
            for (j = 1; j <= 3; j++) {
                if (document.getElementById(`c${i}r${j}`).style.backgroundColor == `${player}` && document.getElementById(`c${i + 1}r${j + 1}`).style.backgroundColor == `${player}` && document.getElementById(`c${i + 2}r${j + 2}`).style.backgroundColor == `${player}` && document.getElementById(`c${i + 3}r${j + 3}`).style.backgroundColor == `${player}`) {
                    alert(`${player} wins`)
                    location.reload()
                }

            }
        }

        for (i = 1; i <= 4; i++) {
            for (j = 6; j >= 4; j--) {
                if (document.getElementById(`c${i}r${j}`).style.backgroundColor == `${player}` && document.getElementById(`c${i + 1}r${j - 1}`).style.backgroundColor == `${player}` && document.getElementById(`c${i + 2}r${j - 2}`).style.backgroundColor == `${player}` && document.getElementById(`c${i + 3}r${j - 3}`).style.backgroundColor == `${player}`) {
                    alert(`${player} wins`)
                    location.reload()
                }

            }
        }

    }, 200)

}
The check function is defined to check for a winning condition after each move. It uses nested loops to iterate over the game board and checks for four consecutive pieces of the same color in a row, column, or diagonal. If a winning condition is found, an alert is shown with the winning player's color, and the game is reloaded.
Event Listeners
// Game Frontend
// playing

// Add event listeners to each column
document.querySelectorAll(".column").forEach((e) => {
    e.addEventListener("click", () => {

        sum = eval(`val_${e.id}`)
        eval(`val_${e.id}++`)


        if (sum <= 6 && turn % 2 != 0) {
            document.getElementById(`${e.id}r${sum}`).style.backgroundColor = "red"
            turn++
            check('red')
            document.getElementById("whosturn").innerText = "Yellow's Turn"
        }

        else if (sum <= 6 && turn % 2 == 0) {
            document.getElementById(`${e.id}r${sum}`).style.backgroundColor = "yellow"
            turn++
            check('yellow')
            document.getElementById("whosturn").innerText = "Red's Turn"

        }

    })
})
Here the document.querySelectorAll(".column") selects all elements with the class "column" in the HTML document. These elements represent the columns of the Connect Four board. The forEach method is used to iterate over each selected element. For each element, an event listener is added to listen for a click event. When a column is clicked, the event listener callback function is executed. The function first evaluates the value of the corresponding val_cX variable using string interpolation and eval. The eval function executes the dynamic expression and returns the result.
If the current value is less than or equal to 6 and it is an odd turn (turn % 2 != 0), a red piece is placed in the next available row of the clicked column. The turn counter is incremented, the check function is called to check for a win, and the text indicating whose turn it is changes to "Yellow's Turn" and if the current value is less than or equal to 6 and it is an even turn (turn % 2 == 0), a yellow piece is placed in the next available row of the clicked column. The turn counter is incremented, the check function is called to check for a win, and the text indicating whose turn it is changes to "Red's Turn".
Conclusion:
In this article at OpenGenus, we walked through the implementation of a Connect Four game using HTML, CSS, and JavaScript. We started by creating the basic HTML structure and used CSS to style the game board and user interface. JavaScript was then used to handle the game logic, including placing game pieces, checking for winning conditions, and updating the turn indicator.
The game allows two players to take turns placing their colored pieces on the game board. The JavaScript code checks for winning conditions by examining rows, columns, and diagonals to determine if there are four consecutive pieces of the same color. If a winning condition is detected, an alert is shown with the winning player's color, and the game can be restarted by reloading the page.
By following the step-by-step guide and examining the provided code, you can understand how to create a simple Connect Four game using web technologies. Feel free to explore the GitHub repository for a more detailed look at the code and make any modifications or enhancements as desired. Remember, web development provides a versatile platform for creating engaging and interactive games, and Connect Four is just one example of the many possibilities.
