
Reading time: 20 minutes | Coding time: 2 minutes
CSS Margin property is used to create space between webpage border and HTML Element's border (if defined using CSS Border property). We will explore the following sub-topics:
- Specifying Margins for Individual sides
- Shorthand property for Margins
- Auto-Margin
- Margin Inherit property
- Margin Collapse
Syntax:
<style>
    #idvalue
    {
        border: {width} {style} {color};
        margin: {value}
    }
</style>
<{html_element} id="idvalue"> {content} </{html_element}>
Example:
<style>
    #margin1
    {
    border: 2px solid black;
    text-align:center;
    margin: 100px;
    }
</style>
<h1 id="margin1"> Generic Heading with defined margin</h1>
<h1> Normal heading </h1>
Output:

Here, the first heading has a margin of 100 px from all four sides: top, right, bottom and left.
The Margin property can be defined in following ways:
- Length
- Percentage
- Auto
- Inherit
Note: We can specify negative margin values
Specifying length as value
Margin can be specified in length as a numeric value followed by units.
Common units are px, cm etc.
Syntax:
<{html_element} style="margin: {numeric value} {unit}; border: {specifications}">
Example:
<style>
    #el
    {
        border: 2px solid black;
        margin: 40px 100px 0px 80px;
    }
</style>
<h1 id="el"> Generic Heading with margin</h1>
Output:

Here,
- Top margin: 40px
- Right margin: 100px
- Bottom margin: 0px
- Left margin: 80px
Specifying percentage as value
We can define percentage values as margin. The default margin of the HTML element is 0%, any percentage value relative to it can be specified.
Syntax:
<style>
    #idvalue
    {
    border: {width} {style} {color};
    margin: {value}%;
    }
</style>
<{HTML-element} id="idvalue"> Content </{HTML-element}>
Example:
<style>
    #el
    {
    border: 8px double black;
    margin: 2%;
    }
</style>
<h1 id="el"> Heading </h1>
Output:

Note: Auto and inherited margin is discussed later.
1) Specifying margins for individual sides
CSS allows the specification of individual margins for each side using following keywords:
- margin-top
- margin-right
- margin-left
- margin-bottom
Syntax:
<style>
    #idvalue
    {
    border: {width} {style} {color};
    margin-top: {value1};
    margin-right: {value2};
    margin-bottom: {value3};
    margin-left: {value4};
    }
</style>
<{HTML-element} id="idvalue"> Content </{HTML-element}>
Output:
<style>
    #el
    {
    border: 8px double black;
    margin-top: 2%;
    margin-right: 300px;
    margin-bottom: 0px;
    margin-left: 250px;
    }
</style>
<h1 id="el"> Generic Heading </h1>
Output:

2) Shorthand property for Margins
Shorthand property for CSS margins is used to specify all the individual borders in one line.
It must have at least one value and at max four values.
Syntax:
<style>
    #idvalue
    {
    border: {width} {style} {color};
    margin: {One-Four space separated values with units};
    }
</style>
<{HTML-element} id="idvalue"> Content </{HTML-element}>
Case 1: 4 values are specified
If four values are specified, then they define top, right, bottom and left margin respectively.
Example:
<style>
    #el
    {
    border: 10px double black;
    margin: 10px 100px 0px 400px;
    }
</style>
<h1 id="el"> Generic Heading </h1>
Output:

Case 2: 3 values are specified
If three values are specified:
- First value defines top margin
- Second value defines right and left margins
- Third value defines bottom margin
Example:
<style>
    #el
    {
    border: 10px double black;
    margin: 10px 400px 0px;
    }
</style>
<h1 id="el"> Generic Heading </h1>
Output:

Case 3: 2 values are specified
If two values are specified,
- First value defines top and bottom margin
- Second value defines left and right margin
Example:
<style>
    #el
    {
    border: 10px double black;
    margin: 10px 100px;
    }
</style>
<h1 id="el"> Generic Heading </h1>
Output:

Case 4: 1 value is specified
If one value is specified, it defines all margins with same value.
Example:
<style>
    #el
    {
    border: 10px double black;
    margin: 200px;
    }
</style>
<h1 id="el"> Generic Heading </h1>
Output:

3) Auto-Margins
Auto keyword is specified as a value for margin property when we want to horizontally center the element specified in a container by its borders.
Following points are to be noted when using auto keyword:
- It only equal margins to both left and right side.
- It does not affect vertical margins
- It works only using shorthand property to specify margin.
- It works only when width property is defined for the HTML element. Width property is used to specify the space the element container would take.
Syntax:
<style>
    #idvalue
    {
    width: {value};
    border: {width} {style} {color};
    margin: auto;
    }
</style>
<{HTML-element} id="idvalue"> Content </{HTML-element}>
Example:
<style>
    #el
    {
    width: 250px;
    border: 8px double black;
    margin: auto;
    }
</style>
<h1 id="el"> Generic Heading </h1>
Output:
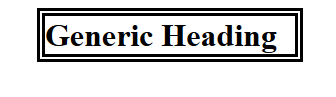
Here, using the auto keyword, we get equal margin with respect to left and right end of the webpage.
4) Margin Inherit property
Inherit keyword can be used to specify margin for an HTML element iff:
- HTML element in which inherit keyword is to be used is contained within another HTML element.
- The element above in hierarchy must have border and margin defined for it.
Syntax:
<style>
    #parent
    {
    border: {width1} {style1} {color1};
    margin: {value};
    }
    #child
    {
    border: {width2} {style2} {color2};
    margin: inherit;
    }
</style>
<{HTML-element1} id="parent">
    <{HTML-element2} id="child">
        Content
    </{HTML-element2}>
</{HTML-element1}>
Example:
<style>
    div
    {
    border: 8px double black;
    margin: 40px;
    }
    h1
    {
    border: 4px dotted black;
    margin: inherit;
    }
</style>
<div>
    <h1>
        Generic Heading
    </h1>
</div>
Output:

Here,
<h1>tag is contained within<div>tag.- Margin of
<h1>takes its value from parent tag.
5) Margin Collapse property
Margin collapse property is not an explicitly defined property but rather it happens due to pre-defined rules. Whenever two HTML elements follow with vertical margins defined as in:
- Upper HTML element has a bottom margin specified of say value = x units.
- Lower HTML element has a top margin specified of say value = y units.
Then, rather than having a combined margin of (x+y) units, there is a margin of max(x,y) units. That is the larger value is set as the margin.
Syntax:
<style>
    #upper
    {
    border: {width} {style} {color};
    margin-bottom: {value};
    }
    #lower
    {
    border: {width} {style} {color};
    margin-top: {value};
    }
</style>
<{HTML-element-1} id="upper"> Content </{HTML-element-1}>
<{HTML-element-2} id="lower"> Content </{HTML-element-2}>
Example:
<style>
    #upper
    {
    border: 8px dashed black;
    margin-bottom: 80px;
    }
    #lower
    {
    border: 12px double yellow;
    margin-top: 40px;
    }
</style>
<h1 id="upper"> Heading on top element </h1>
<h1 id="lower"> Heading on bottom element </h1>
Output:

Here,
- Bottom margin of upper element is 80px.
- Top margin of lower element is 40px.
- Rather than having a combined margin of (80+40) = 120px, it has max(80,40) = 80px margin.