
Introduction
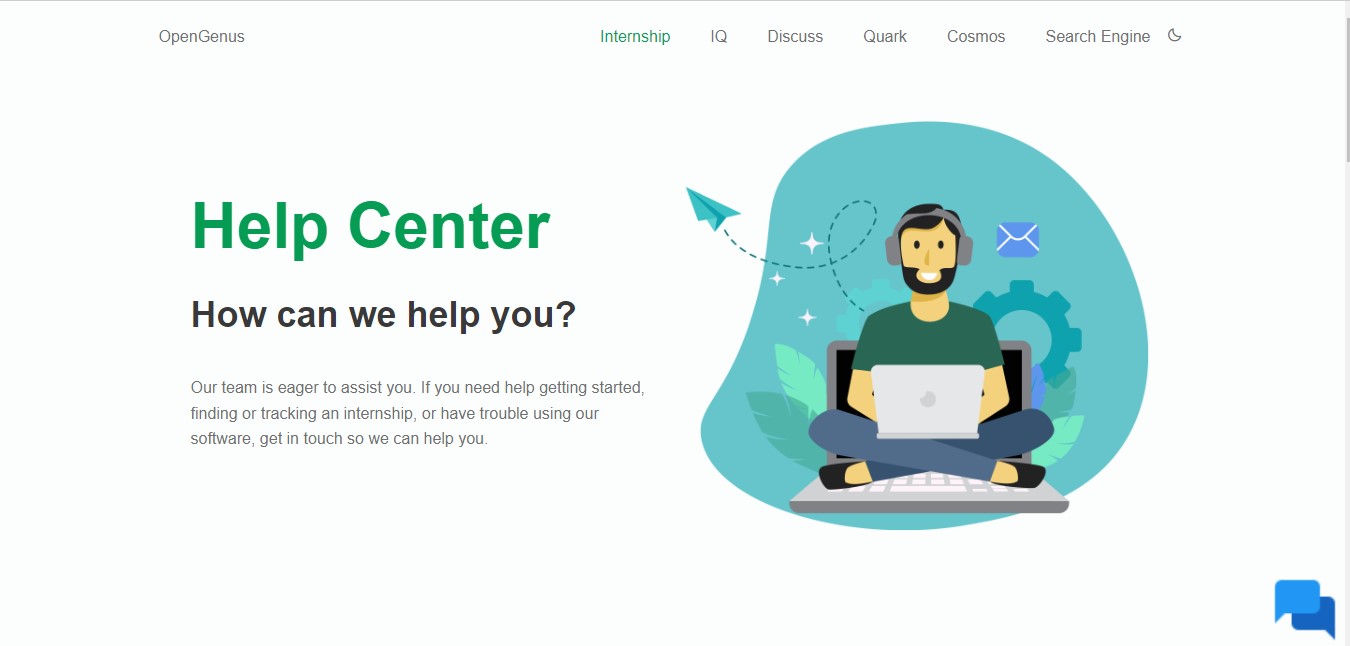
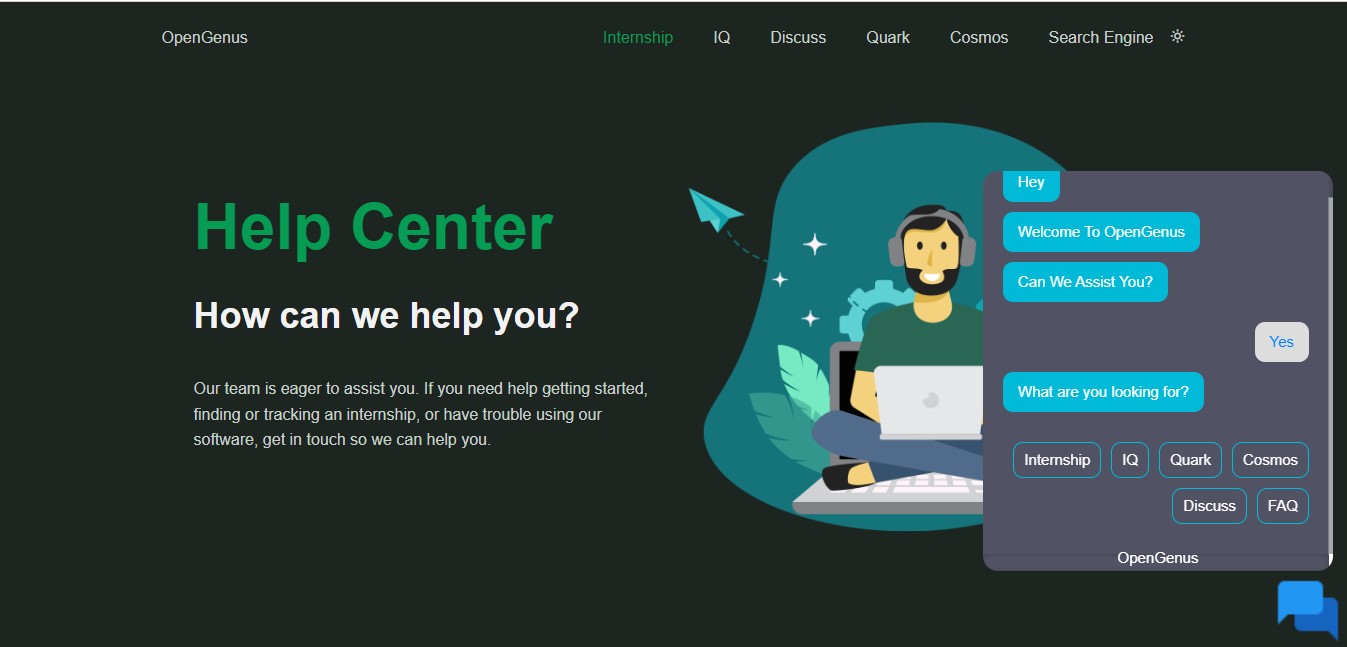
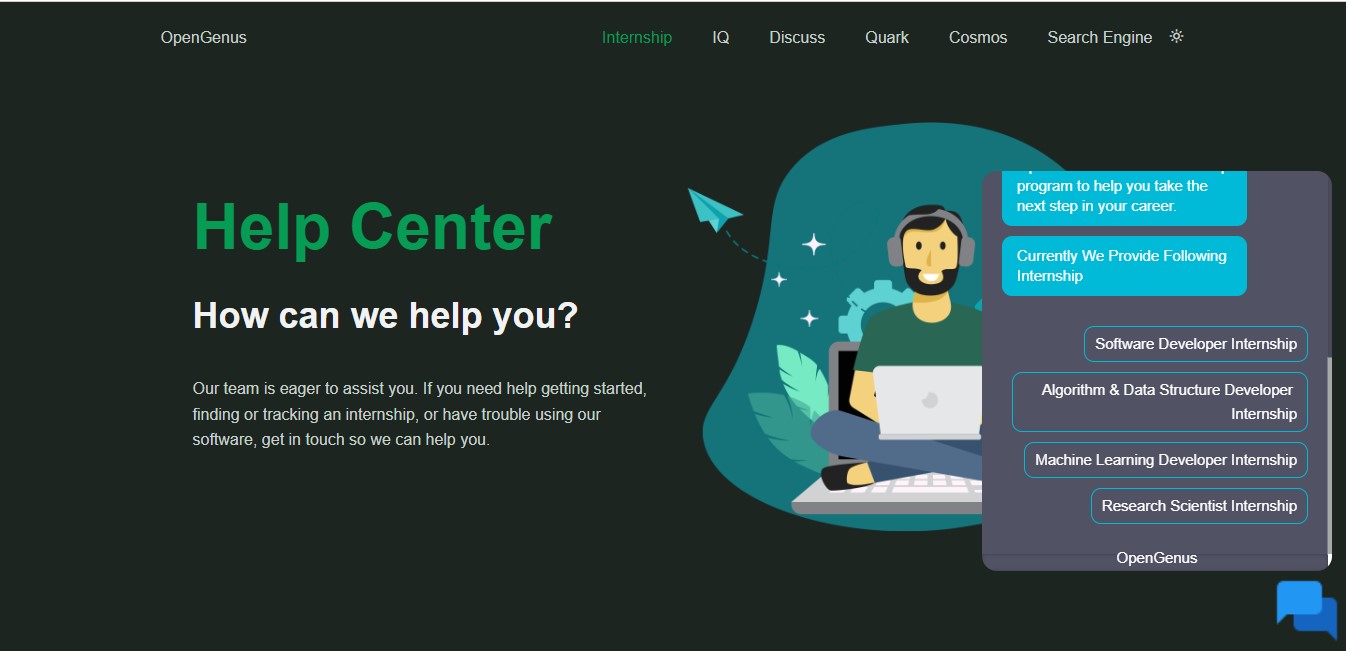
Chatbots have revolutionized the way people interact with technology. A chatbot is an artificial intelligence (AI) software that can simulate a conversation (or a chat) with a user in natural language through messaging applications, websites, mobile apps or through the telephone. In this article, I will explain a menu-based chatbot designed and implemented using HTML, CSS, Bootstrap, JavaScript, and jQuery. It is deployed as a prototype to OpenGenus IQ's homepage.
Codebase: github.com/OpenGenus/chatbot-web
Features
This chatbot is menu-based, which means that the user is presented with several options to choose from, and the bot responds accordingly. The chatbot is designed to be user-friendly and easy to use. Some of the features of the chatbot include:
Menu-based: The chatbot offers the user a choice of options to choose from. The user clicks on the option he wants, and the bot then presents another set of options for him to choose from.
Rule-based: This chatbot is rule-based, which means that it responds based on pre-defined rules. The bot has a set of responses for each option that the user can choose from.
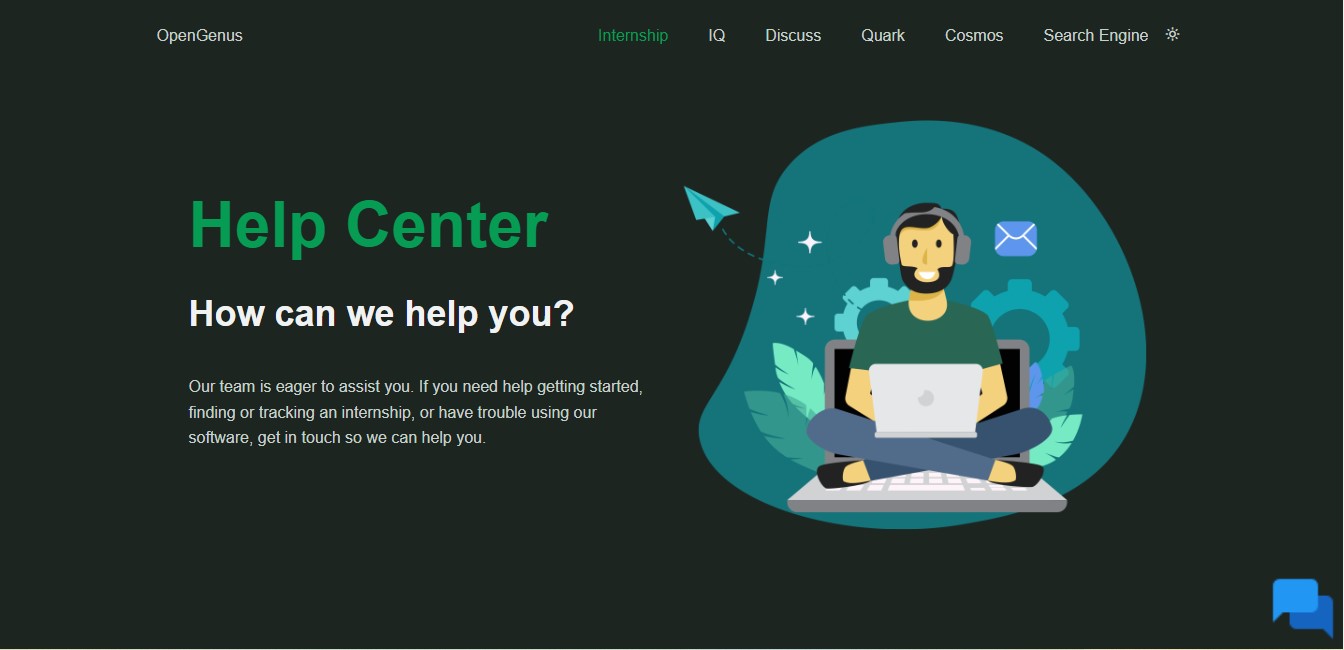
Night mode: The chatbot has a night mode functionality, which allows the user to switch between a light and dark mode for better visibility.
Contact option: The chatbot has an option to contact, which allows the user to connect with the support team.
- Menu-driven interface: Menu-based chatbots use pre-defined menus to guide users through the conversation flow.
- Structured conversation flow: Chatbots with menus are typically designed with a structured conversation flow that is easy to follow.
- Limited user input: Users are limited to selecting options from a menu, so there is less
opportunity for misunderstandings or errors in communication. - Clear navigation: Menus are designed to be easy to navigate, with clear labels and logically grouped options.
- Repetitive tasks: Menu-based chatbots are ideal for handling repetitive tasks, such as placing orders or answering frequently asked questions.
- Faster response times: Because menus are pre-defined, chatbots can respond quickly to user requests without needing to process natural language input.
- Lower development costs: Menu-based chatbots can be easier and less expensive to develop than more complex natural language processing (NLP) chatbots.
- Consistency: Menu-based chatbots can ensure consistent responses and experiences for all users, regardless of their communication skills.
- Limited customization: Chatbots with menus are limited in their ability to provide personalized responses since they are designed to follow a fixed conversation flow.
- Limited functionality: While menu-based chatbots can handle basic tasks effectively, they may not be able to provide the same level of functionality as more advanced chatbots that use NLP and other Al technologies.
Approach/Design
Implementation Details with Code Snippet:
The chatbot is implemented using HTML, CSS, Bootstrap, JavaScript, and jQuery. The HTML code for the chatbot is as follows:
Rule-based and click-based are two common approaches for building chatbots:
Rule-based chatbots:
These chatbots are built using a set of predefined rules that determine how the chatbot will respond to user inputs. These rules are typically based on keyword matching or regular expressions, and they can be programmed to provide specific responses based on the user's input. Rule-based chatbots are relatively simple to build and are useful for handling specific tasks, such as answering frequently asked questions or providing basic customer support.
Design Implementation
Approach and Design:
The chatbot is designed to be simple and user-friendly. The user interface is clean and easy to navigate. The chatbot offers the user a choice of options to choose from, and the bot responds accordingly. The chatbot uses a rule-based approach, which means that it responds based on pre-defined rules.
Designing a menu-based chatbot involved designing a conversational interface that allowed users to interact with the chatbot by selecting options from a menu.
The purpose and scope of the chatbot were defined to identify the features that needed to be included. The user flow was identified by creating a sequence of questions and responses that the chatbot used to interact with the user. Menu options were designed to be easy for the user to understand and navigate, with each option clearly labeled and providing a brief description of what it did.
The chatbot interface was designed to be intuitive and responsive to the user's input. The chatbot backend was developed using a programming language and framework suitable for the project, handling user input and providing appropriate responses based on the menu options selected by the user.
The chatbot was then thoroughly tested to ensure it functioned as intended. Finally, the chatbot was deployed to the desired platform.
It contains the following file and its content.
FOLDER and CONTENT
- demo-data data.json [database file to intereact with user]
- flow.css Include code for Chat Container
- flowchart.css Include code for Chat Window
- flowchat.js Include javascript code for Chat Window
- flowchatui.js Include javascript code for Chat UI
- index.html Include html code for help page
- styles.scss Include css code for UI
- main.js Include js code for MENU
- styles.css Include css code for UI
demo-data
demo-data is data.json database file to intereact with user. This file contain JSON object that represents a message in a chatbot or messaging application.
"id": - This is a unique identifier for the message.
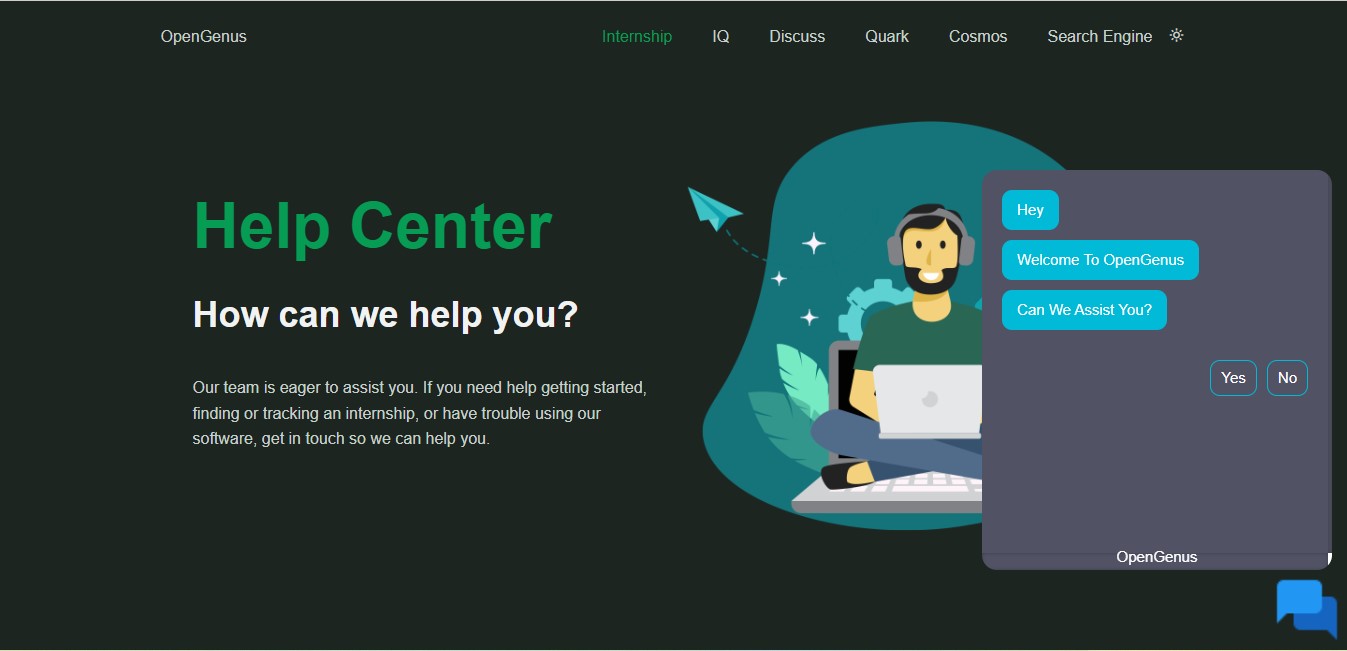
"text": "Welcome To OpenGenus" - This is the text content of the message.
"messageType": "Text" - This specifies the type of message, which in this case is a text message.
"imageUrl": "" - This is the URL of an image that can be displayed with the message. Since it's empty in this case, no image is displayed.
"nextMessageId": 3 - This is the ID of the next message that should be displayed after this one.
"option1" through "option6" - These are options that can be presented to the user, such as buttons or links.
"option1_nextMessageId" through "option6_nextMessageId" - These are the IDs of the messages that should be displayed when the corresponding option is selected by the user.
Overall, this JSON object provides information about a message that can be displayed to a user in a chatbot or messaging application, along with options that the user can select to continue the conversation.
code snippet
  {
        "id": 2,
        "text": "Welcome To OpenGenus",
        "messageType": "Text",
        "imageUrl": "",
        "nextMessageId": 3,
        "option1": "",
        "option1_nextMessageId": "",
        "option2": "",
        "option2_nextMessageId": "",
        "option3": "",
        "option3_nextMessageId": "",
        "option4": "",
        "option4_nextMessageId": "",
        "option5": "",
        "option5_nextMessageId": "",
        "option6": "",
        "option6_nextMessageId": ""
    }
Flowchart.js
This is a jQuery plugin named "flowchat" that creates a chatbot interface. The plugin takes an options object as an argument which can be used to customize the chatbot behavior. The options include delay between bot replies, ID of the button that starts the chat, ID of the first message to be displayed, and a JSON object that contains the chatbot messages.
The plugin has several helper functions like "selectOption() which is called when the user
selects a chatbot option, findMessageIn]sonById() which finds the message in the JSON
object by its ID, 'addoptions() which adds the chatbot options to the chat window,
toggleLoader()" which shows and hides a typing indicator during bot reply, and generateMessageHTML() which generates and adds the chat messages to the chat window
recursively.
The plugin attaches an event listener to the start button that calls startChat() function when clicked. This function clears the chat window, gets the first message from the JSON object, and calls "generateMessageHTML() to display it in the chat window.
The generateMessageHTML() function generates and adds the chat messages to the chat window recursively. It checks if the message has options and adds them if it is a question. It also checks if the message has a next message ID and recursively calls itself to display the next message.
The plugin uses 'jquery' library and wraps itself in an immediately invoked function expression (IIFE) to create a private namespace and avoid polluting the global namespace. The use strict directive is used to enable strict mode and catch common JavaScript mistakes.
"use strict";
(function($) {
  $.fn.flowchat = function(options) {
    // override options with user preferences
    var settings = $.extend({
      delay: 1500,
      startButtonId: '#btn-submit',
      autoStart: true,
      startMessageId: 1,
      dataJSON: null
    }, options);

    var container = $(this);

    // on click of Start button
    $(document).on('click', settings.startButtonId, function() {
      startChat(container, settings.dataJSON, settings.startMessageId, settings.delay)
    });
  }

  function selectOption($this, container, data, delay) {
    $this.parent().hide();
    var $userReply = $('<li class="user"><div class="text">' + $this.html() + '</div></li>');
    container.children('.chat-window').append($userReply);

    // get the message
    var nextMessageId = $this.attr('data-nextId');
    var nextMessage = findMessageInJsonById(data, nextMessageId);

    // add next message
    generateMessageHTML(container, data, nextMessage, delay);
  }

  function startChat(container, data, startId, delay) {
    // clear chat window
    container.html("<div class='footer-chat'>OpenGenus</div>");
    container.append("<ul class='chat-window'></ul>");

    // get the first message
    var message = findMessageInJsonById(data, startId);

    // add message
    generateMessageHTML(container, data, message, delay);
  }

  function findMessageInJsonById(data, id) {
    var messages = data;
    for (var i = 0; messages.length > i; i++)
      if (messages[i].id == id)
        return messages[i];
  }

  function addOptions(container, data, delay, m) {
    var $optionsContainer = $('<li class="options"></li>');
    var $optionsList = $('<ul></ul>');
    var optionText = null;
    var optionMessageId = null;
    for (var i = 1; i < 12; i++) {
      optionText = m["option" + i]
      optionMessageId = m["option" + i + "_nextMessageId"]
      if (optionText != "" && optionText != undefined && optionText != null) { // add option only if text exists
        var $optionElem = $("<li data-nextId=" + optionMessageId + ">" + optionText + "</li>");
        $optionElem.click(function() {
          selectOption($(this), container, data, delay)
        });
        $optionsList.append($optionElem);
      }
    }
    $optionsContainer.append($optionsList);
    return $optionsContainer;
  }

  function toggleLoader(status, container) {
    if (status == "show")
      container.children('.chat-window').append("<li class='typing-indicator'><span></span><span></span><span></span></li>");
    else
      container.find('.typing-indicator').remove();
  }

  function generateMessageHTML(container, messages, m, delay) {
    // create template if text is not null
    if (m.imageUrl != '')
      var $template = $('<li class')
Flowchatui.js
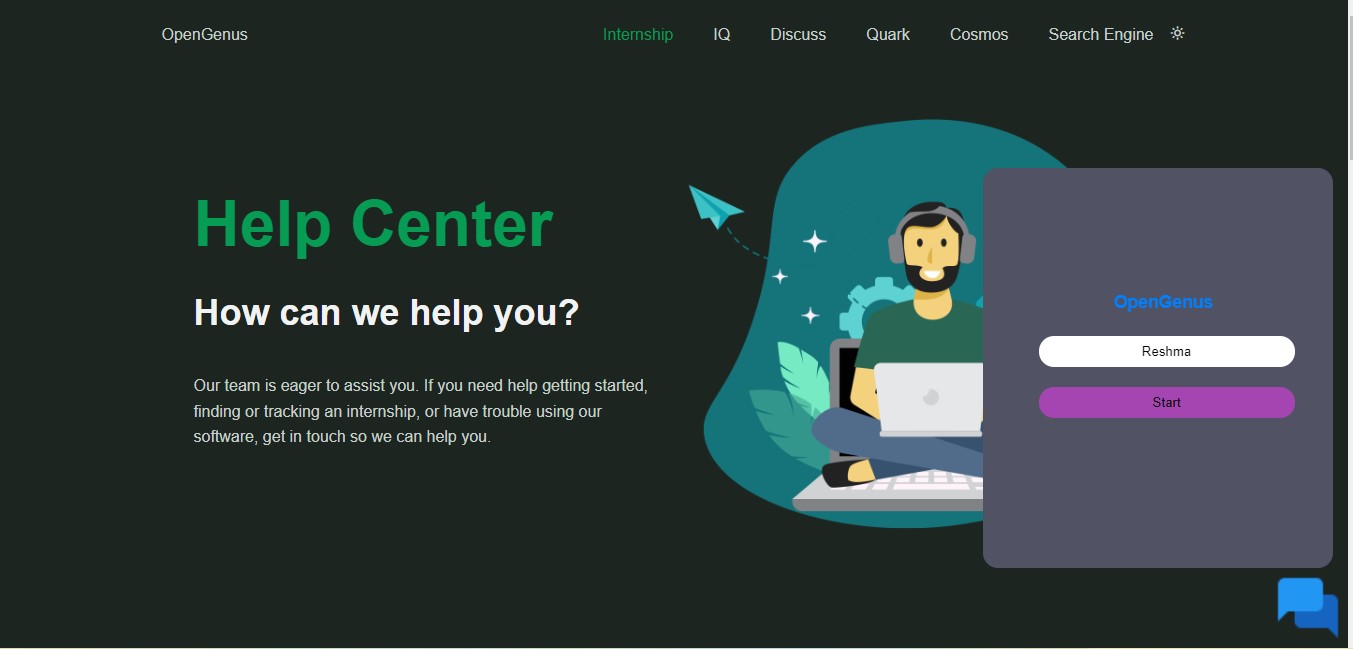
This code creates a chat icon on the bottom right of a webpage. When clicked, it shows a chat popup box where users can enter their names and start chatting. Here are some implementation details:
- A div element is created using JavaScript and given the class "chaticon". An image tag is added to the div, which shows an icon. The div is appended to the body of the webpage.
- Another div element is created with the id "flowchart" and the class "flow". This element contains a form with an input field for the user's name and a submit button.
- The "flowchart" div is appended to the "chat_icon" div using jQuery.
- A click event listener is added to the icon image. When the icon is clicked, the "chat- popup" element is shown or hidden using jQuery's fadeIn() and animate() functions.
- The "chat-popup" element is hidden by default and only shown when the icon is clicked.
Overall, this code creates a simple chat interface that can be easily added to any webpage.
// Create chat icon
let d = document.createElement('div');
$(d).addClass('chat_icon')
    .html('<img src="src/icon.png" alt="" id="icon" style="position:fixed;bottom:0;right:0;height: 80px; width: 80px; float:right;">')
    .appendTo($("body")) //main div

// Add chat popup form to chat icon
$(".chat_icon").append(function() {
    return ($("<div>")
        .attr("id", "flowchat")
        .addClass("flow")
        .html('<div id="myForm" class="chat-popup"><form action="" class="form-container"><h3>OpenGenus</h3><input type="text" placeholder="Type Your Name" name="msg" required><button id="btn-submit" type="submit">Start</button></form></div>'))
});

// Toggle chat popup form visibility when chat icon is clicked
$(document).ready(function() {
    $('#icon').on('click', function() {
        if ($('.flow').is(':visible')) {
            $('.flow').fadeIn(400, function() {
                $('.flow').animate({
                    'width': 'hide'
                }, 1000);
            });
        } else {
            $('.flow').animate({
                'width': 'show'
            }, 1000, function() {
                $('.flow').fadeIn(400);
            });
        };
        if ($('.chat-popup').is(':visible')) {
            $('.chat-popup').fadeIn(400, function() {
                $('.chat-popup').animate({
                    'width': 'hide'
                }, 1000);
            });
        } else {
            $('.chat-popup').animate({
                'width': 'show'
            }, 1000, function() {
                $('.chat-popup').fadeIn(400);
            });
        };
    });
});
Flowchart.css
The given code is a CSS stylesheet that defines the style for a chat window interface. It includes various styles for the chat messages, options, and a typing indicator animation. The chat messages are displayed in a list format with the user and bot messages differentiated by their alignment and background color. The options for the user are displayed as a list of clickable items with a border and background color. The typing indicator animation is displayed as a series of circles that blink in a sequence, with a bulging effect applied to them.
ul.chat-window {
    width: 100%;
    height: 100%;
    overflow: scroll;
    margin-top: 0;
    padding: 20px;
    list-style: none;
    margin: 0;
    box-sizing: border-box;
}

ul.chat-window>li .text {
    box-sizing: border-box;
    margin-bottom: 10px;
    border-radius: 10px;
    padding: 10px 15px;
    line-height: 20px;
}

ul.chat-window>li.bot .text {
    background-color: #01bad8;
    color: #fff;
    float: left;
}

ul.chat-window>li {
    clear: both;
    max-width: 80%;
    box-sizing: border-box;
    white-space: pre-wrap;
}

ul.chat-window>li.user {
    float: right;
}

ul.chat-window>li.bot {
    float: left;
}

ul.chat-window>li.user .text {
    background-color: #ddd;
}

ul.chat-window>li.options {
    margin-top: 10px;
    list-style: none;
    max-width: 100%;
    width: 100%;
    float: left;
    text-align: right;
}

ul.chat-window>li.options>ul {
    margin-top: 0;
    padding: 0;
    list-style: none;
    margin-top: 10px;
}

ul.chat-window>li.options>ul>li {
    border-radius: 10px;
    padding: 5px 10px;
    border: 1px solid #01bad8;
    display: inline-block;
    cursor: pointer;
    color: #fff;
    margin-left: 10px;
    margin-bottom: 10px;
}

.typing-indicator {
    background-color: #E6E7ED;
    will-change: transform;
    width: auto;
    border-radius: 50px;
    padding: 10px;
    display: table;
    margin: 0;
    margin-left: 10px;
    position: relative;
    -webkit-animation: 2s bulge infinite ease-out;
    animation: 2s bulge infinite ease-out;
}

.typing-indicator::before,
.typing-indicator::after {
    content: '';
    position: absolute;
    bottom: -2px;
    left: -2px;
    height: 20px;
    width: 20px;
    border-radius: 50%;
    background-color: #E6E7ED;
}

.typing-indicator::after {
    height: 10px;
    width: 10px;
    left: -10px;
    bottom: -10px;
}

.typing-indicator span {
    height: 8px;
    width: 8px;
    float: left;
Flow.css
This is the CSS code for a chat container with a chat icon. The container has a fixed position on the right bottom of the screen, and it has a specific height and width. It also has an overflow property set to hide to prevent the content from overflowing.
There is a media query for screens that are smaller than 600px in width, which adjusts the width of the container and changes its position. It also hides some elements like the footer and adjusts the submit button's width.
The chat icon has a fixed position on the bottom right of the screen, and it is colored blue. The chat window has a list of chat messages, which are either from the user or the bot. The messages have different styles and colors, and there is also an indicator for when the bot is typing a message.
Overall, the CSS code is for a chat interface that is responsive and has a modern look.
.flow {
    font-family: 'Open Sans', sans-serif;
    width: 350px;
    height: 400px;
    overflow-y: hidden;
    overflow-x: hidden;
    float: right;
    margin-right: 15px;
    margin-top: 15%;
    border-radius: 15px;
    background-color: #515365;
}

@media only screen and (max-width:600px) {
    .flow {
        font-family: 'Open Sans', sans-serif;
        width: 96%;
        height: 400px;
        overflow-y: hidden;
        overflow-x: hidden;
        position: relative;
        margin-top: 45%;
        border-radius: 15px;
        left: 10px;
        background-color: #515365;
    }
    #btn-submit {
        width: 90%;
    }
    #btn-submit:hover {
        width: 90%;
    }
    .footer-chat {
        display: none;
    }
    .chat-popup {
        left: 40px;
        margin-right: 0;
    }
}

.chat-popup {
    position: fixed;
    right: 0;
    bottom: 0;
    margin-bottom: 180px;
    margin-right: 50px;
    padding-bottom: 50px;
}

.chat-popup h3 {
    text-align: center;
}

.chat-popup input {
    text-align: center;
    padding: 8px;
    border-radius: 15px;
    width: 95%;
    outline: none;
    border: none;
    margin-top: 20px;
    margin-left: 10px;
    margin-right: 10px;
}

#flowchat {
    position: fixed;
    right: 0;
    bottom: 0;
    margin-bottom: 80px;
}

.chat_icon {
    position: fixed;
    bottom: 0;
    width: 100%;
    right: 20px;
    z-index: 1100;
    padding: 0;
    font-size: 15px;
    color: #0080ff;
    cursor: pointer;
}

ul.chat-window {
    width: 350px;
    height: 400px;
    margin-top: 0;
    overflow-y: auto;
    padding: 20px;
    list-style: none;
    margin: 0;
    box-sizing: border-box;
}

.footer-chat {
    width: 350px;
    padding: 5px;
    position: fixed;
    text-align: center;
    color: #fff;
    margin-top: 370px;
}

ul.chat-window>li .text {
    box-sizing: border-box;
    margin-bottom: 10px;
    border-radius: 10px;
    padding: 10px 15px;
    line-height: 20px;
}

ul.chat-window>li.bot .text {
    background-color: #01bad8;
    color: #fff;
    float: left;
}

ul.chat-window>li {
    clear: both;
    max-width: 80%;
    box-sizing: border-box;
    white-space: pre-wrap;
}

ul.chat-window>li.user {
    float: right;
}

ul.chat-window>li.bot {
    float: left;
}

ul.chat-window>li.user .text {
    background-color: #ddd;
}

ul.chat-window>li.options {
    margin-top: 10px;
    list-style: none;
    max-width: 100%;
    width: 100%;
    float: left;
    text-align: right;
}
ul.chat-window>li.options
Demo Project
With this article at OpenGenus, you must have the complete idea of how to develop Menu based help chatbot for a webpage.