
In this article, we have implemented a complete text editor with multiple formatting features in HTML, CSS and JavaScript. This is a strong project for Web Developer Portfolio.
TABLE OF CONTENTS:-
- Introduction
- The Composition
- HTML
- CSS
- JavaScript
INTRODUCTION:
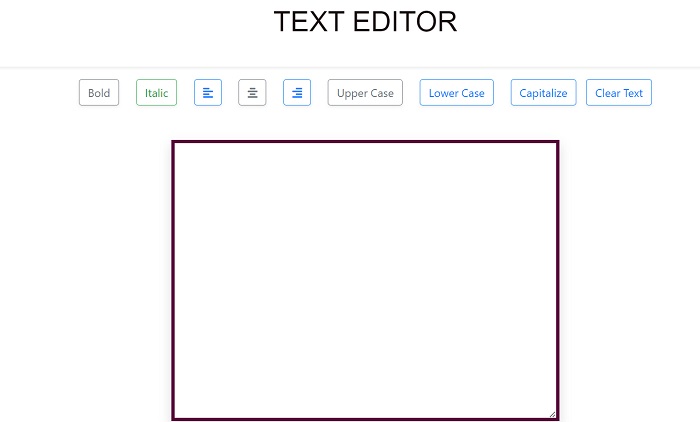
The text editor is a JavaScript application that enables the user to utilize different styles, change the font color, boldness and set it as italics. The user can also capitalize, undo and redo a fuction. In general this project is a system or program that allows a user to edit text.
THE COMPOSITION:
HTML
Using HTML (Hypertex Markup Language) The first step is to create a section and inside the section we will create a div with class flex-box and next a div with class row afterwards a div with class col for the column.
Create buttons for the following functions: Bold, Italic, Upper Case, Lower Case, Capitalize and to Clear Text. As stated the buttons performs different functions. The task assigned to each button will be performed with the help of JavaScript functions. Another div is created for the user as a textarea or input area.
In the HTML head section we will need to add external CSS(Bootstrap) link provided by jsDelivr for a fast and reliable CDn(Content Delivery Network).
Its important to note that the stylesheet <link> is placed in the <head> before all other stylesheets to load the CSS. Next we add the fontawesome stylesheet <link> , this CDN loads the icons in the background and makes the site contect and navigation loads quickly for a better user experience
<!DOCTYPE html>
<html lang="en" dir="ltr">
<head>
	<meta charset="utf-8">
	<title>Text Editor</title>

	<link rel="stylesheet"
		href=
"https://cdn.jsdelivr.net/npm/bootstrap@4.5.3/dist/css/bootstrap.min.css"
		integrity=
"sha384-TX8t27EcRE3e/ihU7zmQxVncDAy5uIKz4rEkgIXeMed4M0jlfIDPvg6uqKI2xXr2"
		crossorigin="anonymous">
	<link rel="stylesheet"
		href=
"https://cdnjs.cloudflare.com/ajax/libs/font-awesome/5.10.0/css/all.min.css"
		integrity=
"sha512-PgQMlq+nqFLV4ylk1gwUOgm6CtIIXkKwaIHp/PAIWHzig/lKZSEGKEysh0TCVbHJXCLN7WetD8TFecIky75ZfQ=="
		crossorigin="anonymous" />
	<link rel="stylesheet"
		href=
"https://pro.fontawesome.com/releases/v5.10.0/css/all.css"
		integrity=
"sha384-AYmEC3Yw5cVb3ZcuHtOA93w35dYTsvhLPVnYs9eStHfGJvOvKxVfELGroGkvsg+p"
		crossorigin="anonymous" />
</head>
In the body of the editor we will start by creating a section and depending on prefrence you can create a header and afterwards we move into creating Divs which will include a <div> as flex-box, a row and a column (col)
   <body>
<section class="">
	<h1 class="shadow-sm">TEXT EDITOR</h1>
	<div class="flex-box">
	<div class="row">
	<div class="col" id="heading">
Inside the <div> with class "col" we created a set of buttons for
different functionality and also an onclick attribute is added to give
button a unique assigment when it is clicked
<button type="button"
							onclick="f1()"
							class=" shadow-sm btn btn-outline-secondary"
							data-toggle="tooltip"
							data-placement="top"
							title="Bold Text">
			Bold</button>
					<button type="button"
							onclick="f2()"
							class="shadow-sm btn btn-outline-success"
							data-toggle="tooltip"
							data-placement="top"
							title="Italic Text">
			Italic</button>
					<button type="button"
							onclick="f3()"
							class=" shadow-sm btn btn-outline-primary"
							data-toggle="tooltip"
							data-placement="top"
							title="Left Align">
			<i class="fas fa-align-left"></i></button>
					<button type="button"
							onclick="f4()"
							class="btn shadow-sm btn-outline-secondary"
							data-toggle="tooltip"
							data-placement="top"
							title="Center Align">
			<i class="fas fa-align-center"></i></button>
					<button type="button"
							onclick="f5()"
							class="btn shadow-sm btn-outline-primary"
							data-toggle="tooltip"
							data-placement="top"
							title="Right Align">
			<i class="fas fa-align-right"></i></button>
					<button type="button"
							onclick="f6()"
							class="btn shadow-sm btn-outline-secondary"
							data-toggle="tooltip"
							data-placement="top"
							title="Uppercase Text">
			Upper Case</button>
					<button type="button"
							onclick="f7()"
							class="btn shadow-sm btn-outline-primary"
							data-toggle="tooltip"
							data-placement="top"
							title="Lowercase Text">
			Lower Case</button>
					<button type="button"
							onclick="f8()"
							class="btn shadow-sm btn-outline-primary"
							data-toggle="tooltip"
							data-placement="top"
							title="Capitalize Text">
			Capitalize</button>
					<button type="button"
							onclick="f9()"
							class="btn shadow-sm btn-outline-primary side"
							data-toggle="tooltip"
							data-placement="top"
							title="Tooltip on top">
			Clear Text</button>
				</div>
			</div>
		      </div>
Next another <div> is created for the text input usually called the textarea, this is where we will input and edit text as desired.
<br>
  	<div class="row", id="content">
  		<div class="col-md-3 col-sm-3">
  		</div>
  		<div class="col-md-6 col-sm-9">
  			<div class="flex-box">
  				<textarea id="textarea1"
  						class="input shadow"
  						name="name"
  						rows="15"
  						cols="100"
  						placeholder="Your text here ">
  				</textarea>
  			</div>
  		</div>
  		<div class="col-md-3">
  		</div>
  	</div>
  </section>
  <br>
  <br>
  <h6 style="text-align:center;">Oluwafunsho Anthony 2022</h6>
Lastly at the foot of the <body> we add a link to the external JavaScript file
<script src="script.js"></script>
</body>

</html>
CSS
As it is with every application or program, CSS is need to beautify and bring the code to life for great user experience. In this article we will be using basic CSS properties to make all area unique in design and functions. The buttons have a custom color and also a specified color when in hoverstate. The display is set to flexand justify-content to center. All the buttons have a uniform marginand border-color. The textarea is given a padding and border-color for accessibilty.
 h1 {padding-top: 40px;
	padding-bottom: 40px;
    text-align: center;
	color: #190f0f;
	font-family: 'Montserrat', sans-serif;
		}

		section {
			padding: 5%;
			padding-top: 0;
			height: 100vh;
		}

		.side {
			margin-left: 0;
		}

		button {
			margin: 10px;
			border-color: #47b8f9 ;
			color: #121616 ;
			margin-bottom: 25px;
		}

		button:hover {
			background-color: #11aa56;
		}

		textarea {
			padding: 3%;
			border-color: #570439;
			border-width: thick;
		}
		.flex-box {
	    display: flex;
	    justify-content: center;
		}
JavaScript
The Javascript code will give the Text Editor its functionality. We will be using DOMto select the elements in the HTMLcodes. The function document.getElementById will be implented to target a unique ID name and utilize its CSSproperties through JavaScript. DOM method will create a function to make the elements Bold, align left or right, capitalize and so on. Lastly we will create a function to make the text back to normal by removing all the methods applied using DOM. The code snippet below will give you a better understanding of the application
Like I wrote earlier we are creating functions to program the elements.
function f1 is to make the text bold using DOM method:
function f1() {
	document.getElementById("textarea1").style.fontWeight = "bold";
}
function f2 is to make the text italic using DOM method:
function f2() {
	document.getElementById("textarea1").style.fontStyle = "italic";
}
function f3 is to make the text alignment left using DOM method:
function f3() {

	document.getElementById("textarea1").style.textAlign = "left";
}
function f4 to make the text alignment "center" using DOM method:
function f4() {

     document.getElementById("textarea1").style.textAlign = "center";
}
function f5 to make the text alignment "right" using DOM method:
function f5() {
	document.getElementById("textarea1").style.textAlign = "right";
}
function f6 to make the text "uppercase" using DOM method:
function f6() {
	document.getElementById("textarea1").style.textTransform = "uppercase";
}
function f7 to make the text "lowercase" using DOM method:
function f7() {
	document.getElementById("textarea1").style.textTransform = "lowercase";
}
function f8 is to "capitalize" the text using DOM method:
function f8() {
	document.getElementById("textarea1").style.textTransform = "capitalize";
}
function f9 purpose is to take the text back to normal by removing all the methods applied
using DOM method
function f9() {
	document.getElementById("textarea1").style.fontWeight = "normal";
	document.getElementById("textarea1").style.textAlign = "left";
	document.getElementById("textarea1").style.fontStyle = "normal";
	document.getElementById("textarea1").style.textTransform = "capitalize";
	document.getElementById("textarea1").value = " ";
}
Its important to save the text in our editor in the localStorage to avoid the loss of data while reloading or closing the tab. The data(text) will be stored in the brower's localStorage. To get this done, we need to access the <div>
id from the HTML document and set it to a localStorage. Subsequently we will write a function that checks the innerHTML of both the divs and saves it in the localStorage
For this we need to use document.getElementById().innerHTML and set it to a localStorage[] 'default text' object will need to have an interval function
that has a localStorage object assigned to the document.getElementById().innerHTML is unique to each div to make the function run every 1000 milliseconds, or 1 second.
document.getElementById("heading").innerHTML =
  localStorage["title"] || "Write"; // default text
document.getElementById("content").innerHTML =
  localStorage["text"] || "This text is saved automatically "; // default text

setInterval(function() {
  // fuction saves the innerHTML of the div
  localStorage["title"] = document.getElementById("heading").innerHTML; // heading div
  localStorage["text"] = document.getElementById("content").innerHTML; // content div
}, 1000);
With this article at OpenGenus, you must have the complete idea of developing a text editor in a webpage using HTML, CSS and JavaScript.