
Get this book -> Problems on Array: For Interviews and Competitive Programming
Table of Contents:
- Introduction
- Car racing game
- Demonstration
- Overall Implementation Strategy
- Requirements of the Game
- Game Structure
- General Flow
- Game Template
- CSS Styling
- JavaScript
- Variables and Event Listeners
- keyDown and keyUp functions
- isCollide function
- moveLines function
- endGame function
- moveCar function
- gamePlay function
- Reset function
- start function
- Conclusion
Introduction:
In this article at OpenGenus, we will discuss and demonstrate the creating of a car racing game using HTML, CSS and JavaScript. I will talk about what is used in creating the UI which will be the HTML/CSS and I will also give explanations of the logic which will be in the javascript. We will go through the functions and variables used to make the game etc.
Car Racing game:
A car racing game is a genre of video game that revolves around the excitement and thrill of driving and competing in races. These games typically offer players the opportunity to control virtual cars and participate in various racing scenarios. Whether it's navigating through realistic circuits, engaging in intense street races, or tackling off-road tracks, car racing games provide a diverse range of experiences.
Demonstration

Here above in the image we can see the start image of the car racing game.

Here as you can see there are multiple white cars in the game which I have to avoid hitting.
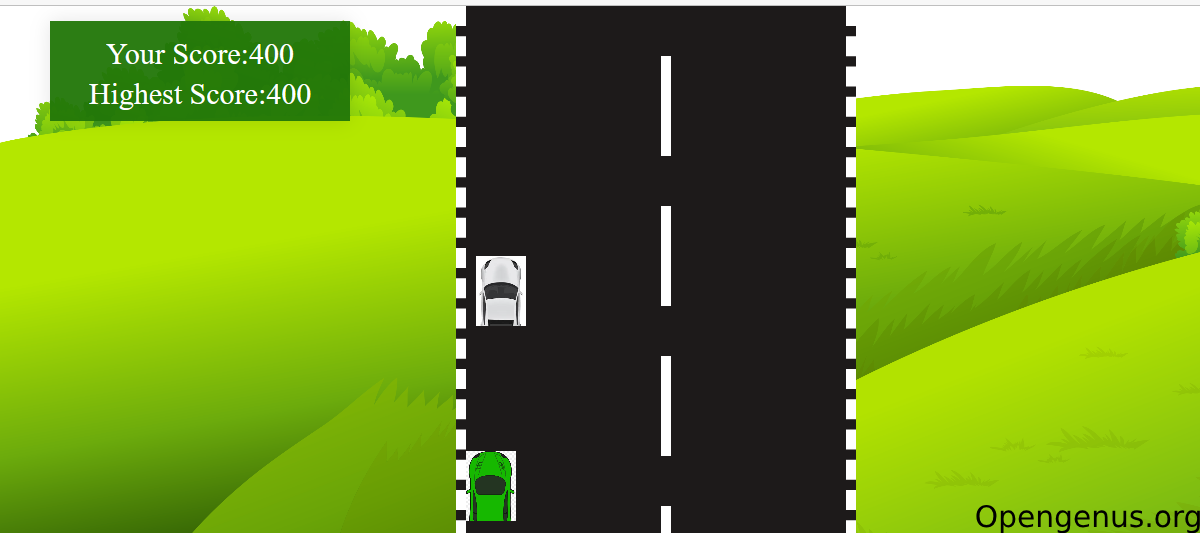
As you can see I have a score counter and a high score counter which updates in real time.
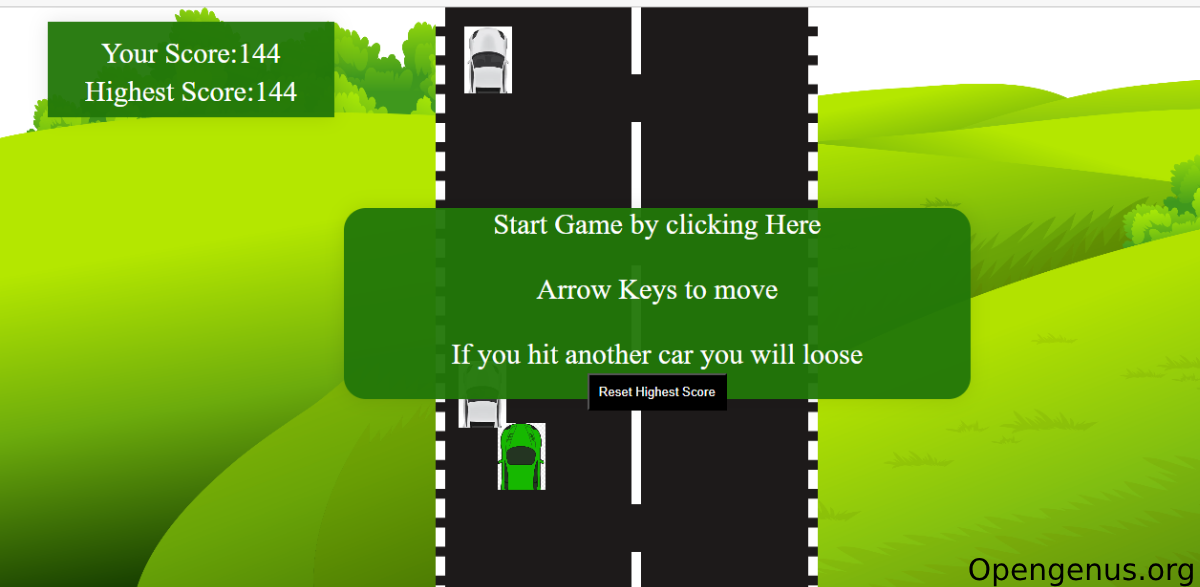
Now I have collided with a car which causes the game to end and gives you the option to replay.
Overall Implementation Strategy
Requirements of the Game
like when the game ends/ how many collisions
- The game will start once you press the button Reset High Score
- The player will need to avoid making any collisions with the white cars
- If the player makes 1 collision with a white car then the game will end and you will have the option to replay
Game Structure:
- The game will consist of 1 green car and multiple white moving cars which the player will need to avoid during the game
- The rules of the game are simply, you try not to touch any other cars
- The game will run in a loop until the player collides with a car and losses
General Flow:
- The game will start with a green car and and a layout consisting of a road and multiple blue cars
- Also there will be a score counter for the user which will update in real time
- The player will have to avoid as many collisions with other cars as possible
Game Template
<!DOCTYPE html>
<html lang="en">
<head>
    <meta charset="UTF-8">
    <meta name="viewport" content="width=device-width, initial-scale=1.0">
    <title>Car game JavaScript</title>
    <link rel="stylesheet" href="styles.css">
</head>
<body>
    <div class="CarGame">
        <div class="Score"></div>
        <div class="StartScreen">
            <p>Start Game by clicking Here<br><br>Arrow Keys to move<br><br>If you hit another car you will loose</p>
            <button onclick="Reset()">Reset Highest Score</button>
        </div>
        <div class="GameArea"></div>
    </div>
    <script src="script.js"></script>
</body>
</html>
Here in my index.html I have linked my css using the link tag and I have linked my javascript which will contain the logic using the script tag. I have created a button which is using an onclick function to reset the screen and I'm using div class multiple times which will help in creating the UI when we go into our CSS.
CSS Styling
*{
    box-sizing: border-box;
    margin: 0;
    padding: 0;
}
.hide{
    display: none;
}
In the CSS we can see that for *{} the box-sizing property is set to "border-box" for all elements. This ensures that the width and height of elements include their padding and border, not just the content. The margin and padding properties are also set to 0, removing any default spacing.
.hide{} that sets the display property to "none". This class can be applied to elements to hide them from view.
.car{
    width: 50px;
    height: 70px;
    background-color: red;
    position: absolute;
    bottom: 120px;
    background-image: url(Images/car.jpg);
    background-size: cover;
}
car styles the car element. It sets the width and height to 50px and 70px. The background-color is set to red, and the car's position is set to absolute. The "bottom" property positions the car 120 pixels from the bottom of its container. The car also has a background image specified with the URL "Images/car.jpg" and its background size is set to cover.
.GameArea{
    width: 400px;
    height: 100vh;
    background-color: rgb(29, 26, 26);
    margin: auto;
    position: relative;
    overflow: hidden;
    border-left: 10px dashed white;
    border-right:10px dashed white;
}
.GameArea styles the game area element. It sets the width to 400px and the height to 100vh (100% of the viewport height). The background-color is set to a dark gray color. The margin is set to auto, which centers the game area horizontally. The position is set to relative, and overflow is set to hidden, meaning any content that exceeds the dimensions of the game area will be clipped. The left and right borders are dashed white lines with a width of 10px.
.lines{
    width: 10px;
    height: 100px;
    background: white;
    position: absolute;
    margin-left: 195px;
}
.lines styles the lines on the road. It sets the width to 10px and the height to 100px. The background color is white, and the position is set to absolute. The margin-left property centers the lines within the game area.
.CarGame{
    background-image: url(Images/backgrass.png);
    background-size: cover;

}
.CarGame styles the background of the game. It sets a background image specified with the URL "Images/backgrass.png" and its background size is set to cover.
.Score{
    position: absolute;
    top: 15px;
    left: 50px;
    text-align: center;
    padding-top: 23px;
    font-size: 30px;
    line-height: 20px;
    background-color: rgba(34, 119, 8, 0.952);
    color: white;
    width: 300px;
    height: 100px;
    box-shadow: 0 0 20px 0px rgba(0,0,0,0.1);
}
.Score styles the score display. It sets the position to absolute, placing it at the top left of the game area. The background color is a green shade, and the text color is white. The width and height are set to 300px and 100px, respectively. The score display has a box shadow effect, and the font size and line height are adjusted for proper alignment.
.StartScreen{
    position: absolute;
    background-color: rgba(34, 119, 8, 0.952);
    color: white;
    z-index: 1;
    margin-top: 210px;
    margin-left:360px;
    text-align: center;
    box-shadow: 0 0 20px 0px rgba(0,0,0,0.1);
    font-size: 30px;
    width: 50%;
    height: 200px;
    cursor: pointer;
    border-radius: 23px;

}
button{
    padding: 10px;
    text-align: center;
    background-color: black;
    color: white;
}
StartScreen styles the start screen of the game. It sets the position to absolute and places it at a specific position using margin-top and margin-left. The background color is green, and the text color is white. The width and height are set to 50% and 200px. The start screen has a box shadow effect, and a cursor style is applied to indicate interactivity. Finally, there is a button element within the start screen styled with a black background and white text.
JavaScript
Variables and Event Listeners :
const score=document.querySelector('.Score');
const startscreen=document.querySelector('.StartScreen');
const gamearea=document.querySelector('.GameArea');
let player={ speed:5,score:0};
let highest=0;
startscreen.addEventListener('click',start);
This code is written in JavaScript which controls a car on a road while avoiding collisions with other cars. Firstly we declare several variables using the const and let keywords score, startscreen, and gamearea are selected using the querySelector method to retrieve elements from the HTML document based on their class names. The player object is initialized with properties for speed and score. The highest variable is used to keep track of the highest score achieved. An event listener is added to the startscreen element. When it is clicked, the start function will be called.
keyDown and keyUp functions :
let keys={ArrowUp: false, ArrowDown: false, ArrowRight: false, ArrowLeft: false};

document.addEventListener('keydown',keyDown);
document.addEventListener('keyup',keyUp);
function keyDown(ev){
    ev.preventDefault();
    keys[ev.key]=true;

}
function keyUp(ev){
    ev.preventDefault();
    keys[ev.key]=false;

}
Then we define two more event listener functions, keyDown and keyUp, which handle keyboard events. The keyDown function sets the corresponding key in the keys object to true, indicating that the key is currently being pressed. Similarly, the keyUp function sets the key to false when it is released.
isCollide function :
function isCollide(a,b){
    aRect=a.getBoundingClientRect();
    bRect=b.getBoundingClientRect();

    return !((aRect.bottom<bRect.top)||(aRect.top>bRect.bottom)||(aRect.right<bRect.left)||(aRect.left>bRect.right));
}
After that we define the isCollide function, which checks for collision between two elements by comparing their bounding rectangles. If any of the collision conditions are met, the function returns true; otherwise, it returns false.
moveLines function :
function moveLines(){
    let lines=document.querySelectorAll('.lines');
    lines.forEach(function(item){
        if(item.y>=700){
            item.y-=750;
        }
        item.y+=player.speed;
        item.style.top=item.y+'px';

    })
}
The moveLines function moves the road lines vertically on the screen. It selects all elements with the class name lines using querySelectorAll and iterates over them using forEach. If the line reaches the bottom of the screen, it is moved back to the top. The player.speed property determines the speed at which the lines move.
endGame function :
function endGame(){
    player.start=false;
    startscreen.classList.remove('hide');
}
The endGame function updates the game state to indicate that the player has lost. It sets player.start to false and removes the hide class from the startscreen element, making it visible again.
moveCar function :
function moveCar(car){
    let other=document.querySelectorAll('.other');
    other.forEach(function(item){
        if(isCollide(car,item)){
            console.log('HIT');
            endGame();
        }
        if(item.y>=750){
            item.y=-300;
            item.style.left=Math.floor(Math.random()*350) + 'px';
        }
        item.y+=player.speed;
        item.style.top=item.y+'px';

    })
}
The moveCar function is responsible for moving the other cars on the road. It selects all elements with the class name other, checks for collisions with the player's car using isCollide, and handles the logic for resetting and moving the other cars when they reach the bottom of the screen.
gamePlay function :
function gamePlay(){

    let car=document.querySelector('.car');
    let road=gamearea.getBoundingClientRect();

    if(player.start){

        moveLines();
        moveCar(car);
        if(keys.ArrowUp && player.y>(road.top+70)){
            player.y-=player.speed;
        }
        if(keys.ArrowDown && player.y<(road.bottom-70)){
            player.y+=player.speed;
        }
        if(keys.ArrowLeft && player.x>0){
            player.x-=player.speed;
        }
        if(keys.ArrowRight && player.x<(road.width-50)){
            player.x+=player.speed;
        }

        car.style.top=player.y + 'px';
        car.style.left=player.x + 'px';

        window.requestAnimationFrame(gamePlay);
        //console.log(player.score++);
        player.score++;
        if(player.score>=highest)
        {
            highest=player.score;
        }
        score.innerHTML="Your Score:"+ player.score+"<br><br>"+"Highest Score:"+highest;


    }

}
The main game loop gamePlay controls the game logic. It first retrieves the player's car and the boundaries of the game area. Within the game loop, it continuously updates the positions of the road lines and other cars, based on the player's input obtained from the keys object. The player's car is also updated based on the input. The game loop is scheduled to run continuously using window.requestAnimationFrame. The player's score is incremented, and if it surpasses the highest score, the highest variable is updated. The score is displayed on the webpage using the score.innerHTML property.
Reset function :
function Reset(){
    highest=0;
}
The Reset function sets the highest variable back to 0.
start function :
function start(){
    //gamearea.classList.remove('hide');
    startscreen.classList.add('hide');
    gamearea.innerHTML="";

    player.start=true;
    player.score=0;
    window.requestAnimationFrame(gamePlay);

   for(x=0;x<5;x++){
        let roadline=document.createElement('div');
        roadline.setAttribute('class','lines');
        roadline.y=(x*150);
        roadline.style.top=roadline.y+'px';
        gamearea.appendChild(roadline);
    }

    let car=document.createElement('div');
    car.setAttribute('class','car');
    gamearea.appendChild(car);

    player.x=car.offsetLeft;
    player.y=car.offsetTop;

    for(x=0;x<3;x++){
        let othercar=document.createElement('div');
        othercar.setAttribute('class','other');
        othercar.y=((x+1)*350)* -1;
        othercar.style.top=othercar.y+'px';
        othercar.style.left=Math.floor(Math.random()*350) + 'px';
        gamearea.appendChild(othercar);
    }
}
The start function is called when the start screen is clicked. It hides the start screen, clears the game area, and initializes the game state. It creates road lines, the player's car, and other cars as HTML elements and appends them to the game area. The player's initial position is set, and the game loop is started by calling window.requestAnimationFrame(gamePlay).
Conclusion
In conclusion, this article at OpenGenus has provided a comprehensive overview of creating a car racing game using HTML, CSS, and JavaScript. We explored the different components of the game, including the game structure, general flow, and game template. The CSS styling was explained, covering various elements such as the car, game area, score display, and start screen. The JavaScript code was discussed in detail, outlining its functions and event listeners responsible for game mechanics like car movement, collision detection, and score tracking.
By following the implementation strategy outlined in this article, you can create an engaging car racing game that offers players the thrill of racing and avoiding collisions. The game's code, which was demonstrated throughout the article, is available on GitHub for reference and further exploration.