
Table of Contents:
- Introduction
- Bubble Shooter Game
- Overall Implementation Strategy
- Game Structure
- General Flow
- Game Template
- CSS User Interface
- JavaScript
- Initialization
- Helper Functions
- Bubble Creation
- Bubble Matching and Removal
- Initialization and Game Loop
- Keyboard Event Listeners
- Conclusion
All of the source code for this application can be found here: https://github.com/OpenGenus/Bubble-Shooter-game-in-HTML
Introduction:
In this article at OpenGenus, we will explore the popular game called "Bubble Shooter" and take a closer look at its underlying code. We will examine the different components of the code and understand how they contribute to the gameplay. We will discuss the structure, styling, and the key aspects of the JavaScript code. We'll explore functions and variables used in the game, such as creating and positioning bubbles etc.
Additionally, we'll dive into the mechanics of the game, including the hexagonal grid representation using a rectangular grid, the concept of active and inactive bubbles, and the initialization of the game grid based on a predefined layout. We'll also cover the shooting mechanism, which involves controlling the angle of the shooting arrow and launching bubbles.
Bubble Shooter Game:
A bubble shooter game is a casual puzzle game where players aim and shoot colored bubbles onto a grid, attempting to create matches of three or more bubbles of the same color. As the player shoots bubbles, they strategically try to clear the grid by causing clusters of bubbles to pop. The game challenges players to think strategically, plan their shots, and anticipate the trajectory of the bubbles. With its colorful and addictive gameplay, bubble shooter games have become a popular choice for players looking for engaging and relaxing puzzle experiences on different platforms.
Here is our bubble shooter game running in the browser using vscode:
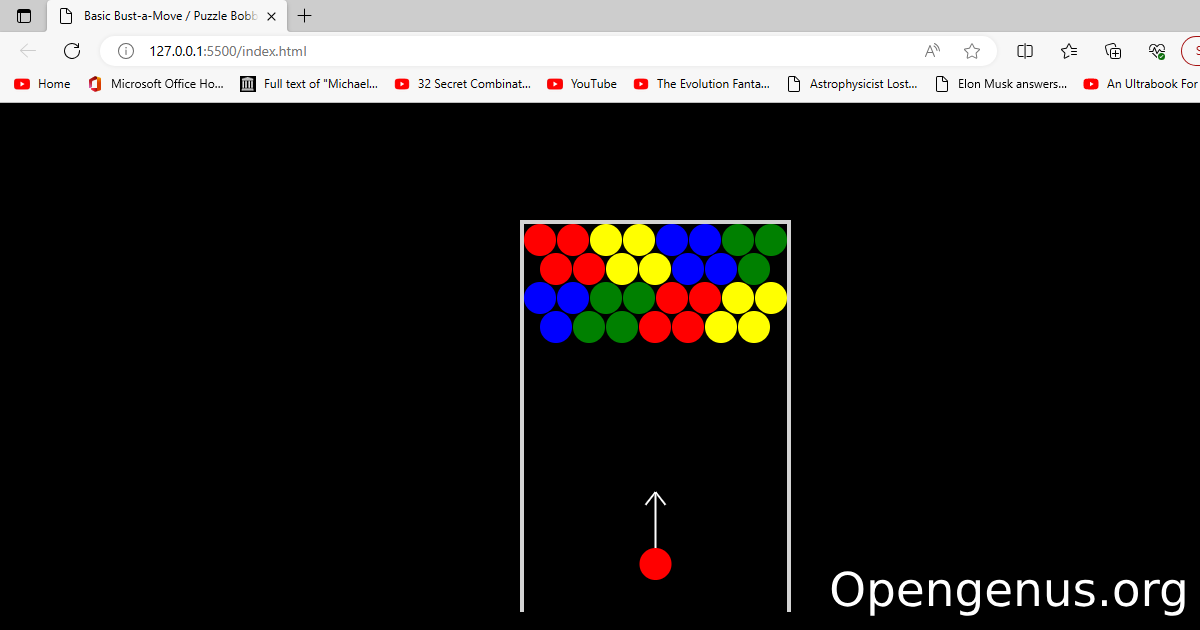
In this demo we are shooting the red bubble towards the group of red bubbles in the grid shown above. This will cause those bubbles to pop and vanish and you will continue the game. The a key is used to aim the shooter to the left and the d key is used to aim the shooter to the right.

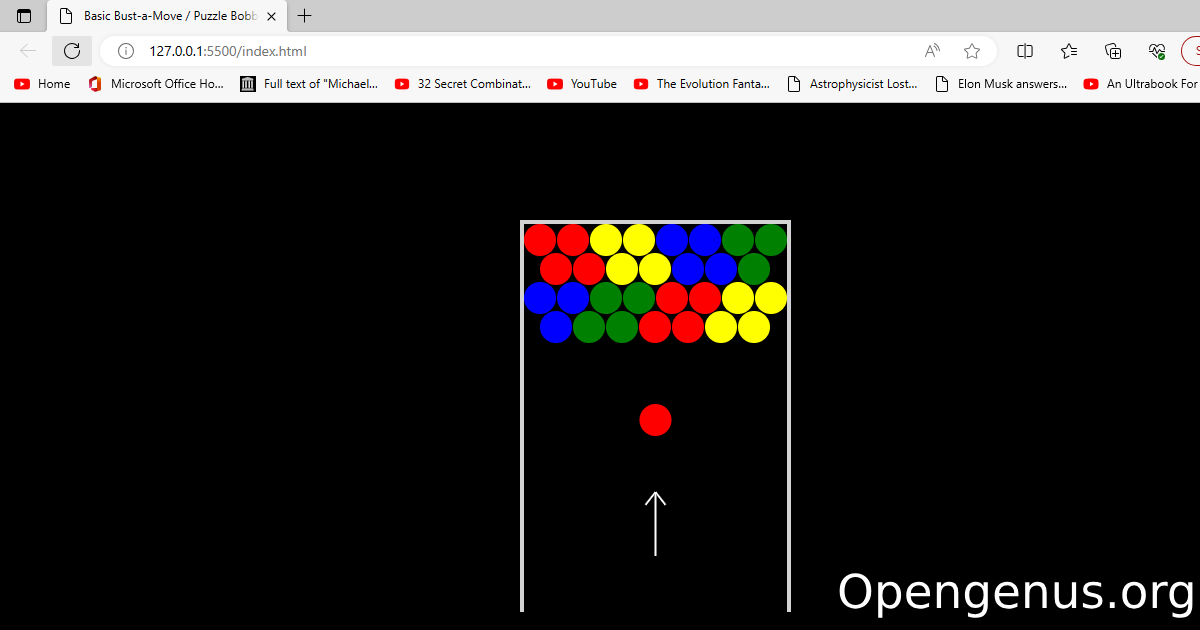
Here as we can see there are less bubbles in the grid now and the color on the shooter is red so we can shoot the red bubble and see if the next colour is matching to anything in the bubble grid. The game doesnt have an end so it will just continue to play for as long as the user wants to play.
Overall Implementation Strategy
Game Structure:
- The game will consist of approximately 4 rows with up to 8 bubbles in each row
- Player will win when they clear the entire screen of the bubbles
- The rules of the game are simply to aim and shoot
General Flow:
- The game will start with the initial black screen with all the bubbles in the grid
- The player will have to focus on aim and accuracy to progress in the game
- Once a player has cleared the entire screen, they have won the game
Game Template
<!DOCTYPE html>
<html>
<head>
  <title>Bubble Shooter HTML Game</title>
  <meta charset="UTF-8">
  <link rel="stylesheet" href="style.css">
</head>
<body>
  <canvas width="271" height="392" id="game"></canvas>
  <script src="script.js"></script>
</body>
</html>
Here above is the HTML template of the game with includes linking important components such as the style.css using href and link tag. The CSS contains the designs and colours of our web application. To link the javascript the script tag is used with src which containes the file name of the javascript file "script.js". The javascript contains all the logic and functionality of our web application. The HTML structure includes a canvas element with an id of "game" where the game graphics will be rendered.
CSS User Interface
html, body {
    height: 100%;
    margin: 0;
  }

  body {
    background: black;
    display: flex;
    align-items: center;
    justify-content: center;
  }
Here in our styling we can see inside body{} the background colour is set to black and flex box is being initialized to make the application responsive on all devices. align-items and justify-content is being used to center the items in the body tags which are in HTML.
JavaScript
This code is a simplified implementation of the game "Puzzle Bubble" using HTMLcanvas and JavaScript. The game is played on a hex grid, but instead of using a complicated hex grid, the screen is filled with bubbles in their correct positions. Each bubble starts as inactive, and when a bubble is shot and collides with a wall or an active bubble, the closest inactive bubble is made active with the same color as the shot bubble. This creates the illusion of the bubble snapping to a grid.
Here are the main topics covered in the code:
Initialization:
The code starts by obtaining a reference to the canvas element and its 2D rendering context. It also defines various constants and initializes the data structures used in the game, such as the bubble grid, color mapping, bubble array, and particle array.
const canvas = document.getElementById('game');
const context = canvas.getContext('2d');

const grid = 32;
const level1 = [
  ['R','R','Y','Y','B','B','G','G'],
  ['R','R','Y','Y','B','B','G'],
  ['B','B','G','G','R','R','Y','Y'],
  ['B','G','G','R','R','Y','Y']
];
const colorMap = {
  'R': 'red',
  'G': 'green',
  'B': 'blue',
  'Y': 'yellow'
};
const colors = Object.values(colorMap);

const bubbleGap = 1;
const wallSize = 4;
const bubbles = [];
let particles = [];
Helper Functions:
The code defines several helper functions used in the game, such as converting degrees to radians degToRad, rotating a point by an angle rotatePoint, generating a random integer within a range getRandomInt, calculating the distance between two points getDistance, checking for collision between two circles collides, and finding the closest inactive bubble that collides with an object getClosestBubble:
// helper function to convert deg to radians
function degToRad(deg) {
  return (deg * Math.PI) / 180;
}
Bubble Creation:
The code defines a function createBubble to create bubbles in the bubble grid. The function takes the x and y coordinates and an optional color parameter. It calculates the row and column based on the grid size and creates a bubble object with the correct position, color, radius, and active state:
function createBubble(x, y, color) {
  const row = Math.floor(y / grid);
  const col = Math.floor(x / grid);

  // bubbles on odd rows need to start half-way on the grid
  const startX = row % 2 === 0 ? 0 : 0.5 * grid;

  // because we are drawing circles we need the x/y position
  // to be the center of the circle instead of the top-left
  // corner like you would for a square
  const center = grid / 2;

  bubbles.push({
    x: wallSize + (grid + bubbleGap) * col + startX + center,

    // the bubbles are closer on the y axis so we subtract 4 on every
    // row
    y: wallSize + (grid + bubbleGap - 4) * row + center,

    radius: grid / 2,
    color: color,
    active: color ? true : false
  });
}
Bubble Matching and Removal:
The code defines functions getNeighbors, removeMatch, and dropFloatingBubbles to handle bubble matching and removal. getNeighbors finds all neighboring bubbles of a given bubble, removeMatch removes bubbles that form a match of three or more colors, and dropFloatingBubbles makes floating bubbles without a chain drop down the screen:
function getNeighbors(bubble) {
  const neighbors = [];

  // check each of the 6 directions by "moving" the bubble by a full
  // grid in each of the 6 directions (60 degree intervals)
  // @see https://www.redblobgames.com/grids/hexagons/#angles
  const dirs = [
    // right
    rotatePoint(grid, 0, 0),
    // up-right
    rotatePoint(grid, 0, degToRad(60)),
    // up-left
    rotatePoint(grid, 0, degToRad(120)),
    // left
    rotatePoint(grid, 0, degToRad(180)),
    // down-left
    rotatePoint(grid, 0, degToRad(240)),
    // down-right
    rotatePoint(grid, 0, degToRad(300))
  ];

  for (let i = 0; i < dirs.length; i++) {
    const dir = dirs[i];

    const newBubble = {
      x: bubble.x + dir.x,
      y: bubble.y + dir.y,
      radius: bubble.radius
    };
    const neighbor = getClosestBubble(newBubble, true);
    if (neighbor && neighbor !== bubble && !neighbors.includes(neighbor)) {
      neighbors.push(neighbor);
    }
  }

  return neighbors;
}

// remove bubbles that create a match of 3 colors
function removeMatch(targetBubble) {
  const matches = [targetBubble];

  bubbles.forEach(bubble => bubble.processed = false);
  targetBubble.processed = true;

  // loop over the neighbors of matching colors for more matches
  let neighbors = getNeighbors(targetBubble);
  for (let i = 0; i < neighbors.length; i++) {
    let neighbor = neighbors[i];

    if (!neighbor.processed) {
      neighbor.processed = true;

      if (neighbor.color === targetBubble.color) {
        matches.push(neighbor);
        neighbors = neighbors.concat(getNeighbors(neighbor));
      }
    }
  }

  if (matches.length >= 3) {
    matches.forEach(bubble => {
      bubble.active = false;
    });
  }
}

// make any floating bubbles (bubbles that don't have a bubble chain
// that touch the ceiling) drop down the screen
function dropFloatingBubbles() {
  const activeBubbles = bubbles.filter(bubble => bubble.active);
  activeBubbles.forEach(bubble => bubble.processed = false);

  // start at the bubbles that touch the ceiling
  let neighbors = activeBubbles
    .filter(bubble => bubble.y - grid <= wallSize);

  // process all bubbles that form a chain with the ceiling bubbles
  for (let i = 0; i < neighbors.length; i++) {
    let neighbor = neighbors[i];

    if (!neighbor.processed) {
      neighbor.processed = true;
      neighbors = neighbors.concat(getNeighbors(neighbor));
    }
  }
Initialization and Game Loop:
The code initializes the bubble grid by looping through the level definition and creating bubbles accordingly. It also initializes the current bubble position, color, and other properties. The main game loop (loop) is implemented using the requestAnimationFrame function. It clears the canvas, updates the game state, checks for collisions, moves bubbles and particles, and finally draws the walls, bubbles, and shooting arrow on the canvas:
// game loop
function loop() {
  requestAnimationFrame(loop);
  context.clearRect(0,0,canvas.width,canvas.height);

  // move the shooting arrow
  shootDeg = shootDeg + degToRad(2) * shootDir;

  // prevent shooting arrow from going below/above min/max
  if (shootDeg < minDeg) {
    shootDeg = minDeg;
  }
  else if (shootDeg > maxDeg) {
    shootDeg = maxDeg
  }

  // move current bubble by it's velocity
  curBubble.x += curBubble.dx;
  curBubble.y += curBubble.dy;

  // prevent bubble from going through walls by changing its velocity
  if (curBubble.x - grid / 2 < wallSize) {
    curBubble.x = wallSize + grid / 2;
    curBubble.dx *= -1;
  }
  else if (curBubble.x + grid / 2 > canvas.width - wallSize) {
    curBubble.x = canvas.width - wallSize - grid / 2;
    curBubble.dx *= -1;
  }

  // check to see if bubble collides with the top wall
  if (curBubble.y - grid / 2 < wallSize) {
    // make the closest inactive bubble active
    const closestBubble = getClosestBubble(curBubble);
    handleCollision(closestBubble);
  }

  // check to see if bubble collides with another bubble
  for (let i = 0; i < bubbles.length; i++) {
    const bubble = bubbles[i];

    if (bubble.active && collides(curBubble, bubble)) {
      const closestBubble = getClosestBubble(curBubble);
      if (!closestBubble)  {
        window.alert('Game Over');
        window.location.reload();
      }

      if (closestBubble) {
        handleCollision(closestBubble);
      }
    }
  }
Keyboard Event Listeners:
The code adds event listeners for keyboard events to control the shooting arrow. When the arrow keys are pressed, it changes the shooting direction shootDir. When the spacebar is pressed, it launches the current bubble by setting its velocity based on the shooting angle shootDeg. When a key is released, it stops the arrow from moving:
let shootDeg = 0;

// min/max angle (in radians) of the shooting arrow
const minDeg = degToRad(-60);
const maxDeg = degToRad(60);

// the direction of movement for the arrow (-1 = left, 1 = right)
let shootDir = 0;
  // move the shooting arrow
  shootDeg = shootDeg + degToRad(2) * shootDir;

  // prevent shooting arrow from going below/above min/max
  if (shootDeg < minDeg) {
    shootDeg = minDeg;
  }
  else if (shootDeg > maxDeg) {
    shootDeg = maxDeg
  }
if (e.key === 'a') {
    shootDir = -1;
  }
  else if (e.key === 'd') {
    shootDir = 1;
  }

  // if the current bubble is not moving we can launch it
  if (e.code === 'Space' &&  curBubble.dx === 0 && curBubble.dy === 0) {
    // convert an angle to x/y
    curBubble.dx = Math.sin(shootDeg) * curBubble.speed;
    curBubble.dy = -Math.cos(shootDeg) * curBubble.speed;
  }
Conclusion
In conclusion, this article at OpenGenus provides an in-depth exploration of the popular game "Bubble Shooter" and its underlying code. The article delved into the HTML structure, CSS styling, and key aspects of the JavaScript code that contribute to the gameplay. It explained the mechanics of the game, including shooting bubbles, creating matches, and clearing the grid.
The JavaScript section provided an overview of the game's code, starting with the initialization of the canvas and various data structures used in the game. It discussed the helper functions used for calculations, bubble creation, matching, removal, and dropping of floating bubbles. The initialization and game loop were explained, detailing the movement of the shooting arrow, collision detection, and bubble dynamics.
Overall, this article provides a comprehensive understanding of the Bubble Shooter game and the code behind it. It demonstrates how different components, including HTML, CSS, and JavaScript, work together to create an engaging and addictive gaming experience. With this knowledge, you can explore and customize the game further, adding your own features and enhancements.