
Get this book -> Problems on Array: For Interviews and Competitive Programming
A whiteboard is a simple and interactive tool that allows users to draw and erase content on a virtual canvas. It has various applications, ranging from online tutoring and collaborative brainstorming to digital art creation. In this article at OpenGenus, we will explore how to develop a whiteboard using HTML, CSS, and JavaScript in the HTML file. We will focus on the implementation of the whiteboard with a functional drawing feature, color selection, a clear button, and a rubber (eraser) function.
-
Table of Contents
- Understand the HTML Structure
- Develop Canvas and Set its Size
- Handle Mouse Events for Drawing
- Add Control Elements
- Conclusion
-
Understand the HTML Structure
Let's start by understanding the HTML structure that constitutes our whiteboard application. The code provided in the question sets up the basic layout of the whiteboard.
<!DOCTYPE html>
<html lang="en">
<head>
    <meta charset="UTF-8">
    <meta name="viewport" content="width=device-width, initial-scale=1.0">
    <title>White Board in HTML</title>
    <style>
        /* CSS styles go here */
    </style>
</head>
<body>
    <center>
        <canvas id="canvasBoard"></canvas>
        <div id="controls">
            <button onclick="clearCanvas()">Clear</button>
            <label for="cursorColor">Cursor Color:</label>
            <select id="cursorColor" onchange="changeCursorColor()">
                <!-- Color options go here -->
            </select>
        </div>
        <script>
            /* JavaScript code goes here */
        </script>
    </center>
</body>
</html>
- The declaration specifies that this is an HTML5 document.
- The html element encloses the entire HTML document, and the lang attribute specifies the language used in the document (in this case, "en" for English).
- The head element contains metadata about the document, such as the character set, viewport settings, and the page title.
- The meta tags inside the head element define the character set and the initial scale for mobile devices.
- The title element sets the title of the whiteboard application, which appears on the browser's title bar or tab.
- The style element defines CSS styles for the whiteboard application. In this case, it sets the background color, margin, and border for the whiteboard area.
- The body element represents the visible content of the document and contains the whiteboard canvas and controls.
- The center element is used to center the content within the body (note: this element is deprecated and not recommended for use in modern HTML).
- The canvas element with the id="canvasBoard" will be used as the drawing area of our whiteboard. We will interact with this canvas using JavaScript to draw on it.
- The div element with id="controls" contains the control elements for the whiteboard, such as the clear button and the color selection dropdown.
-
Develop Canvas and Set its Size
Before we delve into the JavaScript implementation, let's focus on the canvas element and how to set its size dynamically to fit the window. In the provided code, we have the sizeCanvas function that adjusts the canvas size based on the window's dimensions:
function sizeCanvas() {
    canvasElem.width = window.innerWidth;
    canvasElem.height = window.innerHeight - 50; // Subtract 50 for a better display
}

// Call sizeCanvas to resize the canvas on page load
sizeCanvas();

// Resize the canvas when the window size changes
window.addEventListener("resize", sizeCanvas);
The sizeCanvas function uses the window.innerWidth and window.innerHeight properties to get the width and height of the window, respectively. It then sets the canvas width and height to match the window's dimensions. The value of 50 is subtracted from the height to provide some space for the control elements, ensuring that the canvas remains fully visible.
-
Handle Mouse Events for Drawing
The most critical part of creating a whiteboard is enabling users to draw on the canvas using their mouse. For this purpose, we define the draw function:
var pos = { x: 0, y: 0 };

function setPos(e) {
    pos.x = e.clientX - canvasElem.offsetLeft;
    pos.y = e.clientY - canvasElem.offsetTop;
}

function draw(e) {
    if (e.buttons !== 1) {
        return;
    }

    canvasContext.beginPath();
    canvasContext.lineWidth = 10;
    canvasContext.lineCap = "round";
    canvasContext.strokeStyle = cursorColor;

    canvasContext.moveTo(pos.x, pos.y);
    setPos(e);
    canvasContext.lineTo(pos.x, pos.y);
    canvasContext.stroke();
}

// Add event listeners to the canvas
canvasElem.addEventListener("mousemove", draw);
canvasElem.addEventListener("mousedown", setPos);
canvasElem.addEventListener("mouseenter", setPos);
We define a variable pos to store the current position of the mouse pointer.
The setPos function is responsible for updating the pos object with the current mouse coordinates relative to the canvas. We achieve this by subtracting the canvasElem.offsetLeft and canvasElem.offsetTop values from e.clientX and e.clientY, respectively. This calculation ensures that the mouse position is correctly mapped to the canvas.The draw function handles the actual drawing on the canvas. It gets called when the user moves the mouse while holding down the left mouse button (i.e., drawing). We check e.buttons to determine if the left mouse button is pressed (its value will be 1 when pressed).Inside the draw function, we use the beginPath method of the canvas context (canvasContext) to start a new path for drawing.We set the line properties, such as lineWidth and lineCap, to define the appearance of the drawn lines. For a smoother look, we set lineCap to "round".The canvasContext.strokeStyle property determines the color of the drawing, which is initially set to the default color (black).We move the cursor to the previous position using canvasContext.moveTo(pos.x, pos.y), then update the position using setPos(e).Finally, we draw a line from the previous position to the current position using canvasContext.lineTo(pos.x, pos.y), and call canvasContext.stroke() to actually draw the line on the canvas.
-
Add Control Elements
The whiteboard also includes some control elements to enhance user interaction:
1. Clear Button
The provided code includes a clearCanvas function that clears the entire canvas:
function clearCanvas() {
    canvasContext.clearRect(0, 0, canvasElem.width, canvasElem.height);
}
The clearRect method of the canvas context is used to clear a rectangular area on the canvas. In this case, the entire canvas area is cleared, effectively erasing all drawings.
The button element in the HTML code calls the clearCanvas function when clicked:
<button onclick="clearCanvas()">Clear</button>
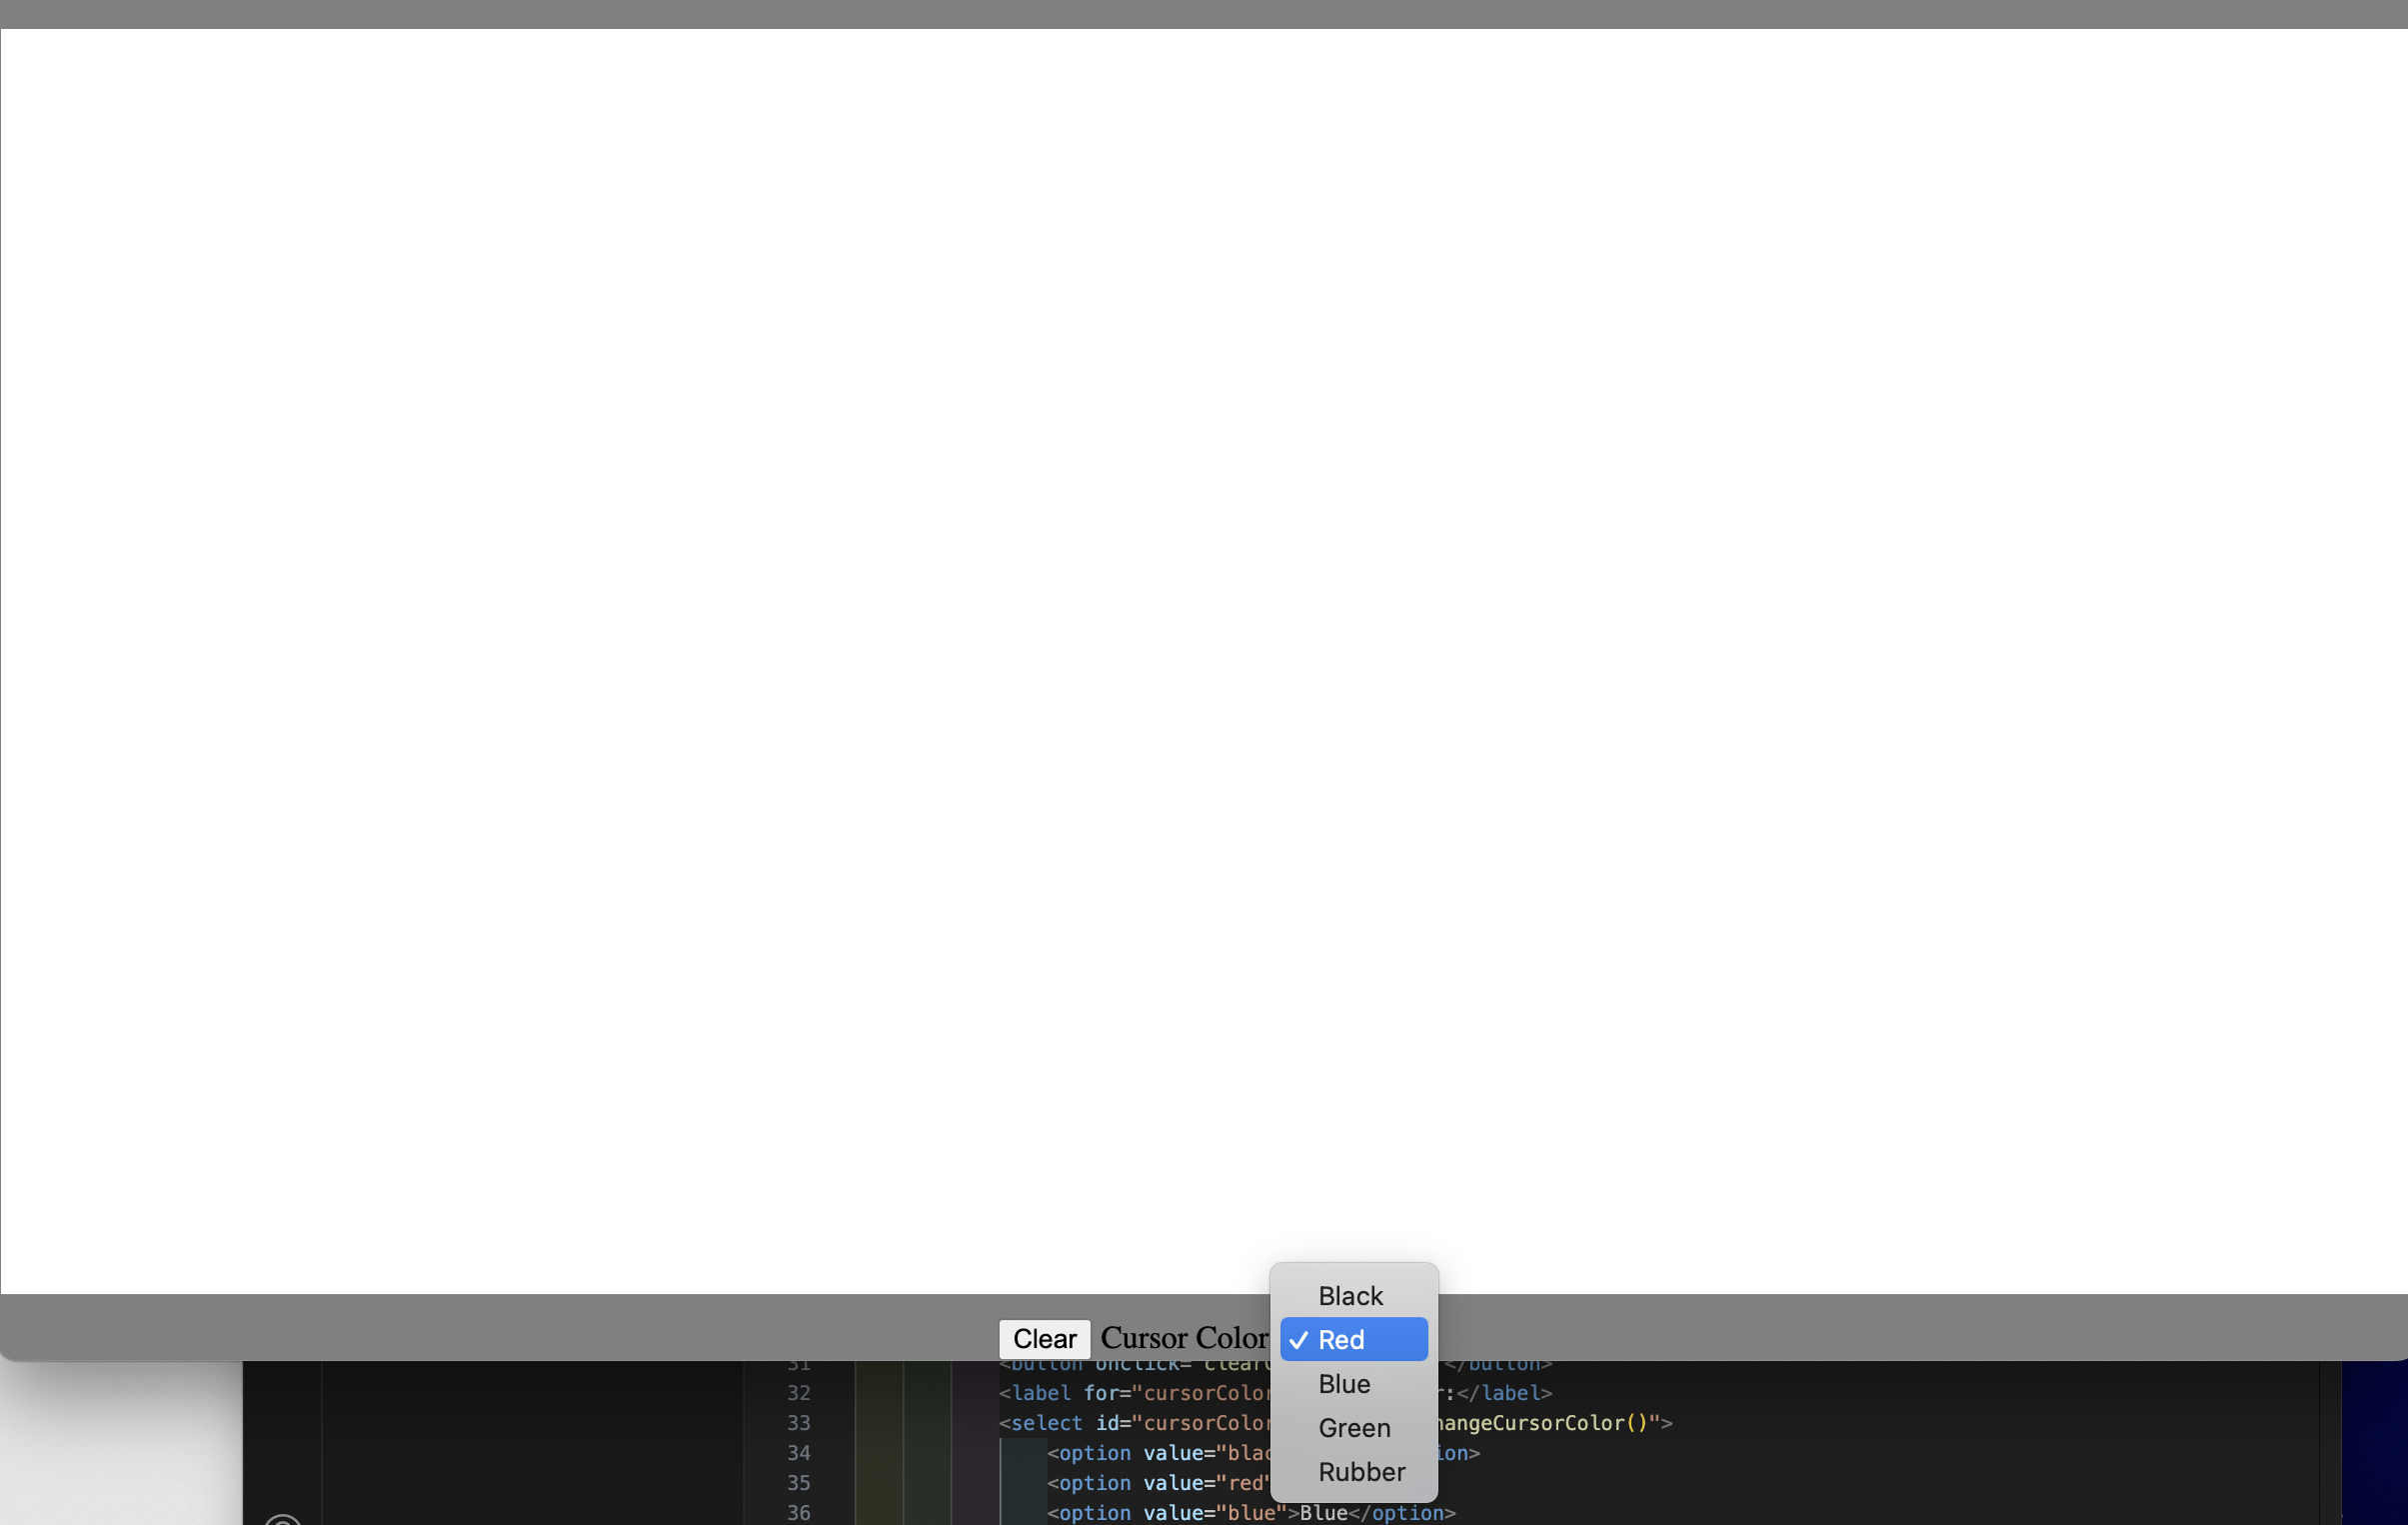
2. Cursor Color Selection:
To allow users to change the color of the drawing cursor, the provided code includes a dropdown (select) element:
<label for="cursorColor">Cursor Color:</label>
<select id="cursorColor" onchange="changeCursorColor()">
    <option value="black">Black</option>
    <option value="red">Red</option>
    <option value="blue">Blue</option>
    <option value="green">Green</option>
    <option value="white">Rubber</option> <!-- Add rubber option -->
</select>
The changeCursorColor function is responsible for updating the cursorColor variable based on the selected option:
function changeCursorColor() {
    cursorColor = document.getElementById("cursorColor").value;
}
3. Rubber Implementation
To implement the rubber (eraser) functionality, we need to add a new option to the color selection dropdown. In the provided code, we already have the option for the rubber:
<option value="white">Rubber</option>
As mentioned earlier, when the user selects "Rubber" from the dropdown, the changeCursorColor function will be called, and the cursorColor will be set to "white". In our drawing logic, drawing with a white color effectively acts as an eraser.
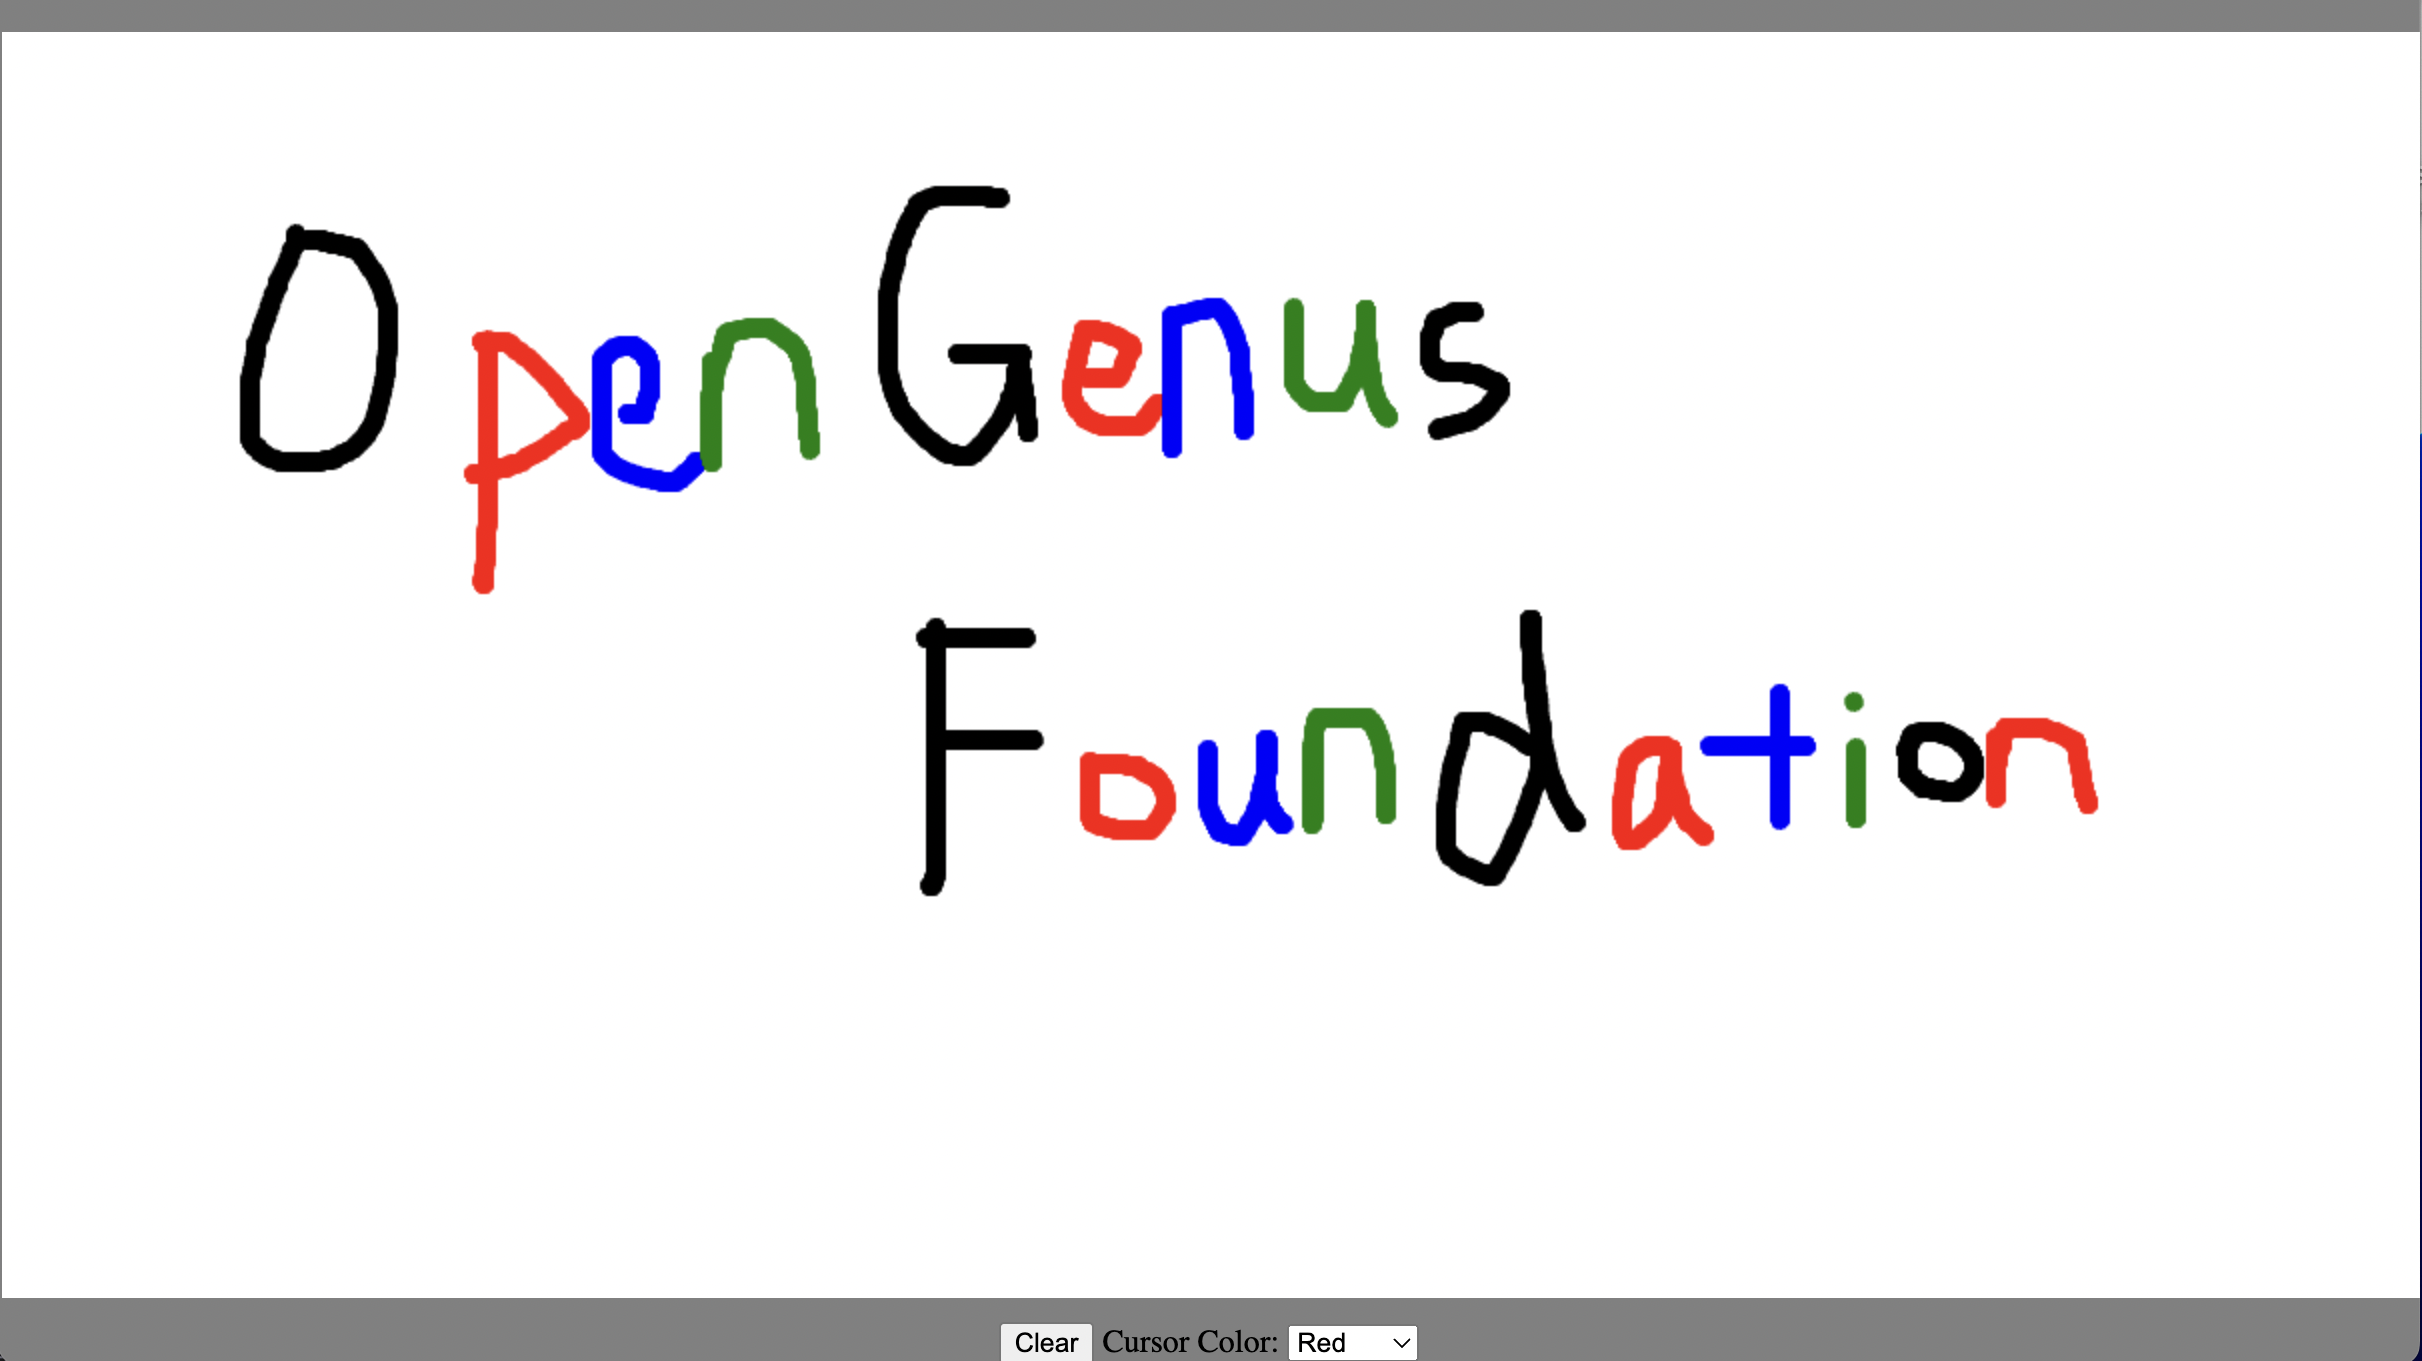
Conclusion
Creating a whiteboard in HTML is an excellent exercise in combining HTML, CSS, and JavaScript to build an interactive drawing application. By understanding the canvas element and its context, mouse event handling, and control element interaction, we were able to develop a functional and user-friendly whiteboard application. The addition of color selection and a rubber function allows users to customize their drawing experience, making the whiteboard versatile and fun to use for various purposes, such as collaborative brainstorming, teaching, and creative expression. Through this article, we hope you've gained a deeper understanding of developing a whiteboard and how the code provided can be utilized to create your own interactive drawing applications.